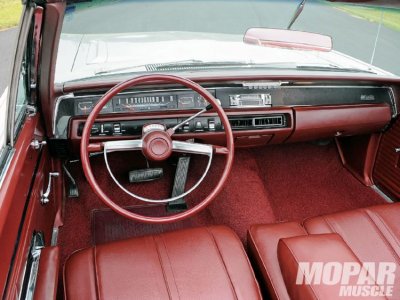
I've had my '68 Plymouth Sport Satellite for almost 4 yrs now and it has been a long road to getting it to the point it is now. The car is an original California black plate car with solid floors and a fairly straight body. I decided since it was a column shift 318 car and I'm building a 451 stroker for it, I wasn't that concerned about originality, so I decided I may as well upgrade all of the suspension, brakes, and steering. Major improvement in handling! After that, I had it painted last year - '71 B5 blue with black '69 hood stripes on my '68 B-body. Then it was on to the interior. I spent a few months laying out my plans and talking to different interior shops and finally got the car into the shop a few months ago. Yesterday I finally got the car back. Underneath the car is in the resto-mod style, but I wanted the interior fairly stock with a few changes to my liking.
Interior when I started:
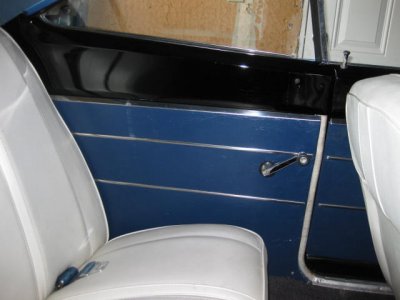
stock back seat, stock buckets with center fold down "buddy seat" - all seat covers in white, seat springs shot
Rear package tray blue and tore up
headliner blue cloth in fairly good condition
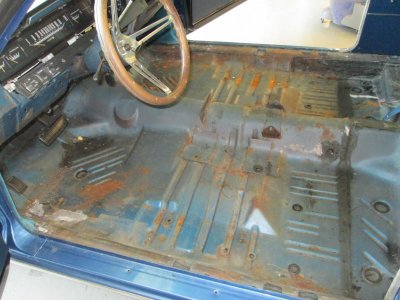
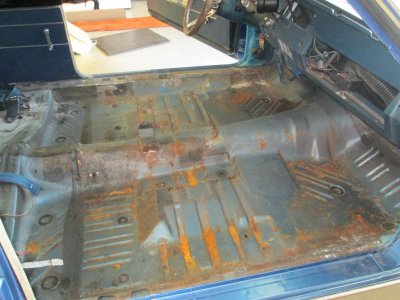
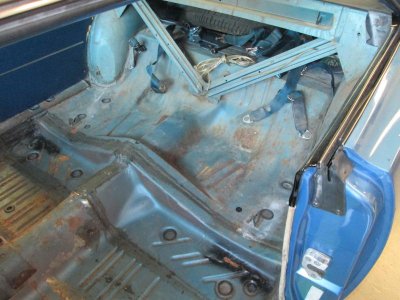
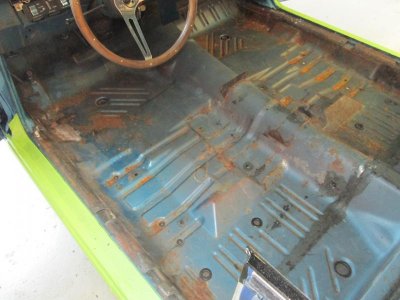
Carpet medium blue - completely shot
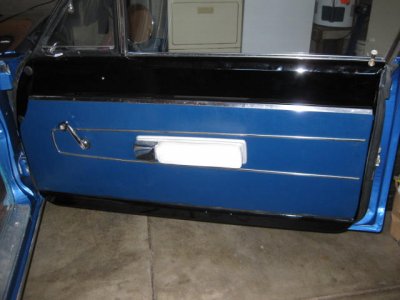
Door panels completely blue with chrome (Sport Satellite should have had wood-grain door panel inserts to match the dash, but previous owner told me he pieced together this car with parts from others, so they were all blue). Arm rests in white mounted to the blue door panels.
Dash all blue with cracked upper pad, hazed and cracked non-rally gauge cluster. Speedo and fuel gauge didn't work. Left and right side of dash had wood-grain inserts.
Interior AFTER RESTORATION:
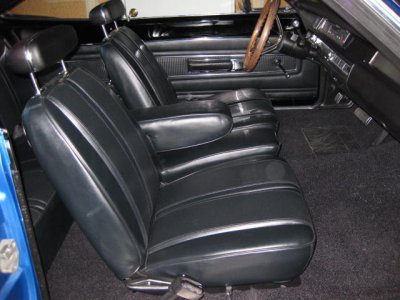
Since the outside of the car is painted in '71 B5 blue with gloss black hood stripes, I decided to go with all black interior accented by chrome.
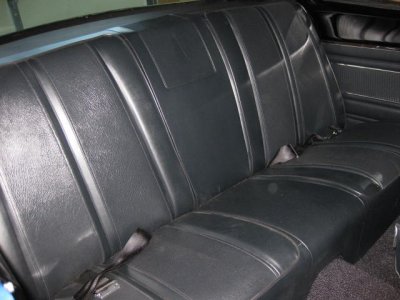
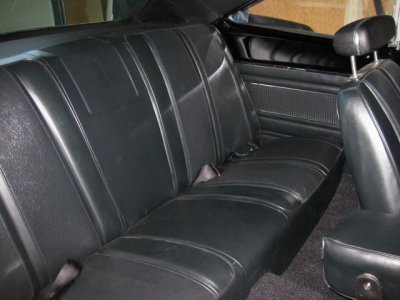
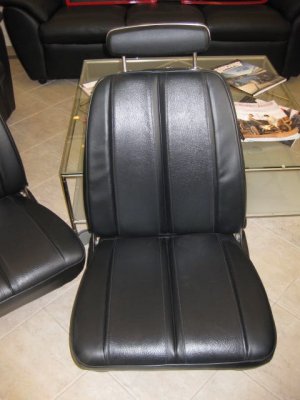
Black seat covers by Legendary.
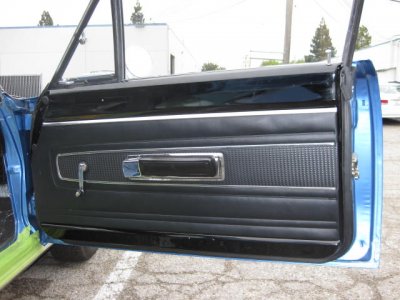
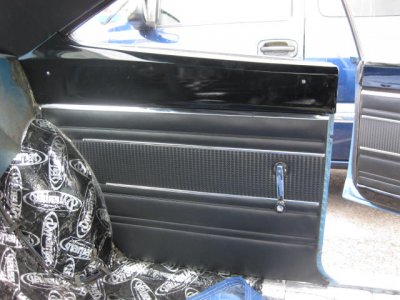
Door panels by Legendary - custom Reed-grain door panel inserts which was a Chrysler option for the 69 decor package. I had Legendary do these custom for my '68. My original door panel chrome was re-used and man oh man these came out way better than I envisioned. I thought about matching the seat covers with reed-grain inserts, but I saw a car with these at a mopar show and it just looked too busy, so reed-grain on door panels only.
Black headliner by Legendary
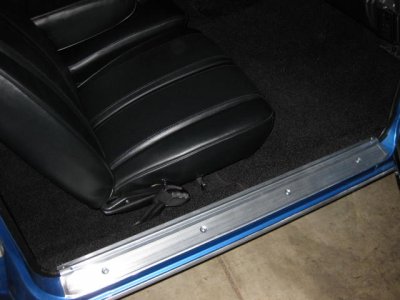
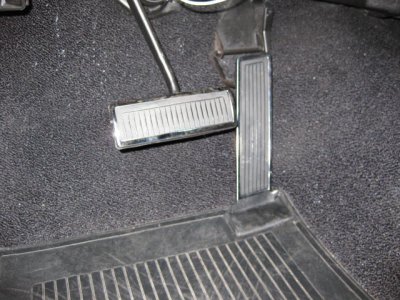
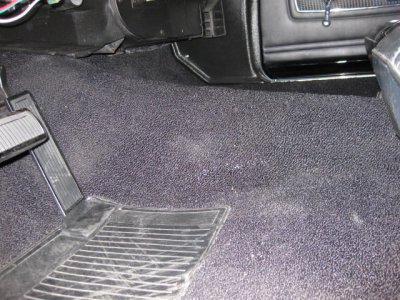
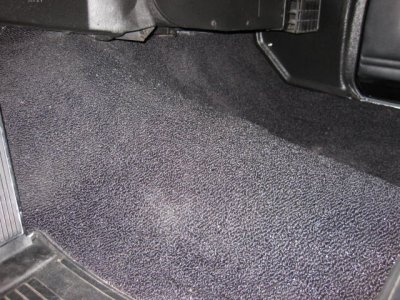
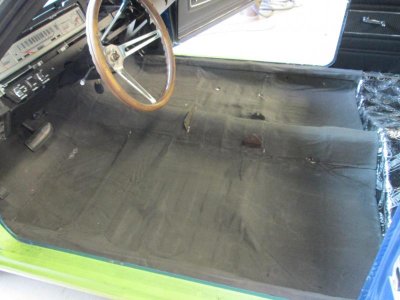
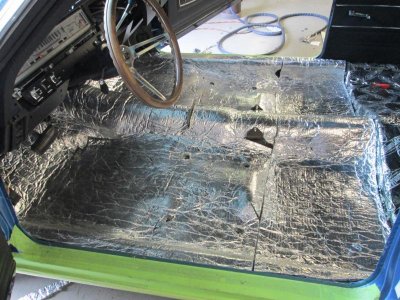
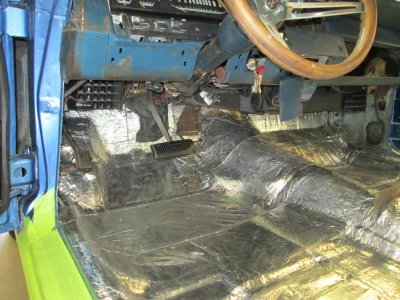
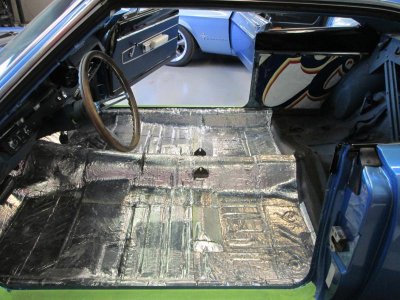
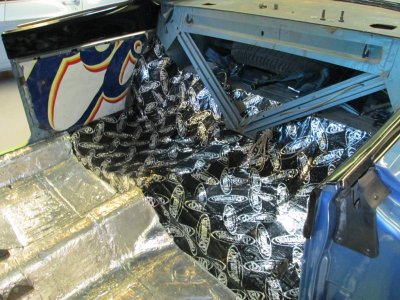
Black carpet by Motor Parts South. WOW! This carpet came out cherry! I found this supplier on accident and posted about it previously on here. There are 2 big name carpet suppliers and each has their downsides. This is the 3rd supplier out there and I couldn't be happier. No color fade, good fit and contour, and the accelerator heel pad location placement is perfect! Under the carpet I laid down Raamat and Dynamat first onto the bare metal floors, then Raamat Ensolite Foam, then Aircraft spruce foil faced insulation (used in aircraft insulation), then the carpet. I had the carpet shipped to me with no jute backing. Also installaed Dynamat on the interior door skins (behind the window mechanicals on the other side of the outside painted surface.) Everything came out great. No more rattles, feels and sounds nice and tight inside, but I didn't do the outer door panels or headliner so it's no so airtight that it doesn't feel like a classic car.
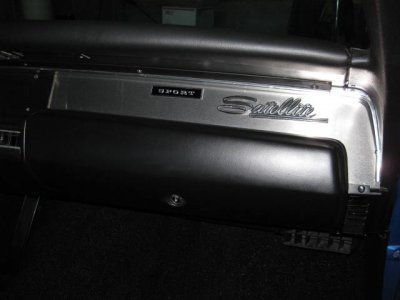
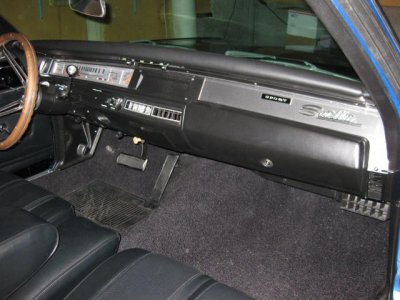
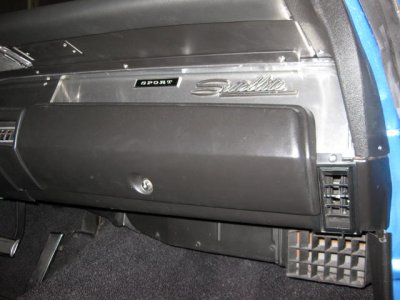
Re-used the original lower dash pad. Had 2 corner cracks repaired and dyed black. Dyed original glove box door black. New repop kick panels, seat belts, door handles and cranks. New repop sill plates. Looks nice and shiny!
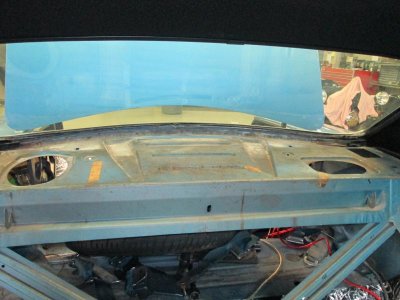
New rear package tray. Had them perforate the holes for each speaker offset 90 degrees from each other just like the metal holes underneath, which I understand was to make room for the optional rear window de-fogger...
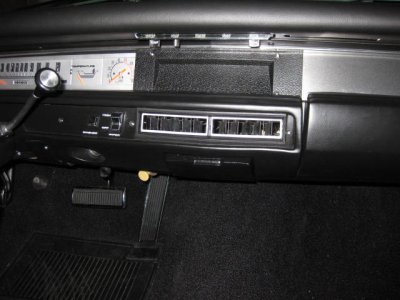
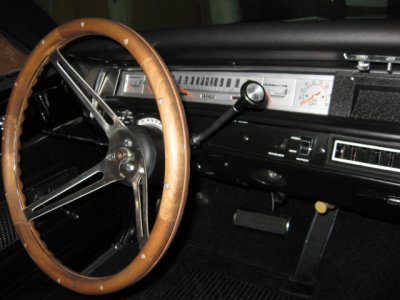
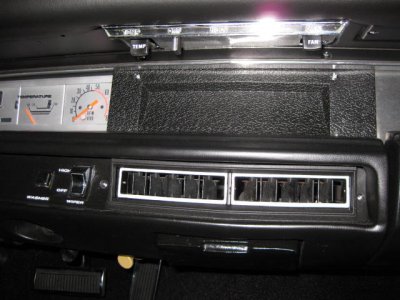
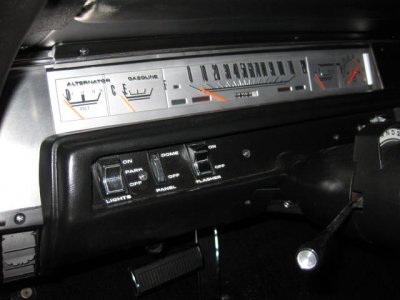
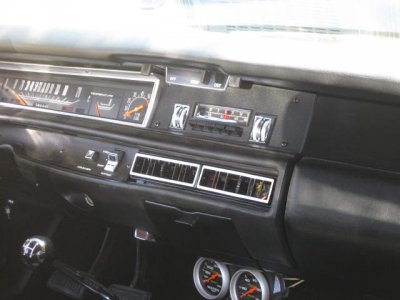
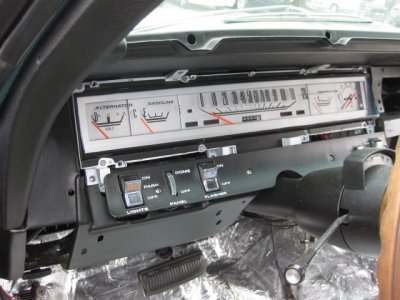
Sent in my best of 3 non-rally gauge clusters to Redline gauge works and had them restore this into one bad-*** looking piece! All new solid state gauges. Upgraded the far right blank gauge to in-cluster Tach. My fuel gauge works now! Speedo works! Had them calibrate and label my temp gauge with 4 temps. By-passed the ammeter under-dash and had them install a voltmeter in its place and etch the plastic gauge cover with a voltage scale. SWEET! Although I decided to go with all black interior, I feel that sometimes all black interiors look washed out and details can get lost. That's why I went with reed-grain door panel inserts. For the same reason, I had Redline change the gauge face color from black to a raw metal finish with newly painted needles.
The wood grain dash inserts are out of there! I replaced them with hand made pieces of brushed aluminum. The long piece on the passenger side I had them rivet on a "Sport" and "Satellite" emblem. These are original fender emblems. My original wood grain piece had this logo molded into the plastic. The fender emblems are larger, but they fit and look pretty good to me.
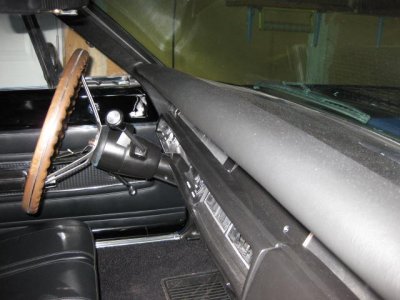
All steering column pieces re-painted black. NOS column shift lever, repop turn signal lever with new internal cancel switch and harness.
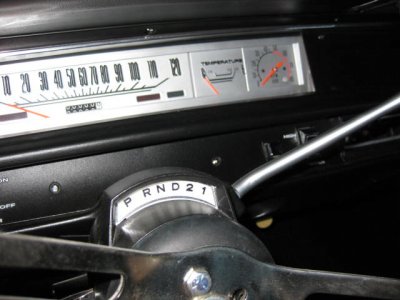
NOS column shift gear indicator - weird thing though - the needle pointer is BEHIND the arched plastic gear indicator label (PND2L). The shop said they couldn't get the needle to fit in front. I'll have to take it apart and see about fixing this.
I have a wood Grant steering wheel. The black one is in the mail and I will install in a week or so.
- - - Updated - - -
Photos loading....be patient!
- - - Updated - - -
BEFORE PHOTOS
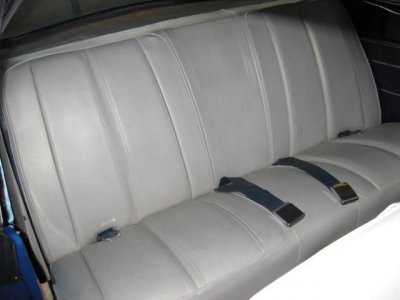
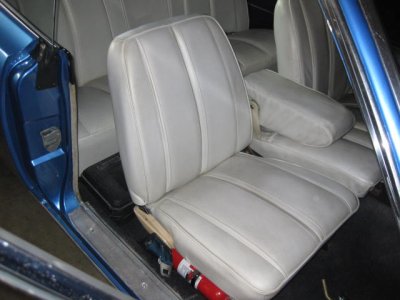
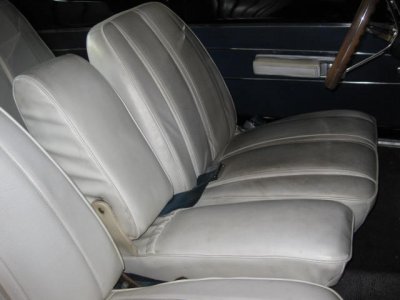
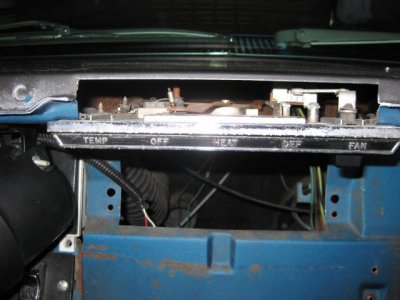
- - - Updated - - -
- - - Updated - - -
- - - Updated - - -
- - - Updated - - -
Also did one other change - The '68 upper dash pad comes out towards the middle in a V wedge shape that sticks out pretty far. The '69 upper dash pad is more flat and clean looking. I had them take my '68 dash pad and trim it straight across like a '69 and recover it in black. Looks good to me. I couldn't just swap a '69 pad in because although the bolt pattern MAY work, I was told by more than one person that the cutout area for the heater controls would be in the wrong location.
The new non-rally gauge cluster looks white in the photo due to the camera flash, but in reality it looks like silver brushed aluminum, although they used a metal textured paint to achieve the look.
- - - Updated - - -
More AFTER photos coming tomorrow....
- - - Updated - - -
Added head-rests to the front buckets too, which weren't there before. Wish with my non-post car I could easily add 3 point seat belts up front.
- - - Updated - - -
For the seats the interior shop repaired all springs and re-strapped all of the burlap strapping underneath. That made a HUGE difference in seat support and comfort.
Interior when I started:
stock back seat, stock buckets with center fold down "buddy seat" - all seat covers in white, seat springs shot
Rear package tray blue and tore up
headliner blue cloth in fairly good condition
Carpet medium blue - completely shot
Door panels completely blue with chrome (Sport Satellite should have had wood-grain door panel inserts to match the dash, but previous owner told me he pieced together this car with parts from others, so they were all blue). Arm rests in white mounted to the blue door panels.
Dash all blue with cracked upper pad, hazed and cracked non-rally gauge cluster. Speedo and fuel gauge didn't work. Left and right side of dash had wood-grain inserts.
Interior AFTER RESTORATION:
Since the outside of the car is painted in '71 B5 blue with gloss black hood stripes, I decided to go with all black interior accented by chrome.
Black seat covers by Legendary.
Door panels by Legendary - custom Reed-grain door panel inserts which was a Chrysler option for the 69 decor package. I had Legendary do these custom for my '68. My original door panel chrome was re-used and man oh man these came out way better than I envisioned. I thought about matching the seat covers with reed-grain inserts, but I saw a car with these at a mopar show and it just looked too busy, so reed-grain on door panels only.
Black headliner by Legendary
Black carpet by Motor Parts South. WOW! This carpet came out cherry! I found this supplier on accident and posted about it previously on here. There are 2 big name carpet suppliers and each has their downsides. This is the 3rd supplier out there and I couldn't be happier. No color fade, good fit and contour, and the accelerator heel pad location placement is perfect! Under the carpet I laid down Raamat and Dynamat first onto the bare metal floors, then Raamat Ensolite Foam, then Aircraft spruce foil faced insulation (used in aircraft insulation), then the carpet. I had the carpet shipped to me with no jute backing. Also installaed Dynamat on the interior door skins (behind the window mechanicals on the other side of the outside painted surface.) Everything came out great. No more rattles, feels and sounds nice and tight inside, but I didn't do the outer door panels or headliner so it's no so airtight that it doesn't feel like a classic car.
Re-used the original lower dash pad. Had 2 corner cracks repaired and dyed black. Dyed original glove box door black. New repop kick panels, seat belts, door handles and cranks. New repop sill plates. Looks nice and shiny!
New rear package tray. Had them perforate the holes for each speaker offset 90 degrees from each other just like the metal holes underneath, which I understand was to make room for the optional rear window de-fogger...
Sent in my best of 3 non-rally gauge clusters to Redline gauge works and had them restore this into one bad-*** looking piece! All new solid state gauges. Upgraded the far right blank gauge to in-cluster Tach. My fuel gauge works now! Speedo works! Had them calibrate and label my temp gauge with 4 temps. By-passed the ammeter under-dash and had them install a voltmeter in its place and etch the plastic gauge cover with a voltage scale. SWEET! Although I decided to go with all black interior, I feel that sometimes all black interiors look washed out and details can get lost. That's why I went with reed-grain door panel inserts. For the same reason, I had Redline change the gauge face color from black to a raw metal finish with newly painted needles.
The wood grain dash inserts are out of there! I replaced them with hand made pieces of brushed aluminum. The long piece on the passenger side I had them rivet on a "Sport" and "Satellite" emblem. These are original fender emblems. My original wood grain piece had this logo molded into the plastic. The fender emblems are larger, but they fit and look pretty good to me.
All steering column pieces re-painted black. NOS column shift lever, repop turn signal lever with new internal cancel switch and harness.
NOS column shift gear indicator - weird thing though - the needle pointer is BEHIND the arched plastic gear indicator label (PND2L). The shop said they couldn't get the needle to fit in front. I'll have to take it apart and see about fixing this.
I have a wood Grant steering wheel. The black one is in the mail and I will install in a week or so.
- - - Updated - - -
Photos loading....be patient!
- - - Updated - - -
BEFORE PHOTOS


- - - Updated - - -


- - - Updated - - -

- - - Updated - - -


- - - Updated - - -
Also did one other change - The '68 upper dash pad comes out towards the middle in a V wedge shape that sticks out pretty far. The '69 upper dash pad is more flat and clean looking. I had them take my '68 dash pad and trim it straight across like a '69 and recover it in black. Looks good to me. I couldn't just swap a '69 pad in because although the bolt pattern MAY work, I was told by more than one person that the cutout area for the heater controls would be in the wrong location.
The new non-rally gauge cluster looks white in the photo due to the camera flash, but in reality it looks like silver brushed aluminum, although they used a metal textured paint to achieve the look.
- - - Updated - - -
More AFTER photos coming tomorrow....
- - - Updated - - -
Added head-rests to the front buckets too, which weren't there before. Wish with my non-post car I could easily add 3 point seat belts up front.
- - - Updated - - -
For the seats the interior shop repaired all springs and re-strapped all of the burlap strapping underneath. That made a HUGE difference in seat support and comfort.

