• When you click on links to various merchants on this site and make a purchase, this can result in this site earning a commission. Affiliate programs and affiliations include, but are not limited to, the eBay Partner Network.

Sub frame connectors

Mocajava

Well-Known Member
Local time
10:21 PM
Joined
Jun 2, 2015
Messages
964
Reaction score
448
Location
Brighton Colorado
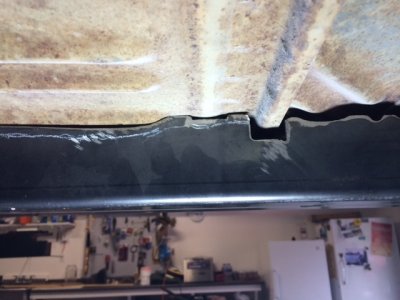
Good morning gentlemen. I am a very junior member here just asking for feedback. Have read previously of US Cartool and their sub frame connectors and how well they worked. I ordered a set for my '69 Coronet and started the prep work for getting them in place. I have to say I was pretty dissapointed in what I got after the initial fit up. I spent almost 5 hours in grinding just to get them where they would fit enough to weld. In some places I had 3/8" of material to take out of them just to get less than 1/8" of standoff, seems they weren't even made for my car? There seemed to be bumps and high places that didn't belong at all on these pieces that had to be completely removed. I was a welder for over 20 years and did years of layout work for fabrication so the quality of what I got was less than satisfactory. My car is original, unwrecked and pretty pristine underneath so i have eliminated anomolies in the car from outside sources...factory differences might be the only variable.
I just wondered if anyone else had this type of experience or is that normal for US Cartool quality? I don't know whether to go back to them for confirmation that they sent the corrct parts or just let it go as another dissapointing aspect of buying retro-fit parts for these old cars. Thanks for any info or opinions you might have. Mocajava
 
Call them. Tell them. My welder said that the USCartool connectors went in easy with no mods if I recall. This was in 2008. Application was 69 B Body. Upside is that the results will be worth it.
 
When I put the connectors in a 66 Barracuda it did take some minor trimming to get the best fit, I don't think it was 4 hours worth might have been 3. Still was better install then making it from scratch. It was also my 3rd set to install and at least the A-body was a mainstream car, off the shelf parts. I mainly install them to remove the extra rattles and twisting in NORMAL driving.

edit: The connectors are cut with a plasma cutter to follow to floor board, which it did as best that they could. Every floorboard is a slight bit different from each other and sometimes can be a 1/4 inch off, post to hardtop to convertible. Most of the install troubles were with the glued in carpet and completely having bare metal only above---do not leave your tape measure or marker on the floors--don't ask me how I know that.
 
I installed them on my 66' Satellite along with torque boxes. The installation went fairly well without to many snags.
Driver rear box.jpgDriver sub connector.jpgpassenger front torque box.jpgpassenger sub frame connector.jpg
 
Just a quick question....I have brushed/sanded the area under the connectors (prior to install/welding) but what did you use to seal up the metal from deteriorating after it is welded? I cleaned and then prepped with a copper/welding aerosol coating (in the soon to be hidden area)in hopes that will stay there after sealed up and inaccessable. Thanks for all the help!
 
Just a quick question....I have brushed/sanded the area under the connectors (prior to install/welding) but what did you use to seal up the metal from deteriorating after it is welded? I cleaned and then prepped with a copper/welding aerosol coating (in the soon to be hidden area)in hopes that will stay there after sealed up and inaccessable. Thanks for all the help!

Well as much as we all like to seal the crap out of everything (for good reason) the one thing I always try to remember is much of the hidden areas of these cars were never sealed 40+ years ago and they lasted. Having said that I think most of our cars will never see the elements that they were exposed to previously so anything you do will likely outlive us.
 
You are probably right...maybe I am being **** about this? Been dealing with a 55 Belair for three years and so tired of all the rust repair with her, just wanted to do the best I can on this Coronet so I am not repeating steps 5 years down the road. THX

- - - Updated - - -

IMG_0506.JPG
 
use a jack to press them up tight to the floor........ the floor will flex a bit and the fit will be much better........ have installed several sets on both B and E bodies....... there is always some trimming involved
 
I put some on a 68 charger, spent several hours customizing they were also to wide in the back, have to cut each side and taper them. i ground the welds on the front so they were square and looked like factory, if i would have looked closer i should have square cut the front flanges so it matched the stock ones net to it20150322_114655.jpg20150322_114625.jpg20150404_172017.jpg
 
You guys are good. To the untrained non-Mopar eye, they look factory.
 
I totally agree, that is some beautiful work! The gaps I HAD were almost 3/8" and the comment of using jacks to move the floor will be tried. Thanks all!
 
just installed these last week.......... i have no problem filling a 1/8-3/16 gap


I just did a set on a friends car and spent a fair amount of time grinding and fitting. Count your blessings if something fits without any work. There are too many variables on old cars to be consistent car to car. Fit,finish and q/c were a joke back then. And don't forget the monday and friday cars. When you have multiple panels fitting together, such as the floor, it reeks havoc on a manufacture's fitting of a product. It fit their guinea pig fine but your car, although the same model/year etc, is off on some areas. As for prep, I marked out where they would go, then cleaned off contaminants, rust, paint etc so the welds would be on clean material. I'm sure you mastered the obvious and removed the interior before you made a car-b-que. If you can swing it, have someone topside to spray some water on the floor as you are welding to contain any flame ups. After I was done, I sprayed in some anti corrosion/rust material from Eastwood to protect all the inside areas of the connectors and boxes. Outside of the units were primed with self-etch primer, seam sealed, then sprayed with some Rust Oleum to finish. Also I used my trans jack to press them against the floor for a better fit. Keep jumping around while you weld so you won't experience as many burn-throughs since the floor is like 20 ga and the structure parts are like 10 or 11 ga. Doing this stuff overhead contributes to the fun. And don't forget to have the wheels loaded when you do this, unless you have a shell on a rotisserie. If you have it on a lift, make sure its a 4 post drive on so the car is loaded in its normal position. If you do it on a 2 post or sitting on stands without the front wheels loaded, your car will be sagging and the addition of the units will make it permanent. Try this: if you can open the doors without any issues you should be fine. If they are hard to open and close, don't stick that stuff on until you can get a better support system for the job.
 
Personally I like to use weldable primer in these areas. I know some will get burned off but better than nothing underneath.
 
To all

- - - Updated - - -

To all (I will try again), the first thing I did was to spray the inside of the bare metal with a copper coated spray meant to conduct and protect the metal. This allows you to weld and not burn off PLUS ading some protection since this interior part will be covered up and unaccessable after welded in place. I used a jack , tacked and beat down the floor to better fit the pre-cut connectors. Ran out of gas for the mig so I couldn't finish but feel much better about the fit up. I was a welder for 25 years so the overhead is no issue to me and it will get finished this week...little by little. interior is stripped already, no fire issues ther. Looking forward to the next aspect which is POR15 for the underside and all the proceedural steps to make that look and seal correctly. will be painting in on with brush and watched several u tube videos about the pros and cons of doing it. Encouraged by the positive results overall and taking notes of the negatives which were mostly because of not following instructions to the letter...see if I can NOT repeat those same mistakes. The plan is to POR 15 the underside, interior floor and trunk floor in preperation for the paint guy to work his magic. Any tips or comments would be appreciated by you gentlemen that have already been down this road. Thanks for all the help and continued support towards my Mopar Eduction.
 
I've used too of there frame connectors kits, one for my 66 Charger and one for my 65 Satellite and filling in the gaps is typical, but what a deference in the ride..made the car a whole lot stiffer...and not like where you could "kind of " tell the deference i mean a BIG Deference !! I'd use them anytime...
 
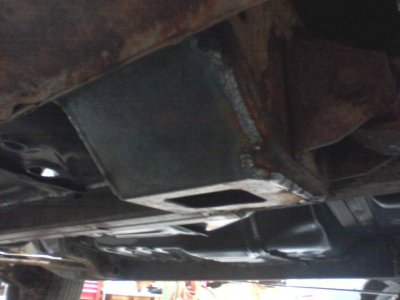
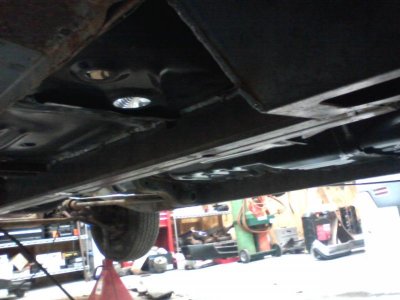
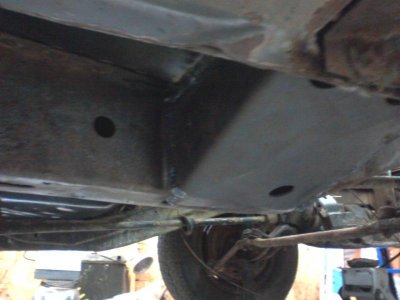
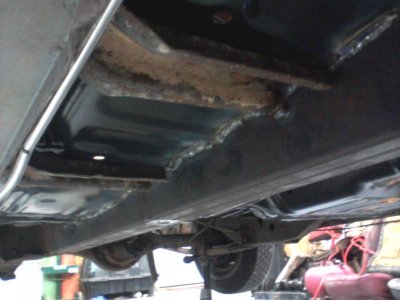
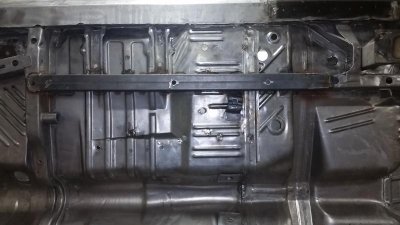
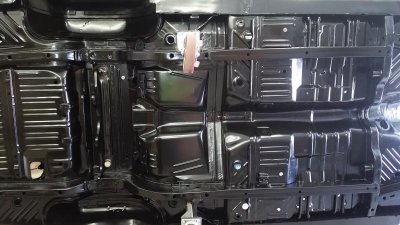
Well the connectors are in! I have a 4 post lift, made it easy and safe. Used the hyd jacks underneath to coax the gap closer. Skipped around, beat floor down in places and got it done. Next step is the POR15 ritual, multiple steps and preperation to do it right from ALL I have read. Since I have bare metal as well as the rusty stuff, a little different technique is required...scuffing up the bare with coarse sandpaper and metal prep to etch it.
I will get some pictures up of the steps and try and keep you all updated as I ease thru it. Last thing I want to do is miss a step and end of with peeling POR15....read that has happened to some. Shoot darts at me if you think I am going down the wrong road...I can take a shot, been Married three times!
 
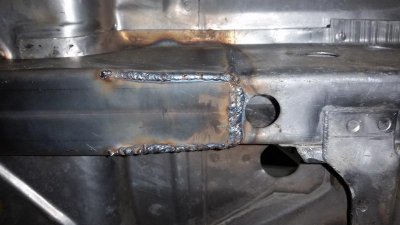
To all of you who have installed these: did you solid weld them or spot weld them? I'm seeing a lot of continual welds in these photos.
I'm guessing solid welds could crack? Spot welds every 1/4" or so would be just as solid and "give" enough to not crack? Factory like.
 
its not necessary to weld them solid, but it is easy to get carried away
 
Tacked every foot or so and then skip welded about a 1 1/2" segment all the way, moving all around to let it cool/contract. Took me two afternoons of welding to finally get it all stitched up end-to-end. Hit it with a small hand grinder to knock off the high spots and smooth it a little. Ready to start the POR15 process. Thanks for all the helpful suggestions.
 
Auto Transport Service
Back
Top