gmcgone*gtx
Active Member
It's been quite a while since I've been on here, I believe it was back in February when I first started telling this saga.
I thought I'd give an update on our progress with these two GTX restorations.
This is only the first car's restoration and we're not done yet. We ordered new seat covers, seat foam, door panels, carpet, headliner, and weather stripping from Dantes.
They're made by Legendary Interiors but, are priced cheaper. But, still they're definitely not cheap.
I'm having the seat covers installed by a professional, as I don't want to try to pound and wrestle those covers on and still not get them straight.
It all goes to the upholstery shop next week for installation.
The engine is still yet to be rebuilt and we're thinking about going with a 512 HP Stroker kit, same price whatever HP you choose. (Feedback on HP/Stroker kit choice is welcome)
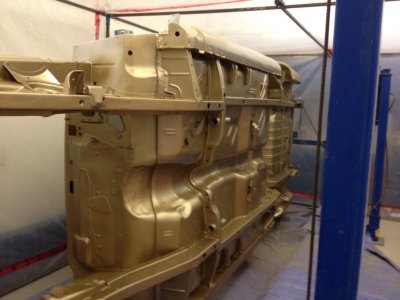
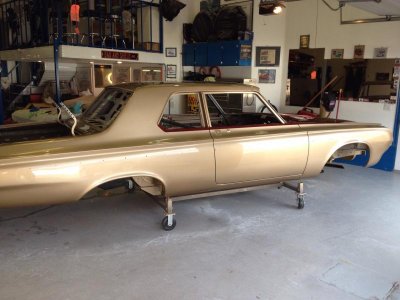
This is only about the body work and paint phase.
But, we have had a lot of success so far!
If you didn't happen to read my previous post, my husband and I brought these two '67 GTX's to Texas from Georgia.
They belonged to my younger brother who sadly passed away in 2011.
Three years after he died we went there to get them before they decayed into a pile of rust or were picked clean of their original parts.
Or, they just completely disappeared.
They were in pretty rough condition after six years of sitting in the damp woods.
We were a bit overwhelmed when we got there and saw them for the first time.
It was a huge job just to get them out and then haul them back to Texas.
But, definitely well worth it to save these two old muscle cars that my brother loved so much. Steve would be smiling I know.....
and probably laughing at our hard work, sweat, and more than a few cuss words we expended while dragging them out of the briars and overgrowth, up on the trailer and half way across the country.
It was more than one crazy cross-country adventure since we could only haul one at a time.
I'd do it all over again so, go ahead and chuckle little brother.
I also know you'd be proud of what we've accomplished so far. Damn, I sure do miss you.
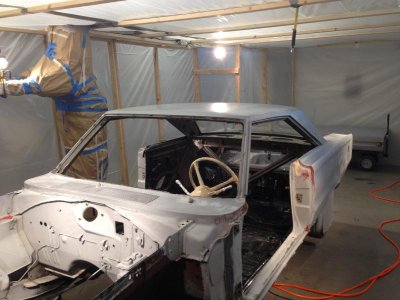
We found a very good body and paint man that was willing to take on all the work of pounding out the many dents in my silver car.
It was very rough, even rougher than we originally thought but, amazingly it was relatively rust free.
He would come by our place in the evenings after his regular job, and sometimes on the weekend.
He worked and reworked the metal and somehow coaxed it back into shape.
He did build coat after build coat and spent countless hours sanding it back down.
This guy loves body work and he does it with patience, he goes over and over it again until he gets it right and he's satisfied that it's as good as it should be.
We couldn't have found anyone else that could or would have been so thorough. AND he's an excellent painter!
He's also become our good friend, he's just an all around good person and a very hard worker.
That's about as good as it gets for a first time at restoration.
Believe it or not, Bob found him through an ad on craislist.
Somehow we got lucky.....
My husband, Bob has worked on these cars an awful lot too.
Everyday he would have everything set up and ready for Johnny (the bodyman) so that when he got here in the evenings he could go right to work on the car doing what he does best.
That might sound simple but, we have very limited amount of space and seven (not even small) vehicles that have to be jockeyed around to make room for different work areas as they're needed.
Not to mention the two trailers and numerous motorcycles. Our house and our lot are both fairly small.
We're busting at the seams and the space logistics right can be like working a Rubiks cube sometimes. Heck, even our dog is big, LOL.
Bob and I are always busy so, that's hogwash about the golden years of retirement, we work more and harder now more than ever. At least we had regular breaks and a lunch hour when we were both employed.
There's the daily clean up from the wet sanding, even with dry sanding there's tons of sanding dust on and in everything.
Then he's also constantly running out for supplies and materials, usually 30-50 miles one way, if you can find it. Johnny is not the most forward thinking individual as far as planning ahead. Must be an artist gene or something.
Bob's also doing the needed mechanical work on both of the restos, regular maintenence on our vehicles and household/homeowner chores and repairs never end, as you know.
Yeah, we stay pretty busy and time only speeds up as you get older too. Doesn't it?
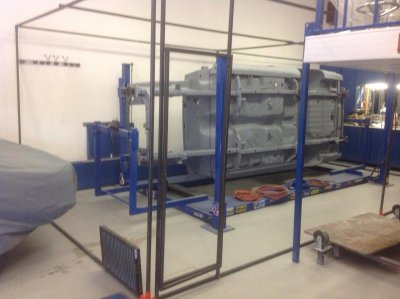
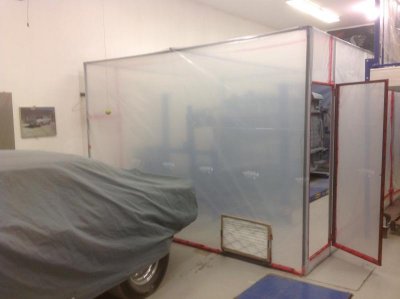
Bob built a homemade paint booth using a wood frame, we covered it with plastic and hung brooder clamp lights (for chickens) as our lights. They cost only $5 each at Walmart.
For ventalation he mounted four box fans on the top of the booth and one huge fan at the bottom of one of the roll up doors in the shop.
We mopped the floor four or five times leaving it slightly damp right before it was time to spray the paint.
We also went over the shop several times thoroughly with the shop-vac to get it as dustless as possible.
Even our dog was shut out of the shop for four or five days prior to painting. (he's not happy)
A couple of dog hairs landing on wet paint could mean a major re-doing of a whole side of a car. No thanks....
But, it all has worked out really, really well!
BTW, I decided to change the color from Silver to a Ditzler PPG Code #13354 Electric Blue. (1968)
We're not going original so why not paint it a color that I like?
How often does that happen?
I'm posting pictures below....

