You are using an out of date browser. It may not display this or other websites correctly.
You should upgrade or use an alternative browser.
You should upgrade or use an alternative browser.
Yankee Express RestoMod Project
- Thread starter Brandy
- Start date
HYRDGOON
Well-Known Member
- Local time
- 3:13 AM
- Joined
- Apr 20, 2013
- Messages
- 3,372
- Reaction score
- 2,745
- Location
- Breslau, Ontario, Canada
This is just BANANAS!! Talk about a "One OF"
Keep em coming!
Keep em coming!
- Local time
- 3:13 AM
- Joined
- Oct 16, 2014
- Messages
- 27,941
- Reaction score
- 66,030
- Location
- Salisbury, Vermont
Wow...thanks an awful lot for the great positive comments. I was very worried that nobody would like or agree with my choices for this build. Wheewwwwww....lol. The side scoop mods are exactly like the ones Chip Foose created on the front fenders of the 2015 Detroit Autorama's Ridler award winning Imposter Impala. I liked them...lol.
- - - Updated - - -
I know...right? I have been storing up ideas in the ole' bean for years. I would be laying out in the sand in Iraq and thinking about what I would if....lol. My thing is this....I have always believed that if yer gonna build one then I want mine to be the one that causes heads to snap around in unison when I roll up to the show gate after which there is a noticeable human migration towards my assigned parking area. on the other hand I took a perfectly fine Coronet and stripped it. Hmmm. My buddy cautioned me yesterday to try to restrain myself from further mods as to many would make it gaudy or a mess. I agreed to do nothing else after the front fender tips are rolled back to square. I'm happy with it and cant wait to make guys scratch their heads while trying to figure out what year and model it is...lol.
Wow, love the side scoop mods....digging the gas cap too!!!!! This is going to be a killer Coronet when it's done.
- - - Updated - - -
I know...right? I have been storing up ideas in the ole' bean for years. I would be laying out in the sand in Iraq and thinking about what I would if....lol. My thing is this....I have always believed that if yer gonna build one then I want mine to be the one that causes heads to snap around in unison when I roll up to the show gate after which there is a noticeable human migration towards my assigned parking area. on the other hand I took a perfectly fine Coronet and stripped it. Hmmm. My buddy cautioned me yesterday to try to restrain myself from further mods as to many would make it gaudy or a mess. I agreed to do nothing else after the front fender tips are rolled back to square. I'm happy with it and cant wait to make guys scratch their heads while trying to figure out what year and model it is...lol.
This is just BANANAS!! Talk about a "One OF"
Keep em coming!
- Local time
- 3:13 AM
- Joined
- Oct 16, 2014
- Messages
- 27,941
- Reaction score
- 66,030
- Location
- Salisbury, Vermont
more pics
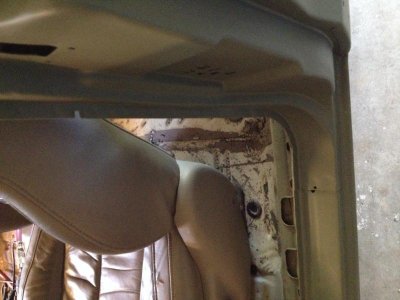
the seats will have to be relocated 4 inches to the rear so I can get in and out comfortably and also reach the gas and brake without my knees up against the dash. That's fine though since there is not going to be a back seat but rather a roadster like panel.
The 66 Sport fury back seat panel was paid for today so I should have it by next week from TN. I sliced off the buddy seat mounts today and mailed them off to another guy. I have a nasty cold so I did not do much today.
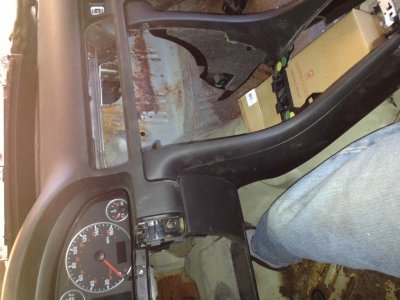
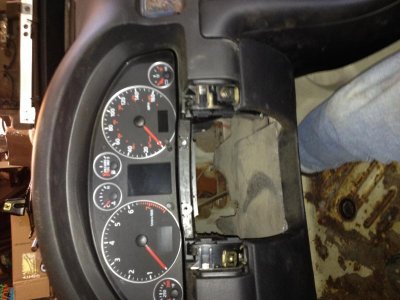
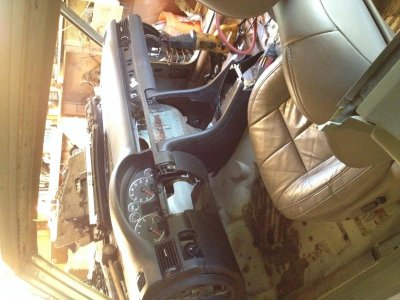
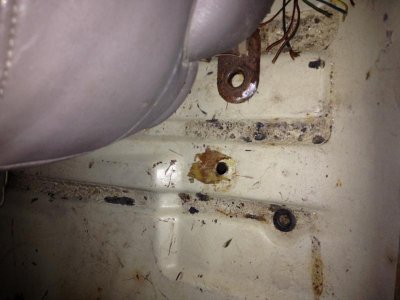


Judging from your "laying in the sand in Iraq" comment I'm assuming you served..... thanks for your service.
As far as your mods go... have at it! Their's plenty of purist out there but this forum seams to be fairly open minded and I'm like minded in building my car my way. I agree you can make them gaudy quick but from what I'm seeing it's taking the Mopar features and just adding a little extra attidude. I'm still on the fence with the modern interior but it does look cool.
As far as your mods go... have at it! Their's plenty of purist out there but this forum seams to be fairly open minded and I'm like minded in building my car my way. I agree you can make them gaudy quick but from what I'm seeing it's taking the Mopar features and just adding a little extra attidude. I'm still on the fence with the modern interior but it does look cool.
- Local time
- 3:13 AM
- Joined
- Oct 16, 2014
- Messages
- 27,941
- Reaction score
- 66,030
- Location
- Salisbury, Vermont
your entirely welcome. Almost 30 years. Once it's all in and carpeted etc,, it will look right at home.
Judging from your "laying in the sand in Iraq" comment I'm assuming you served..... thanks for your service.
As far as your mods go... have at it! Their's plenty of purist out there but this forum seams to be fairly open minded and I'm like minded in building my car my way. I agree you can make them gaudy quick but from what I'm seeing it's taking the Mopar features and just adding a little extra attidude. I'm still on the fence with the modern interior but it does look cool.
- Local time
- 3:13 AM
- Joined
- Oct 16, 2014
- Messages
- 27,941
- Reaction score
- 66,030
- Location
- Salisbury, Vermont
Update....
I have been sick for a few days so have done zip. I looked at it though. The last thing I did was to go to the salvage yard and pull the heat/ A/C unit and blower as well as the rest of the wiring harness and two mount plates I forgot to get. I took the Jeep seats back because I found out that the metal used to attach the seat to the frame will snap without notice due to the wrong steel having been used at the manufacturer. I have the yard owner watching out for a nice set that might come in as he gets cars in several times a month. That's it. Oh BTW Julie, from Concept Cars out in California is watching my thread with apparent interest as they do this sort of thing all of the time, making packages of different stuff to sell to owners to have installed. Cool beans.
I have been sick for a few days so have done zip. I looked at it though. The last thing I did was to go to the salvage yard and pull the heat/ A/C unit and blower as well as the rest of the wiring harness and two mount plates I forgot to get. I took the Jeep seats back because I found out that the metal used to attach the seat to the frame will snap without notice due to the wrong steel having been used at the manufacturer. I have the yard owner watching out for a nice set that might come in as he gets cars in several times a month. That's it. Oh BTW Julie, from Concept Cars out in California is watching my thread with apparent interest as they do this sort of thing all of the time, making packages of different stuff to sell to owners to have installed. Cool beans.
- Local time
- 3:13 AM
- Joined
- Oct 16, 2014
- Messages
- 27,941
- Reaction score
- 66,030
- Location
- Salisbury, Vermont
Well guys, I had to take a break from the "Express" in order to prepare for winter. Also my wife is leaving for Williamsburg tomorrow to visit our son at College Of William & Mary where he's a doctoral candidate in particle physics. She will be gone a little over a week......woo hooo! Car time. All of the yard stuff is safely in the basement, the livestock have shelter, modifications in the barn are done, grass has been cut for the last time this year and all the cars are ready for the snow. Only thing left is to plant 10 small saplings along the pasture fence and rototill the gardens up. I hope to make good progress this coming week so stay tuned.
- Local time
- 3:13 AM
- Joined
- Oct 16, 2014
- Messages
- 27,941
- Reaction score
- 66,030
- Location
- Salisbury, Vermont
Yah..funny how that happens ain't it?
My buddy and I are driving up almost to Canada again to poke around at Gates Salvage. They have acres upon acres of old cars of all types, mostly rusted our hulks but some of the '70s stuff and '60s stuff still has parts on them. They have 4 73/74 Dodge Chargers up there, complete mostly. When we went last time we got there late and they close at noon on Saturday. We are going early and i'll have more time to poke around and take notes of what's what. Any requests? PM me tonight.
Wow you've been busy! Funny how the wife taking off automatically brings on thoughts of "more garage time"! Looking forward to the updates.
My buddy and I are driving up almost to Canada again to poke around at Gates Salvage. They have acres upon acres of old cars of all types, mostly rusted our hulks but some of the '70s stuff and '60s stuff still has parts on them. They have 4 73/74 Dodge Chargers up there, complete mostly. When we went last time we got there late and they close at noon on Saturday. We are going early and i'll have more time to poke around and take notes of what's what. Any requests? PM me tonight.
- Local time
- 3:13 AM
- Joined
- Oct 16, 2014
- Messages
- 27,941
- Reaction score
- 66,030
- Location
- Salisbury, Vermont
"YANKEE EXPRESS" progress
So today was a good day, 45 degrees sunny, spent the day in the garage. I finished up the passenger side fender modification, sweeping the front edge back from an angle to 90 degrees with the fender. Flat. Worked out great, I only had to cut three hunks of steel to patch it together and they were small bits. A bit of filler and it's a go.
I got the Satellite seatback yesterday and mocked it up in place behind the seats. It will set back an inch or two but at about this height.
The curves of the panel will continue to the back glass and diminish as they go down to zero at the glass. Spare tire, tool kit, cleaning gear, jumpers, spare parts, dead bodies, etc.. will go under there. I'll fab a panel to go down the front to the floor behind the seats.
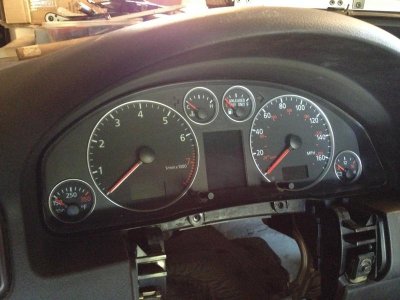
The center emblem/bezel will lose the Satellite name and say "EXPRESS" OR "CORONET" instead. The little emblem on the wood panel in the Audi dash that reads "QUATTRO" will be changed to read " DODGE". The Audi emblem in the horn ring center will be shaved off and something else will go there, have not thought about it yet. lol.
I'm having a difficult time with the quarter extensions though, that white metal is crap. Not sure what i'll do to remedy the issue yet.
Thinking about placing "EXPRESS" in the center oval of the tail light panel. Thoughts on any of this?
View attachment 286964View attachment 286965View attachment 286966View attachment 286967View attachment 286968View attachment 286969View attachment 286970View attachment 286971View attachment 286972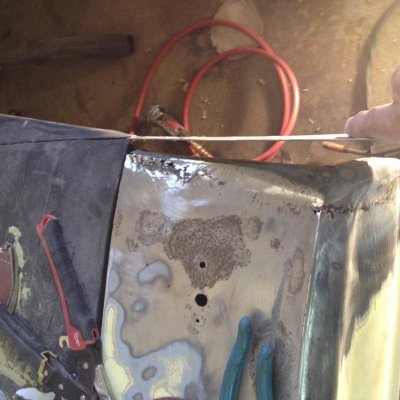

thedodgeman
Well-Known Member
So today was a good day, 45 degrees sunny, spent the day in the garage. I finished up the passenger side fender modification, sweeping the front edge back from an angle to 90 degrees with the fender. Flat. Worked out great, I only had to cut three hunks of steel to patch it together and they were small bits. A bit of filler and it's a go.
I got the Satellite seatback yesterday and mocked it up in place behind the seats. It will set back an inch or two but at about this height.
The curves of the panel will continue to the back glass and diminish as they go down to zero at the glass. Spare tire, tool kit, cleaning gear, jumpers, spare parts, dead bodies, etc.. will go under there. I'll fab a panel to go down the front to the floor behind the seats.
The center emblem/bezel will lose the Satellite name and say "EXPRESS" OR "CORONET" instead. The little emblem on the wood panel in the Audi dash that reads "QUATTRO" will be changed to read " DODGE". The Audi emblem in the horn ring center will be shaved off and something else will go there, have not thought about it yet. lol.
I'm having a difficult time with the quarter extensions though, that white metal is crap. Not sure what i'll do to remedy the issue yet.
Thinking about placing "EXPRESS" in the center oval of the tail light panel. Thoughts on any of this?
View attachment 286964View attachment 286965View attachment 286966View attachment 286967View attachment 286968View attachment 286969View attachment 286970View attachment 286971View attachment 286972View attachment 286973
Really like the work you have done thus far.
Looking at the tail light, it looks like there are 3 bulbs per side.
If so, have you considered the sequential directionals like the T-bird or Cougar.
I had a 69 Cougar XR7 ragtop that had them.
That would REALLY make your already over the top build one more step above!
Keep up with the mods and pictures.
Dave L.
- Local time
- 3:13 AM
- Joined
- Oct 16, 2014
- Messages
- 27,941
- Reaction score
- 66,030
- Location
- Salisbury, Vermont
Update
Hi Dave, yes some of us have discussed that very thing! These lights are 66 T-Bird and are sequential blinkers. I do have to get some new parts to make that happen but yes they will be 1,2,3 blinkers.
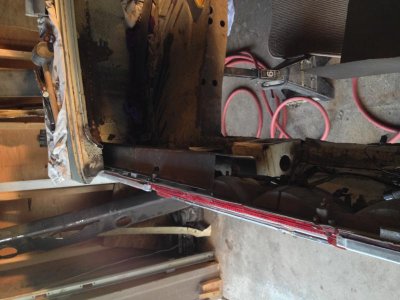
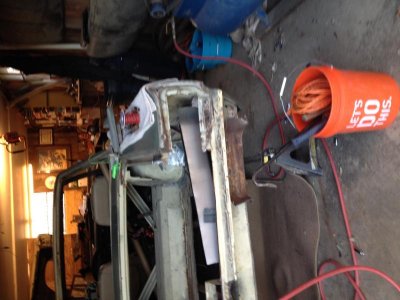
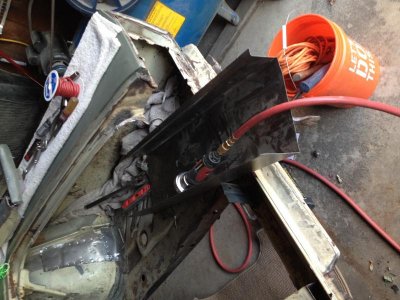
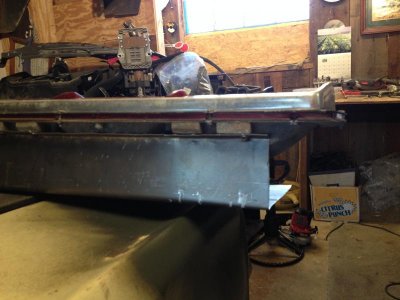
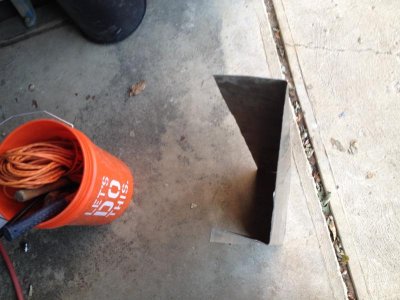
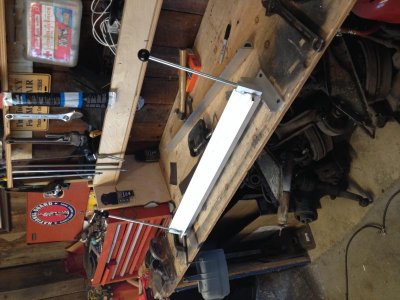
I fabricated two 20 Gauge channels to house the lights and buckets, because my sheetmetal brake is 30" long, and i'll weld them back together once they are finished. It has 3" circles cut out behind each bucket to get bulbs in and out. Pretty trick. Anyway, I have been fooling around with it a bit, trying to get it all in there and now I need to think about using fiberglass to modify the quarter panel extensions to close up the light ends that don't reach all the way right now, plus I had gotten ahead of myself by welding in the trunk seal lip at the back and then found out it wouldn't work where I put it. So that came back out and now things are going more smoothly. Another issue is that have to leave room in the trunk on both ends to be able to bolt up the extensions. I'm about half way there on getting the channels done, I have the left end bolted up to the buckets and am now cutting and bending smaller channels to tack to the large one and also to the bottom edge of the light buckets. Thus completing the mounting channel which will then be welded into the trunk at the back edge, which as it happens, is exactly the right distance out from the mounting flange to end up square with the lights.
Took a lot of sitting on the old Homey- D bucket and thinking to work it all out. When done though, it will be a one off for sure. The lenses on there right now will be replaced with nice new ones once it is all done with and the car is finished. The inside of the light is pristine with all red covers for the middle lights nice and clean and all other bulbs in place and not broken. Need new seals for it too.
The fenders are looking good, and this mod solves another issue as well of the car having been hit in the front at one time and the fender noses have a good bit of Bondo on them. Cut that crap right off of there. The side scoops have been done for awhile now and I'm waiting until I finish all metal work before I start mixing filler to finish up so I can do it all at once. In the interim it's all primed. I will get back to the hood scoop mods at a much later date. I might even get a new hood and start over now that I have tried it out and know what I want and don't want. Sigh...lol. FUN!! Pics this evening!
- - - Updated - - -
On the seatback roadster style panel I have been thinking about how to frame up the panel to fabricate it, I have decided to use some of my nice pasture fence wire to fab the basic shapes with all of the curves and then to skin that with heavy plastic. Then coat it with tinfoil and then glass cloth and resin. The foil will keep it from sticking to the plastic. I can resin mold in some support ridges on the back to keep it ridged and even have a couple of aluminum angle 1/2 inch by 48 inch that I can cut and mold in to get it ridged too. It will be hinged from underneath at the front edge of the package shelf so I can lift it up to get under it. It will have two gas charged lift rods to hold it up, like on a hatch back. The stops for the front edge to set on will be tacked to the inside of the car in the quarter window area.
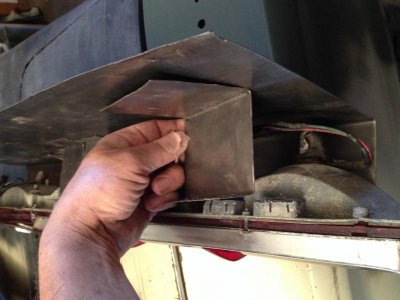
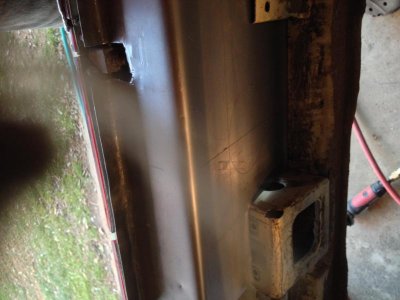
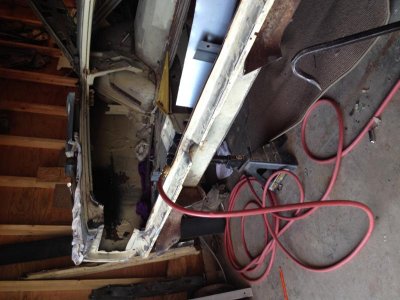
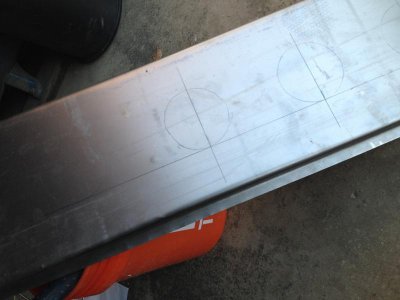
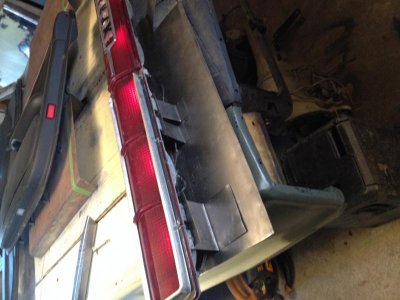
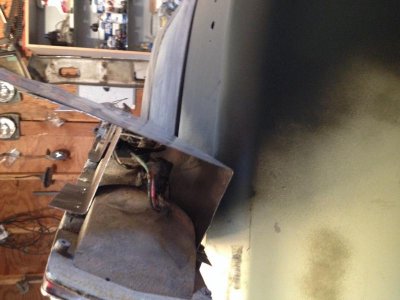
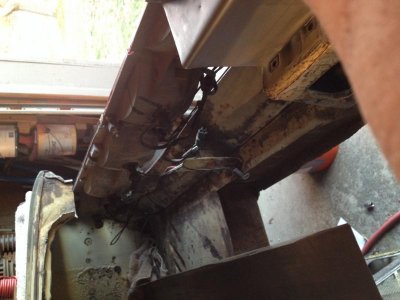
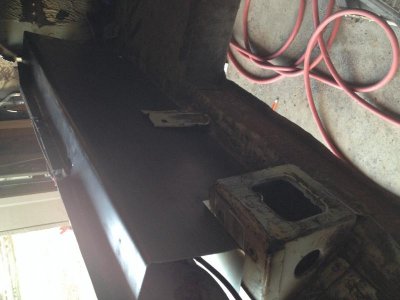


Last edited:
- Local time
- 3:13 AM
- Joined
- Oct 16, 2014
- Messages
- 27,941
- Reaction score
- 66,030
- Location
- Salisbury, Vermont
tail extensions...
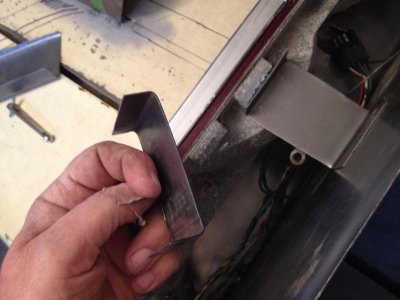
Just bought a 66/67 Charger set up front headlight cases and turn signals to go with the Charger grille I have. Now if I can get my hand on a set of "C" front fender moldings...........anyone....? Also bought a replacement quarter panel tail extension for my right side that I broke. I fooled around with them today and sat and figured out the best way to go to get the buckets to fit. The buckets are 5 inches and the stock space is 4 and something. 5/8ths I think. So I used the extension I already broke and cut a 1 1/16th inch slot down each side top and bottom, the thickness of the light unit complete with trim, and removed the roof and floor of the stock extension tail light slot. This makes a channel for the t -bird unit to slide into. Keep in mind that this is AFTER slicing the angles out of the extension and flattening those surfaces square with the slot. Ok, still with me? Then, lol, I trimmed the frame underlying the slot to get it to 5 1/16th inches wide so the t-bird unit can slide in left to right and also top to bottom. I mocked it up after doing this and it still allows most of the outer trim bezels to be seen and they are painted black. So, that will work. Now, when I get the new replacement tail extension I can modify that one to match and be done with that. Next up is the plate to fiberglass in the left over opening at each end of the light bar. The stock extensions are a square slot but the T-Bird lights are arrow shaped at the ends, no match. So, I made one today to tryout the idea. I think it will work once I also make the inside surface that is arrow shaped to take the place of the outer end of the stock one. Cornfuusing, I know. Here are some pics which might make it clearer....
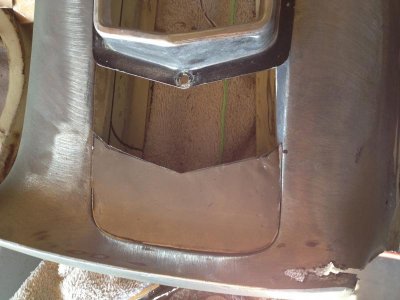
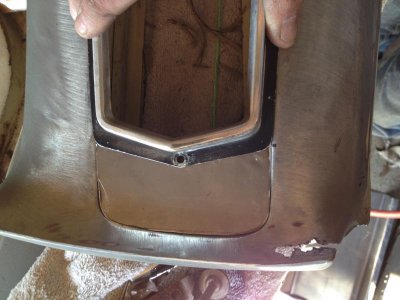
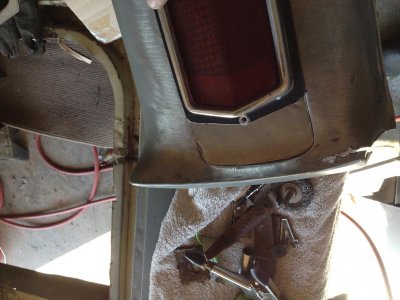
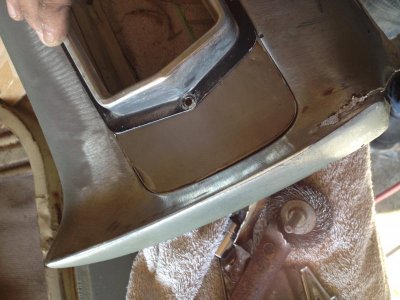
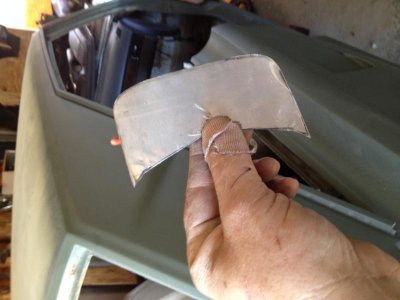
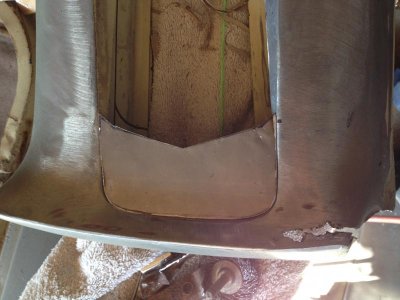
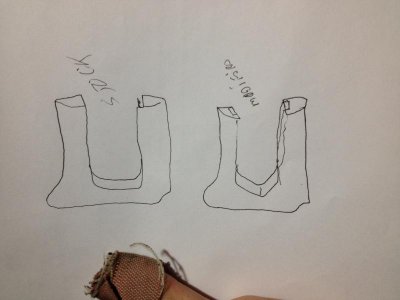
Just bought a 66/67 Charger set up front headlight cases and turn signals to go with the Charger grille I have. Now if I can get my hand on a set of "C" front fender moldings...........anyone....? Also bought a replacement quarter panel tail extension for my right side that I broke. I fooled around with them today and sat and figured out the best way to go to get the buckets to fit. The buckets are 5 inches and the stock space is 4 and something. 5/8ths I think. So I used the extension I already broke and cut a 1 1/16th inch slot down each side top and bottom, the thickness of the light unit complete with trim, and removed the roof and floor of the stock extension tail light slot. This makes a channel for the t -bird unit to slide into. Keep in mind that this is AFTER slicing the angles out of the extension and flattening those surfaces square with the slot. Ok, still with me? Then, lol, I trimmed the frame underlying the slot to get it to 5 1/16th inches wide so the t-bird unit can slide in left to right and also top to bottom. I mocked it up after doing this and it still allows most of the outer trim bezels to be seen and they are painted black. So, that will work. Now, when I get the new replacement tail extension I can modify that one to match and be done with that. Next up is the plate to fiberglass in the left over opening at each end of the light bar. The stock extensions are a square slot but the T-Bird lights are arrow shaped at the ends, no match. So, I made one today to tryout the idea. I think it will work once I also make the inside surface that is arrow shaped to take the place of the outer end of the stock one. Cornfuusing, I know. Here are some pics which might make it clearer....


Last edited:
- Local time
- 3:13 AM
- Joined
- Oct 16, 2014
- Messages
- 27,941
- Reaction score
- 66,030
- Location
- Salisbury, Vermont
fab...
Made the inside wall of the new arrow shaped slot end that will go in once I cut the guides for the light assembly to slide in. Also heres the grille and the rest of the front too.
View attachment 288558View attachment 288559View attachment 288555View attachment 288556View attachment 288557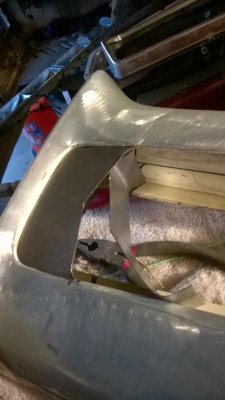
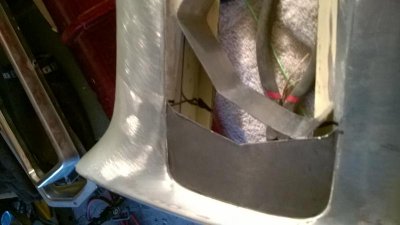
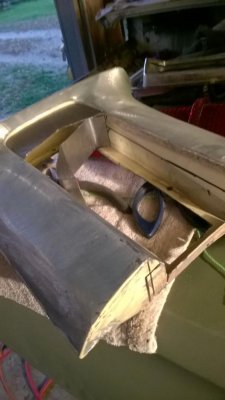


Made the inside wall of the new arrow shaped slot end that will go in once I cut the guides for the light assembly to slide in. Also heres the grille and the rest of the front too.
View attachment 288558View attachment 288559View attachment 288555View attachment 288556View attachment 288557


dieseldazzle
Well-Known Member
Ill send some c molding chrome with the headlights and cases but they arent pretty, Im sure you will work some magic on them.
- Local time
- 3:13 AM
- Joined
- Oct 16, 2014
- Messages
- 27,941
- Reaction score
- 66,030
- Location
- Salisbury, Vermont
oh wow! Thanks a million man, that's so cool. Right on man!
Ill send some c molding chrome with the headlights and cases but they arent pretty, Im sure you will work some magic on them.
Homstead
Well-Known Member
Projects looking good!
- Local time
- 3:13 AM
- Joined
- Oct 16, 2014
- Messages
- 27,941
- Reaction score
- 66,030
- Location
- Salisbury, Vermont
Thanks! It's coming together slowly but it's moving.
Projects looking good!
- Local time
- 3:13 AM
- Joined
- Oct 16, 2014
- Messages
- 27,941
- Reaction score
- 66,030
- Location
- Salisbury, Vermont
Didn't do much today, went shopping with the wifey for a 12 foot fence drive through gate for the far pasture, a 6 foot by 2 foot by 1 foot deep galvanized tub for the ducks to swim in this winter, picked up a ton of wood pellets for the church and loaded them inside the building, sat and fiddled with the tail light frames. I found out that they set in there just right. Good job me. Clamped them up in place sans buckets and studied the situation some. Need to plan ahead for the lower sheet metal below the lights, the sheet metal from the trunk seal to the top of the light frames and the trunk seal itself. How all this needs to be arranged in there and where the trunk lid falls in relation to them. I think I have it all going in right, that is to say that I'll be able to get to the wiring, the bulbs, the extensions, and be able to remove them if needed without having to use a cutting torch. I see how the 66/67 Charger is shaped in this area and I will end up with much the same here. I just don't want to end up looking at the finished product and then say "Oh ****". I don't ever expect to drive it in the rain but stuff happens and I want to be able to if it happens and not have water fill up the trunk.
Similar threads
- Replies
- 9
- Views
- 1K
- Replies
- 1
- Views
- 706
- Replies
- 3
- Views
- 925


