dangina
Well-Known Member
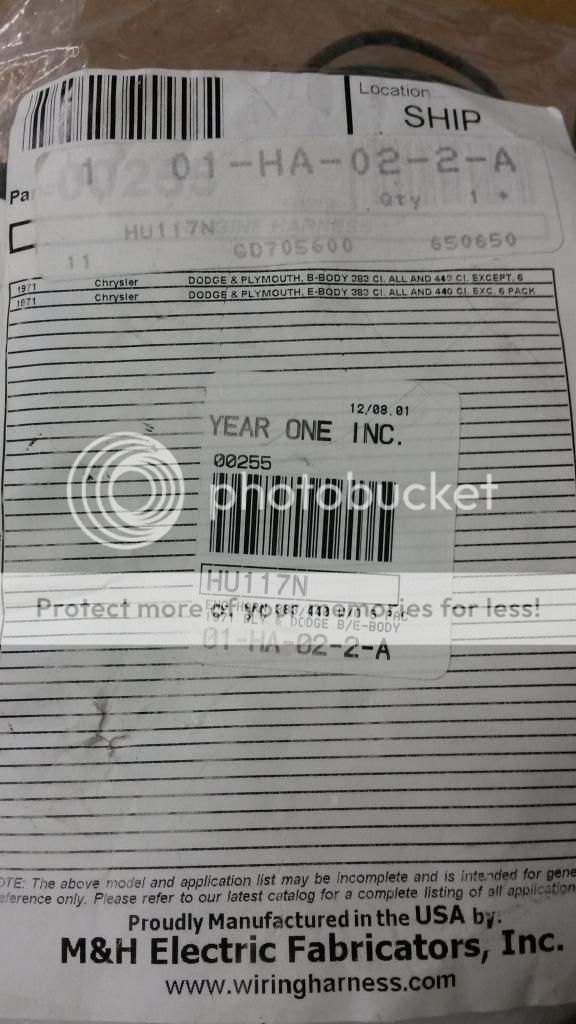
So since I'm running all brand new wiring, I bought a bunch of Harnesses from Year One(M&H) and Mopar. I'm wasting a bunch of time trying to figure out what all these connectors are for and where they go. My goal for this guide is to provide a easy, picture diagram for those looking to hook up their car fast, and effectively with little to no time wasted. With each pick I'll provide the wire colors to the connector as the resolution may be off on some of your screens so you know exactly what your looking at. Keep in mind that these are aftermarket harnesses and may not coincide with the original colored wires, and that's where I need your help. I'm gonna keep this updated as best as possible, What I need/want from the mopar community is to help me identify the connectors, and what they plug into. Just type pic# in the reply and type A) what its for, B) what it plugs into. Also, as I have found out already, do not throw away your old harnesses, some of the wires from your old harness may have to be reused with the new harness. If I had made a mistake, please let me know and I'll correct it asap.
***update (1) had to switch the brown and red wire leads on the windshield wiper motor harness as they were backwards when plugged into the bulkhead****
***update (2) M&H for some reason moved the horn wiring from the lamp harness to the engine harness, and they moved the low brake switch wiring from the engine harness to the lamp harness. So if one wanted to run a mix of old harnesses and new, you would have to change these wires in the actual harness themselves to get it to work.***
Now let's begin:
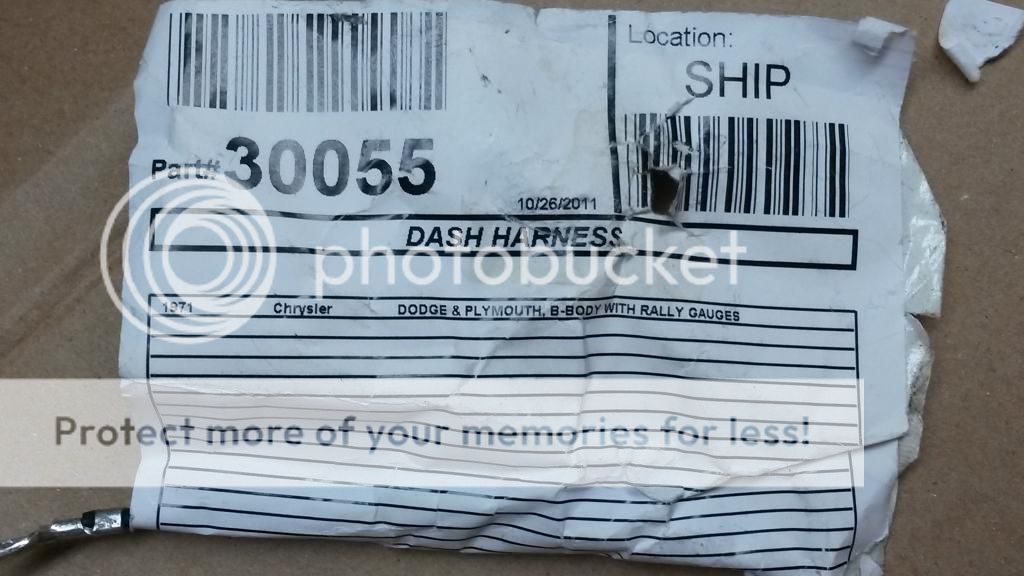
M&H main harness for 1971 Rallye Dash for Plymouth / Dodge Bbody:
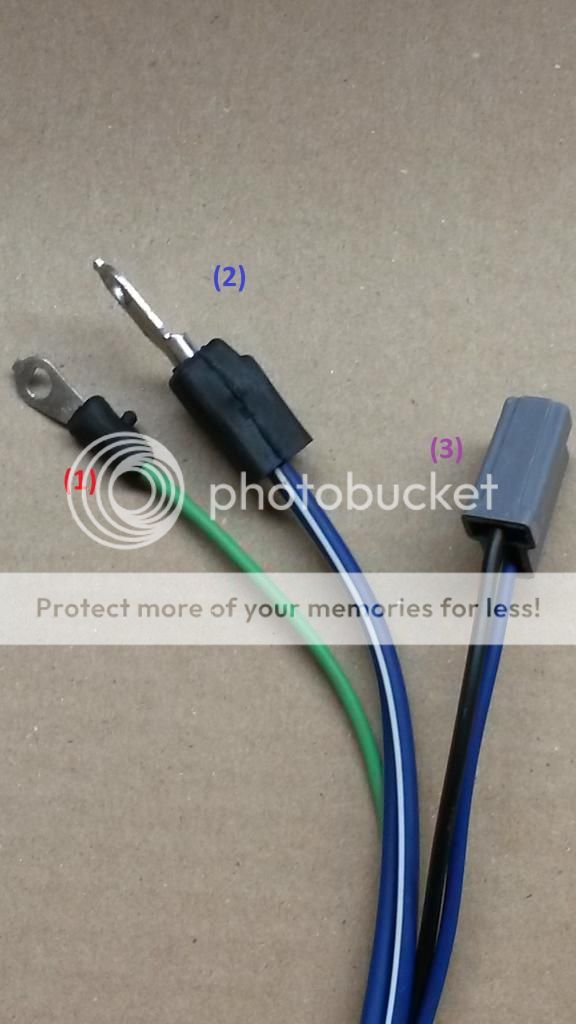
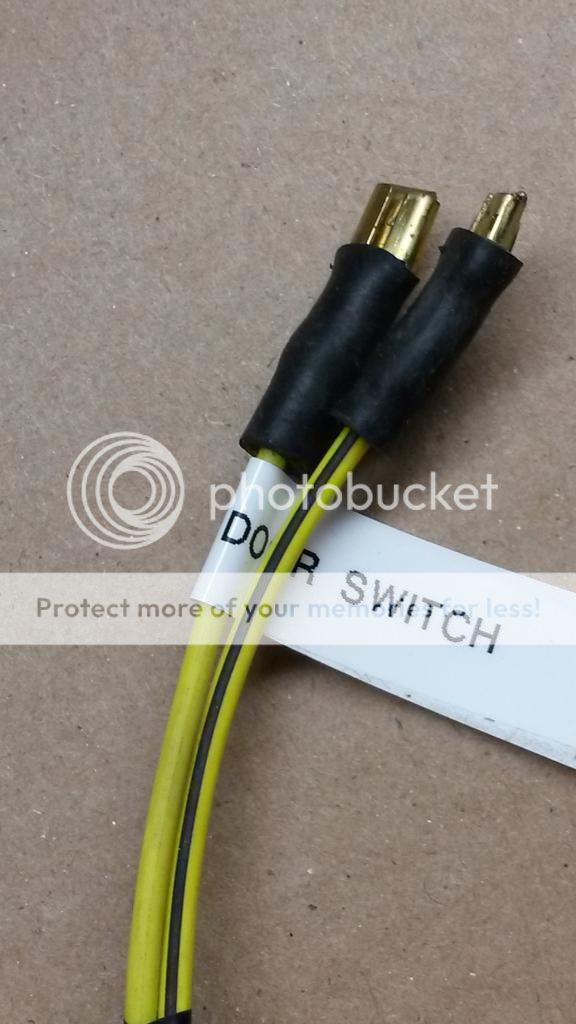
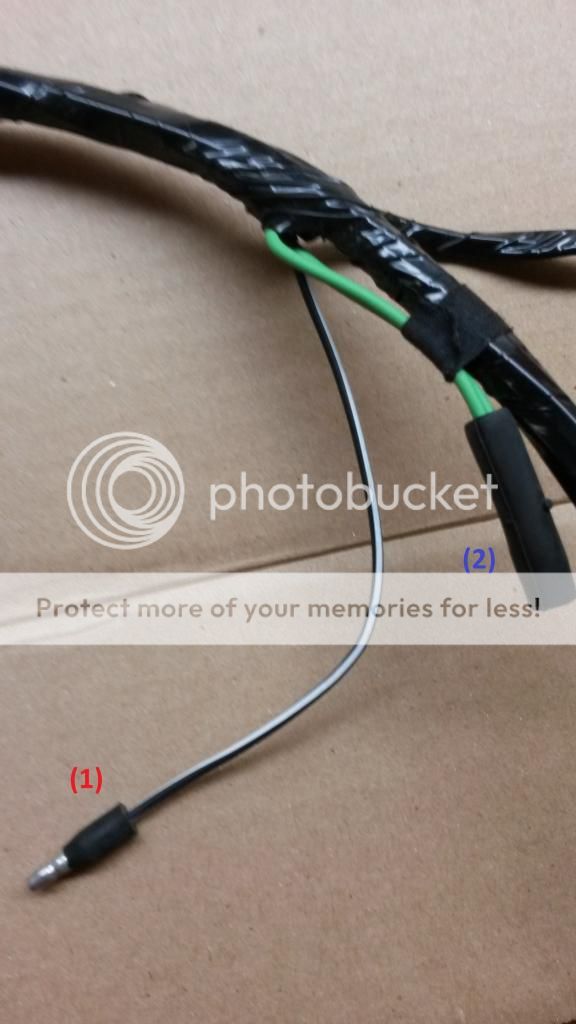
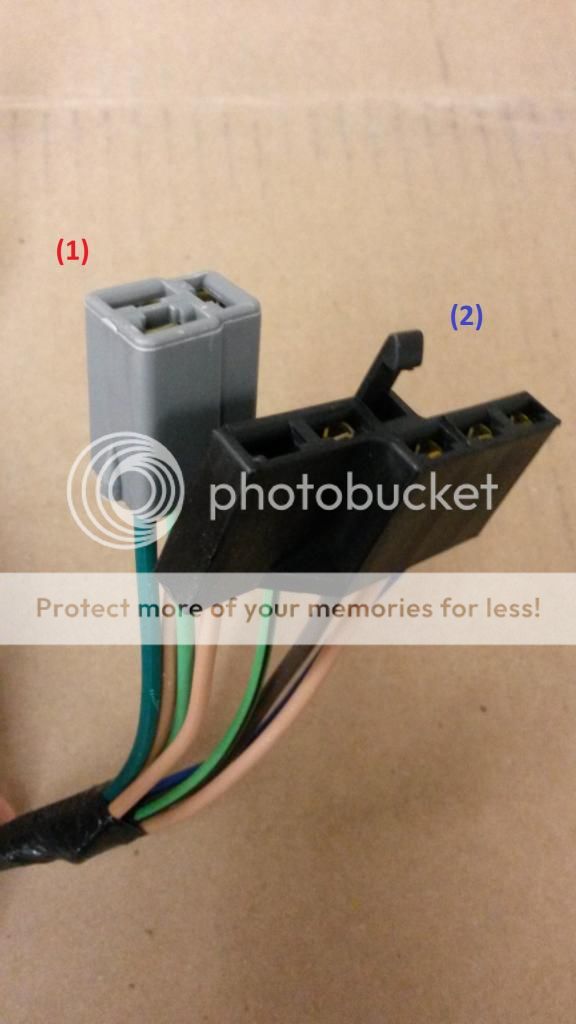
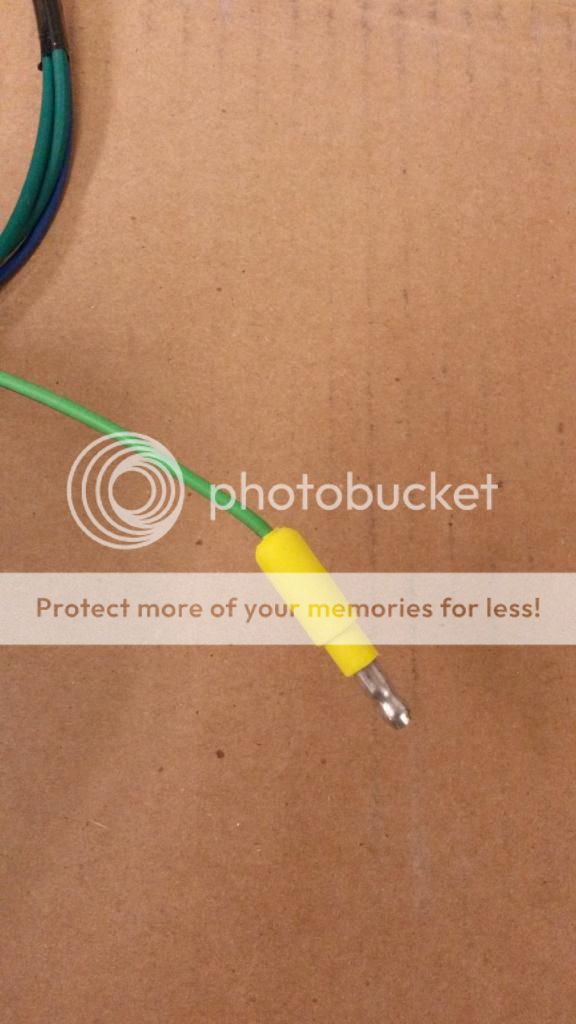
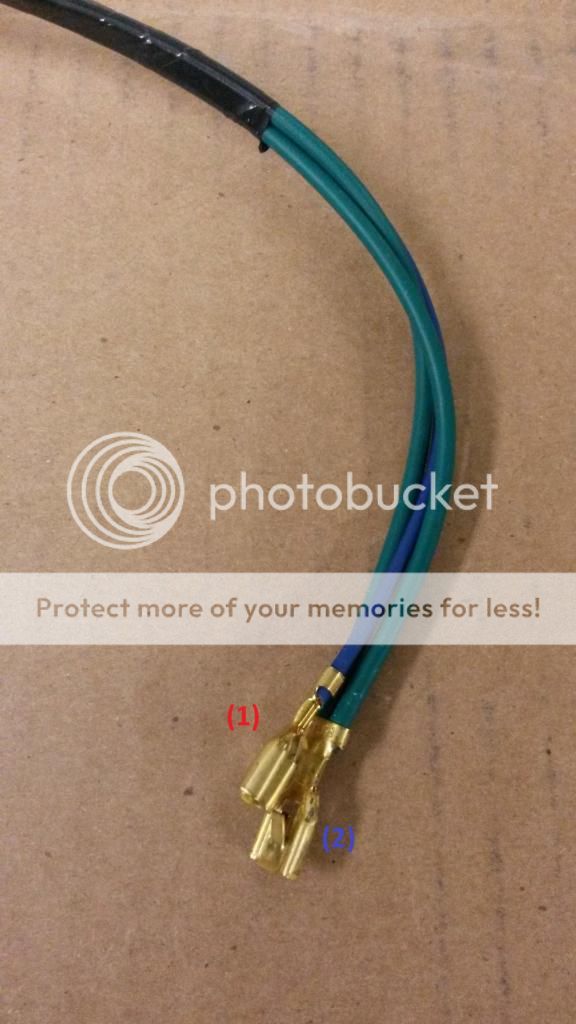
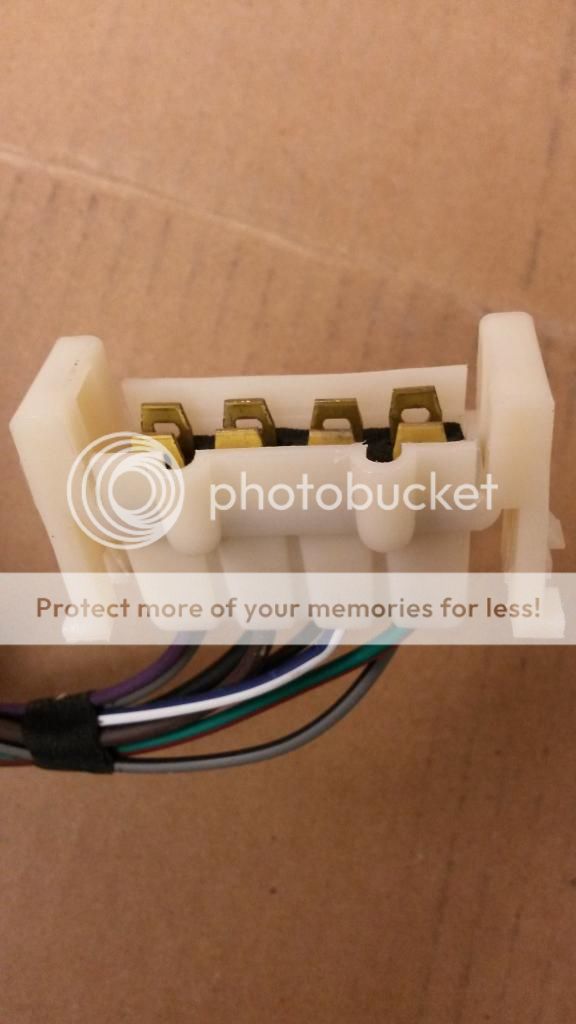
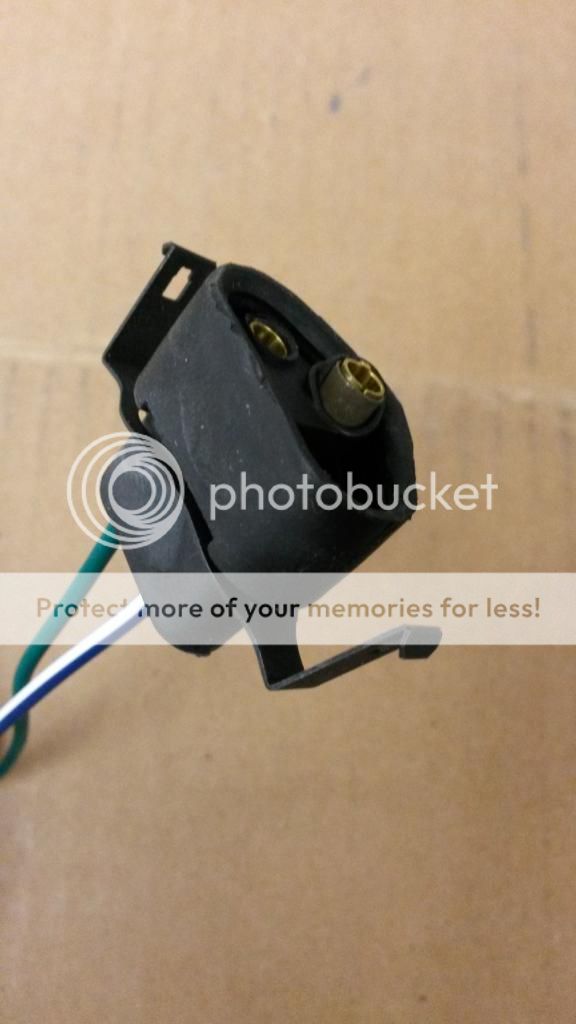
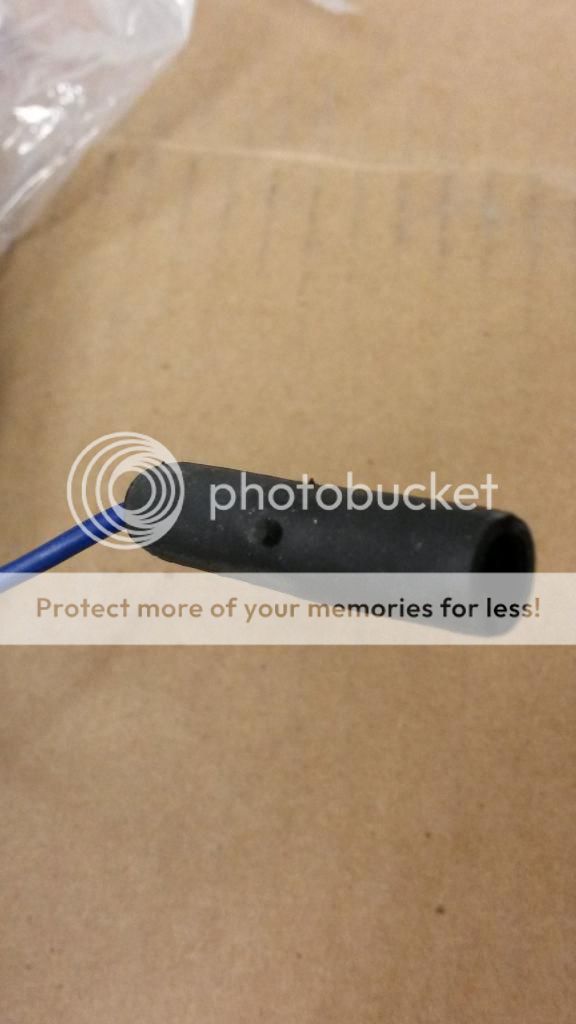
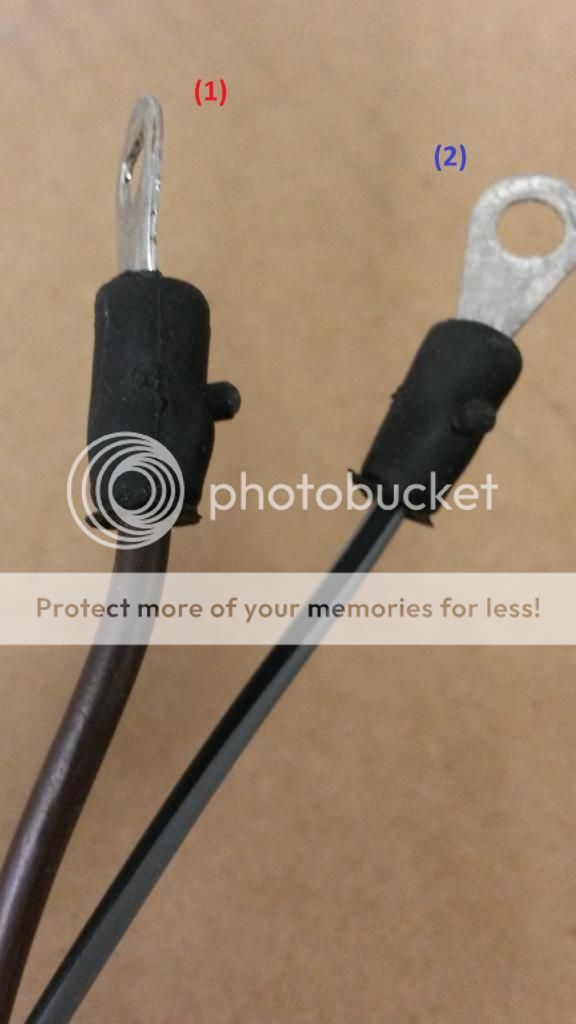
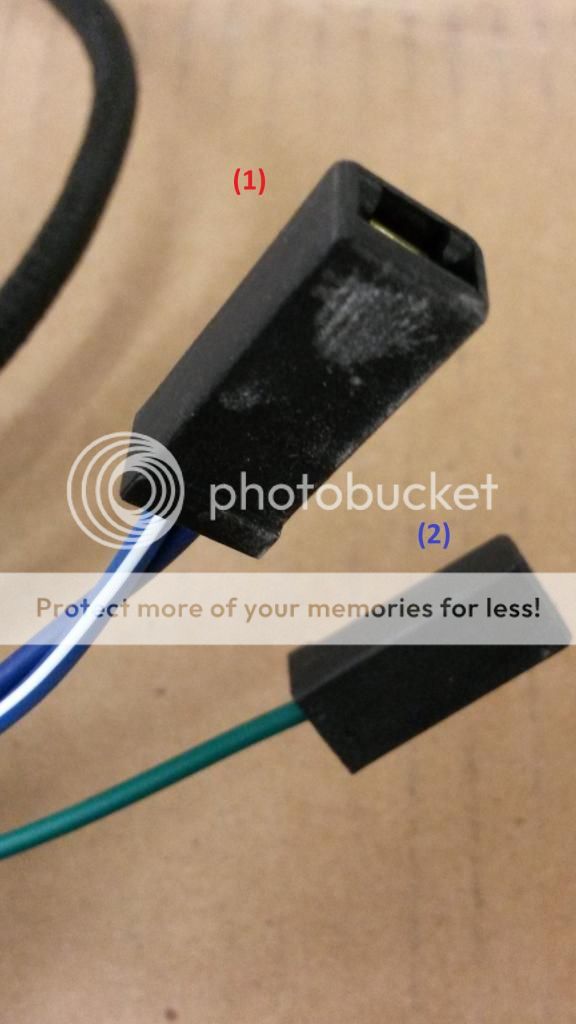
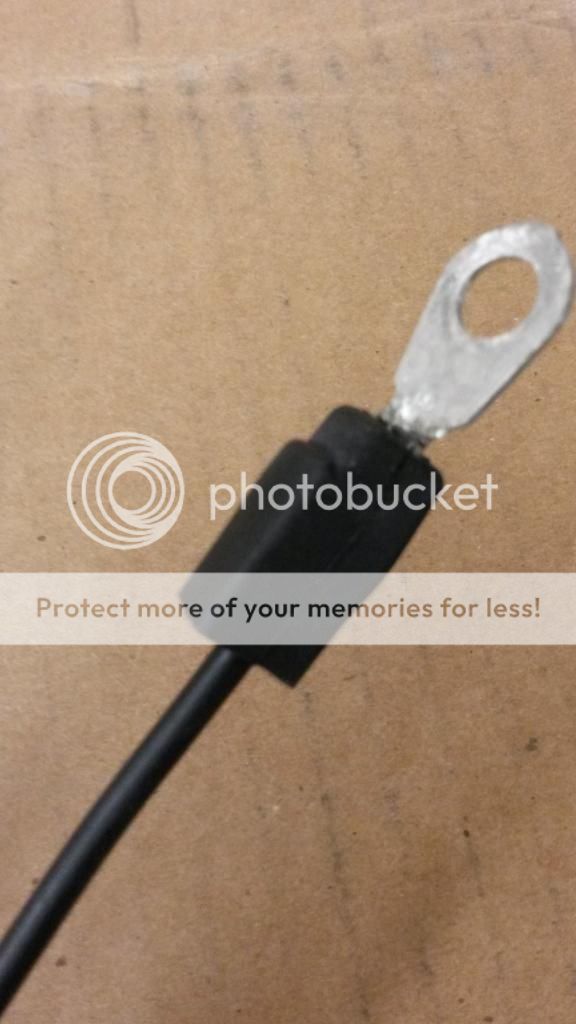
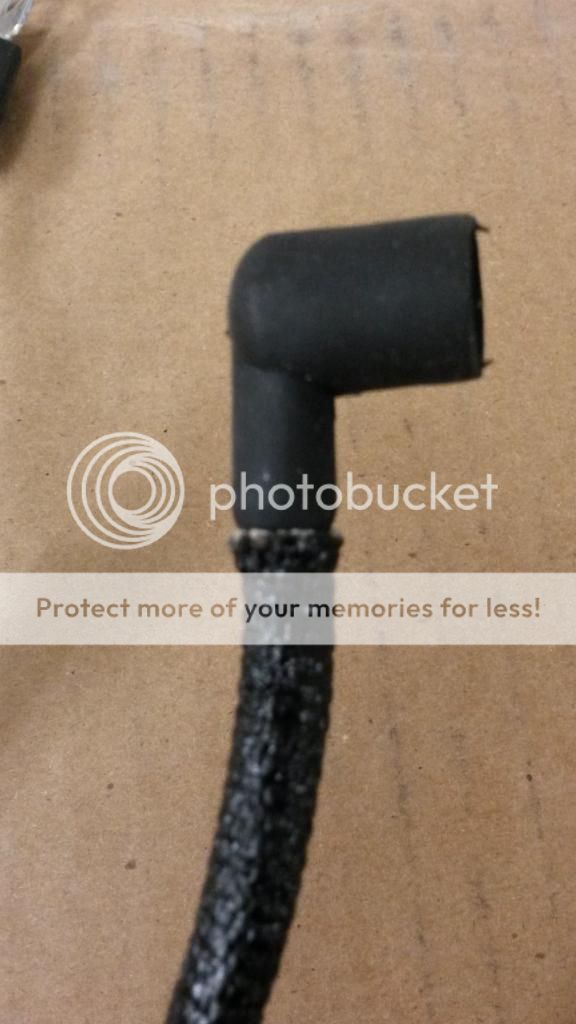
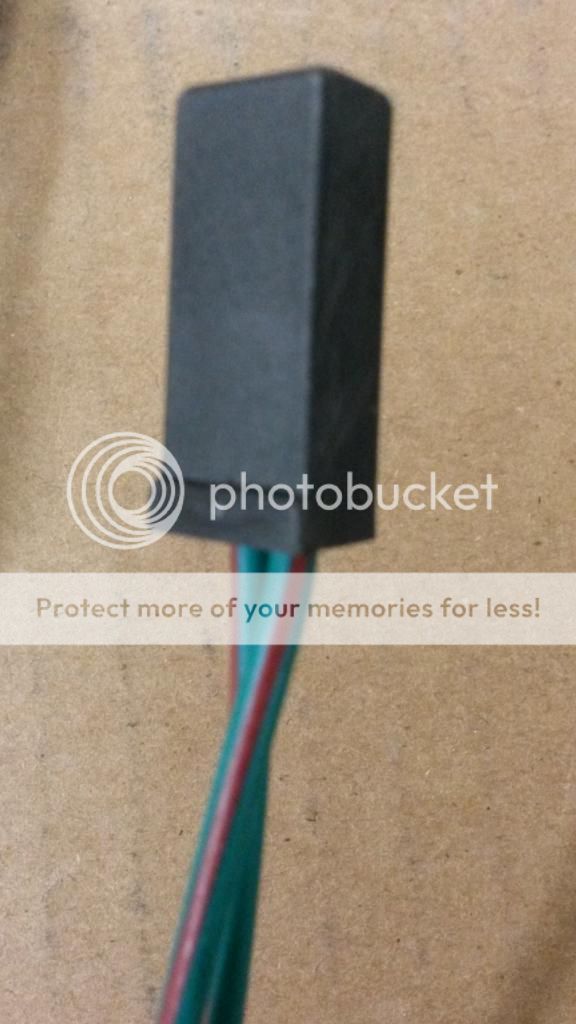
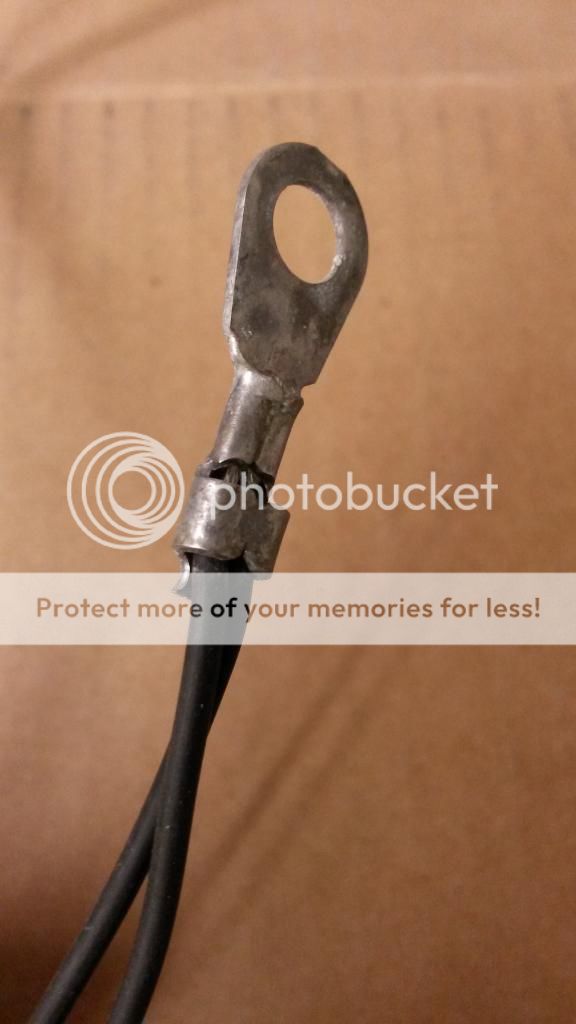
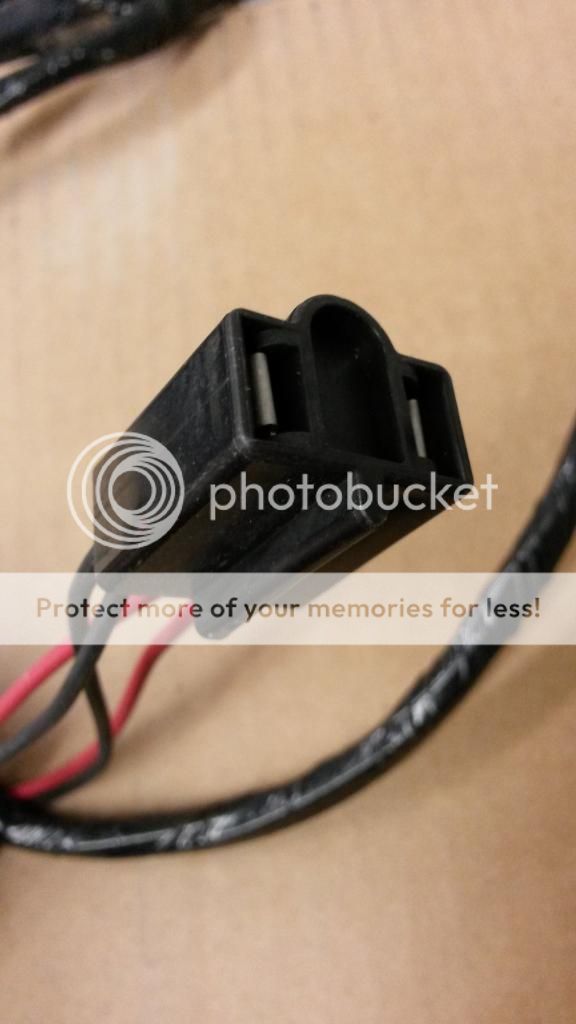
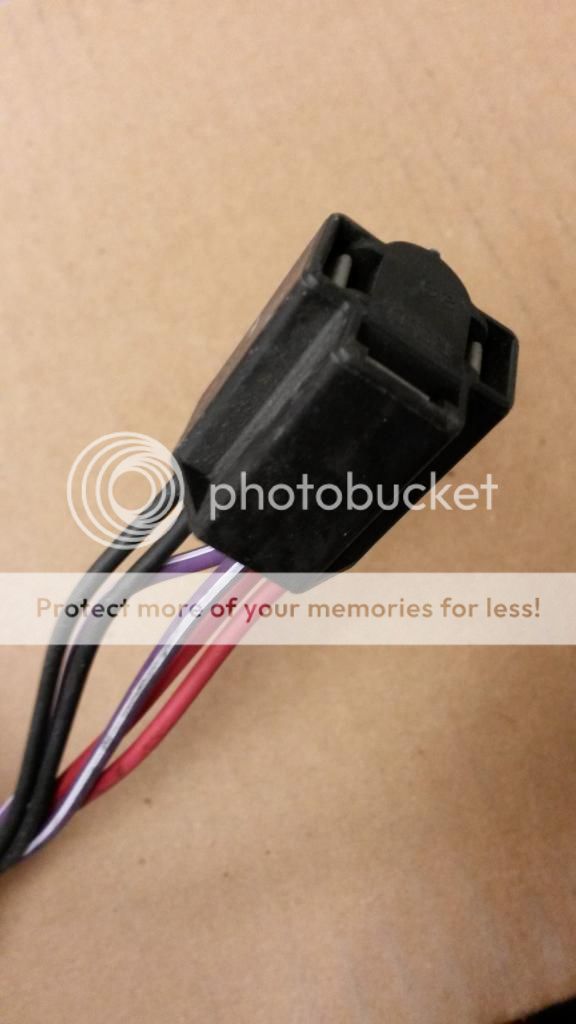
(pic1)
(pic2)
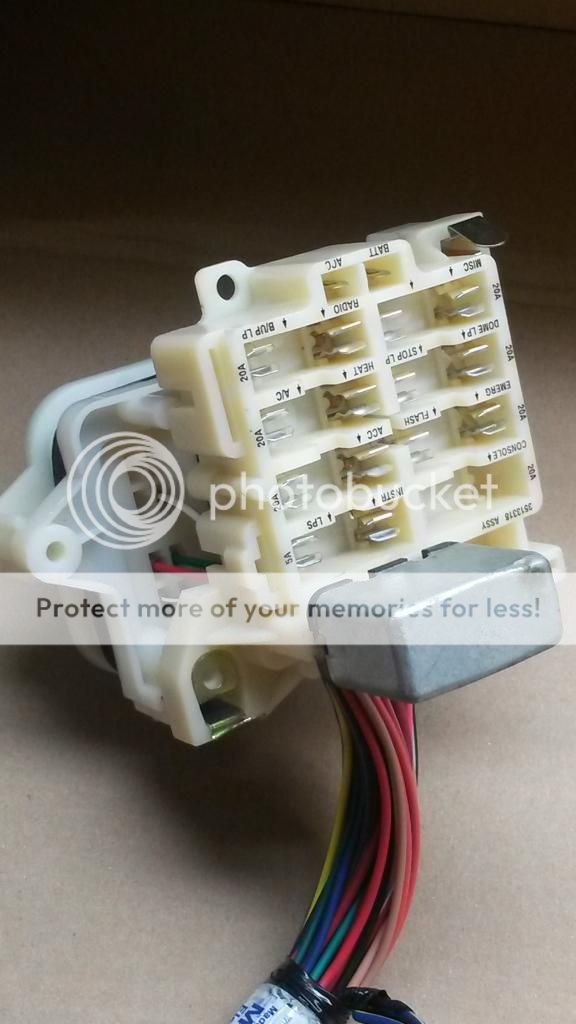
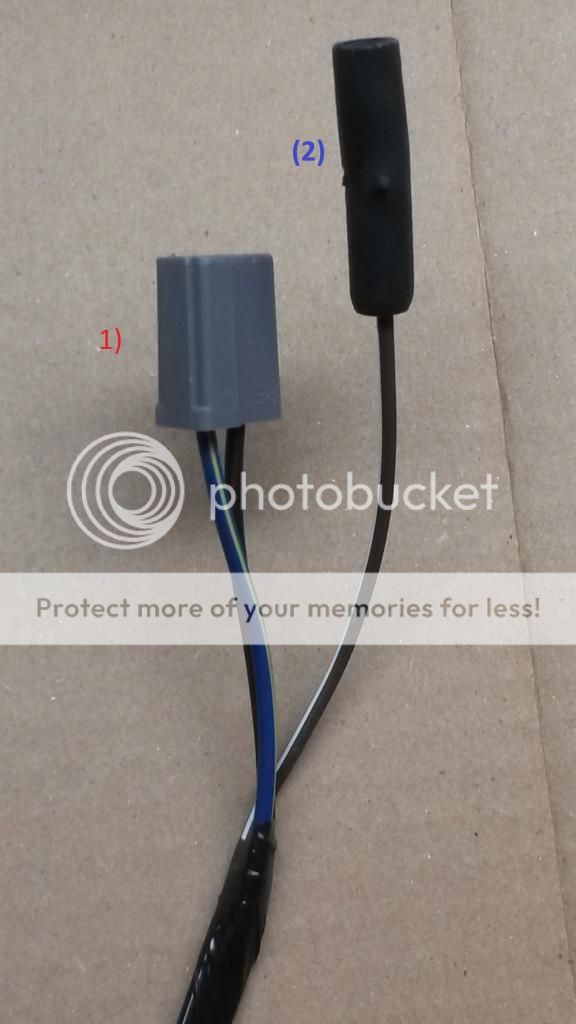
(pic3)
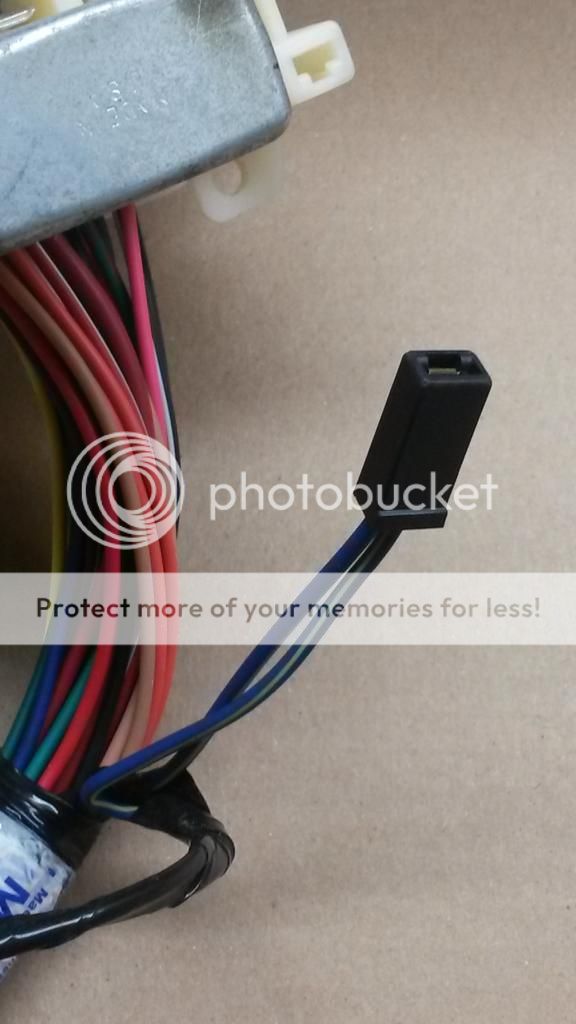
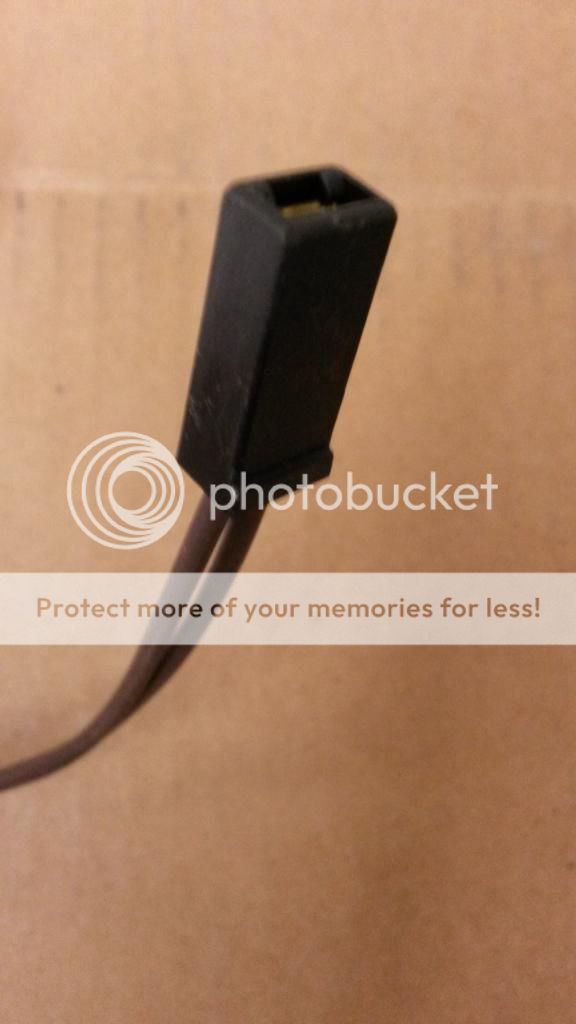
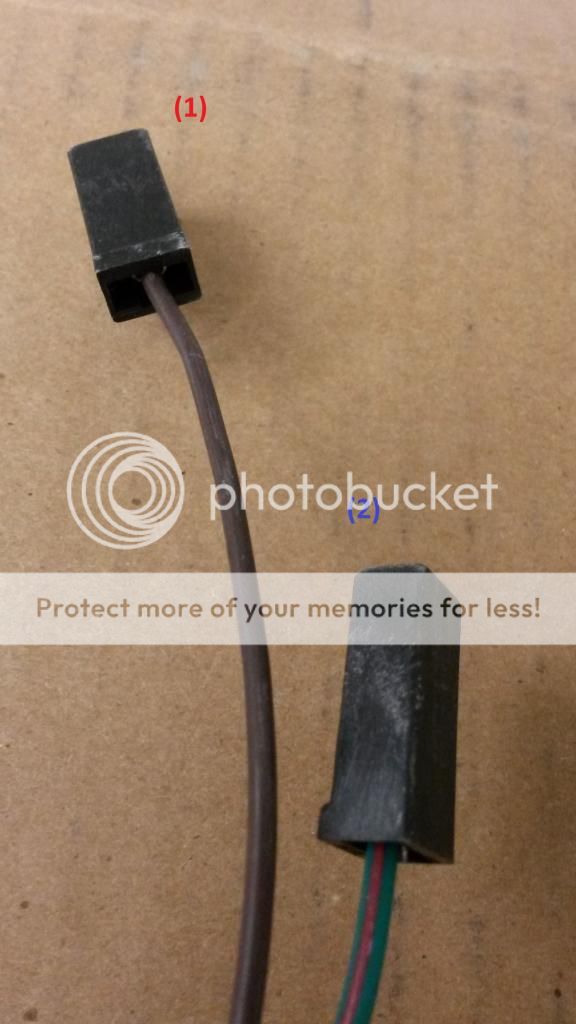
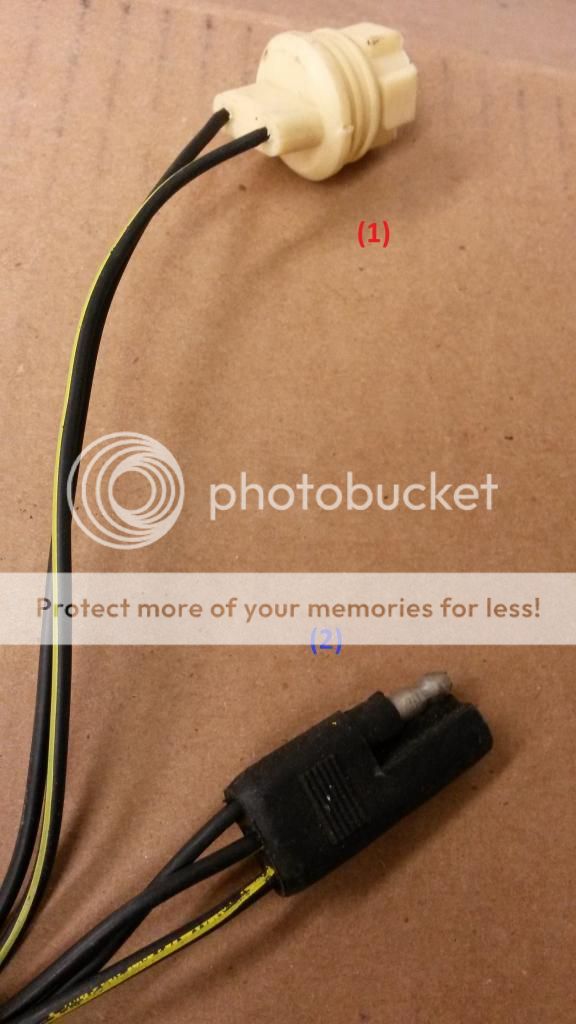
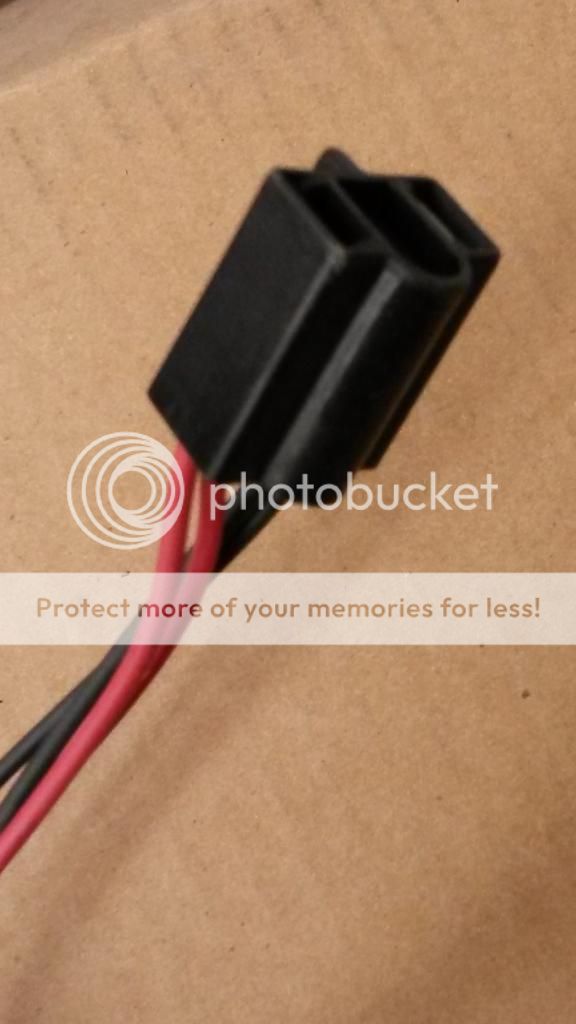
1) 2 wires, both dark blue with yellow stripes
A) headlamp washer
B) only required for those equipped with this option
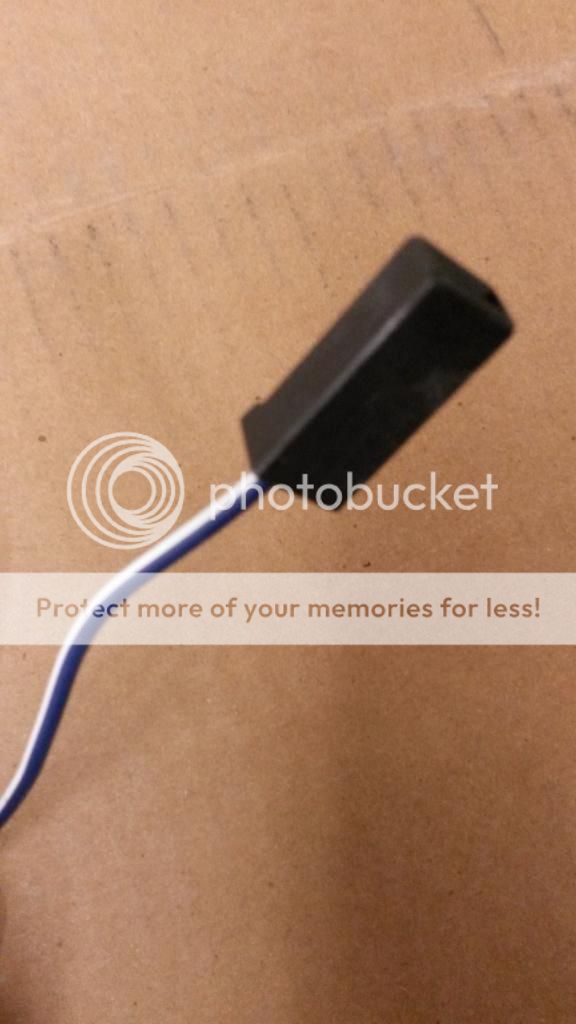
(pic4)

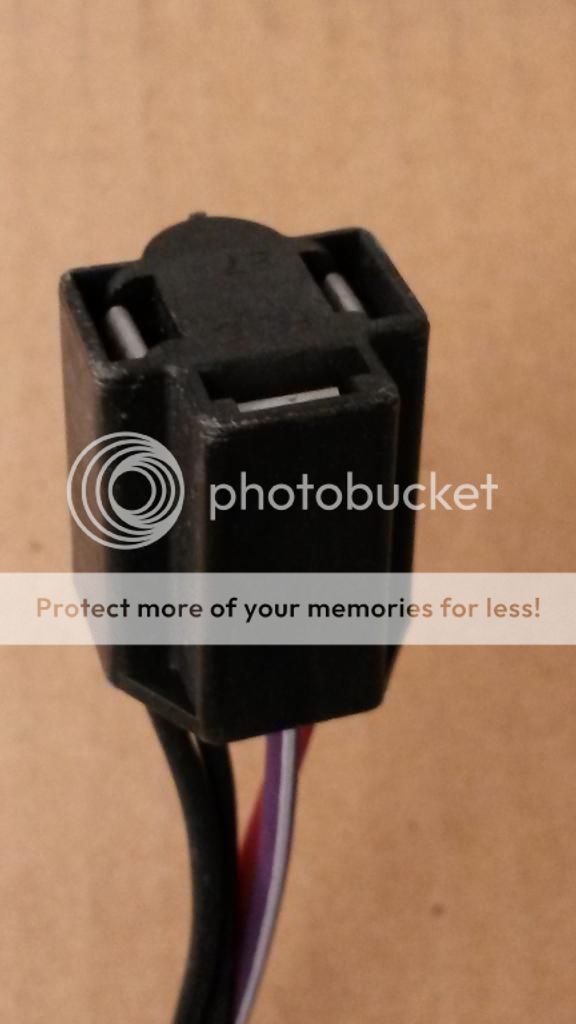
1) brown wire with white stripe
A) headlamp washer
B) The rubber grommet goes into the hole, through the fire wall, its the upper hole near the master cylinder (or booster)
(pic5)
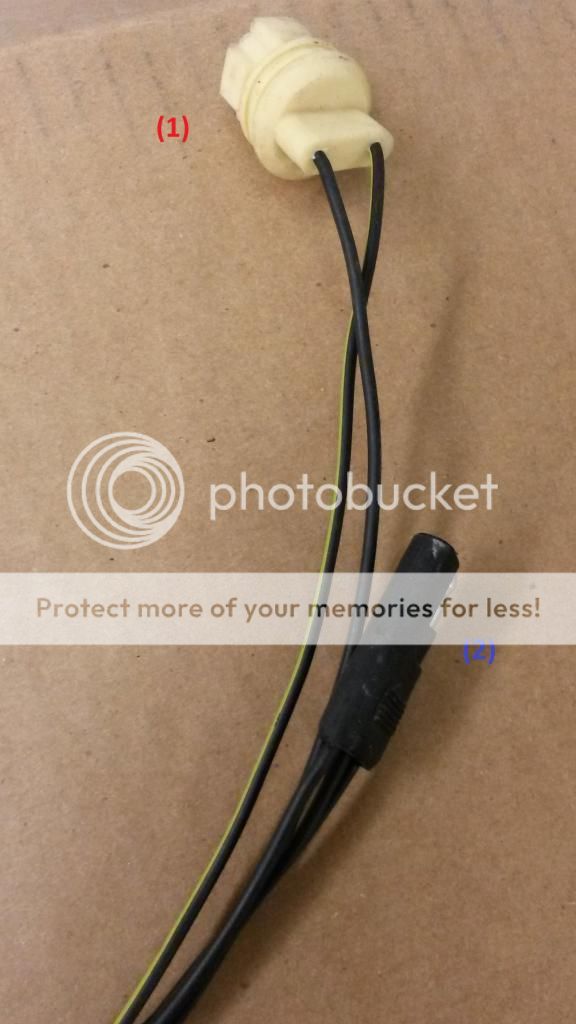
1) dark blue wire with yellow stripe, black wire with red stripe
A) concealed headlamps
B) for dodge chargers not used on GTX/Roadrunner/Satellite
2) Other side of brown wire with white stripe
A) headlamp washer
B) engine side for headlamp washer
(pic6)
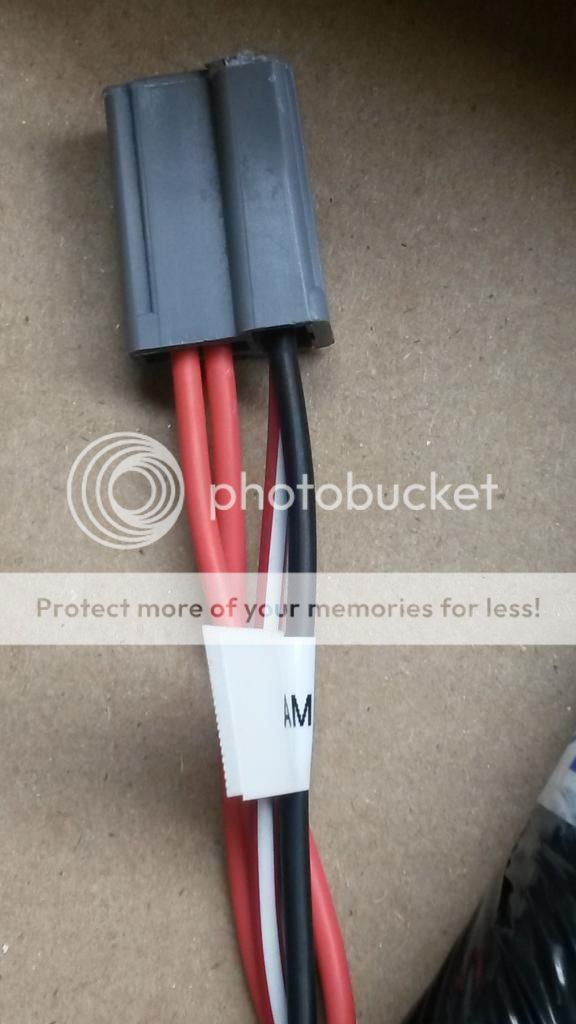
1) 2 solid orange wires, one red wire with white stripe, solid black wire
A) AM Radio
b) Radio Harness
(pic7)
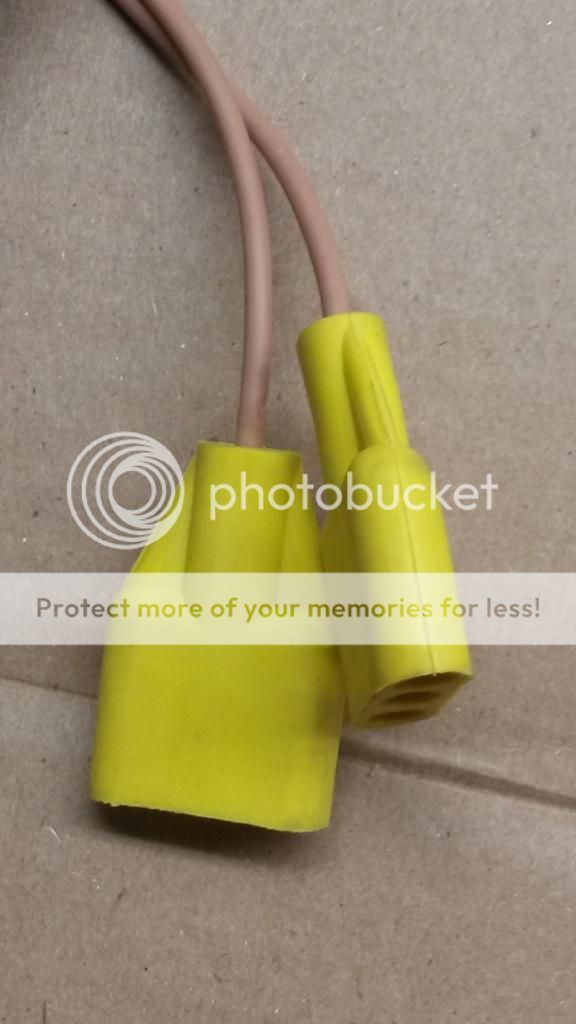
1) solid tan wires to 3 port yellow female connector
A) accessory feed
B) ?
(pic8)
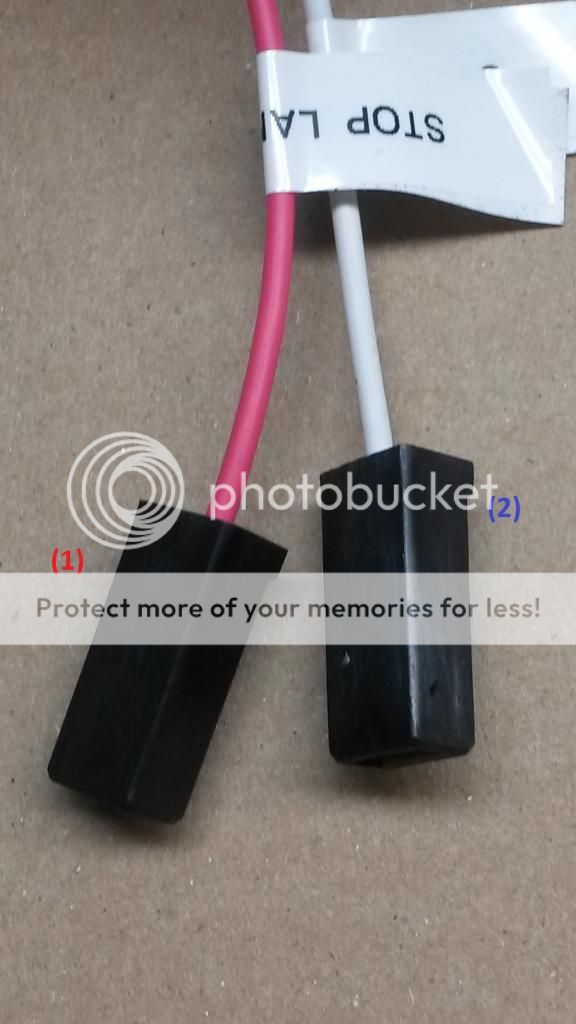
1) solid pink wire
A) stop lamp switch
B) switch on brake pedal
2) solid white wire
A) stop lamp switch
B) switch on brake pedal
(pic9)
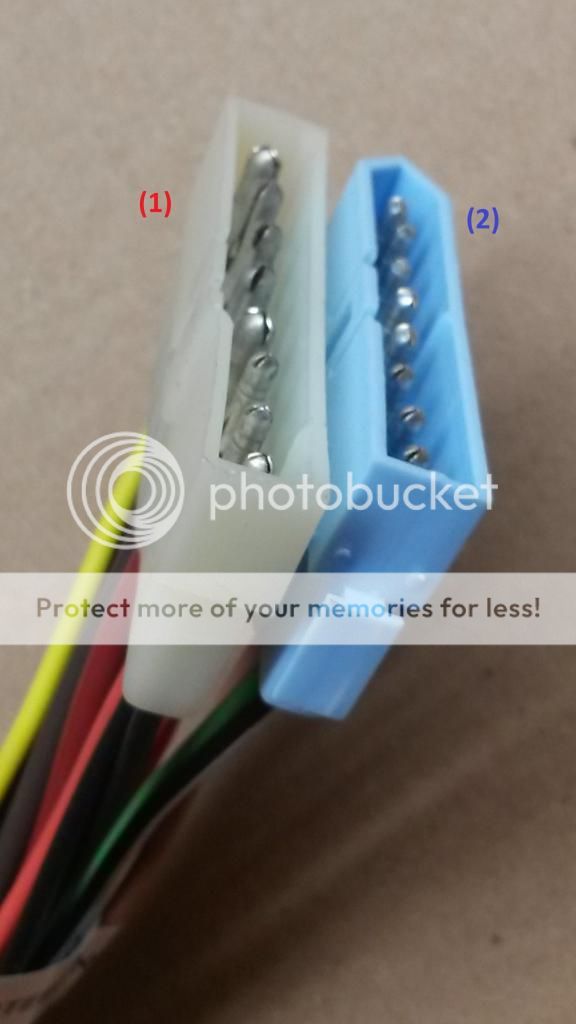
1) solid yellow wire, solid black wire, blue wire with white stripe, solid brown wire, solid red wire, solid orange wire, solid black wire, solid black wire
A) steering column
B) steering column harness
2) black wire white stripe, solid light green wire, solid tan wire, solid pink wire, solid red wire, solid dark green wire, solid brown wire, solid white wire
A) steering column
B) steering column harness
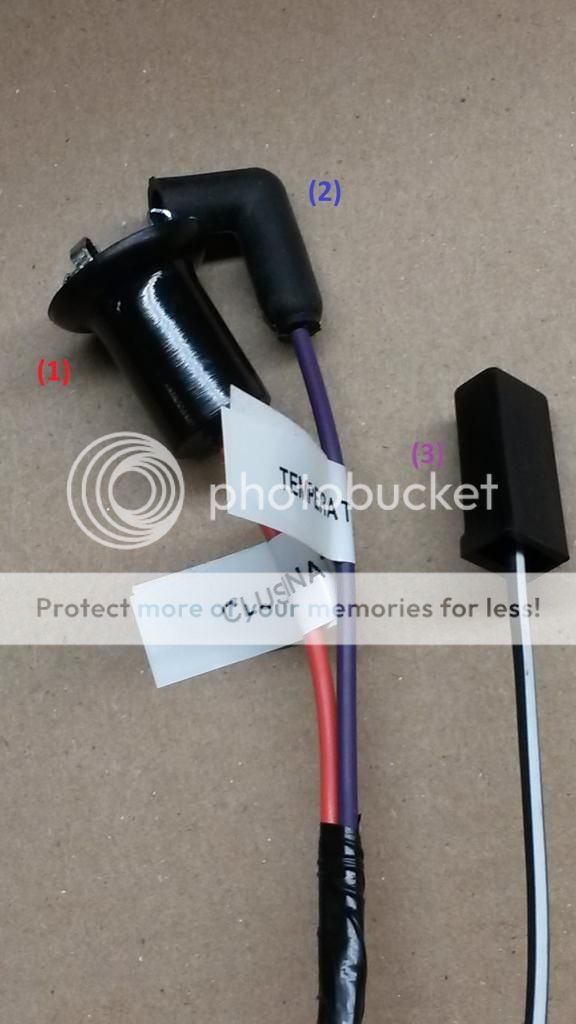
(pic10)
(pic10a)
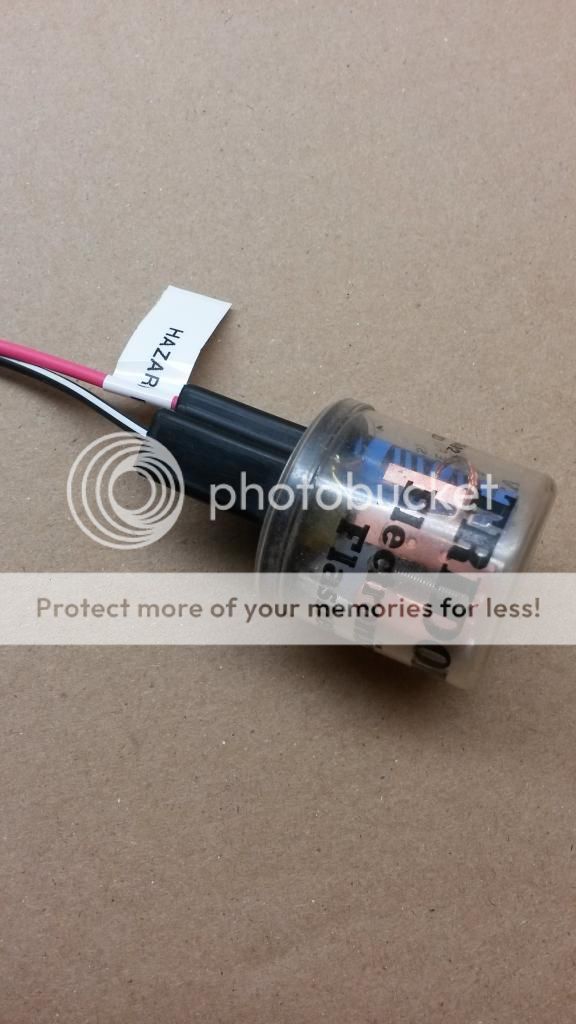
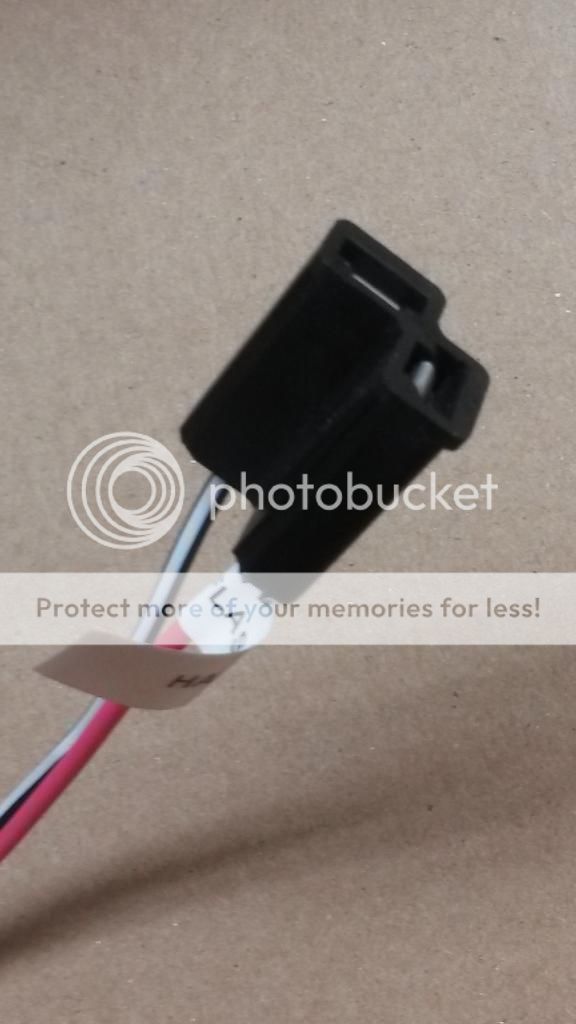
1) solid pink wire, black wire with white stripe
A) hazard flasher
B) electronic flasher
(pic 11)
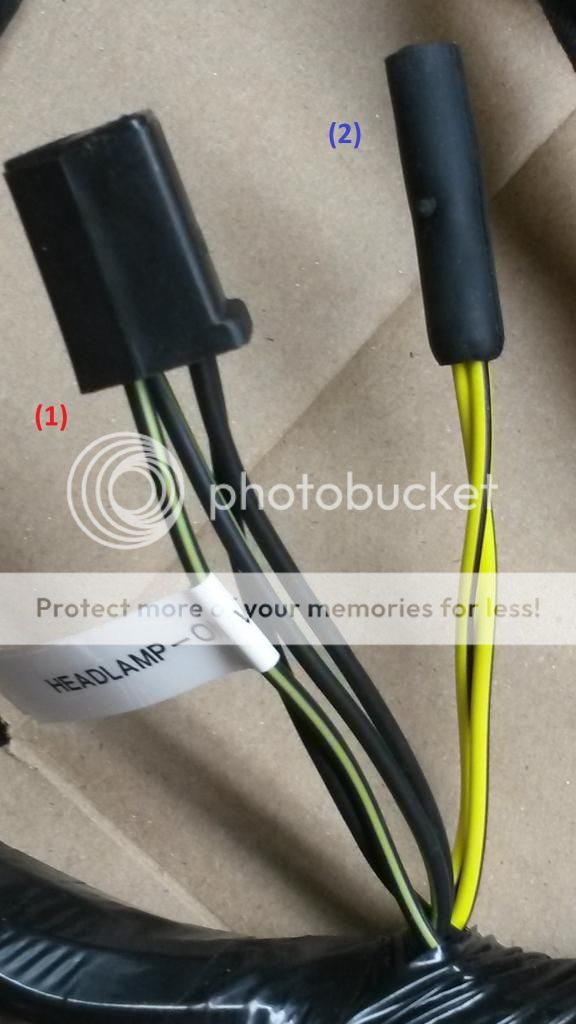
1) 2 solid black wires, 2 black wires with yellow stripe
A) headlamp-on warning buzzard
B) harness gets an extra pigtail to reach the buzzer mounted on dash frame between glovebox and ashtray. Buzzer gets a plug like the blinker flashers ones.
2) 2 yellow wires with black stripes
A) to ignition switch lamp time delay relay wiring
B) It is used for the little lite that shines from the steering column to the ignition key hole when the door is opened.
(pic12)
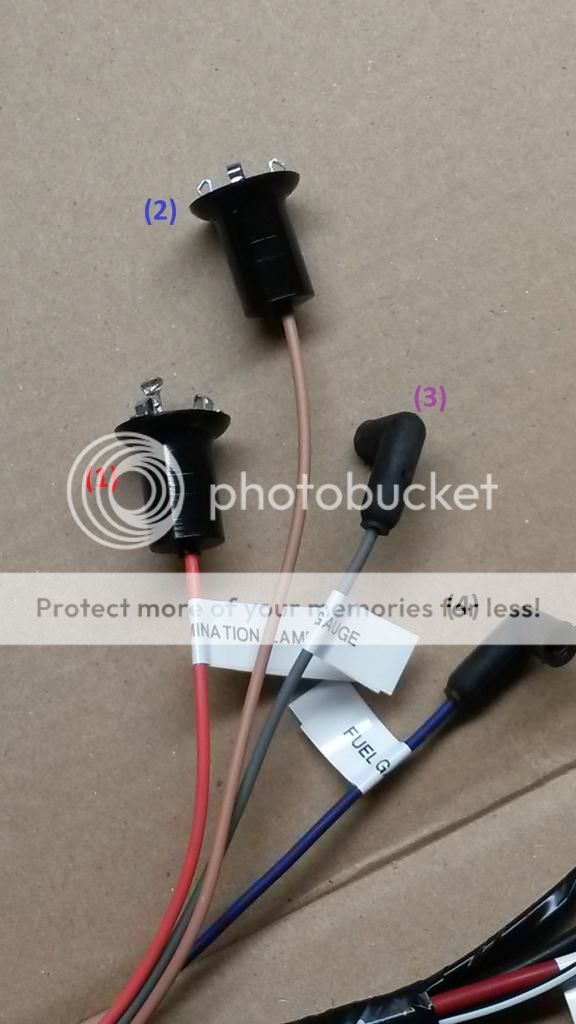
1) solid orange wire
A) cluster illumination lamp
B) back of rallye dash
2) solid tan wire
A) right turn signal indicator lamp
B) back of rallye dash
3) solid grey wire
A) oil gauge
B) back of rallye dash
4) solid dark blue wire
A) fuel gauge
B) back of rallye dash
(pic13)
1) solid orange wire
A) cluster illumination lamp
B) back of rallye dash
2) solid violet wire
A) temperature gauge
B) back of rallye dash
3) black wire with white stripe
A) instrument cluster ground
B) plug into male blade attached to the backing plate on the cluster
(pic14)
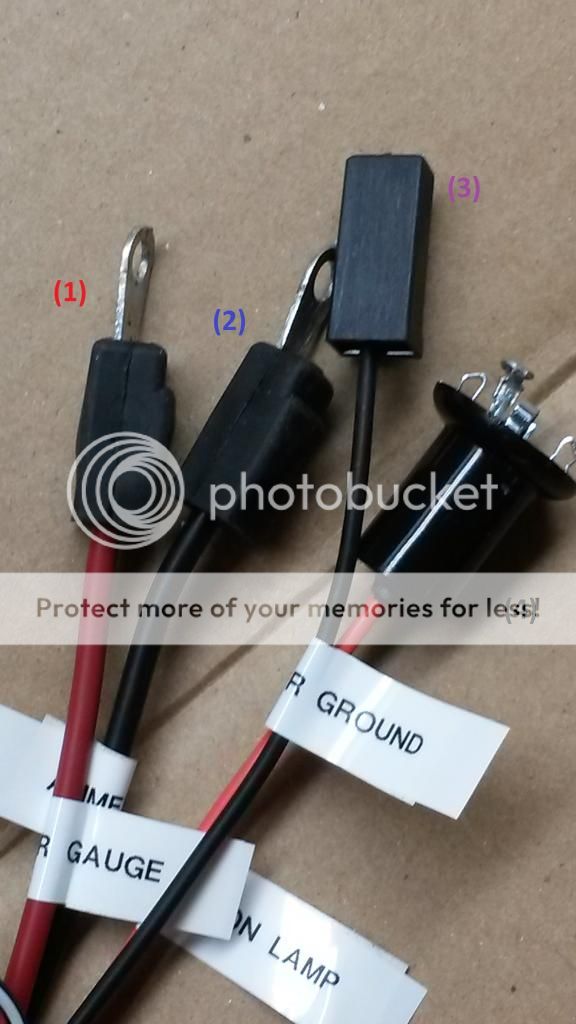
1) solid red wire
A) ammeter gauge
B) back of rallye dash
2) solid black wire
A) ammeter gauge
B) back of rallye dash
3) solid black wire
A) POSITIVE source for voltage limiter
B) plugs straight to voltage limiter double prong
4) solid orange wire
A) cluster illumination lamp
B) back of rallye dash
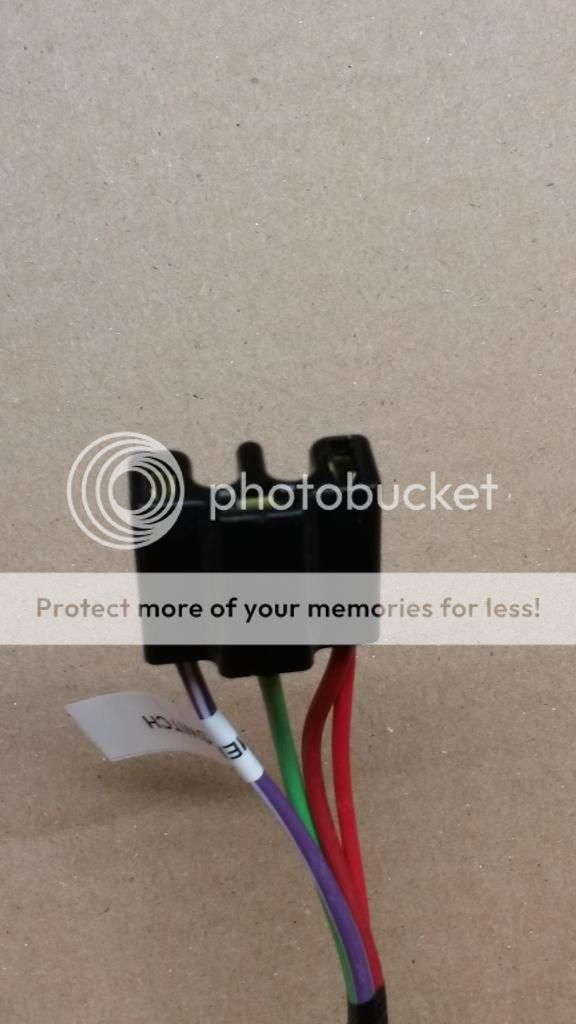
(pic15)
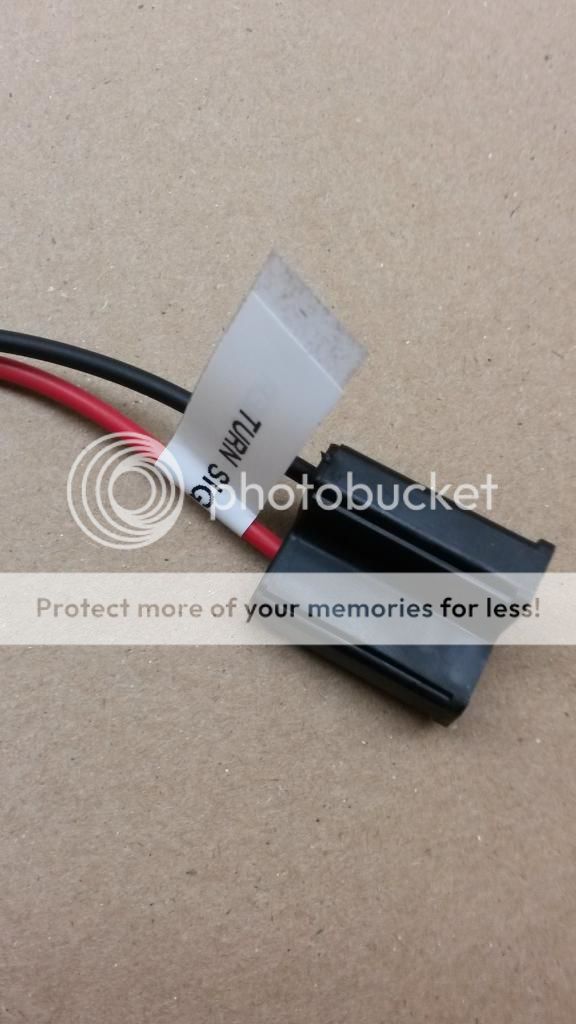
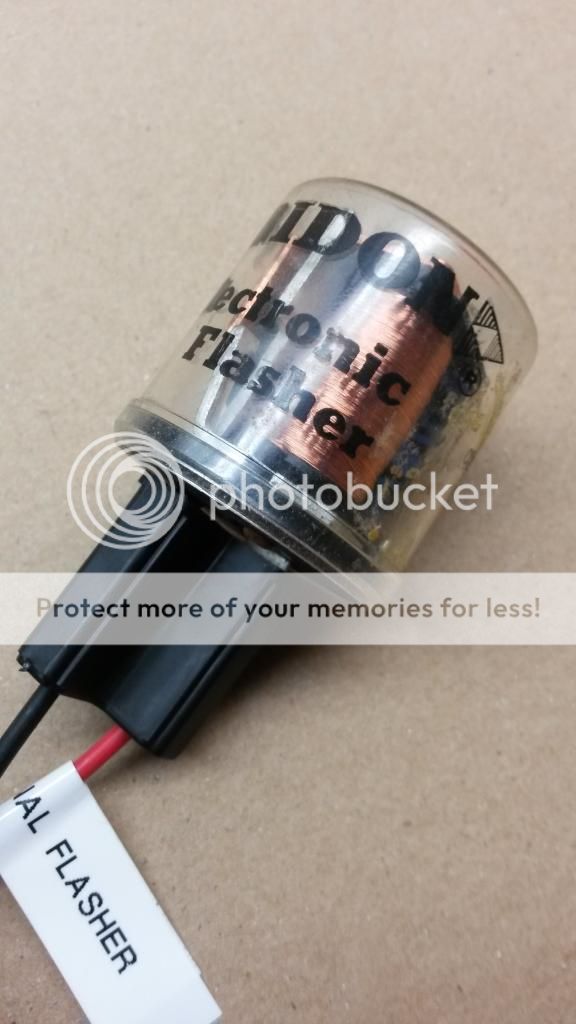
1) solid red wire, solid black wire
A) turn signal flasher
B) electronic flasher
(pic16)
1) solid green wire
A) concealed headlamp relay
B) be sure to tape over the ring terminals or cut them out completely
2) 2 dark blue wires with white stripe
A) concealed headlamp relay
B) be sure to tape over the ring terminals or cut them out completely
3) dark blue wire with yellow stripe, black wire with red stripe
A) concealed headlamps
B) for dodge chargers not used on GTX/Roadrunner/Satellite
(pic17)
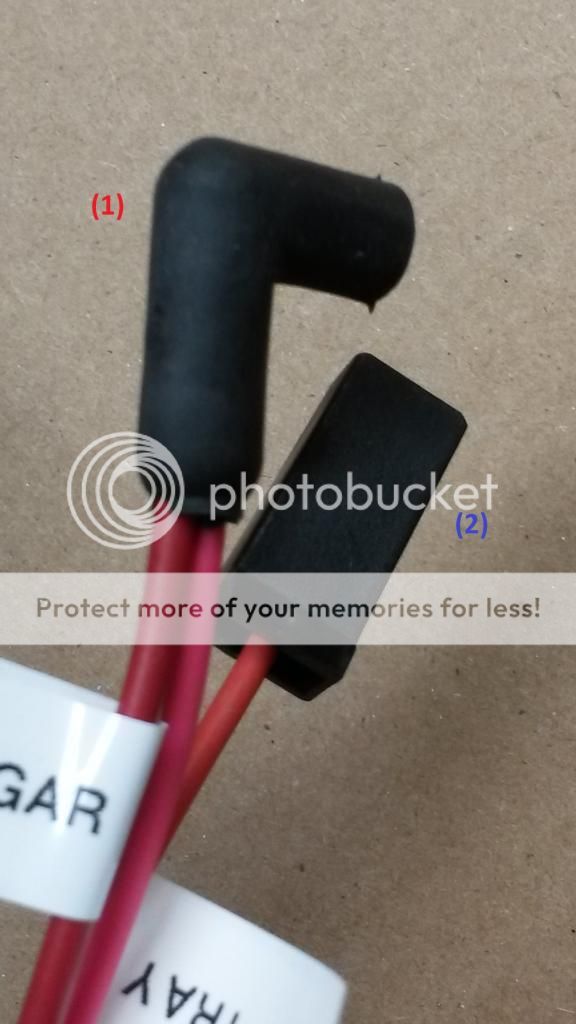
1) solid red wire, solid pink wire
A) cigar lighter
B) cigar lighter back of ash tray
2) solid orange wire
A) ash tray receiver lamp
B) back of ash tray
(pic18)
1) 2 solid pink wires to 3 port red mold
A) battery feed
B) glove box lamp, map lamp harness
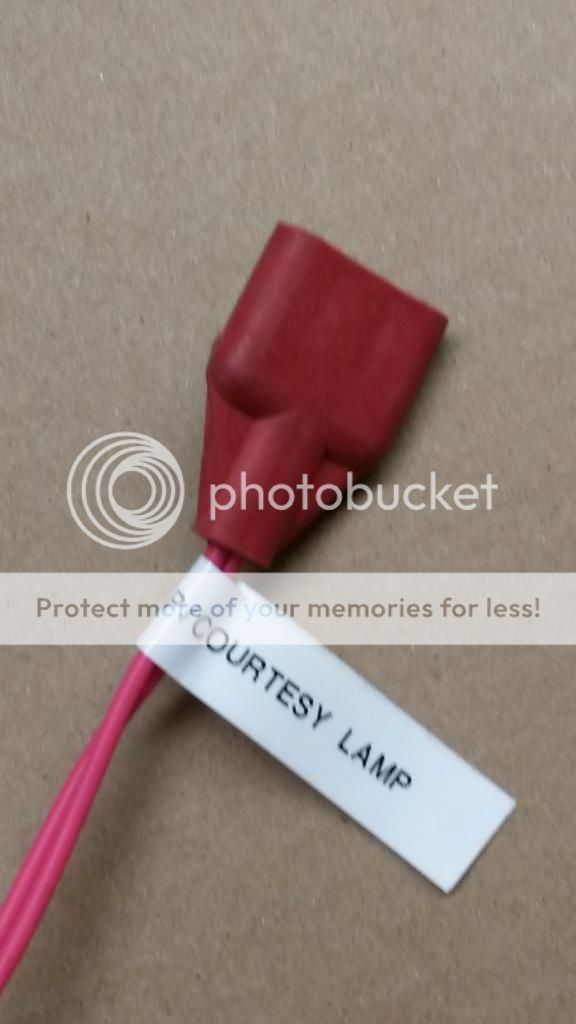
(pic19)
1) 2 solid yellow wires to 3 port black mold
A) Lamp ground
B) for map, courtesy lamp, open door indicator lamp, rear door light switch
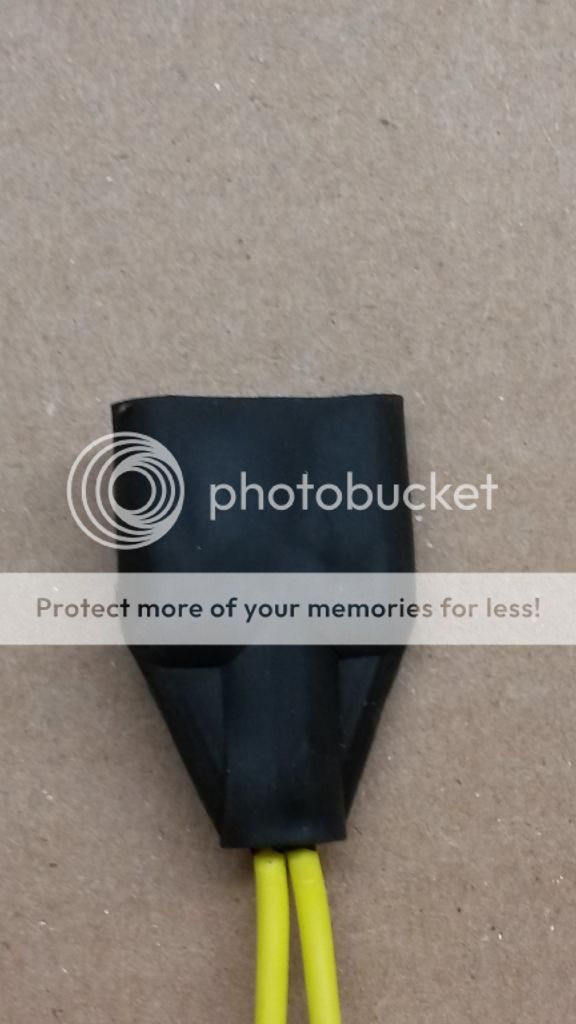
(pic20)
1) yellow wire with black stripe, solid yellow wire
A) right front door automatic switch
B) passenger door switch
(pic21)
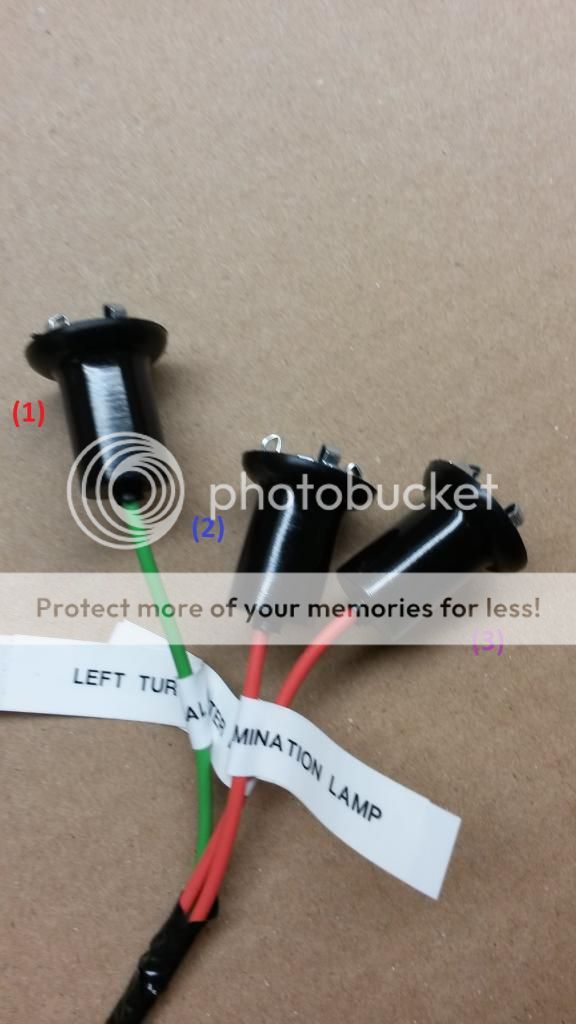
1) solid light green wire
A) left turn signal indicator lamp
B) back of rallye dash
2) solid orange wire
A) cluster illumination lamp
B) back of rallye dash
3) solid orange wire
A) cluster illumination lamp
B) back of rallye dash
(pic22)
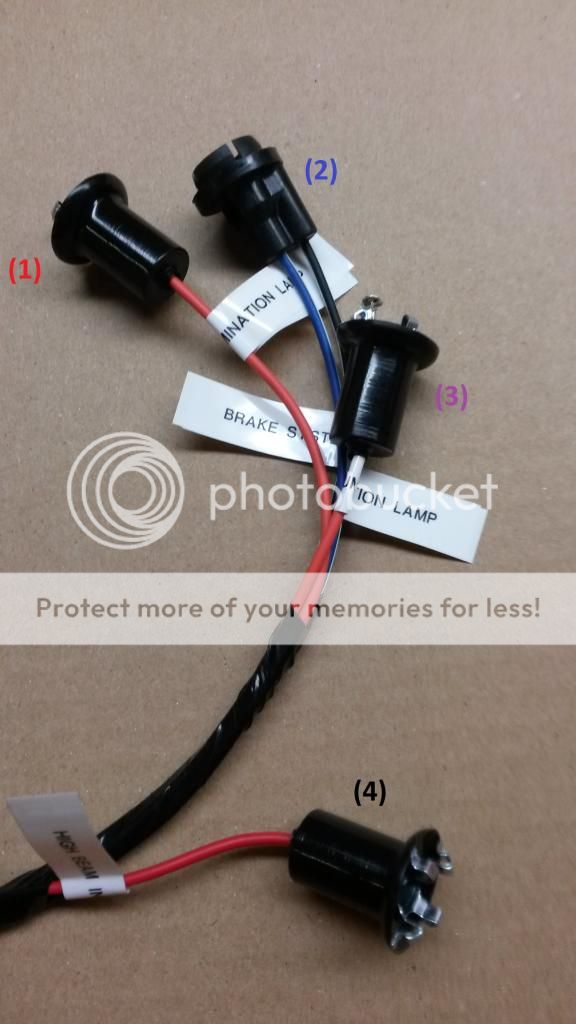
1) solid orange wire
A) cluster illumination lamp
B) back of rallye dash
2) back wire with white stripe, dark blue wire with white stripe
A) brake system warning lamp
B) back of rallye dash
3) solid orange wire
A) cluster illumination lamp
B) back of rallye dash
4) solid red wire
A) high beam indicator lamp
B) back of rallye dash
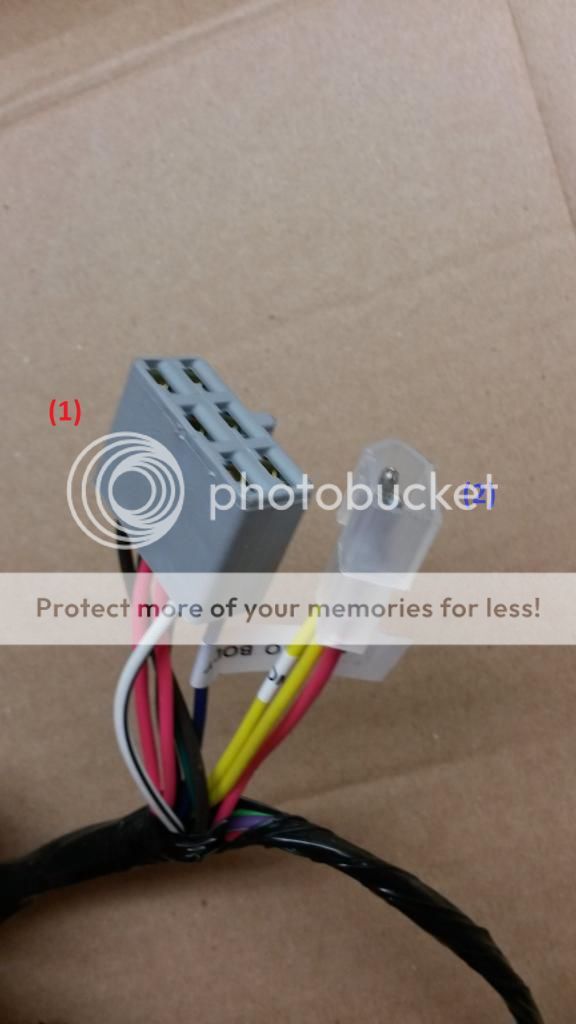
(pic23)
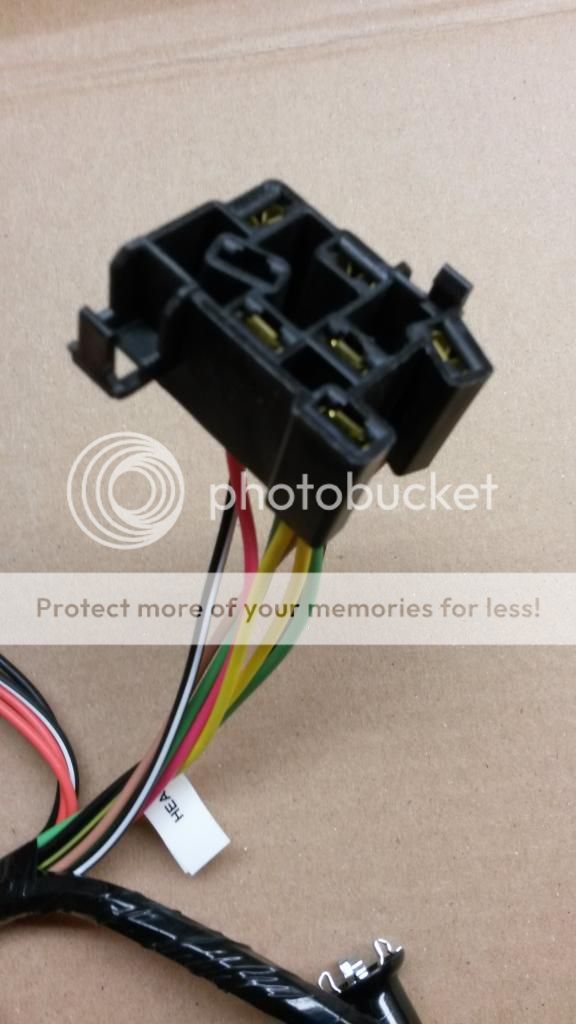
1) 2 solid yellow wires, 2 solid light green wires, one solid tan wire, one solid pink wire, one black wire with white stripe, one black wire with yellow stripe, one solid black wire
A) headlamp switch
B) headlamp switch back of rallye dash
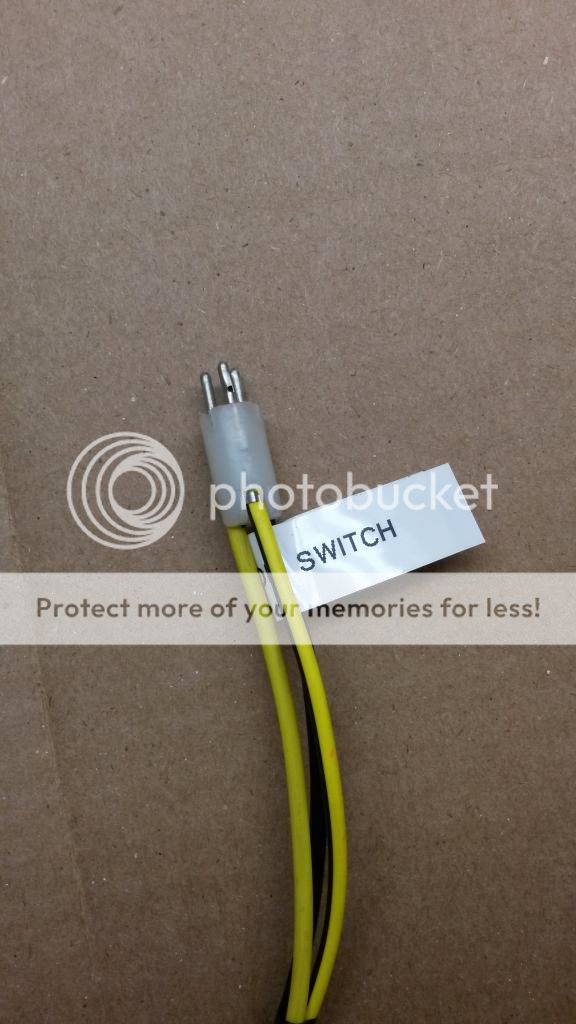
(pic24)
1) is a 71 setup... the one piece plug to wiper switch began on 72, when wiper switches were smaller. Same wires though on diff prongs disposition
A) windshield wiper switch
B) wiper switch back of rallye dash
(pic25)
1) **the M&H harness just came with the black wire with white stripe, I had to add this to the red connector myself**one solid dark green wire, one solid light green wire, one solid brown wire
A) heater blower switch
B) heater blower under dash passenger footwell
(pic26)
(pic26a)
1) 2 solid orange wires, one solid black wire, one black wire with white stripe
A) light for Heater-A/C control face
B) plugs into a small pigtail harness for it using dual bulb on 71/72 correctly shown on 26 A (use from your existing harness)
(pic27)

1) solid orange wire to 3 port orange mold
A) accessory title lamp
B) lamp source for accessories switch under the dash... Air Ram, Rear Deffog, whatever switch down the dash driver side.
2) solid orange wire
A) ?
B) ?
3) solid orange wire
A) ?
B) ?
(pic 28)
1) black wire with white stripe
A) parking brake lamp switch
B) to a switch on the emergency brake that triggers a light in the dash when the emergency brake is engaged or if the brake pressure fails. The switch is just a ground to activate the light.
2) 2 solid light green wires
A) time delay for headlights
B) delay relay gets an extra harness for that plug
(pic 29)
1) one solid yellow wire, one yellow wire with black stripe, one solid black wire
A) left front door automatic switch
b) driver's side door
(pic 30)

1) solid black wire
A) harness ground
B) actually the underdash frame gets a J nut attached around the emergency brake area. Thats a ground source for the harness.
(pic 31)
1) solid dark blue wire, solid black wire, solid dark green wire, solid brown wire, 2 solid pink wires, white wire with black stripe
A) rear body harness to rear lights
B) yes some colors won't match... its on that way from factory. white with black trace becomes in violet for example... some other changes too.
2) solid pink wire, 2 solid yellow wires
A) to dome lamp
B) dome lamp harness , driver's side kickpanel
(pic32)
(pic32a)
1) violet wire with white stripe, solid light green wire, 2 solid red wires
A) foot dimmer switch
B) driver's side floor pan
Rear lamp harness
(pic33)
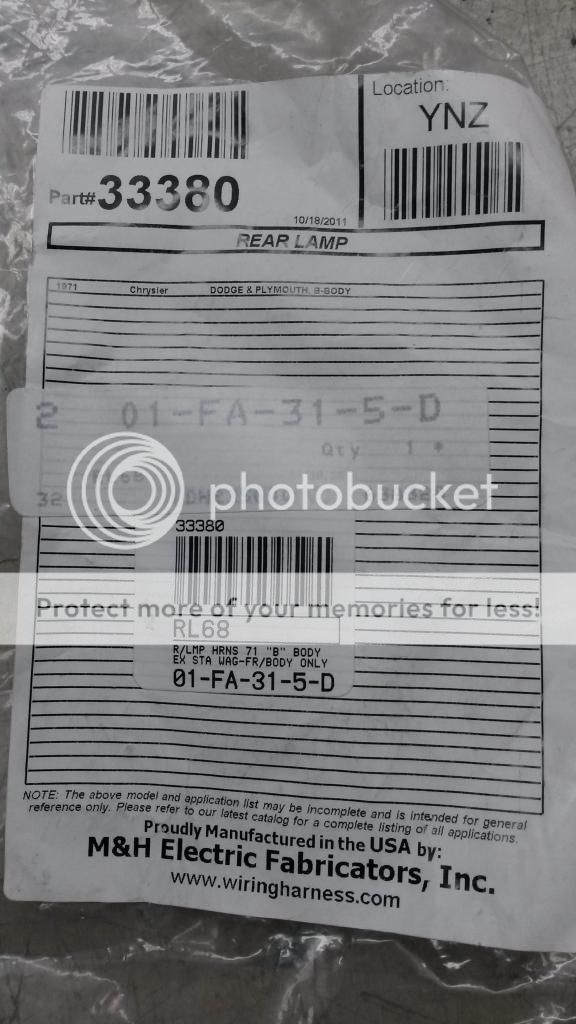
(pic34)
1) solid dark blue wire, solid black wire, solid dark green wire, solid brown wire, solid grey wire, solid violet wire
A) rear lamp harness
B) to body wiring harness on main harness
(pic35)
1) solid grey wire, solid black wire
A) rear driver's side marker lamp
B) rear driver's side marker lamp housing
2) solid violet wire, solid dark green wire, solid brown wire, solid dark blue wire
A) rear taillights
B) rear taillight harness in trunk
Clutch Safety Switch Wire
(pic36)

(pic37)
1) solid dark green wire
A) clutch safety switch wire
B) to a single wire with a grommet through firewall when car is manual transmission
2) solid dark green wire
A) clutch safety wire
B) to starter relay "G" prong (when auto, this prong on relay gets the source from NSS tranny harness )
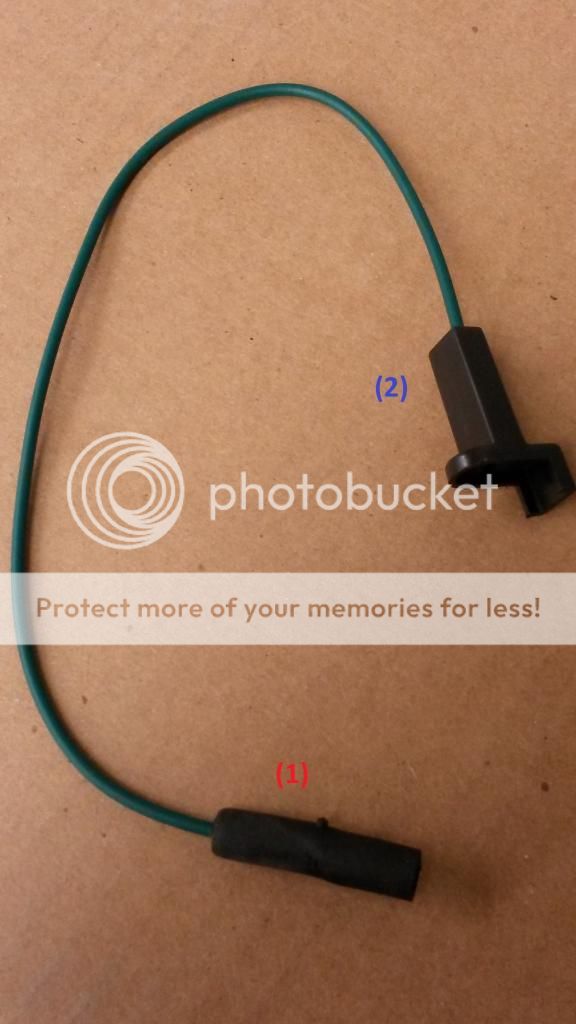
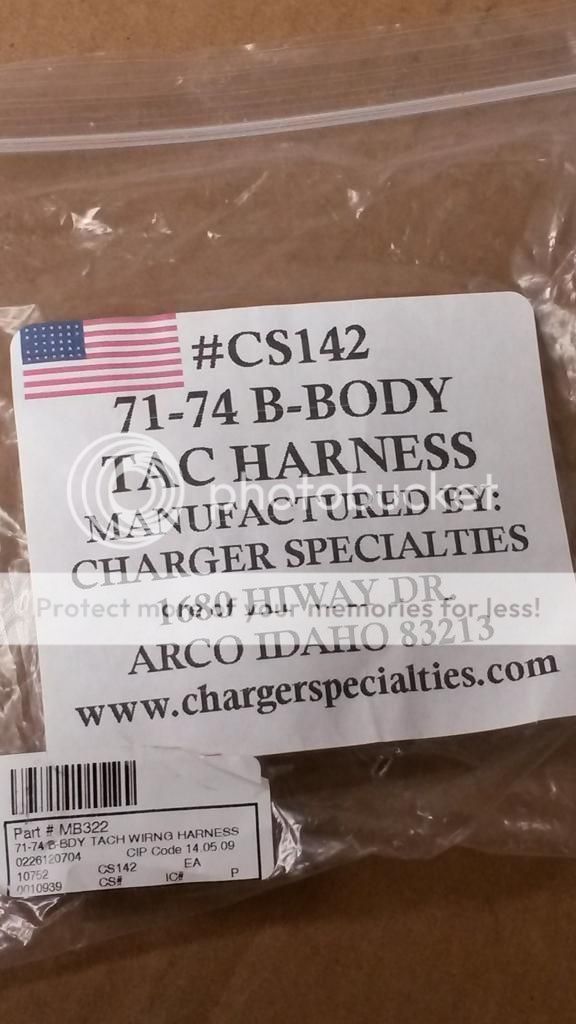
Tach Harness
(pic38)
(pic39)
1) solid black wire
A) tachometer harness
B) negative post on ignition coil
2) solid black wire
A) tachometer harness
B) to yellow accessory yellow mold
3) solid black wire
A) tachometer harness
B) back of tachometer
4) solid black wire
A) tachometer harness
B) back of tachometer
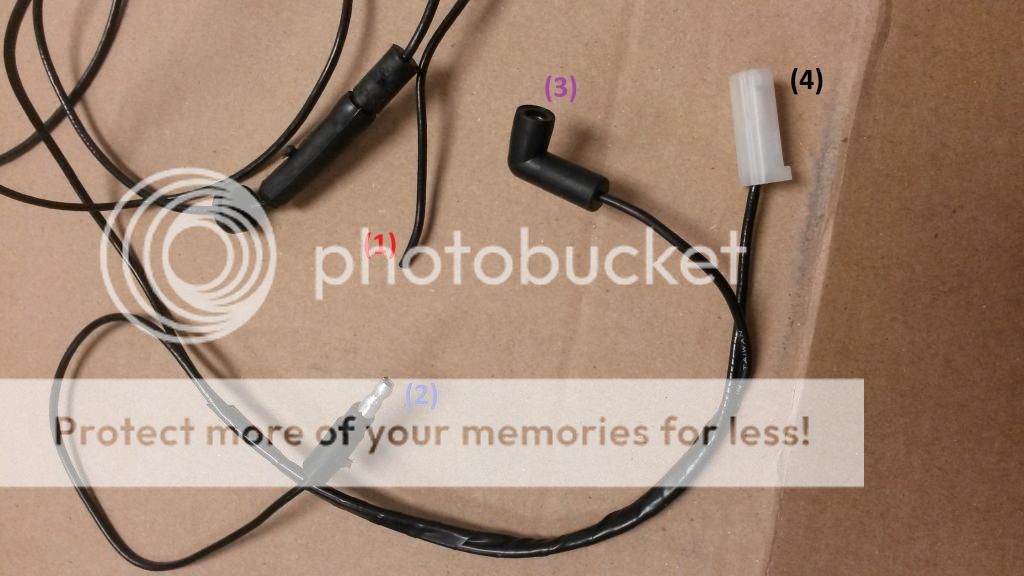
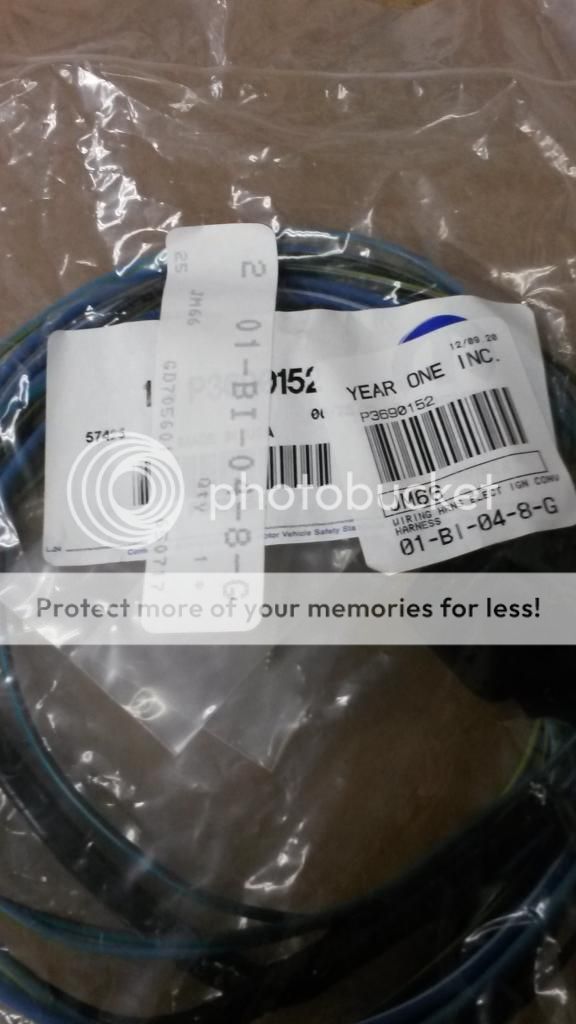
Electronic Ignition Conversion Harness
(pic40)
(pic41)
1) green with red stripe
A) un-used in 4 pin ecu,
B) on 5 pin ecu, goes to "auxiliary" post ballast resistor
2) light blue with yellow stripe
A) ballast resistor "run" wire
B) "run side of ballast resistor
3) black with yellow stripe
A) ignition coil
b) to ignition coil negative
(pic42)
1) dark blue with white stripe, solid dark blue wire
A) distributor connector
B) on the distributor
(pic43)
1) blue with white stripe, solid blue wire, black with yellow stripe, green with red stripe, light blue with yellow stripe
A) control unit ecu harness
B) on the control unit on the firewall
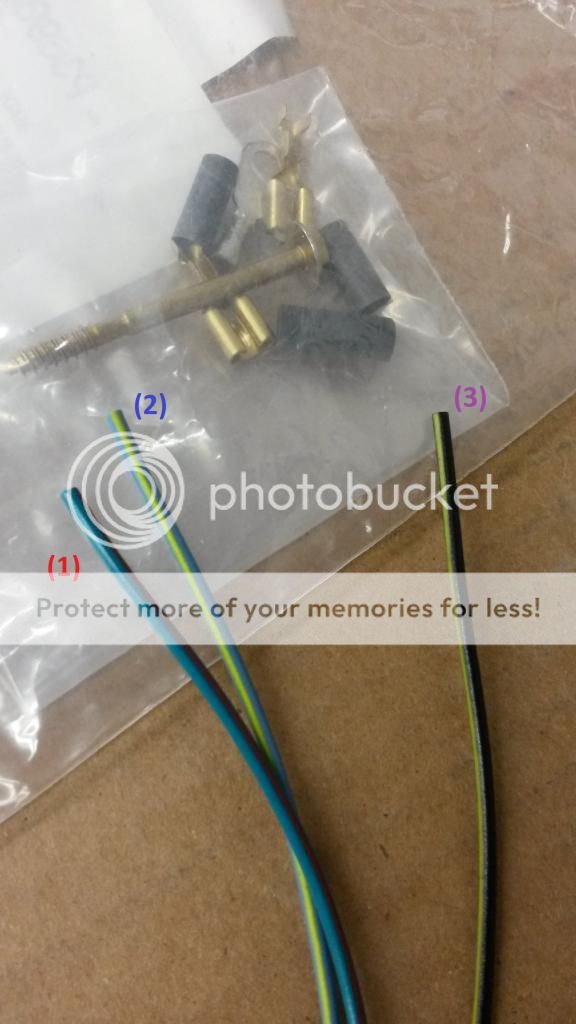
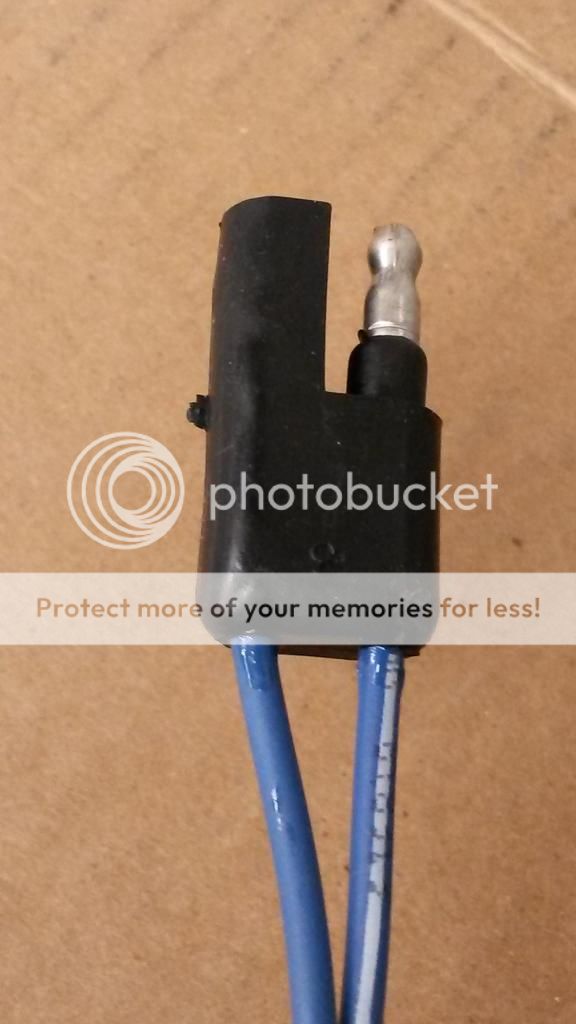
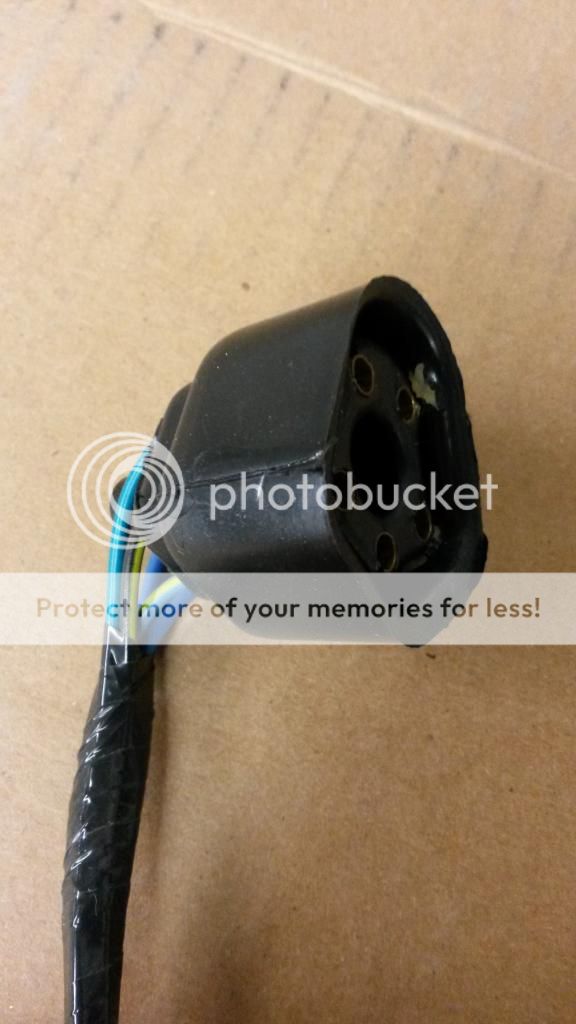
Windshield Wiper Harness
(pic44)
(pic45)
(pic46)
(pic47)
1) solid red wire, solid brown wire, solid dark blue wire, solid dark green wire
A) wiper harness
B) windshield wiper motor
2) solid brown wire
A) ballast resistor
B) ballast resistor on wiper motor
3) solid brown wire
A) ballast resistor
B) ballast resistor on wiper motor
4) solid dark blue wire, solid red wire, solid dark green wire, solid brown wire
A) wiper harness
B) main fuse block
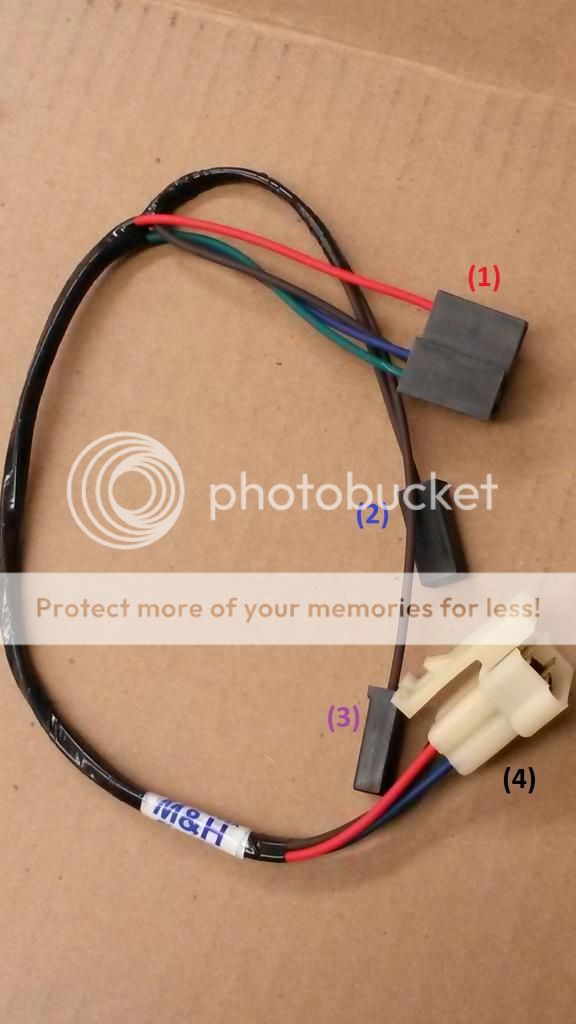
AC / Heater Harness
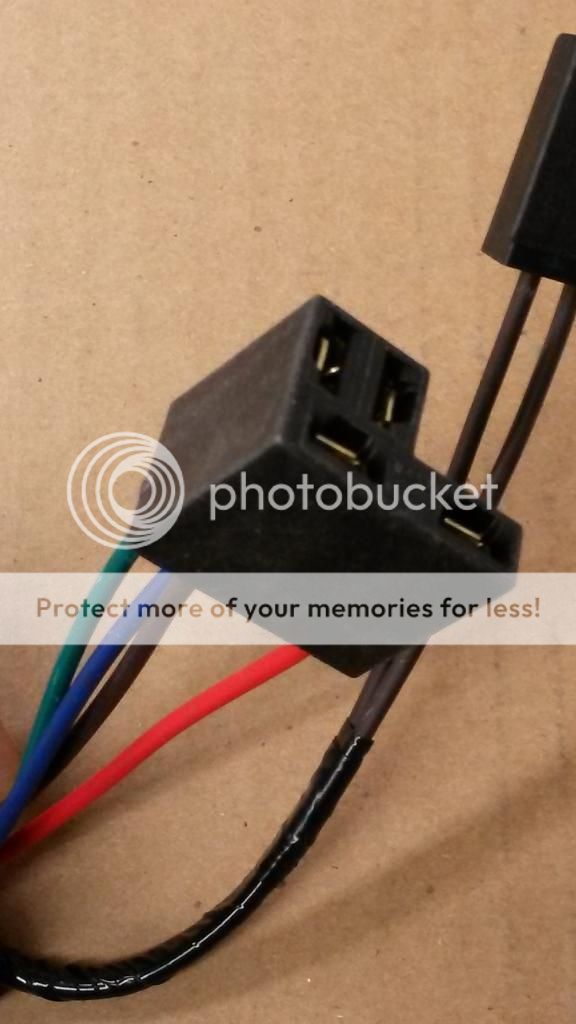
(pic48)
(pic49)
1) 2 solid tan wires, one solid light green wire, one solid dark green wire
A) blower switch
B) on back of rallye dash
2) light green wire with black stripe, solid brown wire, tan wire, one dark blue wire
A) AC and heater control switch
B) on back of rallye dash
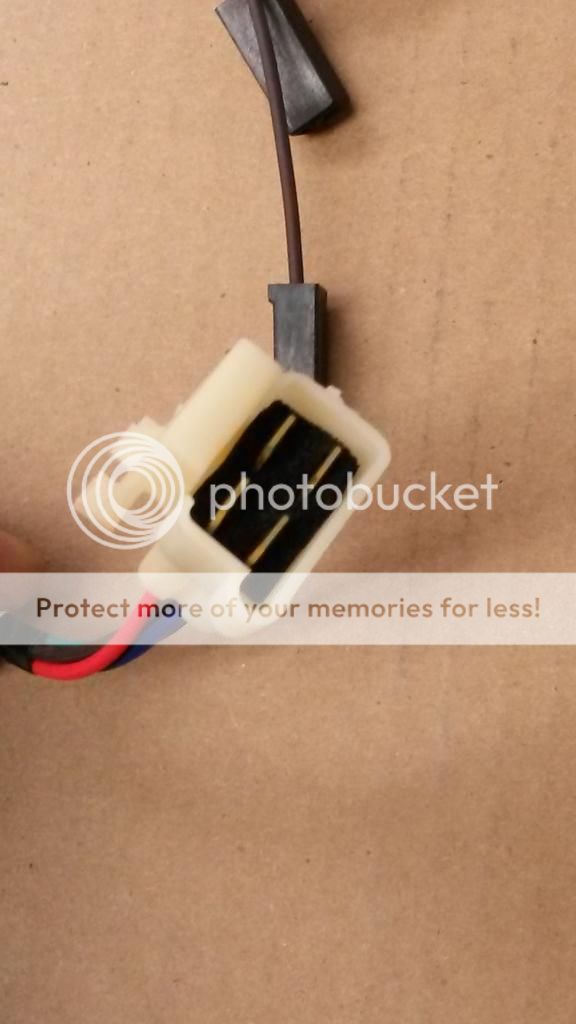
(pic50)
1) solid light green wire
A) clutch feed
B) yellow mold accessory feed
(pic51)
1) solid dark blue wire
A) clutch
B) just on 71 they used cavities left empty on neutral safety switch harness. 72/73 where shared between engine harness an NSS harness, using the green ( blower ) on NSS harness plug and Blue ( clucth ) on engine harness. 74s got a separate grommet for that on firewall due the lack of cavities left
2) 2 solid dark green wires
A) blower
B) same answer as 1B
(pic52)

1) solid tan wire
A) heater motor resistor
B) on the motor in the passenger footwell
2) solid light green wire, solid dark green wire, solid brown wire
A) heater motor resistor
B) on the motor in the passenger footwell
(pic53)
Engine Harness For A 383-440 W/O Six Pack
(pic54)
(pic55)
1) solid grey wire, solid black wire, solid brown wire, grey wire with black stripe, dark green wire with red stripe, dark blue wire with white stripe, solid brown wire, solid violet wire
A) engine harness
B) plugs into main bulkhead
(pic56)
1) 2 solid brown wires
A) ignition ballast/resistor
B) above windshield wiper motor
(pic57)
1) dark blue wire with white stripe
A) ignition ballast/resistor
B) above windshield wiper motor
(pic58)
1) solid grey wire
A) oil gauge wire
B) oil pressure switch on back of engine
(pic59)
1) solid dark green wire, dark blue with white stripe
A) alternator regulator
B) on the voltage regulator on firewall
(pic60)
1) solid dark blue wire
A) carburetor solenoid
B) on carburetor
(pic61)
1) solid brown wire
A) ignition coil
B) positive post on the ignition coil
2) grey wire with black stripe
A) not used on GTX/Roadrunner/Satellite
B) Can be used for the TACHOMETER WIRE... negative lead of coil...the tach harness can use this cavity on back oh bulkhead ( number 20 ) instead of using the grommet on harness to go through firewall
(pic62)
1) solid dark blue wire, dark blue wire with white stripe
A) from the ignition resistor/ballast
B) back of alternator
2) solid dark green wire
A) alternator field
B) back of alternator
(pic63)
1) solid black wire
A) Ammeter gauge wire
B) back of alternator
(pic64)
1) solid violet wire
A) temperature gauge sending unit
B) temperature switch on engine
(pic65)
1) 2 dark green wires with red stripe
A) horn
B) for those equipped with dual horns
(pic66)
1) solid brown wire
A) windshield washer motor?
B) windshield washer fluid bottle in the front passenger engine bay
2) dark green wire with red stripe
A) horn
B) horn front passenger engine bay
Front Lamp Harness
(pic67)
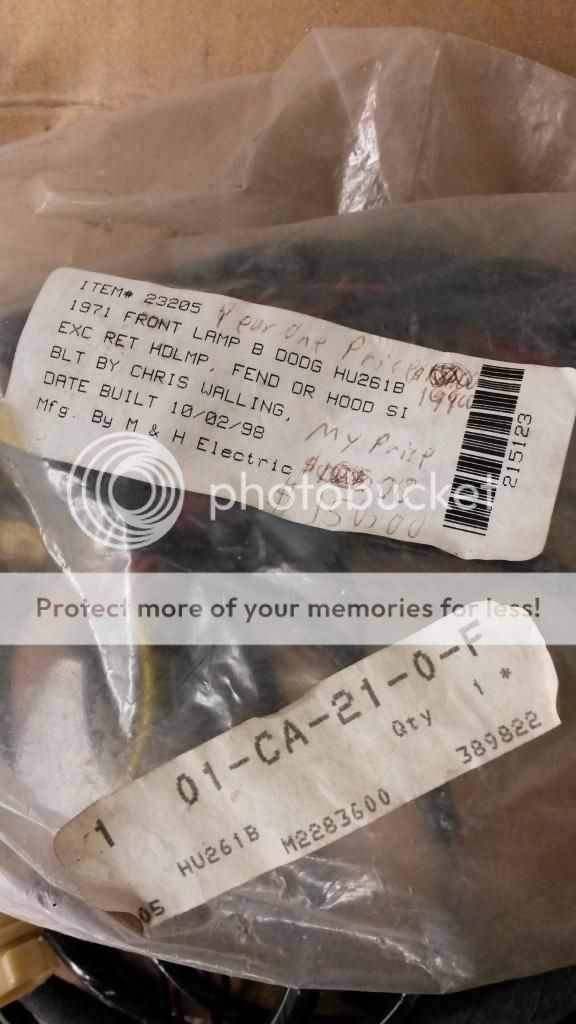
(pic68)
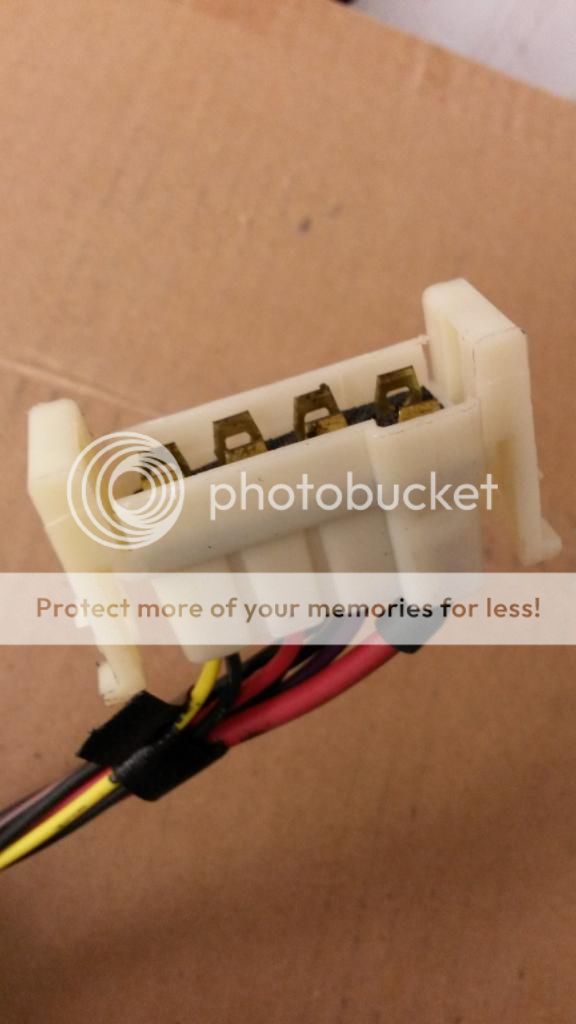
1) solid red wire, violet wire with white stripe, solid red wire, black wire with green stripe, solid black wire, black wire with brown stripe, black wire with yellow stripe, solid yellow wire
A) front lamp harness
B) bulkhead connector on firewall
(pic69)
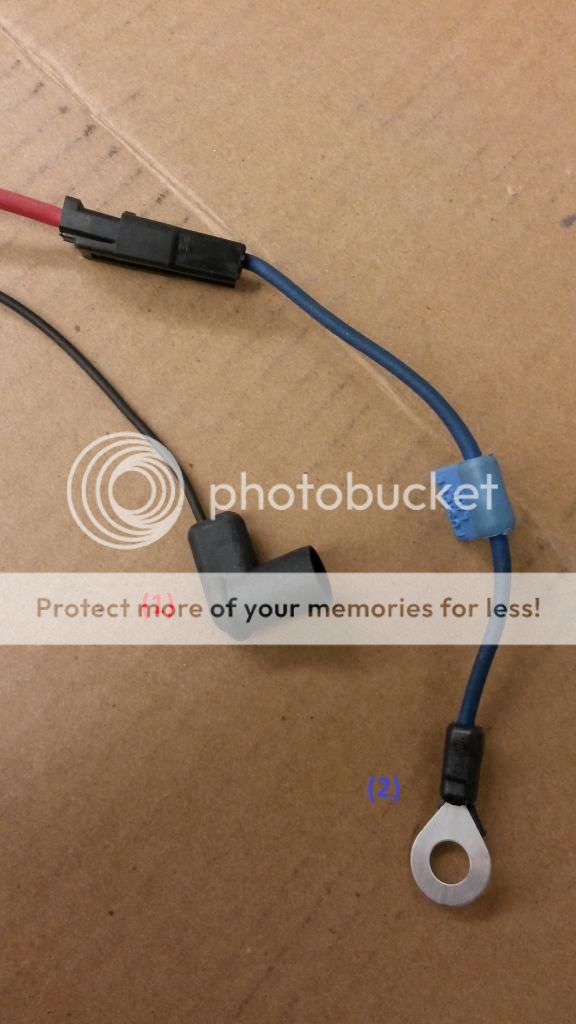
1) solid black wire
A) low brake switch
B) located on your brake distribution block
2) solid red wire to solid blue wire
A) ammeter feed
B) to the "B" on the starter relay
(pic70)
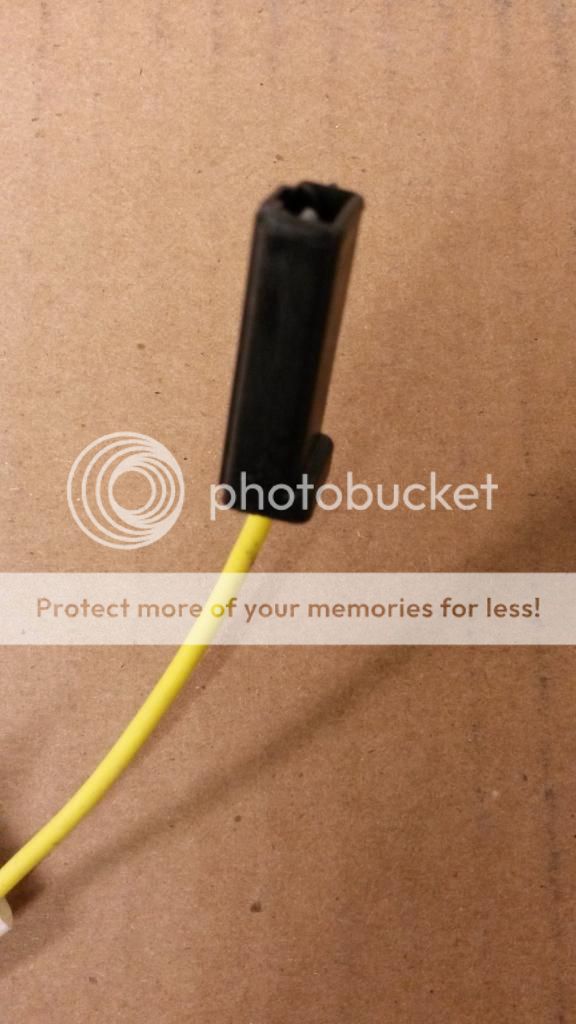
1) solid yellow wire
A) starter relay
B) to the "I" on starter relay
(pic71)
1) 2 solid black wires
A) harness ground
B) on radiator core support
(pic72)
1) 2 solid red wires, 2 solid black wires
A) left high beam lamp
B) inside lamp front grill, driver's side
(pic73)
1) 2 solid red wires, 2 violet wires with white stripe, 2 solid black wires
A) left low beam lamp
B) outside lamp front grill, driver's side
(pic 74)
1) solid black wire, black wire with yellow stripe
A) left marker lamp
B) inside driver's front fender
2) solid black wire, black wire with yellow stripe, black wire with green stripe
A) left parking light
B) front valance driver's side
(pic75)
1) 2 solid red wires, 2 solid black wires
A) right high beam lamp
B) inside lamp, front grill passenger side
(pic76)
1) solid black wire, solid red wire, violet wire with white stripe
A) right low beam lamp
B) outside lamp, front grill passenger side
(pic77)
1) solid black wire, black wire with yellow stripe,
A) right marker lamp
B) inside front passenger fender
2) solid black wire, black wire with yellow stripe, black wire with a brown stripe
A) right parking light
B) front valance passenger side
***update (1) had to switch the brown and red wire leads on the windshield wiper motor harness as they were backwards when plugged into the bulkhead****
***update (2) M&H for some reason moved the horn wiring from the lamp harness to the engine harness, and they moved the low brake switch wiring from the engine harness to the lamp harness. So if one wanted to run a mix of old harnesses and new, you would have to change these wires in the actual harness themselves to get it to work.***
Now let's begin:
M&H main harness for 1971 Rallye Dash for Plymouth / Dodge Bbody:
(pic1)
(pic2)
(pic3)
1) 2 wires, both dark blue with yellow stripes
A) headlamp washer
B) only required for those equipped with this option
(pic4)
1) brown wire with white stripe
A) headlamp washer
B) The rubber grommet goes into the hole, through the fire wall, its the upper hole near the master cylinder (or booster)
(pic5)
1) dark blue wire with yellow stripe, black wire with red stripe
A) concealed headlamps
B) for dodge chargers not used on GTX/Roadrunner/Satellite
2) Other side of brown wire with white stripe
A) headlamp washer
B) engine side for headlamp washer
(pic6)
1) 2 solid orange wires, one red wire with white stripe, solid black wire
A) AM Radio
b) Radio Harness
(pic7)
1) solid tan wires to 3 port yellow female connector
A) accessory feed
B) ?
(pic8)
1) solid pink wire
A) stop lamp switch
B) switch on brake pedal
2) solid white wire
A) stop lamp switch
B) switch on brake pedal
(pic9)
1) solid yellow wire, solid black wire, blue wire with white stripe, solid brown wire, solid red wire, solid orange wire, solid black wire, solid black wire
A) steering column
B) steering column harness
2) black wire white stripe, solid light green wire, solid tan wire, solid pink wire, solid red wire, solid dark green wire, solid brown wire, solid white wire
A) steering column
B) steering column harness
(pic10)
(pic10a)
1) solid pink wire, black wire with white stripe
A) hazard flasher
B) electronic flasher
(pic 11)
1) 2 solid black wires, 2 black wires with yellow stripe
A) headlamp-on warning buzzard
B) harness gets an extra pigtail to reach the buzzer mounted on dash frame between glovebox and ashtray. Buzzer gets a plug like the blinker flashers ones.
2) 2 yellow wires with black stripes
A) to ignition switch lamp time delay relay wiring
B) It is used for the little lite that shines from the steering column to the ignition key hole when the door is opened.
(pic12)
1) solid orange wire
A) cluster illumination lamp
B) back of rallye dash
2) solid tan wire
A) right turn signal indicator lamp
B) back of rallye dash
3) solid grey wire
A) oil gauge
B) back of rallye dash
4) solid dark blue wire
A) fuel gauge
B) back of rallye dash
(pic13)
1) solid orange wire
A) cluster illumination lamp
B) back of rallye dash
2) solid violet wire
A) temperature gauge
B) back of rallye dash
3) black wire with white stripe
A) instrument cluster ground
B) plug into male blade attached to the backing plate on the cluster
(pic14)
1) solid red wire
A) ammeter gauge
B) back of rallye dash
2) solid black wire
A) ammeter gauge
B) back of rallye dash
3) solid black wire
A) POSITIVE source for voltage limiter
B) plugs straight to voltage limiter double prong
4) solid orange wire
A) cluster illumination lamp
B) back of rallye dash
(pic15)
1) solid red wire, solid black wire
A) turn signal flasher
B) electronic flasher
(pic16)
1) solid green wire
A) concealed headlamp relay
B) be sure to tape over the ring terminals or cut them out completely
2) 2 dark blue wires with white stripe
A) concealed headlamp relay
B) be sure to tape over the ring terminals or cut them out completely
3) dark blue wire with yellow stripe, black wire with red stripe
A) concealed headlamps
B) for dodge chargers not used on GTX/Roadrunner/Satellite
(pic17)
1) solid red wire, solid pink wire
A) cigar lighter
B) cigar lighter back of ash tray
2) solid orange wire
A) ash tray receiver lamp
B) back of ash tray
(pic18)
1) 2 solid pink wires to 3 port red mold
A) battery feed
B) glove box lamp, map lamp harness
(pic19)
1) 2 solid yellow wires to 3 port black mold
A) Lamp ground
B) for map, courtesy lamp, open door indicator lamp, rear door light switch
(pic20)
1) yellow wire with black stripe, solid yellow wire
A) right front door automatic switch
B) passenger door switch
(pic21)
1) solid light green wire
A) left turn signal indicator lamp
B) back of rallye dash
2) solid orange wire
A) cluster illumination lamp
B) back of rallye dash
3) solid orange wire
A) cluster illumination lamp
B) back of rallye dash
(pic22)
1) solid orange wire
A) cluster illumination lamp
B) back of rallye dash
2) back wire with white stripe, dark blue wire with white stripe
A) brake system warning lamp
B) back of rallye dash
3) solid orange wire
A) cluster illumination lamp
B) back of rallye dash
4) solid red wire
A) high beam indicator lamp
B) back of rallye dash
(pic23)
1) 2 solid yellow wires, 2 solid light green wires, one solid tan wire, one solid pink wire, one black wire with white stripe, one black wire with yellow stripe, one solid black wire
A) headlamp switch
B) headlamp switch back of rallye dash
(pic24)
1) is a 71 setup... the one piece plug to wiper switch began on 72, when wiper switches were smaller. Same wires though on diff prongs disposition
A) windshield wiper switch
B) wiper switch back of rallye dash
(pic25)
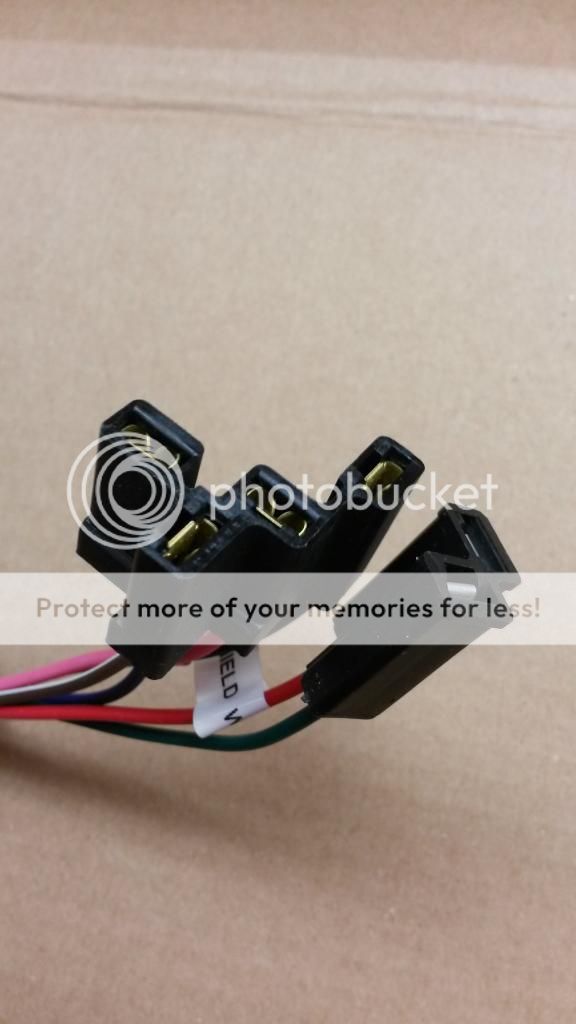
1) **the M&H harness just came with the black wire with white stripe, I had to add this to the red connector myself**one solid dark green wire, one solid light green wire, one solid brown wire
A) heater blower switch
B) heater blower under dash passenger footwell
(pic26)
(pic26a)
1) 2 solid orange wires, one solid black wire, one black wire with white stripe
A) light for Heater-A/C control face
B) plugs into a small pigtail harness for it using dual bulb on 71/72 correctly shown on 26 A (use from your existing harness)
(pic27)
1) solid orange wire to 3 port orange mold
A) accessory title lamp
B) lamp source for accessories switch under the dash... Air Ram, Rear Deffog, whatever switch down the dash driver side.
2) solid orange wire
A) ?
B) ?
3) solid orange wire
A) ?
B) ?
(pic 28)
1) black wire with white stripe
A) parking brake lamp switch
B) to a switch on the emergency brake that triggers a light in the dash when the emergency brake is engaged or if the brake pressure fails. The switch is just a ground to activate the light.
2) 2 solid light green wires
A) time delay for headlights
B) delay relay gets an extra harness for that plug
(pic 29)
1) one solid yellow wire, one yellow wire with black stripe, one solid black wire
A) left front door automatic switch
b) driver's side door
(pic 30)
1) solid black wire
A) harness ground
B) actually the underdash frame gets a J nut attached around the emergency brake area. Thats a ground source for the harness.
(pic 31)
1) solid dark blue wire, solid black wire, solid dark green wire, solid brown wire, 2 solid pink wires, white wire with black stripe
A) rear body harness to rear lights
B) yes some colors won't match... its on that way from factory. white with black trace becomes in violet for example... some other changes too.
2) solid pink wire, 2 solid yellow wires
A) to dome lamp
B) dome lamp harness , driver's side kickpanel
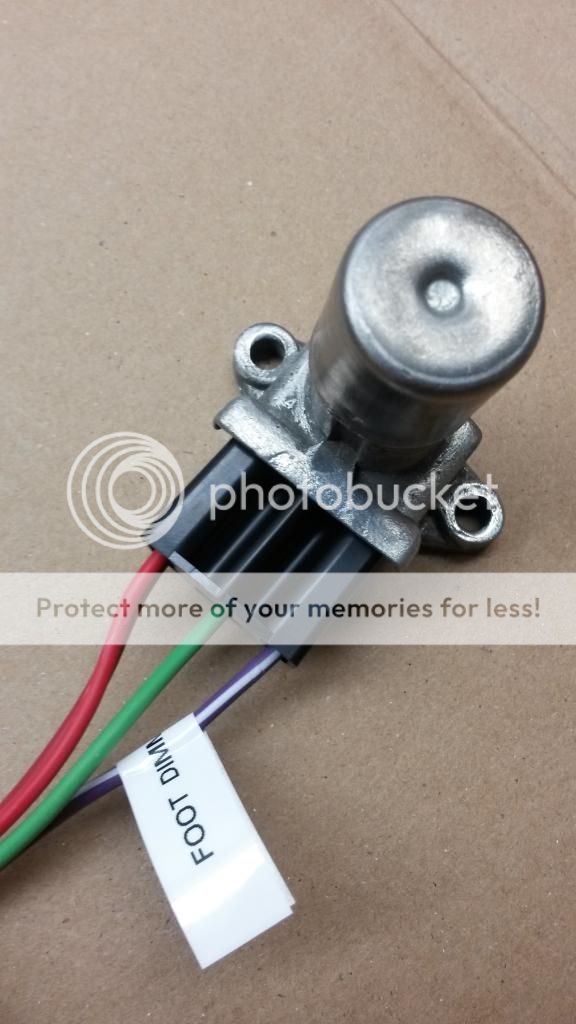
(pic32)
(pic32a)
1) violet wire with white stripe, solid light green wire, 2 solid red wires
A) foot dimmer switch
B) driver's side floor pan
Rear lamp harness
(pic33)
(pic34)
1) solid dark blue wire, solid black wire, solid dark green wire, solid brown wire, solid grey wire, solid violet wire
A) rear lamp harness
B) to body wiring harness on main harness
(pic35)
1) solid grey wire, solid black wire
A) rear driver's side marker lamp
B) rear driver's side marker lamp housing
2) solid violet wire, solid dark green wire, solid brown wire, solid dark blue wire
A) rear taillights
B) rear taillight harness in trunk
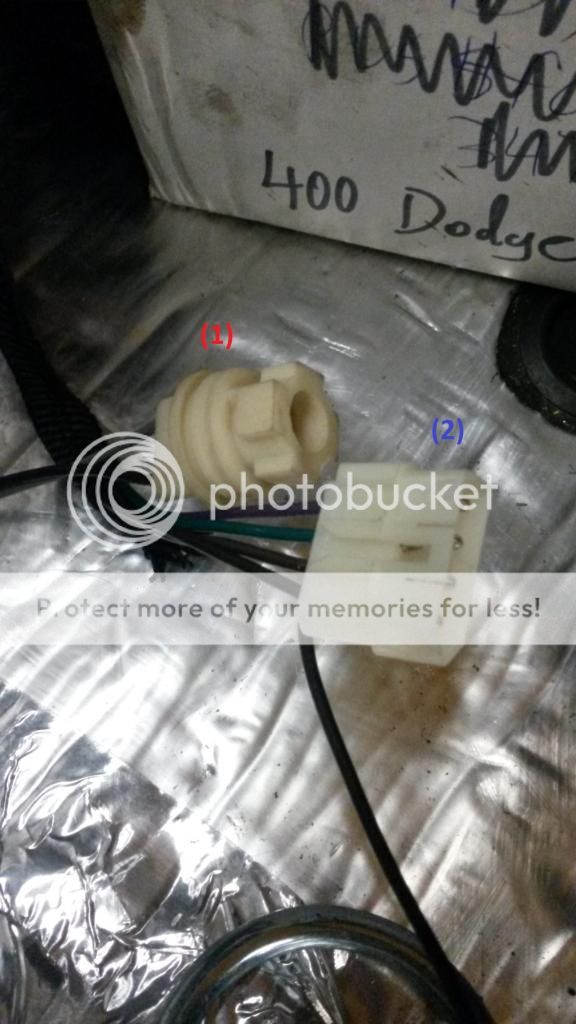
Clutch Safety Switch Wire
(pic36)
(pic37)
1) solid dark green wire
A) clutch safety switch wire
B) to a single wire with a grommet through firewall when car is manual transmission
2) solid dark green wire
A) clutch safety wire
B) to starter relay "G" prong (when auto, this prong on relay gets the source from NSS tranny harness )
Tach Harness
(pic38)
(pic39)
1) solid black wire
A) tachometer harness
B) negative post on ignition coil
2) solid black wire
A) tachometer harness
B) to yellow accessory yellow mold
3) solid black wire
A) tachometer harness
B) back of tachometer
4) solid black wire
A) tachometer harness
B) back of tachometer
Electronic Ignition Conversion Harness
(pic40)
(pic41)
1) green with red stripe
A) un-used in 4 pin ecu,
B) on 5 pin ecu, goes to "auxiliary" post ballast resistor
2) light blue with yellow stripe
A) ballast resistor "run" wire
B) "run side of ballast resistor
3) black with yellow stripe
A) ignition coil
b) to ignition coil negative
(pic42)
1) dark blue with white stripe, solid dark blue wire
A) distributor connector
B) on the distributor
(pic43)
1) blue with white stripe, solid blue wire, black with yellow stripe, green with red stripe, light blue with yellow stripe
A) control unit ecu harness
B) on the control unit on the firewall
Windshield Wiper Harness
(pic44)
(pic45)
(pic46)
(pic47)
1) solid red wire, solid brown wire, solid dark blue wire, solid dark green wire
A) wiper harness
B) windshield wiper motor
2) solid brown wire
A) ballast resistor
B) ballast resistor on wiper motor
3) solid brown wire
A) ballast resistor
B) ballast resistor on wiper motor
4) solid dark blue wire, solid red wire, solid dark green wire, solid brown wire
A) wiper harness
B) main fuse block
AC / Heater Harness
(pic48)
(pic49)
1) 2 solid tan wires, one solid light green wire, one solid dark green wire
A) blower switch
B) on back of rallye dash
2) light green wire with black stripe, solid brown wire, tan wire, one dark blue wire
A) AC and heater control switch
B) on back of rallye dash
(pic50)
1) solid light green wire
A) clutch feed
B) yellow mold accessory feed
(pic51)
1) solid dark blue wire
A) clutch
B) just on 71 they used cavities left empty on neutral safety switch harness. 72/73 where shared between engine harness an NSS harness, using the green ( blower ) on NSS harness plug and Blue ( clucth ) on engine harness. 74s got a separate grommet for that on firewall due the lack of cavities left
2) 2 solid dark green wires
A) blower
B) same answer as 1B
(pic52)
1) solid tan wire
A) heater motor resistor
B) on the motor in the passenger footwell
2) solid light green wire, solid dark green wire, solid brown wire
A) heater motor resistor
B) on the motor in the passenger footwell
(pic53)
Engine Harness For A 383-440 W/O Six Pack
(pic54)
(pic55)
1) solid grey wire, solid black wire, solid brown wire, grey wire with black stripe, dark green wire with red stripe, dark blue wire with white stripe, solid brown wire, solid violet wire
A) engine harness
B) plugs into main bulkhead
(pic56)
1) 2 solid brown wires
A) ignition ballast/resistor
B) above windshield wiper motor
(pic57)
1) dark blue wire with white stripe
A) ignition ballast/resistor
B) above windshield wiper motor
(pic58)
1) solid grey wire
A) oil gauge wire
B) oil pressure switch on back of engine
(pic59)
1) solid dark green wire, dark blue with white stripe
A) alternator regulator
B) on the voltage regulator on firewall
(pic60)
1) solid dark blue wire
A) carburetor solenoid
B) on carburetor
(pic61)
1) solid brown wire
A) ignition coil
B) positive post on the ignition coil
2) grey wire with black stripe
A) not used on GTX/Roadrunner/Satellite
B) Can be used for the TACHOMETER WIRE... negative lead of coil...the tach harness can use this cavity on back oh bulkhead ( number 20 ) instead of using the grommet on harness to go through firewall
(pic62)
1) solid dark blue wire, dark blue wire with white stripe
A) from the ignition resistor/ballast
B) back of alternator
2) solid dark green wire
A) alternator field
B) back of alternator
(pic63)
1) solid black wire
A) Ammeter gauge wire
B) back of alternator
(pic64)
1) solid violet wire
A) temperature gauge sending unit
B) temperature switch on engine
(pic65)
1) 2 dark green wires with red stripe
A) horn
B) for those equipped with dual horns
(pic66)
1) solid brown wire
A) windshield washer motor?
B) windshield washer fluid bottle in the front passenger engine bay
2) dark green wire with red stripe
A) horn
B) horn front passenger engine bay
Front Lamp Harness
(pic67)
(pic68)
1) solid red wire, violet wire with white stripe, solid red wire, black wire with green stripe, solid black wire, black wire with brown stripe, black wire with yellow stripe, solid yellow wire
A) front lamp harness
B) bulkhead connector on firewall
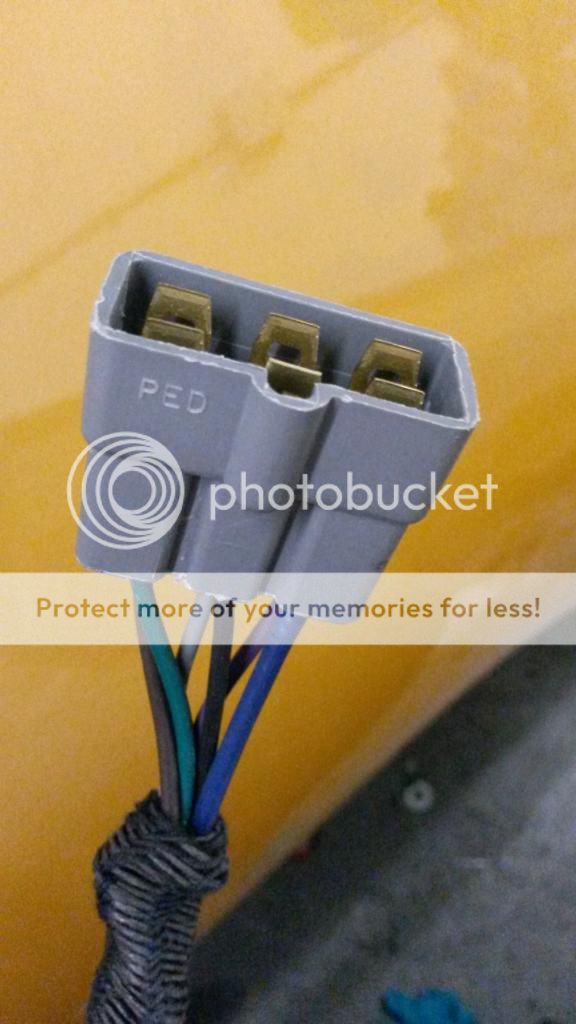
(pic69)
1) solid black wire
A) low brake switch
B) located on your brake distribution block
2) solid red wire to solid blue wire
A) ammeter feed
B) to the "B" on the starter relay
(pic70)
1) solid yellow wire
A) starter relay
B) to the "I" on starter relay
(pic71)
1) 2 solid black wires
A) harness ground
B) on radiator core support
(pic72)
1) 2 solid red wires, 2 solid black wires
A) left high beam lamp
B) inside lamp front grill, driver's side
(pic73)
1) 2 solid red wires, 2 violet wires with white stripe, 2 solid black wires
A) left low beam lamp
B) outside lamp front grill, driver's side
(pic 74)
1) solid black wire, black wire with yellow stripe
A) left marker lamp
B) inside driver's front fender
2) solid black wire, black wire with yellow stripe, black wire with green stripe
A) left parking light
B) front valance driver's side
(pic75)
1) 2 solid red wires, 2 solid black wires
A) right high beam lamp
B) inside lamp, front grill passenger side
(pic76)
1) solid black wire, solid red wire, violet wire with white stripe
A) right low beam lamp
B) outside lamp, front grill passenger side
(pic77)
1) solid black wire, black wire with yellow stripe,
A) right marker lamp
B) inside front passenger fender
2) solid black wire, black wire with yellow stripe, black wire with a brown stripe
A) right parking light
B) front valance passenger side
Last edited:
 but I did order a NSS harness and will be adding that and all of the rest of the answers to a new post for those who are interested


