• When you click on links to various merchants on this site and make a purchase, this can result in this site earning a commission. Affiliate programs and affiliations include, but are not limited to, the eBay Partner Network.

My 1967 Belvedere Convertible Plans and Restoration (aka - Mad Scientist Build)

Great quality work, and I like your approach to problem solving. I'm taking notes for my project.

David
 
Finding it hard to concentrate on the car . . . but trying to work on it .

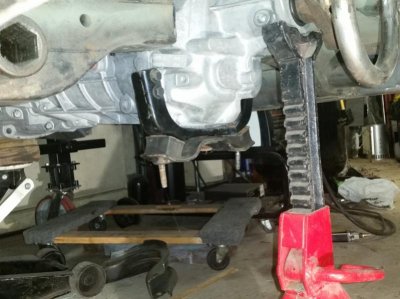
The design work on the transmission support is slowly progressing . . . here's what we're putting together . . .

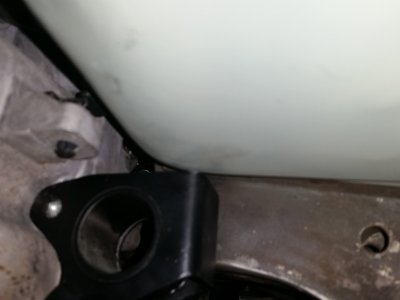
The original isolators were setup under the transmission ( Too low for my liking ) . . . so it's gotta change . . . this view allows you to see my thoughts, if the bracket could be moved back then it would also allow for it to be moved up for more clearance too ! !

sm_thehemiisin20.jpg

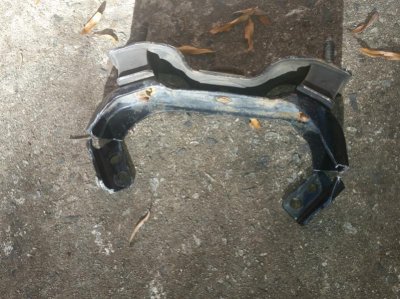
So the tabs got cut off the original supports - they will bolt back to the transmission . . .

sm_thehemiisin27.jpg

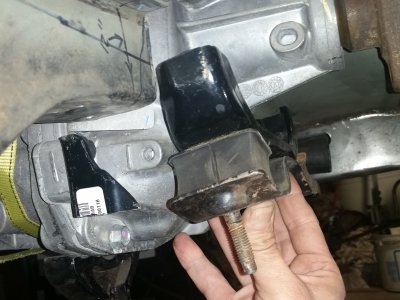
Then the bottom part of the original isolator bracket will be moved aft, and up too - these will be attached with 1/4" plate . . .

sm_thehemiisin28.jpg

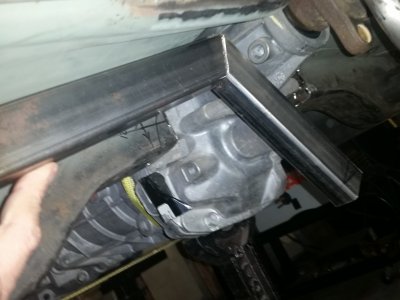
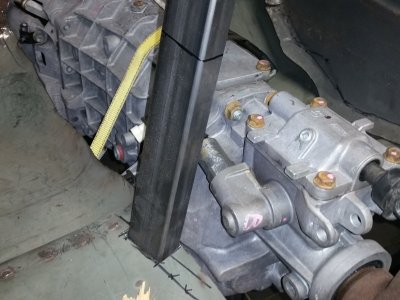
Then a new cross member is being fabricated - it will be welded in aft too - TOO much cantilevered to use the existing cross member . . .

sm_thehemiisin29.jpg

And the original cross member will be used to build the support over the top of the transmission - original cross member ( replace what was cut out )

sm_thehemiisin30.jpg

That's the plan . . . so far . . . and I'll try and keep working on it this week . . .
 
What significance are the two ears at the rear by the original cross member, can they be drilled/ tapped for isolator/ bracket that could be attached to the orig cross member?

Gary
 
What significance are the two ears at the rear by the original cross member, can they be drilled/ tapped for isolator/ bracket that could be attached to the orig cross member?

Gary

Hey Gary - sorry for the delay in responding, had to take care of my daughter first.

The two ears on the rear of the trans are actually 4 ears, ( 2 more on the other side ) that held the bracket to cantilever the shifter off the back of the transmission. Good idea - not sure if they have enough strength to support it, but with the original (2) supports ( 4 bolts ) that might work out nicely - thanks for the pointer !

Not a problem - I have been following your daughters progress.

It may also be possible for more strength to have a metal tie strap across the top or bottom of the tail shaft to unitize the entire mount.

Gary
 
Last edited:
Been a while . . .

I know that it's been a while since I've been on here, but my daughter's surgery has seemed to have taken a little bit of wind out of my sails . . . it was a very rough week, and the 10 hour wait to hear back from the surgeons . . . I can't even begin to explain it to you . . .

But here's some of the things going on . . .

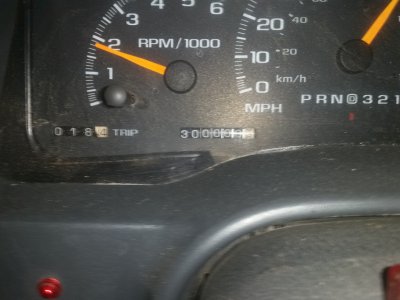
First, with all of the driving back and forth to the hospital that week, my truck has surpassed 300,000 miles . . .
( now I can't claim that I did NOT take this picture, in the truck, doing 70 mph down the road - look and the tach and speedo . . . RUH ROH )

sm_dailymileage.jpg

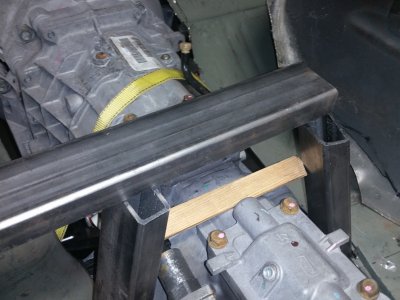
Then working on the replacement over the top of the transmission cross member . . . I could do this . . .

sm_thehemiisin31.jpg

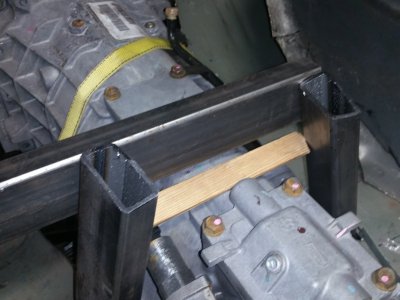
Or this . . . but the location of the cross member would be moved like the picture below this . . .

sm_thehemiisin32.jpg

Like this . . .

sm_thehemiisin33.jpg

Hope to make it out to the shop and make some progress on the car this weekend . . . I hope . . .
 
Hey bud, im sorry about the troubles your having, ive been thru such a mess myself the last 3 year and i can honestly say i know how you feel, i would like to just suggest staying away from the shop for awhile and ease into it when everything else levels out,but i cant, winter is hear for me and im looking forward to my little shop and my car, it, sometimes helps when going thru the tribulations we have, i tell my wife i always go out, even if i just sit and think and with me it helps, i pray buddy it gets better for everyone soon!!! Take care my friend..... Ron...
 
I'm just glad it's over and you can relax again, stressful I'm sure. Time for more Mad Science!
 
Karma . . . and a little rant . . .

The speed limit on my street is 35mph - and it's a dead end street. I posted pictures a while back of a girl that was driving in excess of 60 on the street, and in one of the bends, lost control and ended up in the middle of the pasture ( missing the trees in the tree lined area by inches - she was lucky ).

Got a new renter at the very end of the cul-de-sac that also flies down the road, and I've meant to try and catch him and ask him to slow down - we do have kids in the neighborhood.

Last night I saw his truck off the road, guess where . . . in the tree lined area of the street . . .

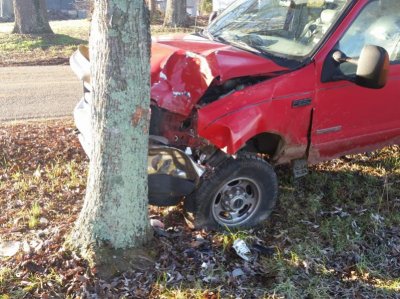
Now tell me . . . does THIS look like the damage that would be caused by a 35mph confrontation with a non-movable tree ? ?

sm_ouch.jpg


Got this picture this morning while walking the puppy dog . . . and guess who drives by . . . the owner of the truck. I took the opportunity to remind him that the speed limit on "our street" was only 35mph. He told me his girlfriend was driving and swerved to avoid a deer and it's baby . . . if you were driving 35mph, like you're suppose to, I really doubt that you'd end up in the tree, with that much damage . . .

I got my chance to remind him of "our 35mph speed limit" . . . wonder if it'll do any good . . .
 
The speed limit on my street is 35mph - and it's a dead end street. I posted pictures a while back of a girl that was driving in excess of 60 on the street, and in one of the bends, lost control and ended up in the middle of the pasture ( missing the trees in the tree lined area by inches - she was lucky ).

Got a new renter at the very end of the cul-de-sac that also flies down the road, and I've meant to try and catch him and ask him to slow down - we do have kids in the neighborhood.

Last night I saw his truck off the road, guess where . . . in the tree lined area of the street . . .

Now tell me . . . does THIS look like the damage that would be caused by a 35mph confrontation with a non-movable tree ? ?

View attachment 295794


Got this picture this morning while walking the puppy dog . . . and guess who drives by . . . the owner of the truck. I took the opportunity to remind him that the speed limit on "our street" was only 35mph. He told me his girlfriend was driving and swerved to avoid a deer and it's baby . . . if you were driving 35mph, like you're suppose to, I really doubt that you'd end up in the tree, with that much damage . . .

I got my chance to remind him of "our 35mph speed limit" . . . wonder if it'll do any good . . .
You would think a military grade aluminum frame wrapped in high strength steel wouldn't have that much damage - eh??? LMAO!

Gary
 
It's about time . . . time to make some progress on this car now . . .

I've been having one heck of a hard time trying to come up with way to make the transmission mounts work and not hang down too low . . . spent the last couple weeks coming up with designs and promptly figuring out that they would not work . . .

Well . . . think that the solution has finally been figured out and put into place . . .

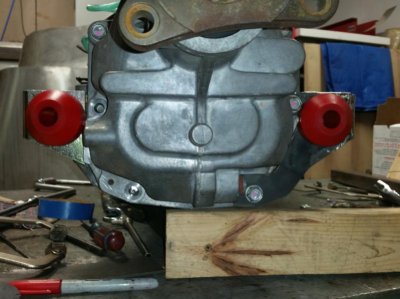
sm_thehemiisin34.jpg

Ordered these mounts from Summit, and when they came in, WOW . . . they were a bit larger than I had thought . . . but it looks like we've got a means that will not only work, but will keep them from hanging down too low ! !

This "task' was one heck of a P.I.T.A . . . but I think that the worst of it is now behind me ! ! Now to get some work done no the car ! ! !

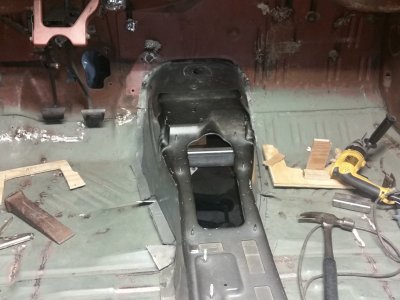
While the transmission is out of the car, I've been doing some fine tuning of the tunnel hump . . . now that I can see what needs to be done with it . . .
 
Got a little behind on my posts . . . time to catch up . . .

Here's the things that I've got done and am working on . . .

Got the tunnel hump back in the car
Got tunnel hump clecoed into place so that the fitment will be repeatable ( need it out of my way to lift it up into place yet )
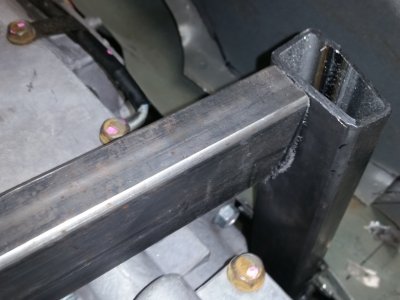
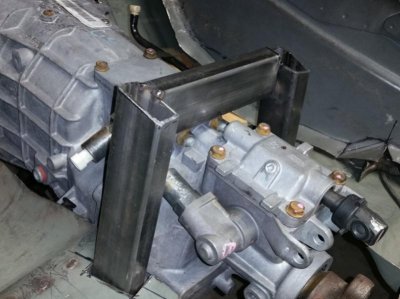
This allowed me to get the over the top of the transmission frame set up and tacked into place . . .

sm_thehemiisin35.jpg

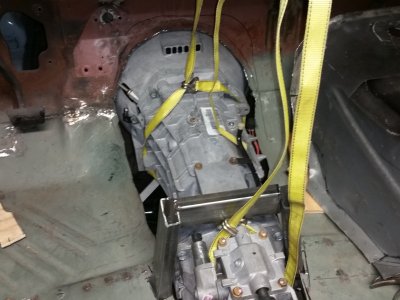
With the upper cross member tacked into place - now I can test fitment with the transmission . . . got transmission re-attached to the engine . . .

sm_thehemiisin36.jpg

Now . . . to see how the transmission mounts fabrication will work . . .

sm_thehemiisin37.jpg

The mounts are surely tucked up high and out of the way - still got some fine tuning to do . . . Hitting the floor here ( both sides ), but got room to cut away some excess metal . . .

sm_thehemiisin38.jpg

Still got a little more work to do on this over the top frame replacement . . . but it's coming along nicely . . .

sm_thehemiisin39.jpg
 
Lots of progress today . . . the dam has broken . . . nothing in my way ( for a bit )

Got over to my buddies shop and got a couple things accomplished that has set me loose on my fabrication work - the design and development are all appearing to work out great for the transmission mounts . . . what I got done . . .

1 - shaved a bit off the top corners of the new brackets so they won't hit the floor
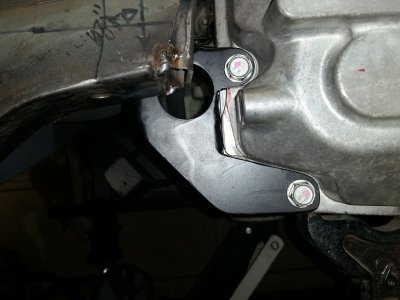
2 - made bosses to attach to the bottom of the frame rails to receive the bolts from the transmission mounts
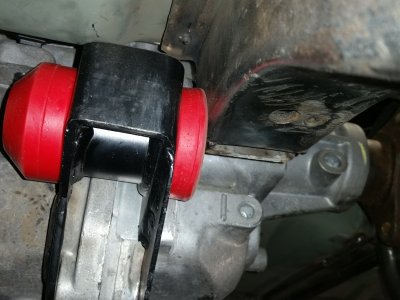
3 - the rear rubber bushing was going to hit the frame - so it was "modified" to fit between the mount and the frame ( you'll see )

This was the hold up . . . so now I've been tearing into the car . . .

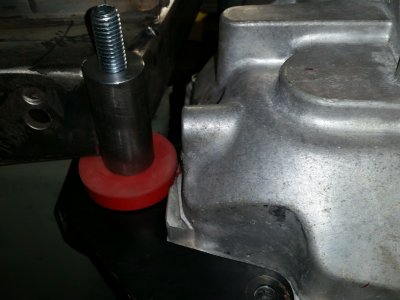
First, got the driver side positioned in place ( notice the new shape of the rear bushing ) - cleared the frame to allow the bolt to go through

sm_thehemiisin40.jpg

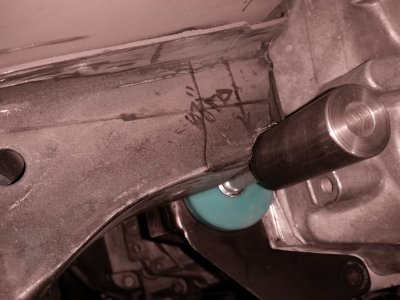
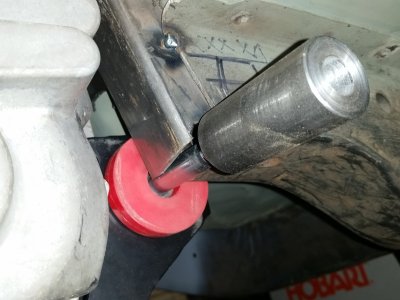
Slid the boss on the bolt to mark lines that needed to be cleared on the frame . . . worked it back a bit at a time . . . ( not sure what happened to this pic ? )

sm_thehemiisin41.jpg

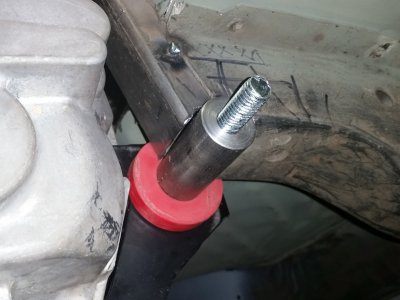
After all the clearing was done - the boss is now sitting in it's approximate location . . . I like the way everything is lining up . . .

sm_thehemiisin42.jpg

With the driver dies done, now it's time to focus my attention to the passenger side - working the frame clearing for the boss . . .

sm_thehemiisin43.jpg

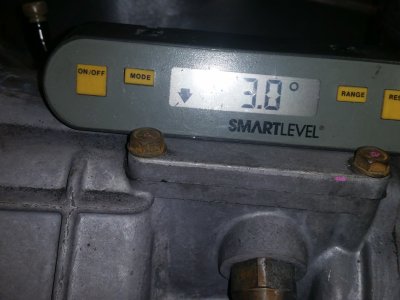
I'll want the full weight of the transmission resting on the mounts to make sure that they hold the engine with the desired 3 degrees tail down angle . . .
 
A now your talkin!! Good job Larry all the fabrication work and planning are having an awesome result

Well done and Merry Christmas!!
 
Back on track . . .

Nice to have that "headache" behind me . . . and be able to work on the car again ! !

Had to make the way back out to the shop and work on the passenger side boss . . .

sm_thehemiisin44.jpg

After getting it fitted . . . I'll have some fine tuning, some engine/transmission layout plans . . . once it's welded . . . I don't want to have to go back ( again )

First test . . . how does the level look . . .

sm_thehemiisin45.jpg

3 degrees tail down . . . so far so good ! ! !

- - - Updated - - -

A now your talkin!! Good job Larry all the fabrication work and planning are having an awesome result

Well done and Merry Christmas!!

Thamks Goon . . . it's all the head banging that really hurt ! ! ! Can't believe I fought over this stupid thing for a MONTH ! ! ! ( sigh ) . . .

It's almost behind me now . . .
 
Auto Transport Service
Back
Top