• When you click on links to various merchants on this site and make a purchase, this can result in this site earning a commission. Affiliate programs and affiliations include, but are not limited to, the eBay Partner Network.

67 belvedere mini tub

dsd1967

Well-Known Member
Local time
2:41 PM
Joined
Mar 6, 2011
Messages
919
Reaction score
509
Location
Toledo
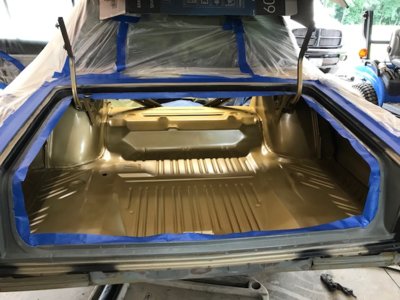
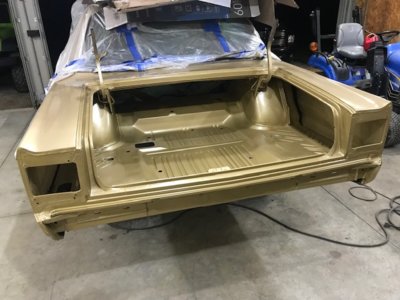
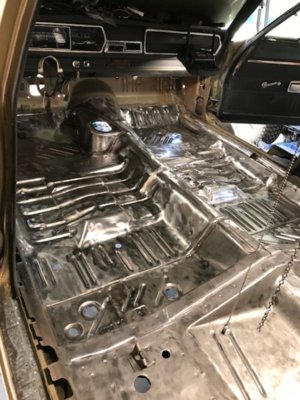
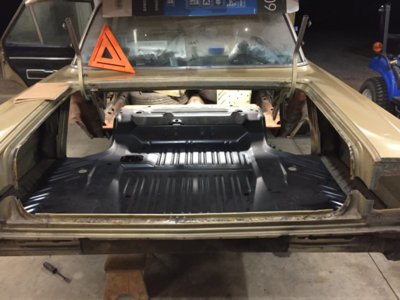
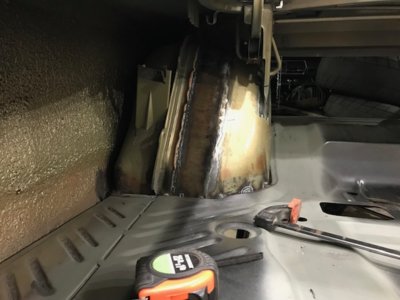
I've been working on this car off and on for about 5 years and the pendulum has finally stopped swinging from the tear apart and fix to going back together. Last night I put the final touches on the mini-tub upgrade by painting the trunk gutter. I put a 68-70 charger floor in it so I could get the exhaust all the way out the back so the trunk doesn't exactly look like a 67.

I have a few touch up items in the engine compartment and then it's ready to start bolting stuff together. The goal is to have it on the road next spring.
IMG_0866.JPG IMG_0016.jpg IMG_0438.jpg IMG_0451.jpg
 
Very nice! Never even thought about going with a later model trunk pan. Mine is in good shape but did cut out the spare tire well and planned on laying in some sheet metal. The plan was to use a fuel cell and drop it down and make the top of the cell as level with the floor as possible.
 
You are doing an excellent job on your Belvedere Dave! We can't wait to see it with the monster motor. Jeff and I need to get down to your place and see ya. Great job!! Dodge33
 
i thought that was called a super stock suspension ? witch was used by mopar engineers to get more tire under the car to go around the n.h.r.a rules ie cant cut the quarters for a stock class car ? looks great!!!!
 
Yes, very nice indeed.. I thought I had a pretty good looking mini tub/flat floor job on my 66 but yours with 68 floor makes me think that may have been better. I'm impressed!
 
I haven’t done anything with the wheel lip yet. I figured that would be pretty easy to tackle once I get serious about rims and tires and see what clearance I need.
 
Thanks for all the positive comments.

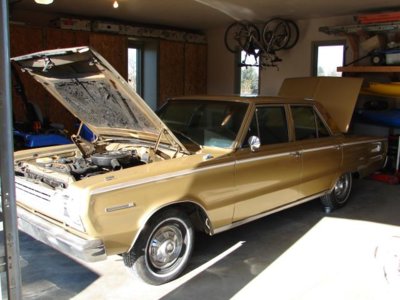
This is what I started with. I bought it with intent on using a lot of the underneath structure to resurrect a 69 satellite (mock road runner) convertible. After looking over the great condition of this car, and poor condition of the convertible....my flight path changed. I sold everything I had related to the 69 car and put all that money into a 512 stroker (650 HP, 675 TQ). I have no plans on painting this car....it's a decent second paint job. Amazingly I found a Rustoleum metallic aged brass paint that is nearly identical to the existing paint on the car (which is on one repaint...not quite the factory color). I rattle canned everything from the trunk gutters inward to the trunk and only have about $100 in paint and primer. It actually matches the sheen of the factory trunk paint and that's good enough for me.

It's getting a 4 speed (23 spline) and a narrowed 8.75 (thanks 2quick) with caltrac system and split monoleaf springs. I have a S60 waiting in the parts bin that I have a feeling will be needed at some time down the road and am on the lookout for some type of upgrade for the transmission. The hood will be an one piece fiberglass WO/RO scooped flat black piece. Interior wise it's getting buckets up front and I'm debating on adapting 66 charger rear buckets to the back. Other than needing a clutch, header back exhaust system and rear rims/tires, I have everything ready to go back into the car. I have to change from an AC firewall to non-AC and then rattle can the engine compartment....and then start bolting everything together.

It's no show queen....it's destined to be beat on like a red headed stepchild.

belvedere.JPG IMG_0308.jpg
 
My kind of car. A more door. I'm proud of ya !
 
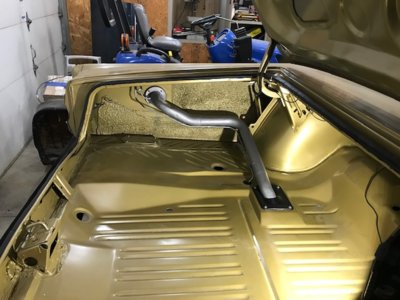
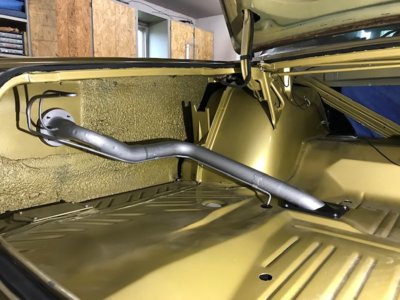
Well I've been able to get a little more work done on the Belvedere. One of my challenges with putting the 69 trunk floor and tank in the 67 was how to make the fuel filler tube. It turned out a lot easier than I thought. I cut the gas tank vent tube off the 67 filler neck and reamed the hole out until a 1/2" copper pipe solder cap fit and then silver soldered that hole shut. The filler tube was rotated 90 degrees forward and it had a nice fall and ended up horizontal. I found 2" header fabrication pipe for about $14 and with only a couple cuts was able to route it exactly where I needed it to go on both ends (to the tank and the rotated filler neck. The breather vent was bent upward 90 degrees and extended using 1/4" brake line tubing. I stole a couple brake line clips from an old firewall section to fasten the breather vent after the pipe was installed, and welded the clips to the fill tube. Everything was pressure tested and a few holes rewelded. A little primer and some hammered metal rustoleum and "voila" it's a finished product.

In all I have about $20 in materials and 6 hours fabrication/test/finish work in it. On to the next challenge....getting the rear pipes hung out the back. That was what all this hoopla was about to begin with, so I'm looking forward to see how they tuck up under there.

IMG_0542.jpg IMG_0543.jpg
 
Out standing work.
 
looks nicely done
 
Out, standing and outstanding are all proper words, so it most likely wouldn't catch that. :)
I assume out standing 'is like a late unpaid bill'
I assume outstanding 'is like great'

or visa versa

maybe/maybe not
But;
I'm not the '******** :hifu:spelling/grammar police' either

Spelling Police Correct My Spelling again I dare you double dare you MF-er.jpg
 
Auto Transport Service
Back
Top