• When you click on links to various merchants on this site and make a purchase, this can result in this site earning a commission. Affiliate programs and affiliations include, but are not limited to, the eBay Partner Network.

So It Begins, 1966 Charger Restification.

66ChargerHI-PO

Well-Known Member
Local time
7:03 PM
Joined
Mar 15, 2019
Messages
4,055
Reaction score
8,831
Location
Berlin, CT
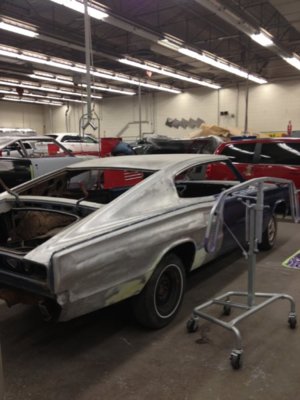
So It Begins, my stepfathers 1966 Charger Restification. He decided to restify it sooner than later of his other projects because he was re-diagnosed with prostate cancer. I explained the history and information about the car in my photo garage but will recap for those who are just seeing this.

The Car- The car is a 1966 Dodge Charger with a 383 4 bbl Hi-Po engine (explains my code name here), with a red interior, power windows, floor shift with full length console, floor console clock, and air conditioning. The exterior color is WW1 White.

The History- The car was bought new out of Santa Monica, CA on Jan 7, 1966. It was sitting in the previous owners garage and had not run since 1987, I have newspaper pictures in trunk to prove it. My stepdad bought it on August 14, 2015.

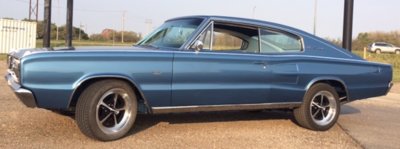
The Plan- The plan is to keep the red interior, paint the car silver, put a modern A/C unit in, upgrade the front brakes to disc and keep the backs original but rebuilt drums, put on Magnum 500 wheels, and maybe a tti exhaust kit on it too. (Make a clone like my profile picture, from the 1966 Charger brochures with a bit of a twist) My "personal" plan is to hopefully document the progress, and make an album of the car being done and sharing it on here when I have time.

Hope you join me "along for the ride" along this journey.
 
November 7th- Gas tank dropped, old gas taken out and gas tank brought to get refurbished. Trunk carpet ripped out and thrown away.

November 11th- Old exhaust cut off and thrown away. Old rear bumper taken off.

November 12th- New rear shocks installed, Brake lines taken off. Discovered tonight that the car has a 2.94 gear ratio!
 
Last edited:
Awesome to hear Eric! I know you were talking about it at Frankenmuth. You'll have to add some pics during this journey.:thumbsup:
 
Picture "Update"

The old exhaust. We thought it was the original 1966 exhaust but it wasn't. The exhaust had the "dip" in it so it wouldn't hit the frame, but turns out it is an exhaust from Midas. The tailpipes were rotted out and no good. The original shocks were ok but we wanted new stuff.
Exhaust 1.jpg

Exhaust 2.jpg
Exhaust 3.jpg

Exhaust 4.jpg

Exhaust 5.jpg

Exhaust 6.jpg
 
Need some pics of the car man! We are picture whores here!
:thumbsup:
 
Congratulations that looks like an awesome project! I’d pass on a few tips that were given to me, especially with these cars. It’s always dangerous to give tips, especially not knowing how experienced you are with these things. I am not a mechanic or overly inclined mechanically, not any other trade, but I had tremendous support to do mine.
1) Throw away nothing. You may want to use old carpet for a template or see how to do something from original. Going on I assumed anything old was garbage, I was wrong. Old is gold! Also you likely will not be able to get some parts easily or at all. When the car is COMPLETELY done, then you can CONSIDER throwing stuff away.
2) Try to use everything original you can. E.g. Cat whiskers you can’t do the same way, but compare difference with new vs old parts. Be aware that new parts that “look” the same often aren’t. My rubber parts new were weak reproductions, but looked the same. Door panel clips look similar, but rarely are.
3) Keep a manual handy. Printing one is nice because if it gets dirty, no big deal. Save you hours of time.
http://www.mymopar.com/downloads/servicemanuals/1966_Polara_Monaco_Service_Manual.zip
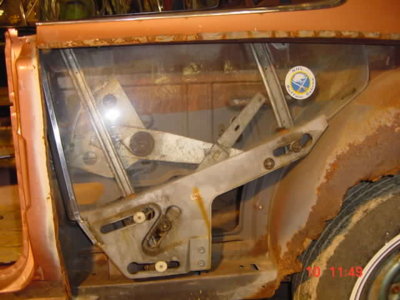
4) Follow side window installation instruction religiously. Religiously! Snap on clips suck, I used a socket that went over the clip taped to a pair of channel locks. Worked well. But it still sucks.
5) Take lots of pics. Then take some more. Most of my pics are super up close detail “bolt head” shots, it would be the world’s worst photo album, but great for reassembly. I should have taken more. Make sure to at least occasionally get a person in there too, those will be the ones you'll eventually treasure most.
6) Bag, tag, label EVERYTHING. I date it too. This was the some of the best advice and I didn’t follow it closely enough. Be disciplined! Takes more time up front, but could save you HUGE on reassembly. Think of it this way: if I disassemble everything, die, and 50 years later someone else wants to reassemble it, would they know what everything is and where it goes? My car took just short of 4 years, and if I had a dollar for every time I thought “Oh surely I’ll remember where this goes” or “Remember I put this on a shelf” and then completely forgot- I’d have enough to pay for 1/2 my car.
7) If you’re sending the car out for paint/body, be fussy. You’re paying for it. Burn out ALL lead at your A and C pillars and weld them down. Trust me on this. As soon as it’s out, start working on your bright work (stainless, chrome, aluminum etc. Also interior. Again, assuming it’s going out for paint/body.
8) TTI is unbelievably good stuff. I went headers/exhaust. Don’t get tricked into too big. I have 3” and 2.5” is more than adequate. Stock build is very tight at 3”. Goes in like a dream. But use step clamps, not the supplied clamps. Buy separately. I got 1 3/4 used headers, new 3” ceramic exhaust. 1 3/4 headers is fine, don’t give into the chart numbers. It’s nice to have a bit of room on there. Engine Masters (Motor Trend TV does a nice bit on denting headers- functionally does very little to performance).
http://www.ttiexhaust.com/MoparClassics-Headers/383440-134/TTi383440-134.htm

http://www.ttiexhaust.com/MoparClassics-Exhaust/Exhaust_2530XHW.htm#X25HW 62-79 B-bodies

9) Don’t buy 17” rims. Tire choices are limited. 15” allows more flexibility.
10) Hood clearance is ridiculously tight. Holley Street Dominator one of the few intakes that will work if you go that route.
11) Buy shares in your favourite beer company. At least get some of your money back!
12) Have fun! Enjoy the process!

I was super lucky to have great advice, experienced people, access to parts cars, fully restored cars, and tremendous amounts of help. The hardest part was following good advice!
I should have listened even MORE carefully!

-Dana
67 Charger 383 4bbl 4 speed.
Mostly stock, 73 cuda front disc brake swap, headers, exhaust, hurst shifter, Holley intake.

8590DD0A-8F3D-4464-A1A1-3A5F824A15A0.jpeg 57F4EAE0-FB7D-4492-80D3-3F12F316FBE3.jpeg B9845F1F-EF71-4ADF-8BA8-1A18AB35F834.jpeg AA169A8C-36B6-496E-A909-F949FC375BB4.jpeg F19E726E-4EE2-424C-B7F2-25B919BC1BD6.jpeg
 
Last edited:
"Update" 11/21/2019:

No work done to the Charger lately since last update with needing brake parts and still having the gas tank worked on. However a gas tank gromment and 7 piece brake line with front right hump kit was ordered from InLine Tube today 11/21/2019. Stay tuned
 
"Update" 11/21/2019:

No work done to the Charger lately since last update with needing brake parts and still having the gas tank worked on. However a gas tank gromment and 7 piece brake line with front right hump kit was ordered from InLine Tube today 11/21/2019. Stay tuned
Inline Tube is a great place for the lines. Only about 2 miles up the road. Got my trans lines there.:thumbsup:
 
have 3 66 chargers one in shop for 17 years looks a lot like yours with back quarter off driver is fun car have done 9 power toura
 
My friend has a 67 Charger 383 car that is silver with red interior,and the car is very sharp!
 
Update-

12/8/19

Gas tank back from being gone through/cleaned/rebuilt etc, and some brake work done also. Saw that on the right rear brake that I believe the return spring was missing. It was completely gone/non existent. Put on/shortened a '67 c-body (Fury) one. Otherwise not much else done sine then.
 
Update-

Hi all, I finally have a little "update". Not much of one by any means but better than nothing I suppose. My stepdad has been real busy working his job, and on his other projects a lot lately so not much has really gotten done to the ol' Charger. A little at a time though, baby steps. So far since my last update.....

The gas tank came back from the shop cleaned out. My stepdad painted it silver and it is now back in the car. The gas tank I believe filler is being worked on as we speak as far as I know. I believe 2 rare rear bumper parts are painted as well.

And....

The rear drum brakes are now rebuilt with lines and everything, they are going to stay drums while the front is getting disc.

Soon Future Plans.... Convert front drum brakes to disc. Lastly in soon to be spring take the engine out, still not sure if we are going to use the engine that is in the car now or another rebuilt one.

Otherwise that is pretty much it for now. Stay tuned until next time. I will keep all updated....
 
"Update"-

Not much done to the Charger lately. Just the gas tank piece painted and put back in the car. Here are a couple pictures of it painted
gas tank piece 1.jpeg
gas tank piece 2.jpeg
 
Auto Transport Service
Back
Top