• When you click on links to various merchants on this site and make a purchase, this can result in this site earning a commission. Affiliate programs and affiliations include, but are not limited to, the eBay Partner Network.

71 Charger SE build

T2R9

FBBO Gold Member
FBBO Gold Member
Local time
2:56 AM
Joined
Jul 18, 2008
Messages
3,598
Reaction score
8,607
Location
Conway, SC
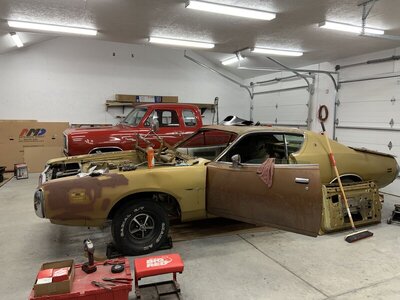
I bought this car back in 2018 and its sat on the side lines until I finished my Power Wagon Earlier this year. I love 71's and have a ton of spare parts for these so its time I put them on a car!

It will keep the SE trim cause I think it has class and not just another clone.

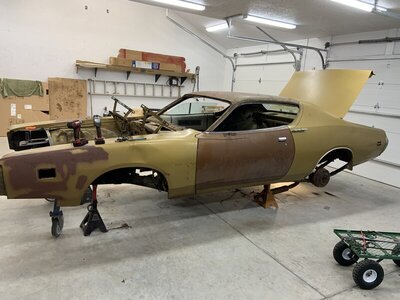
Its a numbers matching 383 N code Auto, but that's all out the window. The plan is 440 4-speed 3.55 rear. Its also gold with the gold/cream colored interior so that's out the window too.

Couple pics the day I drug it home. The engine block and heads were in the trunk. LOL

IMG_0875.JPG
IMG_0876.JPG
 
Started tearing it down in February and, yay! Discovered rust under all the windshield trim on the cowl. Going to need some work here.
IMG_0127.JPG
IMG_0128.JPG
 
Since I already had a ton of parts for this build why not drag home a parts car? Lots of good stuff on this one for $1500

IMG_0885.JPG
IMG_0888.JPG
 
Yeah that was a bonus! The best part of the parts car was the complete black interior including factory leather buckets. I am on the fence on going with leather or cloth for the build. Surprisingly leather is cheaper than cloth. My original plan was hounds tooth cloth which I have that I bought a few years ago for a 73, but since bought a 74 Rallye I will use those covers on that. That's a whole different project thread.
 
I love the 71 SE s - So mad at myself for not buying a factory U Code - 4 speed - Dana car back in the 90s for dirt cheap

Especially factory N and U Codes SE s Awesome

So many options available it was crazy

Could you get a option factory Ramcharger hood on a 71 SE ?
 
I am going with the standard power bulge with this one.

IMG_0294.JPG
 
I just pulled out the sales codes

Looks like on a 1971 SE the Ram Charger Hood was not an available option

Option only on the R/Ts and Bees

That bulge hood will look Awesome
 
Word was it spun a bearing back in the 80s and the engine removed and taken apart and that's how it sat. Has some damage on the drivers side. The door will be replaced with one off the parts car. The fender will be fixed. Found more rust on the cowl.

I really like the early style pin stripe used so that will get reproduced.

IMG_1093.JPG
IMG_0126.JPG
IMG_0129.JPG
IMG_0136.JPG
IMG_0137.JPG
IMG_0156.JPG
 
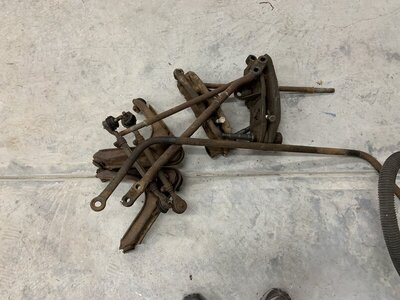
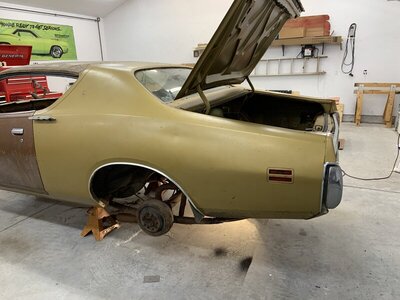
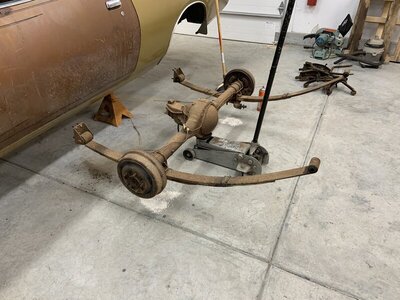
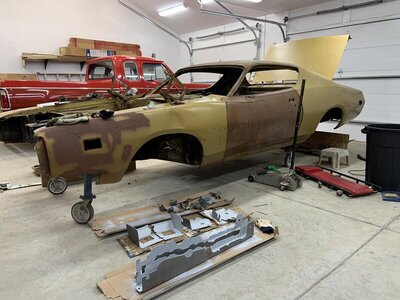
Installed rebuilt door hinged I had stashed away and the new drivers door while loaded. Then the suspension came out and got it on dollies.

IMG_0155.JPG IMG_0222.JPG IMG_0223.JPG IMG_0224.JPG IMG_0230.JPG IMG_0285.JPG
 
Cool build, I just got a 71 Charger myself, just a plain Charger 318 AT when new, I am going wish a 5.7 and 4spd.
 
Overall she looks like a good solid car. I am working on the 71 R/T 440 4 speed car that I bought the fender from you for. My friends Gary and Pam were instrumental in making all that AMD sheetmetal possible for the 71/72 B body Dodge and Plymouth cars. He loaned AMD his NOS and nice used pieces for templates and did years of test fitting the parts to make sure that they were the best fitting parts available. We can thank them for those nice hoods!
 
Overall she looks like a good solid car. I am working on the 71 R/T 440 4 speed car that I bought the fender from you for. My friends Gary and Pam were instrumental in making all that AMD sheetmetal possible for the 71/72 B body Dodge and Plymouth cars. He loaned AMD his NOS and nice used pieces for templates and did years of test fitting the parts to make sure that they were the best fitting parts available. We can thank them for those nice hoods!

That fender came with the parts car. After tearing into the original on this car I should have kept it as my dog leg was shot. I was not able to meet you at Carlisle when I dropped it off. 2021 is a new year!
 
Floors and trunk are clean! but that vinyl top left a mess.

IMG_0140.JPG
IMG_0225.JPG
IMG_0226.JPG
IMG_0227.JPG
 
Here it is completely gutted. I measured and drilled the emblem holes for the hood and fitted it. Installed the 4-speed hump and buddy seat brackets, then a good coat of SPI epoxy in the interior and trunk.
IMG_0304.JPG
IMG_0292.JPG
IMG_0293.JPG
IMG_0305.JPG
IMG_0792.JPG
IMG_0794.JPG
 
Great work, love what you have done so far. I am shocked you had so little rust on your pans. Cost me almost $3K to fix all my rust issues and it wasn't even that bad besides the trunk.
 
Great work, love what you have done so far. I am shocked you had so little rust on your pans. Cost me almost $3K to fix all my rust issues and it wasn't even that bad besides the trunk.

My rust is all in the cowl and a-pillers which was ugly once reveled.

IMG_0438.JPG
IMG_0443.JPG
IMG_0509.JPG
IMG_0444.JPG
 
Auto Transport Service
Back
Top