• When you click on links to various merchants on this site and make a purchase, this can result in this site earning a commission. Affiliate programs and affiliations include, but are not limited to, the eBay Partner Network.

68 Charger headlight bezels, has anyone here painted these?

QOTHL

Well-Known Member
Local time
5:03 AM
Joined
Sep 13, 2017
Messages
7,085
Reaction score
8,254
Location
Planet Mopar
If you have painted these back to original, please let me know how you did it.
No offense, I'm glad 69's don't have these.
 
Yes, many times, but just touched them up.
Use black DupliColor interior paint and the small DupliColor gray metallic paint...blends perfectly.
Take the part in to match the 68 Charger dark silver.

68-CHARGR-HLBEZ-09.jpg
 
I reconditioned mine a few years ago. I used Mother’s Back to Black and then used a silver paint pen from Hobby Lobby. Here they are side by side. One before and one after.

754091A1-5AF6-477D-B4D8-02D3359D6DBA.jpeg
 
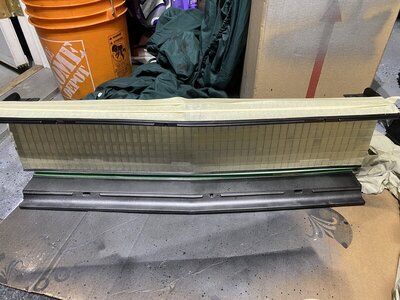
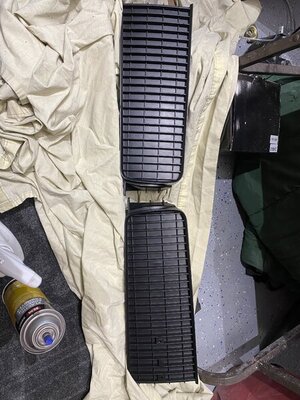
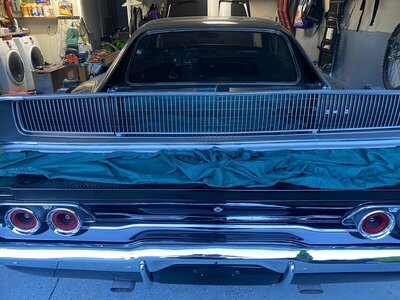
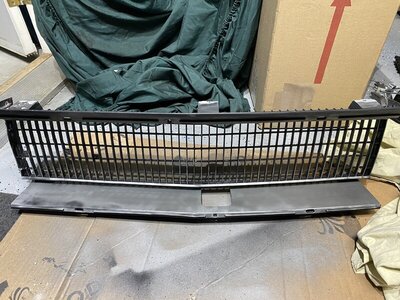
The guy I'm doing them for has specific paint he wants like Rustoleum Metallic Matte Nickel. So I have to mask them off - already did it, it's a nightmare. He also has me using SEMS Color Coat landau black. My lines have to be straight, it has to be near perfect. I'm almost there but had problems with masking the round parts.

That's why I posted my question to see if anyone has done it this way.
Thanks for your help!
 
I presume you're doing the black first (full coat), then masking off the parts that stay black in order to paint the silver/nickel? That, some good painters tape, and a fresh blade in an X-acto knife would be my method.

I agree - glad my '70 doesn't have anything like that.

I think.

I haven't looked AT the front end with the headlights on yet! I'll get a good enough look when I install my halogen conversion lights in a couple weeks, once they arrive.
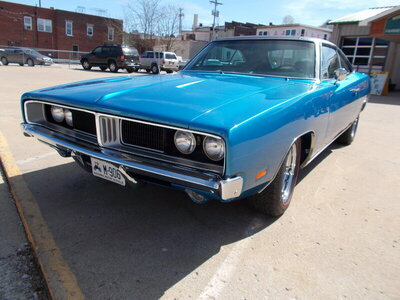


Well the back was painted black, then like factory, I painted the whole front silver, then masked off the silver to paint the black. I used good painters tape, took a long time to get the curves and still had problems. They must have used a production mask, I'd bet money on it.
Headlight bezels or no headlight bezels is probably a touchy subject - I think this handsome devil looks just fine without them:

DSC_4028.jpeg
DSC_4035.jpeg


DSCN0606.JPG
 
Well the back was painted black, then like factory, I painted the whole front silver, then masked off the silver to paint the black. I used good painters tape, took a long time to get the curves and still had problems. They must have used a production mask, I'd bet money on it.
Headlight bezels or no headlight bezels is probably a touchy subject - I think this handsome devil looks just fine without them:

View attachment 1116273 View attachment 1116274

View attachment 1116272
That handsome devil is painted the wrong Silver. Charger Grilles were a dark silver. Trim blends in with this Silver, a big resto no no.
 
That handsome devil is painted the wrong Silver. Charger Grilles were a dark silver. Trim blends in with this Silver, a big resto no no.


That was researched and changed from the dark silver.
I just went downstairs and looked at two untouched, unrestored 69 Charger front grills. One is dark and the other is light. I remember an "expert" telling me a 69 Charger couldn't have a pearl vinyl top...ooops, wrong, they can.
DSC_9671.jpeg

Another expert told me that the tail panels are supposed to be painted with organisol. I've talked to people who do restoration paint and they have seen a lot of original 69 Chargers and have never seen it. I've looked at all of mine and none of them have that paint there either.

I prefer the lighter silver because it helps reflect light in to the grill space. The trim contrasts by texture more than color. This car also has the light silver, back to original and looks great with B5 Blue.
But I'm no expert.
 
I just did mine used Sem trim black
& Sem titanium silver ,with Sem adhesion
Promoter & heat gun , going to touch up a bit , did the grill as well.used a soda blaster
to etch out the old paint

F43AB410-F76B-4058-B248-52A3B94D5B9D.jpeg F4E4E86D-4AF5-42F5-BC58-8FDA170DB0C7.jpeg D7D9BC24-94CA-4F9A-9C2C-2C3B3995D742.jpeg 45DC5598-E621-4176-957D-B05112426330.jpeg 8BF1BB69-70AD-41CD-96ED-FC65DA92BFB5.jpeg A4F26115-A973-4425-90AF-B4E2BF1D0BB6.jpeg
 
If you have painted these back to original, please let me know how you did it.
No offense, I'm glad 69's don't have these.
Hi I used SEM Trim Black 39143 & SEM Titanium Silver & SEM Adhesion Promoter for prep I used a soda media blaster I got off Amazon, built a card board box on top of 4’ table with a plexiglass 3’x2’ see through window for blasting soda works best
as it’s water soluble just rinse off the parts , dried them completely, any flaws or chips in the plastic I used jb weld for plastics waited 24 hrs and sanded with 400 & 800 grit wet sand paper each piece was then heated up with a heat gun ,then applied the Sem adhesion promoter follow directions on the spray can , heating between Sprays , then blacked out parts that require black, taped off the silver areas using different widths of masking tape , let dry 24 hrs , then taped off black areas , then more adhesion promoter & heat gun then sprayed Sem Silver titanium go lightly with sprays then get heavy then heat again between sprays , it stops running if you spray to much, let dry 24hrs, to get the silver stripes back to original I used a square piece of foam , pinched it off with a paper spring clip so just about an 1/8” of it was protruding at the end
You can see the pictures in this chat ,borrowed from the Mrs 2 pie plates with tinfoil protection, I sprayed adhesion promoter in one plate , the other silver paint
and gently brushed on promoter down each grill slat , then heat , then silver down each slat and more heat , go lightly don’t worry if you don’t get the paint on immediately, I gave mine 3 coats take your time have a beer and think how beautiful it will turn out , Good luck , I hope I helped you out Cheers !!!
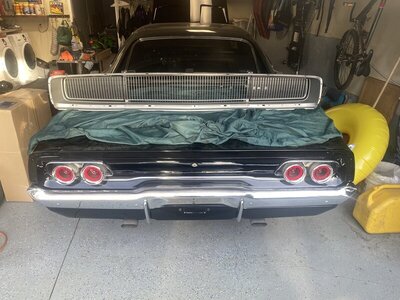

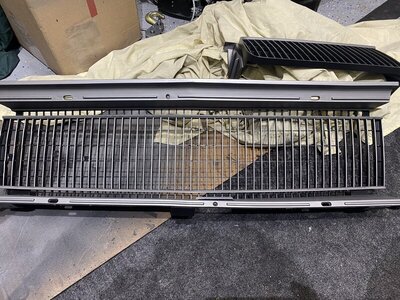
4526210F-C0B6-4163-88E3-C49EF4D98328.jpeg 5017B4F9-C4B3-4CED-8F86-A7390875A14D.jpeg 1CADC235-75AB-4203-878D-4545C3241F77.jpeg 2171CF0E-8FAB-4C55-BE51-DB51BE9E5083.jpeg C8B17FDB-3D7E-4698-8853-CBAD75840C16.jpeg 02CDACDE-6676-4348-83F9-F4F32DEBAC88.jpeg
 
The guy I'm doing them for has specific paint he wants like Rustoleum Metallic Matte Nickel. So I have to mask them off - already did it, it's a nightmare. He also has me using SEMS Color Coat landau black. My lines have to be straight, it has to be near perfect. I'm almost there but had problems with masking the round parts.

That's why I posted my question to see if anyone has done it this way.
Thanks for your help!
Hi I used 1/4” masking tape it bends easier than the other , as for getting the tape into the corners ,cut your tape at a 45 degree angles , as I found out in larger areas use more tape , so when you spray it doesn’t leach through the tape, and areas where there is single tape go lightly with the spray and heat it so it doesn’t soak , and more light sprays in those areas , good luck
 
Pin stripe tape works pretty good it stretches to the form you want. Local auto supply store.
 
Another thing I forgot to mention when you cut your 1/4” masking tape at 45 degree angles overlap them as you go around the circumference of the circular part of the outer bezel, I just finished painting and touching up my bezels ,there not perfect by no means , but if any one is that close to your car looking at them , there too Close !!!
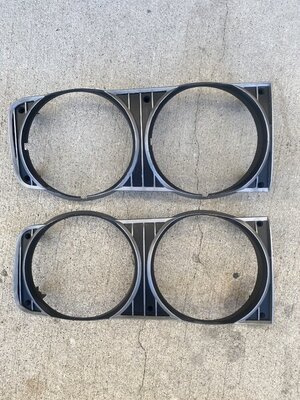
 
Another thing I forgot to mention when you cut your 1/4” masking tape at 45 degree angles overlap them as you go around the circumference of the circular part of the outer bezel, I just finished painting and touching up my bezels ,there not perfect by no means , but if any one is that close to your car looking at them , there too Close !!!

D6355993-9AF5-4995-8152-BD8FA190A556.jpeg
 
Another thing I forgot to mention when you cut your 1/4” masking tape at 45 degree angles overlap them as you go around the circumference of the circular part of the outer bezel, I just finished painting and touching up my bezels ,there not perfect by no means , but if any one is that close to your car looking at them , there too Close !!!


Unfortunately to some degree, these and the rest of the grill are for a customer. They have to be damn near perfect because they will be unpacking them and seeing them up close and personal. What I have so far after a lot of hours: Zooming in I can see a couple of little things that need touching up. Then, I hope I am done with these!:mad:

DSC_1669.jpeg
DSC_1670.jpeg
DSC_1671.jpeg
 
Unfortunately to some degree, these and the rest of the grill are for a customer. They have to be damn near perfect because they will be unpacking them and seeing them up close and personal. What I have so far after a lot of hours: Zooming in I can see a couple of little things that need touching up. Then, I hope I am done with these!:mad:

View attachment 1119212 View attachment 1119213 View attachment 1119214
Wow excellent Workmanship!! Your customer
Will be Happy
 
Wow excellent Workmanship!! Your customer
Will be Happy

Could be better but at some point I have to stop. There are things I would do different if I had to do this again....:realcrazy:
I hope you're right because I'm working for someone who got this job from a shop and I don't want to make him OR myself look bad.

I really appreciate your help and kind words.
 
Auto Transport Service
Back
Top