• When you click on links to various merchants on this site and make a purchase, this can result in this site earning a commission. Affiliate programs and affiliations include, but are not limited to, the eBay Partner Network.

1967 Resto Charger

chrisd

Well-Known Member
Local time
1:58 AM
Joined
Jun 18, 2010
Messages
482
Reaction score
24
Location
Texas
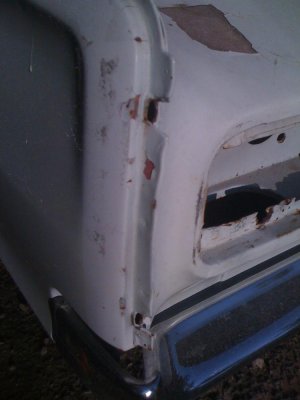
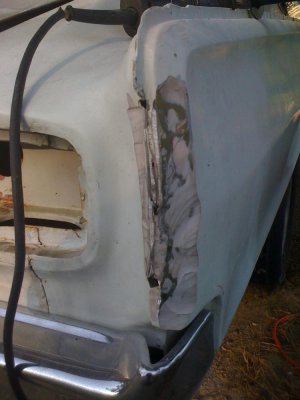
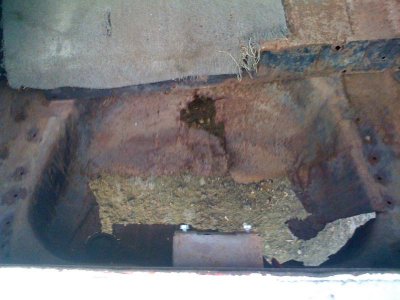
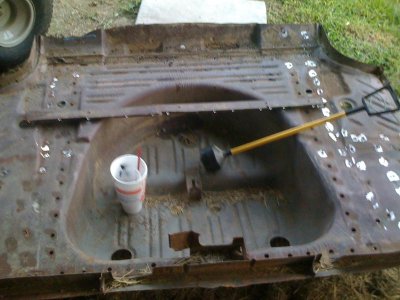
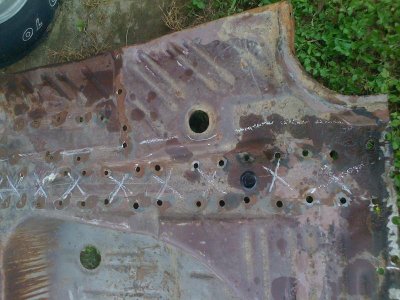
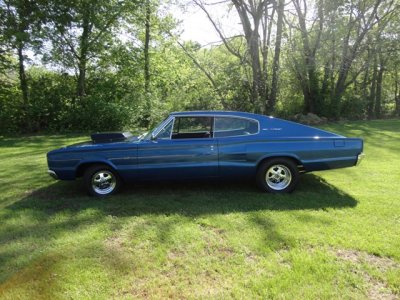
Having something to keep me accountable is the only way I'm going to finish this car. Or get started, one or the other. So I'm going to try and maintain my progress on a thread. I started a resto mod forum earlier this year @ therestomodforum.com to try and get some resto mod info. It's slow starting, but I've got my thread there too. So if you're not familiar with my car, I owned it in 1993/94 and due to a city beautification project, had the car legally stolen. Fast foward to 2010 and I found the car about 200 miles away. There's a thread somewhere here with some more info and I can elaborate more if need be. But what I want is a restomod. Modern drivetrain, modern interior, modern luxuries. I want a daily driver. Especially in the Texas heat I live in. So after letting the car sit for way too long, I began to check some things out. I want to do away with the peak moldings. I'm sure the quarters are welded at the top, so I won't cut the entire rear quarter ridge the molding attaches to all at the same time. I found a lot of bondo on the rear. And after doing a little sanding, I've reassured myself that the car needs to be blasted to remove the paint. My issue with the blasting is the nearest place is 25 miles away unless I do it myself.
 

Attachments

  • 1967 Charger 001.jpg
    1967 Charger 001.jpg
    55.5 KB · Views: 299
  • 1967 Charger 003.jpg
    1967 Charger 003.jpg
    67.5 KB · Views: 298
Here was day two of my new therapy. My painter still says he'll get some space and time to fit my car in but in the meantime, I'm going ahead with the project. Here's a trunk pan and the one I bought from Desert Auto Parts a while back for the last Charger I had. I want to do it right (as far as I'm concerned) and not do any cutting so I've drilled about 80 spotwelds and have about 80 to go.
 

Attachments

  • 1967 Charger 2 001.jpg
    1967 Charger 2 001.jpg
    64.2 KB · Views: 297
  • 1967 Charger 2 002.jpg
    1967 Charger 2 002.jpg
    63.9 KB · Views: 292
Wow...bring on the bondo eh? That's nuts. Progress is looking good Chris. Gotta love the spot welds, bundle of joy!
 
That is a ton of mud in that quarter, maybe you could consider having a donor corner cut from another car and starting over with better metal. Could save time and $$ in the long run.
 
Yeah, I'm going to try and find a corner and weld it in. The bad part is there was no red paint underneath it. Which means that I did that almost twenty years ago. With age comes wisdom.
 
I know a guy in ar that has a really nice set of corners on a 6 or 7 here's a couple pics
 
PM if interested wouldn't post pics

Joey has this someplace on the site, but i keep it handy for some folks i know Its toward bottom of the page and usually with images not working, its because there to large.. This will fix them up good for you..

http://www.freeimageconverter.com/

Chris, im following along myself.. The 67 Charger was my first Mopar at the ripe age of 17, Mine was white with a maroon interior. Good luck to you!!
 
After 5 Red Wasps, 200 welds, and 5 days, I have the new trunk separated from the frame rails. Now I'm looking at this thing and I'm begining to wonder if what I thought was the best way to put it in is the best way. Going from underneath is not an option. I don't want to remove the excisting frame rails. If I go in through the quarter panel, I'll have to remove (other than the quarter) a few support brackets that go up into the roof panel. My other option is cut what I have down and cut the floor out of the car. I took a picture of what I'm thinking of. The X's split the frame rail. The dashed line outside the frame rail is where I'm thinking of cutting it. I coulds split the frame rails, but I want to be able to get to the underside to seal it off. Any suggestions?
 

Attachments

  • New Trunk Pan.jpg
    New Trunk Pan.jpg
    80.6 KB · Views: 241
Its great to see your 67. Keep up the good work.Here is my old 67.
 

Attachments

  • dadstoy.JPG
    dadstoy.JPG
    153.6 KB · Views: 242
Looks great 67. I love that color too. I haven't completely decided on a color yet. I've been thinking about something similar to that blue.
 
If you did cut it down where you have it marked would it still fit in threw the trunk opening? I know there isn't much room in the 66-67 trunks.
Aren't some of the replacement floors for other B body floor pans seemed in the middle? It's not ideal but could you cut it in the middle and slide each half of the the pan in then?
 
I agree, right down the middle if you have a plasma cutter or know someone who does, It would be a good way to hide some repair/replacement lines and still be able to seal underneath. Im trying to place this, but its been a life time ago since i had mine and the trunk is so small... Good luck with it, if you do consider this, id do some measuring and maybe a piece of card board to mock up and make sure both will fit this way..
 
After spending Memorial Day morning at the Huntsville, Tx Fairgrounds, I was "inspired "again. I came home and decided to strip the door. I's like to sand blast the car, but the process of getting it to and from is my biggest hindurance. I have pics, but until I go over how to make them smaller, I (may) hold off.
 
thumbs.gif
You'll get it! That image converter works well i left loneagle.. Did you figure out the trunk pan yet? just curious, I know how small an area your dealing with! 67440chrg thats a beauty!
 
I think I'm going to cut it down the middle and weld it back. I'm going to call around to some body shops and see who has a plasma cutter. Can't cost too much to cut the thing down the middle. I just can't see pulling the rear quarter due to the braces inside.
 
I agree, and in the middle i do think you'll be able to get it sealed, Dealing with such a small area makes it tuff.. I wouldn't want to take a quarter off to do this and i don't think anyone would charge that much to cut it for you. Good luck with it!
 
If you have a saws all that would work to make the cut. Use some masking tape to mark the cut on the floor pan, use the tape as a guide to keep the edge straight. Start with a new metal blade for your saw, take your time and you'll be just fine.
 
Although I haven't posted on this thread, I've been busy building my front bumper. I've almost come to the conclusion I'll fiberglass the new bumper to the car. Has anyone had experience in fiberglass? My flat panels are a bit wavy. What's the easiest way to fill that in?
 
Auto Transport Service
Back
Top