You are using an out of date browser. It may not display this or other websites correctly.
You should upgrade or use an alternative browser.
You should upgrade or use an alternative browser.
1969 Dodge Coronet R/T restoration, going one piece at the time
- Thread starter Wietse
- Start date
Wietse
Well-Known Member
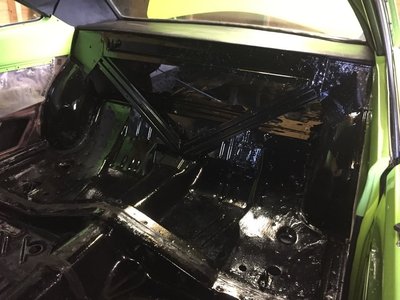
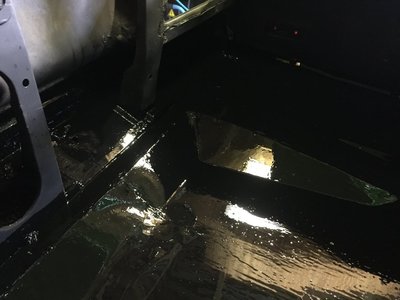
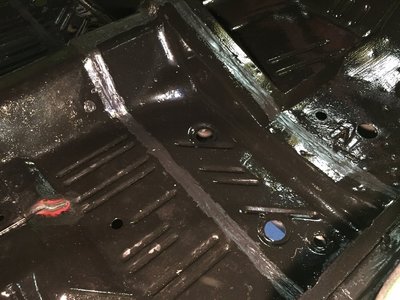
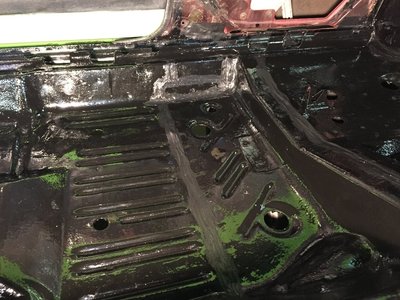
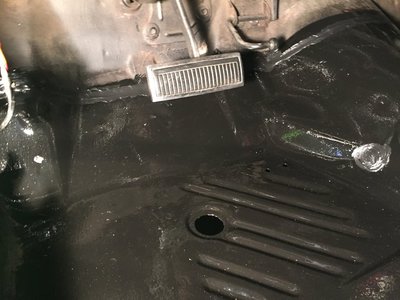
First coat of POR 15 is in place.
I let it dry for a few more hours and apply a second coat.
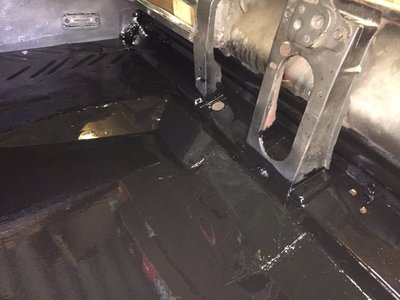
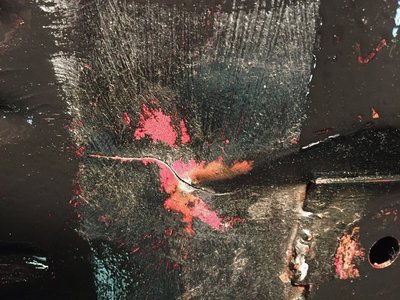
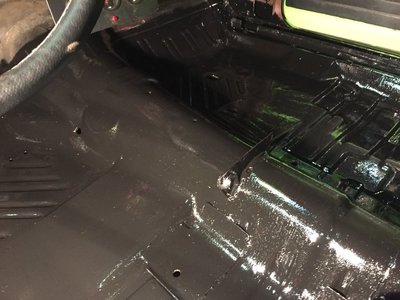
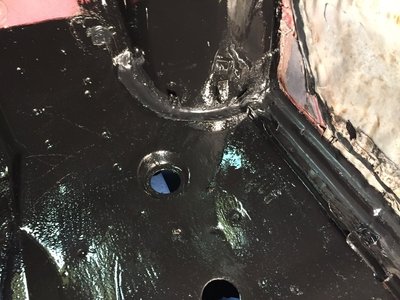
Unfortunately last moment i found a crack in the bottom
Guess this is due to the tranny mount that has been pulling and twisting here.
Tomorrow when the paint is dry is will have to drill the ends, grind it out and weld it.
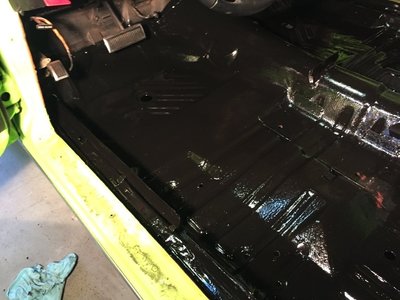
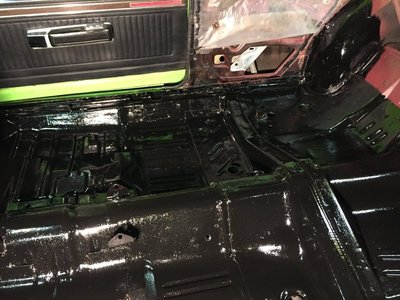
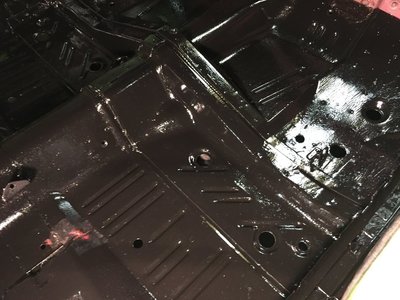
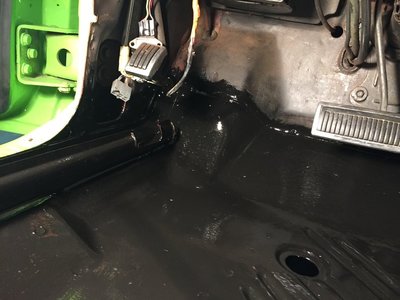
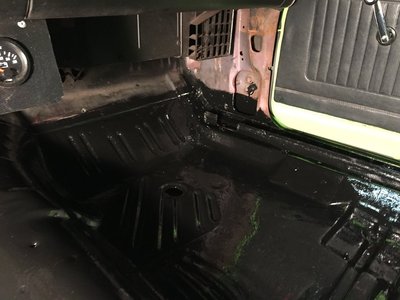
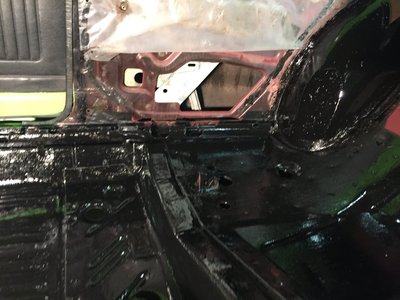
I let it dry for a few more hours and apply a second coat.
Unfortunately last moment i found a crack in the bottom
Guess this is due to the tranny mount that has been pulling and twisting here.
Tomorrow when the paint is dry is will have to drill the ends, grind it out and weld it.


CoronetDarter
Well-Known Member
Looking forward to your build thread. Coronets are awesome cars and yours will be gorgeous when completed. I started a resto thread my 69 Coronet too; let me know if you ever have questions. See here:
http://www.forbbodiesonly.com/moparforum/threads/my-69-coronet-project.75162/
To answer your question; if you're up to it I would remove the dash. Yes, the windshield has to come out first, but removing the dash opens everything up. At that point you can detail the inside firewall, refurb the windshield wiper pivots, brake assembly, etc. Take a look inside the back of the dash too; on my car the inside dash was coated in rust. I wound up removing all the wiring, gauges, etc and having the dash media blasted. Of course then it had to be repainted, then had to install a new dash pad because the original just wouldn't do. And since the gauge cluster is out might as well refurb the gauges. And that AM radio sure would be nice upgraded to digital with MP3 capabilities. On and on it goes....
Wietse
Well-Known Member
I am not really keen on removing the window now actually...scared 
As far as the dash goes, i already did the rally cluster and everything is 100%. (Just external need some touch ups)
I will remove it anyway, together with everything else that can be unbolted.
Also the heater box will come out obviously, that way i hope i will end up with a bare dash frame.
That way i can clean up and slap the fire wall and dash frame in the POR 15 as well.
I already have a new dash pad (upper) to be installed and i will have to get a new dash wiring harness also.
This one is cut up too much and already have some electrical gremlins flying around there.
For the front window, i am thinking of removing this whenever the exterior of the car needs to be done, or if i want to...whatever comes first.
It's nice being Sublime Green, but from all i found this car originally was R6 red, which maybe one day it will be again.
You had some project as well on your car, still need to read all but just jumped forward to see the results
That car came out really nice!
And i've got the second coat of POR 15 in, that stuff dries faster then i was expecting.
I checked the section where i started expecting it still to be wet as it is so shiny, but instead is was already "tacky" so had bottoms up my fresh cup of coffee and get started.
Tomorrow's plan is to weld the crack, get the seams filled with sealant and once dry get the top coat of POR 15 in.
oldbee
Well-Known Member
They have no humor at all!!Then i would be a dead man walkin.....
Wietse
Well-Known Member
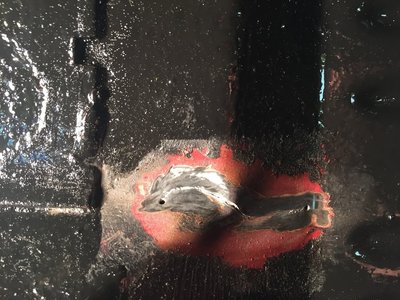
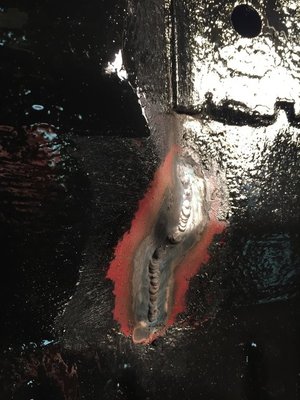
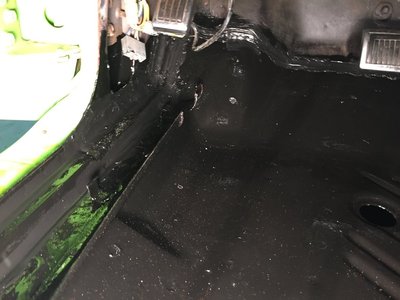
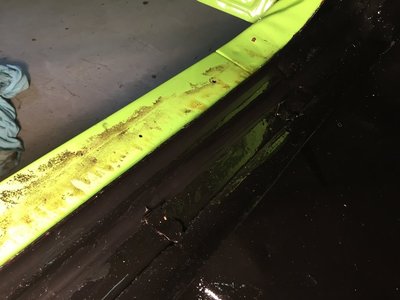
This morning i sorted my crack!
Guess that came out wrong
I cleaned it up and drilled a 2mm hole on both ends to prevent it from starting again.
After i straightened it up and created a little grove with a Dremel.
I only have a TIG welding machine but it did the trick, after cleaned it up and slapped POR 15 on it inside and outside.
Got all the seams refilled with sealant and now letting it dry.
If that is cured in a few hours i can lay the top coat of POR 15 and the floor is done, and that will never rust again. (at least from the inside)


CoronetDarter
Well-Known Member
It was my first time digging into a resto project too, and it was intimidating. This site has great members that walked me through the entire build. The biggest take-away for me was to break each part of the resto down into it's own process, otherwise it's easy to become overwhelmed. Use the Search function within each forum and you'll find numerous threads on the subject that you'e tackling. And take pictures - literally hundreds of pics. I have well over a thousand in my album and I went back and studied almost every single one at some point in the build.
Going back the windshield; once you dive in you'll find like most other things it's not so bad. It's held in by the gasket and the trim, no glue. Probably the most time consuming part is carefully removing the trim so it doesn't kink. Using a helper, the glass lifts right out. I stored all the Coronet's glass in a guest bedroom for over a year - having an understanding wife is a God send.
Going back the windshield; once you dive in you'll find like most other things it's not so bad. It's held in by the gasket and the trim, no glue. Probably the most time consuming part is carefully removing the trim so it doesn't kink. Using a helper, the glass lifts right out. I stored all the Coronet's glass in a guest bedroom for over a year - having an understanding wife is a God send.
Wietse
Well-Known Member
Yeah it's easy to bite more then you can chew on with these things.
But i am doing bit by bit and i am confident with the help of all you guys on the forum.
99% of the things you come across is there already, and if not there are plenty people willing to share their experience.
As for the afternoon and evening, i noticed the sealant was still not dry so did not start applying the last coat of paint.
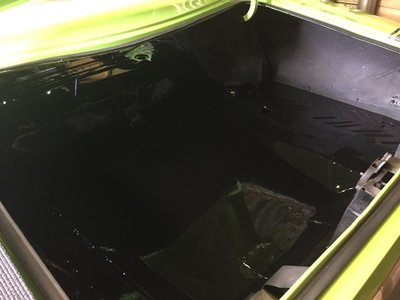
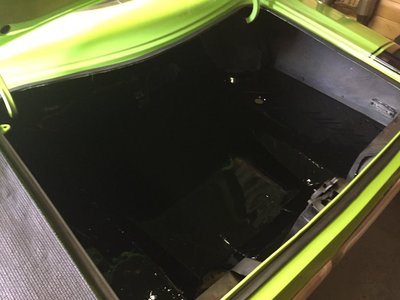
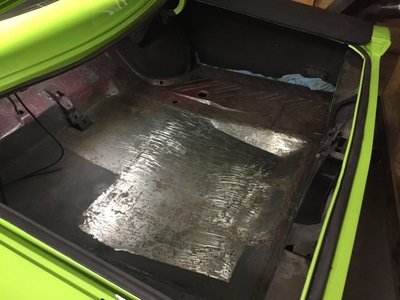
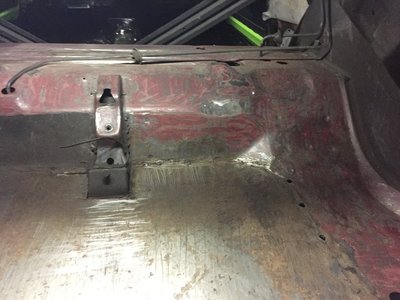
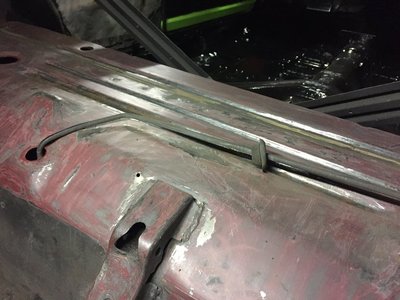
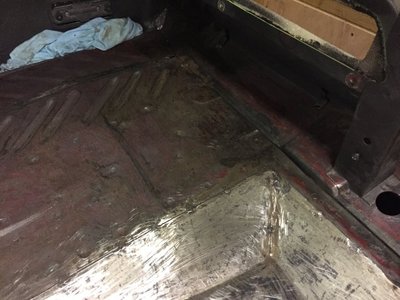
Instead i made a good start on the trunk, it was all sprayed black with some weird stuff.
Was easy enough to remove it with a paint scraper, although it takes forever.
Also ripped out the old sealant as far as i went, just be sure there is noting growing underneath.
But so far so good, only surface rust and everything is dry so not much to worry about i guess.


Wietse
Well-Known Member
When i removed my rear light harness i already knew i will need a new one.
I was looking at Classic Industries for a replacement, but they have 2 versions:
Rear light Harness with 1 light option
Rear light Harness with 2 light options
Links:
https://www.classicindustries.com/product/1969/dodge/coronet/parts/mb2475.html
https://www.classicindustries.com/product/1969/dodge/coronet/parts/mb2476.html
Does anyone know what the difference is between them?
My guess is for the reverse light(s), mine has 2 but maybe i am missing something.
My car also does not have a light in the side markers.
Wietse
Well-Known Member
Spend another afternoon cleaning up the trunk, from the rear seat to the tail lights.
Overnight i will let it dry completely with a heater in the car blowing some warm air around, tomorrow POR time again.
Once the trunk has 2 coats of that and new sealant i can paint the top coat in 1 go through the complete car.
Now some time to give me knees and back some rest after all that abuse, i'm f*cking broken!!
I stripped all the undercoating off the bottom of my car . . . and more. One think that I did notice in my door was that any place that there was a impact ( had something pointy strike the outer door ) the undercoating in the door was chipping away and easily removed with your fingers.
I think a fully painted bottom of the car looks incredible . . .
View attachment 512881
For getting that undercoating off the bottom of the car I would highly recommend a needle scaler - like this
View attachment 512882
It will save you a lot of time . . . ask me how I know . . .
Wieste , I am not hijacking your thread. Your car is looking great but I really needed to ask this gentleman a question. I see you are outside on your rotator, how in the world did you get your car to look like it does in the picture without it rusting faster than you could fix it?
Did you tarp it at night and when you couldn't work on it? I don't have a shop big enough to work in and am amazed at how you did this. Or maybe you were able to jump on it and get it done quick?
Wietse
Well-Known Member
Guess that picture was taken just after blasting, any way depending on what paint you are going to use you don't have to run to get it in the paint.
The POR 15 i am using now might adhere even better on a rusty surface you will get after blasting, once the paint is on and dry it will stop the rust process completely.
Just my imo, if he does not read it you could send him a private message as well.
I don't feel hijacked, open discussion here
The POR 15 i am using now might adhere even better on a rusty surface you will get after blasting, once the paint is on and dry it will stop the rust process completely.
Just my imo, if he does not read it you could send him a private message as well.
I don't feel hijacked, open discussion here
Wieste , I am not hijacking your thread. Your car is looking great but I really needed to ask this gentleman a question. I see you are outside on your rotator, how in the world did you get your car to look like it does in the picture without it rusting faster than you could fix it?
Did you tarp it at night and when you couldn't work on it? I don't have a shop big enough to work in and am amazed at how you did this. Or maybe you were able to jump on it and get it done quick?
All of the work on the car was done in my shop. The picture that you see of priming the bottom of was done in 1 day - I pulled it out of the shop, attached it to the rotisserie, painted the bottom of the car, removed it from the rotisserie, and got the car back in the shop that same night
( unfortunately, with the rotisserie attached to the car, it will not fit in my shop unless I leave the shop door open - and I don't want to do that ).
In other words . . . I need a BIGGER shop ! ! ! !
Wietse
Well-Known Member
BeeKool
Well-Known Member
Looks nice. Good job on not getting the stuff where it's not wanted.
It takes months to get off skin.
Some dripped through the body plugs on my floor pan onto shop concrete. Its Still there
I was looking at your before pics. I think POR15 in the trunk was a good choice
It takes months to get off skin.
Some dripped through the body plugs on my floor pan onto shop concrete. Its Still there
I was looking at your before pics. I think POR15 in the trunk was a good choice
Wietse
Well-Known Member
To be honest, the garage floor has plenty spots with paint 
Once the car is movable i hopefully can scrape most of it off, anyway plan for next year is a new/bigger garage for my mopar!
POR15 works perfect, just needs a good preparation with the degreaser and metal prep and paints on very easy.
Once the car is movable i hopefully can scrape most of it off, anyway plan for next year is a new/bigger garage for my mopar!
POR15 works perfect, just needs a good preparation with the degreaser and metal prep and paints on very easy.
Thank you, I love the outside of your car, hopefully someday I will get mine there. How did the seam sealer work out for you? Did you like it, there are so many brands.Guess that picture was taken just after blasting, any way depending on what paint you are going to use you don't have to run to get it in the paint.
The POR 15 i am using now might adhere even better on a rusty surface you will get after blasting, once the paint is on and dry it will stop the rust process completely.
Just my imo, if he does not read it you could send him a private message as well.
I don't feel hijacked, open discussion here
Wow that sounds like a very busy day, thanks for the reply.All of the work on the car was done in my shop. The picture that you see of priming the bottom of was done in 1 day - I pulled it out of the shop, attached it to the rotisserie, painted the bottom of the car, removed it from the rotisserie, and got the car back in the shop that same night
( unfortunately, with the rotisserie attached to the car, it will not fit in my shop unless I leave the shop door open - and I don't want to do that ).
In other words . . . I need a BIGGER shop ! ! ! !
Similar threads
- Replies
- 7
- Views
- 468
- Replies
- 0
- Views
- 213
- Replies
- 41
- Views
- 5K
- Replies
- 114
- Views
- 4K
What's it Worth
68 Coronet R/T on eBay. YEP it's green!
- Replies
- 78
- Views
- 3K

