• When you click on links to various merchants on this site and make a purchase, this can result in this site earning a commission. Affiliate programs and affiliations include, but are not limited to, the eBay Partner Network.

1971 B-Body prefabricated metal brake lines

1971 Charger, 8 3/4” rear end, 10” drums.

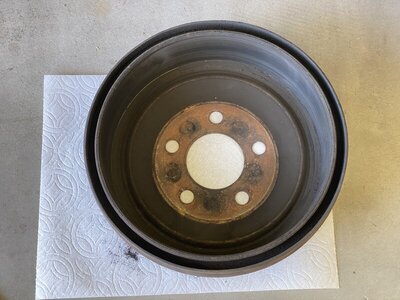
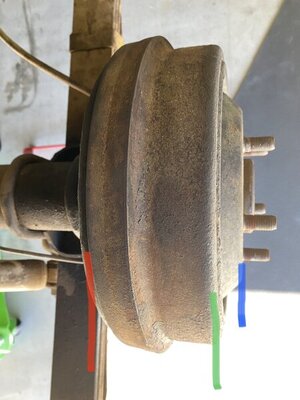
I’m getting three different overall widths from drum to drum, depending upon what point on the drum I measure from.

54” when measuring from red line to red line

61” when measuring from green line to green line.

62” when measuring from blue line to blue line.

To get an accurate measurement, I need to know which of the three lines I should be measuring from drum to drum as marked in my photo.

red = inner drum edge
green = outer drum edge
blue = outer hub surface
or other location not any one of these three, maybe the base of the fitting on inside where the lines attach?

If you’ve never done this before, like me, for Dr Diff to state measure from drum to drum is insufficient information. Have to know where on the drum to measure from.
3D41C6E7-5D36-459D-A6C6-316D33568CC5.jpeg
 
Speaking of the drum diameter, I don’t know how to properly measure that either. I think these are 10” drums, but now I’m not sure.

I don’t think I can delete this post, but I found that the correct way to measure drum diameter, is the inside diameter of the drum, which is 10” on mine. Now to determine the correct way to measure drum to drum rear end with..

Are 10” and 11” drums the same overall depth, inside to outside?


E964BDC4-AA17-4190-B4AE-329EADD9F214.jpeg
 
Last edited:
I’m coming up with different measurements than post #20. None of my measurements match his. I know this car does not have its original casing in it. It has a 742 casing, the original should have been a 489. The rear end housing may not be original either.. I just know my measurements don’t match post #20. Will have to talk directly to Dr Diff. 8 3/4 rear with 742 casing, 10” drum brakes, that’s all I know about this rear end.

Unfortunately, I have no idea what the measurements should be for an original 71 Charger 8 3/4 rear. If post #20 is correct for original OEM, then my rear must not be.

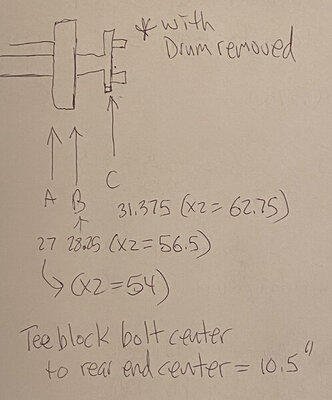
Measurements in the photo are from center of rear end to the points shown in the drawing, then doubled to get the full width.

0A28E502-A2C7-47F8-A969-E4156DADCDA5.jpeg
 
  • 8 3/4 B Body '71-'74= 57 7/8" flange to flange
 
8 3/4" rear end widths, drum-to-drum:

A BODY
'66-'72= 57 1/8"

B BODY
'62-'63= 58 1/2" (And '64 Max Wedge)
'64 = 60 7/8" (Exc.Max Wedge)
'65-'67= 59 1/2"
'68-'70= 60 1/8"
'71-'74= 63"
'71-'73 wagon= 64 3/8"

C BODY

'65-'69= 61.75"
'70-'71= 63.0" (Chrysler & Fury)
'70-'73= 64 3/8" (and '69 wagon)

IMPERIAL
'65-'66= 61 15/16"
'67-'69= 62 5/16"
'70-'71= 59 3/4"
'72-'73= 64 9/16"

E BODY
'70-'74= 61 5/8"


Which would be C on your diagram.
 
After measuring yet again from using the point C, the outer face of the axle. My overall width is 62.875” (63”). Matching the specification shown in post #25 for 71-74 B-Body.

Center of tee block bolt to center of rear is 10.5”. Dr Diff’s choices are 7.75” or 11.25”. Mine is neither..

Also for 71 Charger B-Body his largest overall drum to drum width choice is 61.75”. No selection for 63” (mine).
 
Ordered lines from Doctor Diff. He said he makes lines for 63” rear ends. Will see how they work out.
 
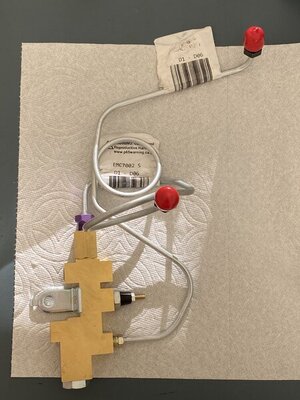
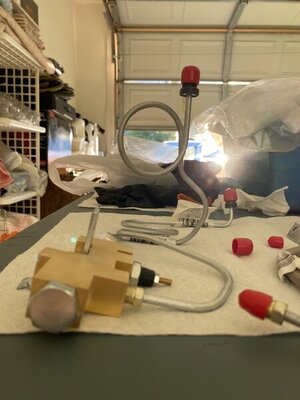
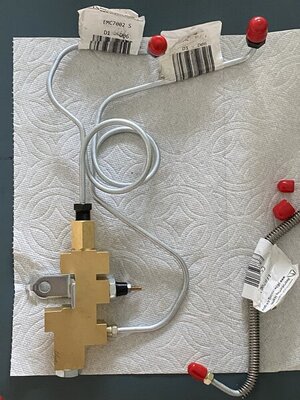
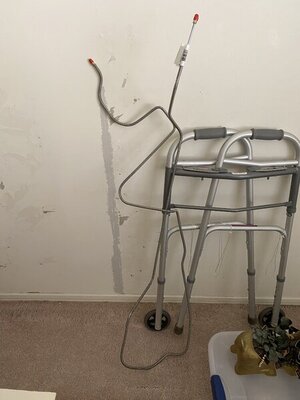
Got the lines from Dr. Diff. I don’t see how the Master lines, when attached to the proportioning valve, will even come close to connecting to the Master Cylinder’s ports.. It looks all wrong to me..

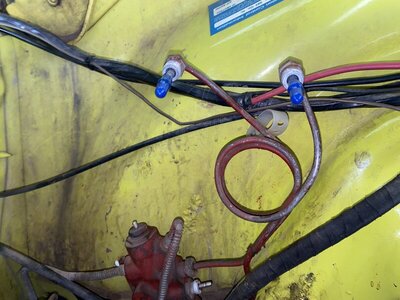
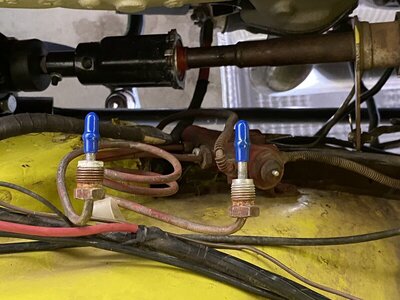
Compare with my old lines showing where they need to be.

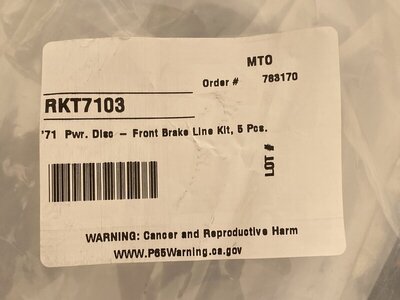
The front disc line kit was for 1971 Power Disc.

I did not realize Dr. Diff does NOT fabricate these lines when I ordered them. I think these may be “Right Stuff” lines. It sure looks like they drop shipped me the Wrong Stuff though..

843C2BE0-5EB3-44CB-9B68-2A1C99EEE19B.jpeg F0EDA94D-0831-4A07-A22B-8AF3B3A3BF56.jpeg 92936CC0-4E02-4CB7-B40C-E9B82D3B7DA0.jpeg 11831CE6-8D76-4B12-AFB3-ECF3AA32B0B7.jpeg 4ABFD666-BBDD-4923-95EF-BFBC83FAB9F9.jpeg
 
Cass has The Right Stuff drop ship... they fawked my order up on my '64 lines, after $66US to drop ship, and sent me bare steel vs the stainless I paid for. Cass at least credited me for that..

..what happens when you turn that top line around... purple fitting to master?
 
Turning the top line around with the purple at Master end improves things. I think that’s how it is supposed to be. Though, it looks like I’m going to have to do some minor bending to get the ends aligned properly.

That is why I didn’t want to get stainless steel, because I was doubting that the lines, as received, were going to fit without me needing to do bending on them.

I saw the black threaded ends and thought they were both meant to be on Master end.

They have the rear Master end purple and the front Master end black.

784B781E-1475-45AF-9A53-A121FD6BBCC6.jpeg
 
I think I’ve got the correct end matched up to the correct side of the car for the passenger caliper line. This line looks like I’ll need to do some bending on it. The old passenger caliper line was a total custom bent line, not having “factory” bends, so I can’t really use the old line as a template for checking the new one.

Cass said to lay the line across your lap and bend gently to remove the shipping bend on the front-to-rear line.

The walker is for me after working on the car all day haha. My back has been hurting all week and I haven’t done much other than remove the rotors.. The booster and master cylinder just arrived this afternoon.

6F534E5E-3844-4235-AF6A-C1558C0C3DC2.jpeg A42D931F-1A37-4F91-B862-DCF6797E188B.jpeg
 
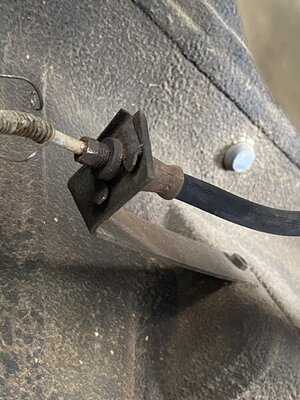
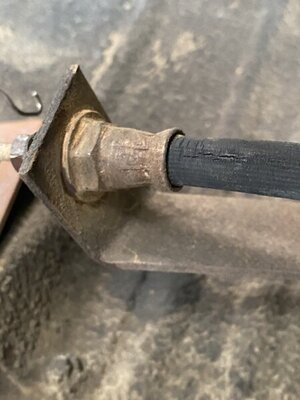
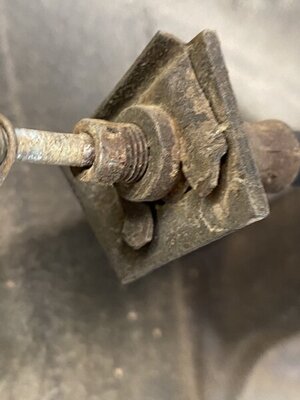
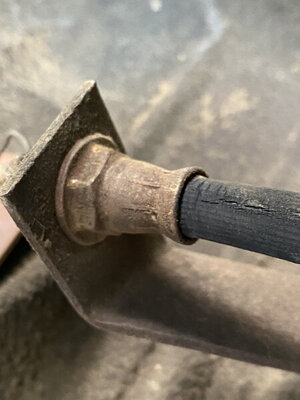
Any suggestions how to remove the front to rear brake line where it attaches to the rear hose and bracket that mounts to the unibody?

The problems. The nut on end of the line is seized to the hose, and I’ve been unable to detach the hose from the bracket. Even if I cut the hose and hacksaw the line, the hose fitting is still seized to the bracket. I have already hit the line threads with WD40, which hasn’t helped.

The new hose fitting has a snap ring on the axle side, the old hose doesn’t appear to have a snap ring. The U-Shaped wedge piece on the proportioning valve side of the fitting doesn’t want to budge when hitting it with a screwdriver and hammer.

01133ECE-7375-49A6-8F67-65E69E348D59.jpeg A7030F3A-C6A8-4966-B0A4-D0E398BCEAF6.jpeg 81058A52-901B-4694-B0B9-89DD61569110.jpeg 3E7C11AE-961C-4F4B-8AC1-651754CA556F.jpeg
 
I have had good luck using channel locks on the retaining clips. I would soak that fitting good for a while, get the retaining clip off then you can spin the hose off the brake line. Soak and heat will get that fitting free if your not planning to replace the hard line.
 
I have had good luck using channel locks on the retaining clips. I would soak that fitting good for a while, get the retaining clip off then you can spin the hose off the brake line. Soak and heat will get that fitting free if your not planning to replace the hard line.
I’m replacing everything but the brass Tee-Block. Doctor Diff did not have a Tee-Block for my car in stock. So I was going to try to reuse the existing Tee-Block after cleaning it.

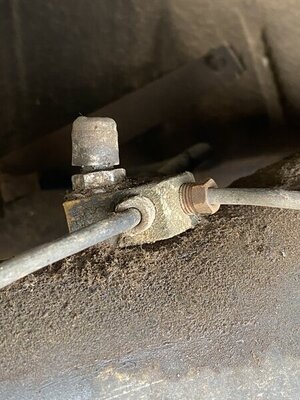
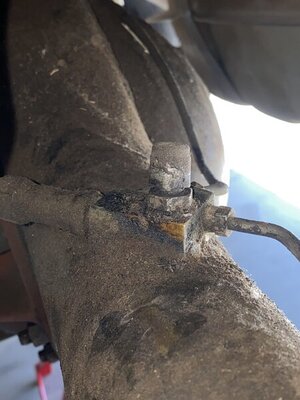
The only nuts I have been able to turn so far, back there, are the nut holding the Tee-Block to the rear axle, and the nuts at each wheel cylinder. The metal line nuts at the Tee-Block don’t want to turn. Oh, and I haven’t yet tried to turn the nut on the hose that screws into the T-Block.

The fittings are so close to the gas tank, which has about 2 gallons of gas in it, that I don’t want to blow myself up trying to heat the Tee-Block and the hose line junction with a torch..

There is a cap above the nut that holds the Tee-Block to the axle. I think that is some sort of pressure release valve? I hope that little cap is not plastic, as heat will melt it. I have not been able to remove that cap. It just spins in place but doesn’t seem to want to come off.

20300134-1CF3-4C39-A6BB-AB5C494F8354.jpeg DE06DC15-0660-4024-AE3F-ACB3F80B88EC.jpeg
 
Well if your replacing all the hard lines bust out the tin snips and cut the lines. No need to fool with freeing up the fittings. You can get the lines out of the t-block when its on the bench.
 
Well if your replacing all the hard lines bust out the tin snips and cut the lines. No need to fool with freeing up the fittings. You can get the lines out of the t-block when its on the bench.
Yes I can cut lines and hoses. Problem is the U-wedge (or whatever it’s called) that is holding the rear hose to the metal mounting arm refuses to budge. That sucker is in there TIGHT. And no snap ring to loosen/remove on the opposite side.. Looks like someone just pounded that U-Wedge piece in there HARD, to insure it would be extremely difficult to remove it. I have hit it with a map gas torch and WD40 after to let the cool WD40 soak in and it still won’t budge.

Again, I can cut all lines all hoses, but that doesn’t solve the stuck U-Wedge problem.

Only thing I can think of doing now is remove the entire back seat from the car, so I can remove that metal bracket arm entirely from the car. Then bludgeon that U-Wedge piece until it comes loose.

A Mopar restorer guy at a car meet, last night, told me I should be able to replace my all my brake parts in two hours.. I’d like to see him try that with this car.. I know if we bet money on that, he would lose.
 
Ok... Every time you ask a question you question the answers. Are you also the guy at work that needs read receipts on emails sent?

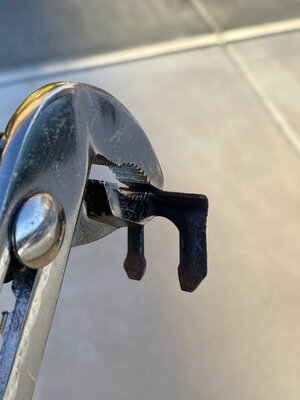
Channel locks positioned like the pic, rotate up then back down and it will be off before you know it.

IMG_1963.jpg
 
The axle splitter Y block is held on by a HOLLOW stud and that is just the dust cap to keep **** out. It is the vent for the axle housing. Try turning the entire block with an adjustable or similar WHILE you also turn the "nut" on the stud. As for the C wedge that holds the line. Some are just a bitch, channel locks from the bracket to one of the "legs" usually makes quick work of them, but you'll need a new one to install the new hose.
 
Ok... Every time you ask a question you question the answers. Are you also the guy at work that needs read receipts on emails sent?

Channel locks positioned like the pic, rotate up then back down and it will be off before you know it.

View attachment 1193700
I tried channel locks earlier without success.

I gave it another try. Positioning the locks like in your photo didn’t work. I was not able to grab onto the U clip thing well enough in that orientation. I had to turn the channel locks 90 degrees as shown in my photo. Squeeze them as tight as I could and jerk that thing around hard. It then eventually broke loose.

And no, I don’t do read receipts, haha.

4E638BA9-229D-4DFB-A26F-A2F277835913.jpeg
 
Auto Transport Service
Back
Top