• When you click on links to various merchants on this site and make a purchase, this can result in this site earning a commission. Affiliate programs and affiliations include, but are not limited to, the eBay Partner Network.

41 Plymouth gasser

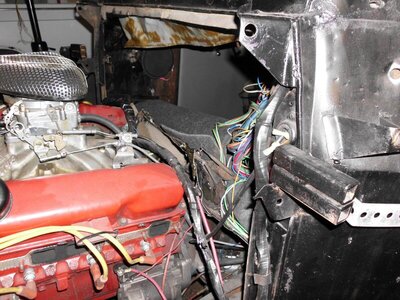
Today's saga. I removed the aluminum firewall so I could cut clearance for a real transmission fill tube and stick. I took great delight in pitching that stupid flexible dip stick set up. Also need to correct the firewall exit point for the steering column once I've repositioned the steering box. Hope to have metal for making the steering box mount by Tuesday. I've already cleaned up the left frame rail in anticipation of that.

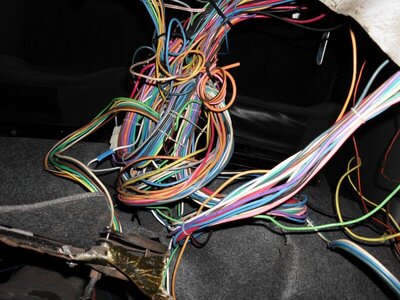
This mess of wires was tied up on top of the steering column. Looking at the fuse panel they must have gone with one of the biggest circuit counts possible. There's a spot for cruise, power windows, A/C, and so on. I don't think any of that's appropriate for a gasser, but that's just me. Now to figure out how many of these wires are just looped up to get them out of the way vs 'sort of' hooked up to something, somehow, somewhere.
SANY0001.JPG SANY0002.JPG

Unrelated subject: do you think a conventional mechanical fuel pump will pull enough vacuum to work with -8AN line, or should I just go with 1/2" aluminum line or assume the use of an electric mounted behind the fuel cell?
 
Last edited:
Its a toss up on opinions. But it is better to push it forward than pull it. I know its a different critter but look at the 24v Cummins in the trucks. Kept killing the injection pumps until the electric feed pump was put either in the tank or close by the tank. If its in the tank its even better as the fuel can cool the pump and the pump noise goes away. Are you going to keep the frame mounted brake or convert to swing from dash area?
 
Its a toss up on opinions. But it is better to push it forward than pull it. I know its a different critter but look at the 24v Cummins in the trucks. Kept killing the injection pumps until the electric feed pump was put either in the tank or close by the tank. If its in the tank its even better as the fuel can cool the pump and the pump noise goes away. Are you going to keep the frame mounted brake or convert to swing from dash area?

Thanks much for the input. I can't disagree with your points. I guess it was a theoretical question more than anything else. I'm resolved to go with the electric pump back by the fuel cell. FYI I did inspect the inside of the cell for corrosion, based on your input. Fortunately it's very clean inside.

Regarding the brake pedal setup; for now I'm ok with it as is. The firewall would require a fair amount of fab work before it would be strong enough to support a swing pedal setup. I've had a couple of street rods over the years, so have run with both styles.

Spent some time with wiring this afternoon. The headlight switch had been wired up with the power feed going to the wrong spade. I can't imagine how they missed that as there was 6" of a clearly heavier gauge red wire still attached to the connector. Seemed like a no brainer, but they'd connected power lead to a lighter gauge wire elsewhere on the connector. That said, the heavy red wire had an inch section of bare wire showing, so the error may have avoided a melt down. Jumping things with a couple of alligator clips I was able to get headlights, dash lights and tail lights to work. Verified the brake light switch works and has power to it. Had to switch some wires in the trunk around to get brake lights. The LED's do look nice illuminated.

New headlight switch ordered this evening. I didn't like the looks of the one in the car. There'd been a toggle switch in the dash I couldn't figure out. Turns out it was to control an air horn which was mounted on the drivers side cowl. I'd already removed that stupid thing. The horn had actually been wired up with a relay. I was amazed at that.

Spent a fair amount of time cutting electrical tape and unwrapping wires. They must have spent hours wrapping up this mess. Every bundle I've opened up has either extra wires in it, wires that change colors through a crimp on splice mid stream or wires that just end. One run had an extra 3' of a brown wire folded back and forth along the length. It's not wire that's part of the harness. Haven't figured that one out yet.
 
When I put the Painless harness in my friend John's 68 c20, the unused but possible to use in the future leads got rolled up tight and wire tied up high but accessible for later.
 
Well, some progress to report anyway. The cold weather doesn't help with heating the shop nor does it do my attitude any good, but I've managed to get a couple good mornings in on the 41.

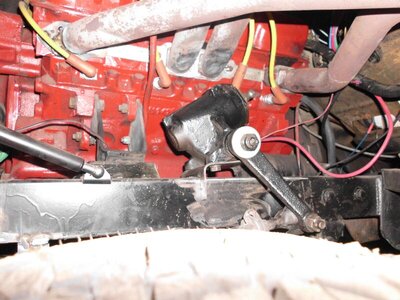
Steering box mount remade. It's now sitting correctly with all 3 bolts fastening it as opposed to the 2 I found originally, (both on one side of the steering box). Output shaft is level and perpendicular to the frame rails. I moved it inboard some to help straighten out the steering column position. The column had been at too much of an angle toward the left as you sat in the car, to catch the mickey mouse steering box/mount setup. The Corvair style box mounting points are not parallel to the output shaft, so you have to mount the box at an angle to get things properly positioned. I've tacked it in place for now.

I moved the box forward a couple inches to improve the clearance around the back header tube. The steering column housing was darn near sitting right on the header before.

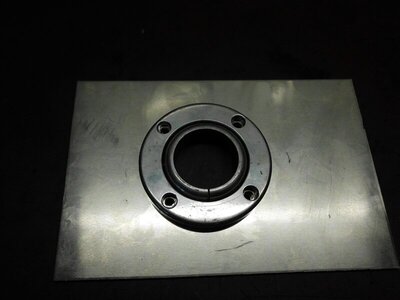
Worked up another aluminum plate to cover the hole from the original steering column location. Picked up this nice swivel style support for the column as it goes through the firewall. Originally the column just went through an oversized hole with some rubber sheet glued to the inside of the firewall to seal it somewhat. I'm making a new shortened drag link as the original one scared me a bit, just being butt welded together, but it was too long now anyway with the box moving forward. I've ordered a steel bushing to slip both ends into and then weld up. I used a tie rod tube from a b body I had laying around.

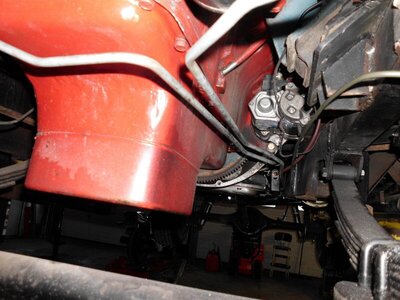
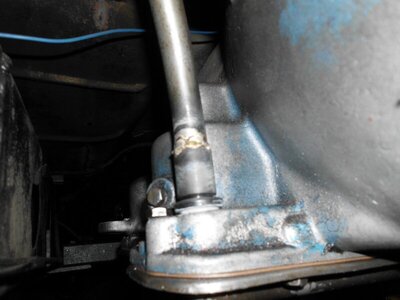
Also replaced the rubber hoses used for transmission cooling lines with steel lines. AND I threw away that damn aftermarket transmission filler tube setup! Modified the oem filler tube bracket to better position it in the car. I then decided to order one of those super duper seals to replace the oem o ring.

You may notice the two center header tubes look a bit beat up on the bottom. When I took the header off that side I discovered they'd been hammered in pretty badly for reasons unknown. I heated the tubes up with a torch to try and open them up somewhat. Certainly better than they were.

SANY0003.JPG SANY0001.JPG SANY0006.JPG
 
Last edited:
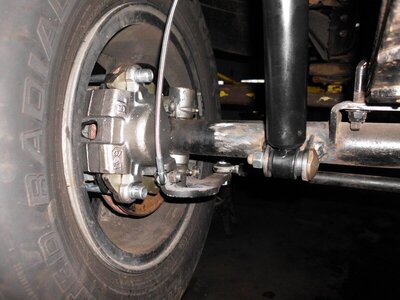
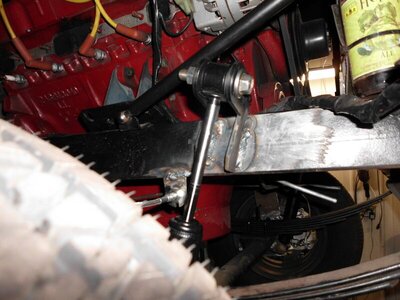
Front shocks and new brake line brackets are in place and brake lines are hooked up. I like the AN style brake lines, and found a bolt on union I like much better than the style that uses one of those c clips to hold it in place.

SANY0004.JPG SANY0005.JPG
 
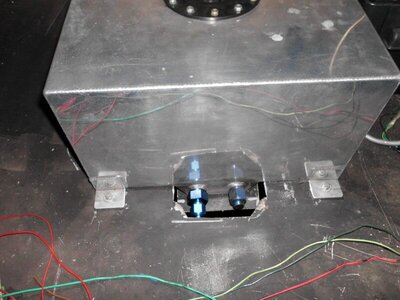
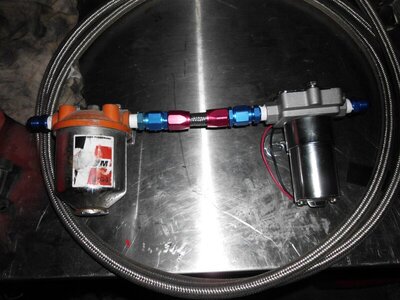
The fuel cell is now installed with the sump to the rear. It positions things nicely to be able to use the rear crossmember to mount the electric fuel pump and Fram fuel filter. Went through the filter housing and replaced the spring, the seals and the filter element. Started making lines. Have the ones from sump to fuel pump and one from pump to filter made. Of course I figured wrong on the number of AN fittings I'd need and had to order a few more.

I confirmed I had exactly enough -8AN line left to cover the length from the back cross member to the position on the firewall where the regulator will mount. Wish I could say I planned that.

SANY0007.JPG SANY0002.JPG
 
Last edited:
Nice. I had one of those Fram filters on my Duster. When I was working at the speed shop, during some down time in between customers and my usual curiosity, I found that there is another replacement filter that Fram made that would go down to 5 microns instead of the replacement unit for that which does 10. C1110PL was the number. Also I've found over the years from dealing with rust sediment getting past any filter made and causing run issues, I epoxied on rare earth magnets to the outside of the canister. No more rust problems. Carters weren't too bad about it but with Holley's its a bigger issue since there are more cavities rust can get into and you can't get out.
 
Thanks for the tip on the filter! More parts showed up today so I'll be back at it again.
 
Well, another surprise. Purely by accident while mounting the fuel pump and filter to the rear crossmember I realized the leaf spring shackles swing back so far they bottom out against that same crossmember. So when sitting static, there is virtually no rear suspension. That probably explains why they'd cobbled in the air shocks; to create a bit of shackle movement by raising the rear of the car.

I spent some time measuring and comparing springs on other cars in the pole barn. I'd been told the rear leafs were from a Dodge pickup, but the dimensions make them more likely mid 60's/early 70's full size passenger car. At least that was the only spring I could find with the front segment length I currently have; 25".

Web sites I've looked at seem inconsistent on rear segment length for the full size springs. Some show 31" and others show 37". It also looks like 2 leaves have been removed from each side. My guess is when first assembled the rear suspension was so stiff they pulled some leaves out to soften things out and then realized the springs grow enough to cause the shackle problem. The car should only weigh about 2900-3000 pds and most of that weight is in front with the big block engine.

So, time to pull the springs, do some careful measuring and see what I should have made for rear leaves, as these are at least 3 or more inches too long. The complicating factor is the front segment length, which needs to remain 25" so the wheels are positioned properly in the rear fenders. Most of the shorter Mopar leaves I've found have a shorter front segment length. I'd like to avoid having to redo the front spring mounts. Some rough measuring gave me the 25" front segment and a 28" rear segment. I have to determine how much arch I need too. Seems pretty straightforward. If I can come up with those dimensions and the right arch that should place the shackles at about 30 degrees from vertical, under load.

If I can get this sorted out reasonably well, the car might launch pretty good!

Good brain teaser stuff anyway.
 
Progress has slowed appreciably. My wife had knee replacement surgery so I've been consumed for the last 3 weeks. She does not make a very good patient!

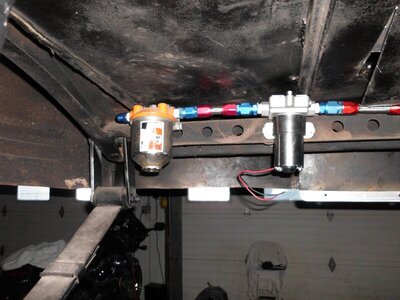
I was able to install a regular transmission filler tube using a better seal arrangement than stock. I'm happy with that. Also a photo of the fuel pump and filter mounted on the rear crossmember.

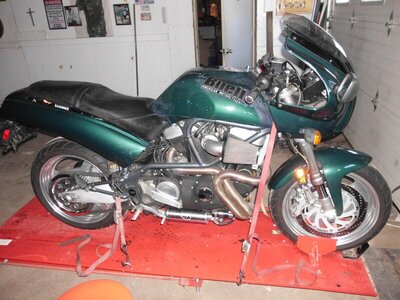
Finally a photo of a diversion project: 1999 Buell S3. I've always been intrigued by the early Buells. Have owned an 1125CR for some time and really like that bike. Wanted to try one with the Harley based engine. Picked it up at a very good price late fall and literally have only driven it a half mile. Anxious to take it for a serious spin.

Putting it kindly, the previous owner (and possibly the one before him) was an idiot. They'd put neon lights under the bike, wired directly to the battery, no fuse and using a house wall switch to turn it off and on. There was also some kind of vinyl wrap done over the green, with overspray of some sort all over the rims, frame, windshield, etc.. Come to think of it maybe they were connected somehow to the guy who did the work on the 41 Plymouth...............

SANY0002.JPG SANY0003.JPG SANY0004.JPG
 
Looking at your fuel pump pics makes me think you could maybe use a spring slider under the frame and ditch the shackles all together...Sliders will also lower the back a little...Might be easier than replacing springs... .02
 
Looking at your fuel pump pics makes me think you could maybe use a spring slider under the frame and ditch the shackles all together...Sliders will also lower the back a little...Might be easier than replacing springs... .02

What a great idea! Got to get my wife on track and then get the car up in the air again and do some measuring. Thanks much!
 
Post up later how wide your springs are...

I have sliders that I had narrowed to fit 2" springs that I will be removing and I don't see ever having anything else with 2" wide springs...

You can always weld a plate into the car and then bolt in spacers at a later time to adjust the rear ride height...
 
Thanks again for your suggestion on sliders. I was able to get out in the garage a bit yesterday and the leaf springs are just plain too long. In order to do sliders I actually have the extend the frame rails or get shorter springs.

Started calling around about a new set of springs. Custom would be pushing $1000.00 for a pair. The difficulty is mine have a 25" front segment and I figure I need a 27 - 28" rear segment. The springs are 2 1/2" wide. I finally figured out last evening 72-93 Dodge pickups have a 24" front and 28" rear, but the back eyelet is reversed. Otherwise I could make those work.

I'm going to start checking street rod catalogs and see what might be available through them.
 
Check around with some of the heavy truck[ semi's] repair shops. There may be a spring company around that deals with them and may have the ability to whip up a set for you.
 
Actually I just got off the phone with a shop like you described. Very helpful and may have a set on the shelf already that would work. Im going to bring one in to compare.

The other option they suggested was to rework my main leaf to fit the car. Sounded like there might be just enough material to turn a new rear eye. Fingers crossed!

This thing is driving me crazy.
 
Unrelated subject: do you think a conventional mechanical fuel pump will pull enough vacuum to work with -8AN line, or should I just go with 1/2" aluminum line or assume the use of an electric mounted behind the fuel cell?[/QUOTE]
I haven't read the whole thread, but.....
For what it's worth, I'm replacing about fifteen feet of braided rubber line that leaks like a sieve (installed by previous owner), with 1/2 aluminum line. That decision is from previous experience having a 1/2 aluminum line on my other car for thirty years with no problems. I am on my second rear mounted (lower than the fuel cell) 150/140 gph electric pump.
For flexible line, I'm doing nothing but teflon from here on out.
 
Well. My wife is slowly improving. It's amazing how ones mental state can affect physical recovery. She's been terribly up and down, as has the recovery. I've not resorted to drinking yet.

Spring shop fixed me up with a set of Ford leaf springs that fit great. Only took an hour to swap them out. I've played with the # of leaves to get the stance I wanted. The shop had these springs on the shelf for years.and cut me a great deal on them. Even said they'd take then back if they didn't work out. Nice guys!

I now need to redo the upper rear shock mount. Original setup doesn't allow for enough compression travel. I'm mad at myself for not realizing this when I replaced the air shocks earlier this winter. Another lesson learned.

I've also ordered a roll of 1/2 inch aluminum fuel line based on your inputs here. Thanks for helping me avoid future headaches.
 
Auto Transport Service
Back
Top