• When you click on links to various merchants on this site and make a purchase, this can result in this site earning a commission. Affiliate programs and affiliations include, but are not limited to, the eBay Partner Network.

'64 Fury Pro-Touring

Another milestone passed today; after 12 years I got the glass, regulator, and locking mechanisms installed in the driver side! This is only a mockup, I'm waiting on the weather stripping, but so far so good!

IMG_0558.jpeg


IMG_0559.jpeg

There's a lot of adjusting to do once the weather stripping is installed but knowing I can get the regulator and such installed is a huge boost to the morale!
 
Your on a roll!! Keep that momentum going! Looking great.
 
Took a few days off over Christmas but got back to work right afterwards, so here's some updated info.

Been focusing on the how all the windows, regulators, trim, and weatherstripping go in the Fury, and while some of it's pretty easy and straight-forward some of it's a real bitch. Once I get everything figured out, and what order the pieces need to go back together, I'll pull everything back apart, clean it up, and get it ready for final assembly.

Got the rear window regulator/glass in and functioning. It took a little while but went together pretty easily:

IMG_0575.jpeg

After the rear window was in place I began adjusting the front, when I noticed I couldn't get the in/out "tilt" of the front window to stay where I wanted. Then I figured out the SC fiberglass doors are missing the mounting point for the tilt adjustment (it's the arm with a threaded knuckle that extends below the vent window), so I spent all day yesterday fabbing up a mount for each side.

The round hole just behind the door hing is where you insert a socket and screwdriver to adjust the tilt; notice there's nothing inside the door.
IMG_0580.jpeg

These are the two mounts I fabbed up, with one for each door. I left plenty of room for adjustment on all the mounting locations since the vent window has LOTS of room to adjust and these mounts pretty much have to move with the vent.
IMG_0581.jpeg

Here's the mount inside the door, and while it's tough to see you can just make out the slotted adjustment screw in the center of the mount; back the adjustment screw out and the top of the window moves out, screw the adjuster in and the top of the window moves inward.
IMG_0582.jpeg

It's been 12+ years since I took the Fury apart so now I've run into a situation where I don't remember what a couple pieces are, nor can I seem to figure it out, so I'm hoping someone can help me identify what the pieces are (pictured below), and where on the car they go.

These two pieces are about 6" long and appear to be some type of interior trim.
IMG_0584.jpeg

These two are also about 6" long, and again, look to be trim pieces.
IMG_0585.jpeg

These two pieces are much longer, about 12", and unlike the others are thin, stamped sheet. What's even more odd is the fact I appear to have 2 of the same piece as opposed to mirrored pieces. Maybe these are extra pieces I accumulated along the way (I've found others!) but I'd still like to identify them.
IMG_0586.jpeg
 
Coming good Bob! The first picture those pieces are fillers at the sides of the dash. The second picture I think those chrome pieces go at the top corners of the back seat at the narrow part of the roof. The last picture, those run along the inside of the windshield pillars. I think. My car is in storage so its a guess.

Too bad about those damn doors, I admire your patience and persistence.
 
Thanks guys, I really appreciate it.
Been hard at work and will post some updates today.
 
Coming good Bob! The first picture those pieces are fillers at the sides of the dash. The second picture I think those chrome pieces go at the top corners of the back seat at the narrow part of the roof. The last picture, those run along the inside of the windshield pillars. I think. My car is in storage so its a guess.

Too bad about those damn doors, I admire your patience and persistence.

I tell ya Mal, if I could find a pair of rust-free doors at a reasonable price I'd change out the glass ones, they're just such a hassle!
 
I haven't posted in nearly 2 weeks but I've been working on the Fury full time every day taking care of a bunch of mundane things that need to be done, so here's an update.

I don't know if I mentioned it before but it's obvious someone who previously owned my Fury smoked in the car A LOT! The damage to the trim, especially the chrome, is pretty extensive, so I decided to try the old-school method of cleaning, a mixture of warm water, 0000 steel wool, Dawn liquid dish soap, and some citrus based cleanser, and the results were remarkable (though not perfect). If this were a show car of any type I would have had the pieces re-plated, but since it's intended to be a beat on driver I'm satisfied with the results.

Here are some "before and after" picture showing what a nice job the old-school method does:

IMG_0588.jpeg

IMG_0589.jpeg

It took me an hour or so to bring all these pieces back to the condition you see them here. I could have continued but you find this method will only take care of so much rust/deterioration, but like I said, it's MUCH better than it was to begin with.
IMG_0590.jpeg

I found a real nice guy, Bob, and purchased a dome light assembly from him. Not sure if dome lights were an option but I don't ever remember my car having one, nor did I find any remnants of the spot welds where the light attaches. Regardless, I used 4 pan-head screws to mount mine and installed an LED bulb (LOVE those things!).
You'll also notice the inner panel mounted in this picture, all part of the weather stripping fitment to follow.
IMG_0603.jpeg

Since the fiberglass doors don't have any holes for mounting the "cat whiskers" I used my cheapy roto-tool and carefully cut them out. Tedious but they worked out terrific.
IMG_0604.jpeg


IMG_0605.jpeg

Sorry about the mess of tools but I wanted to show the cat-whiskers as viewed from outside the car. BTW - the cheapy roto-tool I bought on Amazon is the "Utool" box in the upper left corner and the yellow oblong tool at the right edge of the picture. I highly recommend this inexpensive knock-off, it's worked wonderfully for all the little things I've needed and was 1/5 - 1/6 the cost of the name brand. Do I expect it to last like the name brand? No, but for what I want/need it's working out just fine.
IMG_0606.jpeg

I used a combination of Steele and Metro weatherstripping and this view shows the Steele door surround. This piece, which fits over the pinch weld, includes the windlacing, so no need to purchase any of that separately.
For fitment purposes I used my old, rotted sill plates; I don't want to damage the nice new ones I got from Joe Suchy.
IMG_0607.jpeg
 
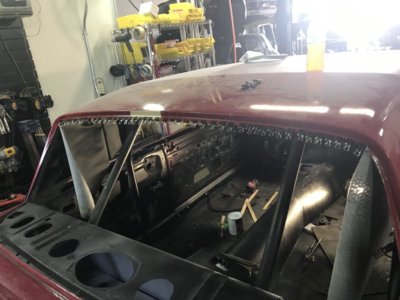
I realized the weatherstripping could not be completed until the headliner was in place, so after years of concern and hesitation I bought a headliner and got down to installing it. I found mine on ebay from classicautotrimnv for about 1/2 the cost of the big guys, and spoiler alert, it fit perfectly and the material is absolutely first rate! I HIGHLY recommend their headliners to anyone in need.

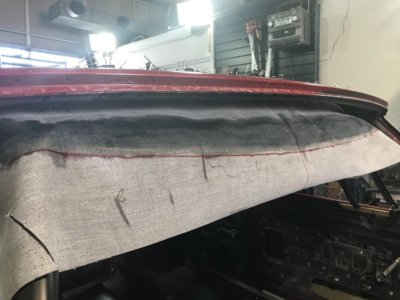
The weather's been cold here in Vegas but it was sunny and warm enough to hang the headliner outside and get the wrinkles/folds out of it. After hanging outside for a couple hours I brought it inside, laid it on the workbench, and began marking the center-line as well as where I needed to trim back the listing.
You may notice the headliner has "65 Fury" written on it. I contacted classicautotrimnv and they assured me the seamstress simply mis-labeled it when she sewed the piece together (they were right :thumbsup:)​
IMG_0609.jpeg

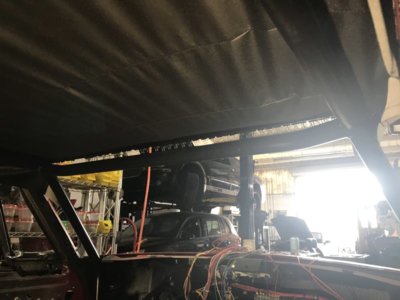
Trying to wiggle the headliner, with rods inserted, around the roll-cage was a bit time consuming, and in hindsight I believe I could have done it quicker and easier, but regardless, I slid the assembly in from the rear, over the cage, and into place.
IMG_0610.jpeg

As the headliner slid forward I tried to keep it centered, which meant lining up the read marks on the listing to the string hanging from the window channel.
IMG_0611.jpeg

Pictures from inside the car as I slid the headliner forward.
IMG_0612.jpeg


IMG_0613.jpeg


IMG_0614.JPG

Sounds stupid but one of the most frightening moments was actually cutting the slot for the dome light to slip through; if I made a mistake here I'd ruin a brand new headliner. Luckily, measured lots, cut once, and perfect results.
IMG_0619.jpeg
IMG_0620 (1).jpeg IMG_0621 (1).jpeg IMG_0622 (1).jpeg
 
Once I got the headliner lined up front to rear I began using spring clips to hold it in place. I bought 144 of the clips online and ended up using about 100 during the install, so glad I bought enough!
IMG_0620 (1).jpeg

I marked the outer edge of the roof line on the headliner and applied contact cement to both it and the "tack strip" on the roof, then waited 20 minutes for the cement to set up.
IMG_0621 (1).jpeg

I had watched lots of videos on how to install a headliner and almost every video talked about getting the headliner stretched lengthwise, with the bows properly in place, getting the ends glued, THEN work on the sides, so that's what I've done here. Don't worry, those waves in the headliner are gone!
IMG_0622 (1).jpeg

View from outside the car after stretching and cementing the front edge.
IMG_0623 (1).jpeg

I'm still waiting on my sail panels to arrive (f'n postal service is 3 days overdue!!!!) but I'm going out of town for a few days so the Fury will have to wait until I get back. The time off will give the cement plenty of time to cure, and as you can see, no waves, wrinkles, or tears!
I absolutely LOVE the LED bulbs I put in the dome and courtesy lights, they light up the interior like nobody's business and use virtually no power. I use a cordless drill battery to power them while I'm working inside the car and have yet to have them drain the battery to a point the lights go out. I now know I am definitely going with LED headlights!
IMG_0624 (1).jpeg
 
Been working steadily on the Fury, bouncing back and forth between different areas of the car while I wait for pieces to arrive, adhesive to dry, etc.

While waiting for the adhesive to dry around the edges of the headliner I decided to start working on the gauge cluster/layout. My gauges, custom ordered from Speedhut, arrive on Tuesday so the timing works out really well.

I went by a local metal supply house and they have a scrap pile you can search through so I scored 2 pieces 18" x 48" of 20 gauge for $5. Finally, something doesn't cost me an arm and a leg to buy! I made a template out of heavy art-board, transferred the shape onto a piece of steel, then began adding the necessary curves.
IMG_0629.jpg

The factory gauge cluster looks flat, but it is definitely not, when looked at from the end there is a slight "S" curve in the panel and I wanted to emulate that. There's also a recessed area at the right end, which makes for a compound curve, so you'll see a slice in the metal just below the lower right screw.
IMG_0630.jpeg

I ordered a pretty typical array of gauges but specified 4" faces for the speedo and tach, as opposed to the typical 3 5/8". The original Fury cluster has 4 3 1/2" (roughly) "gauges" so they fill up the panel well and I wanted to get that same look and feel.
If you compare the picture above with this picture you'll see I've also trimmed the lower edge of the gauge panel, which I also rolled far more tightly, so the lower edge conforms to the dash really well. I'm going to use the same rubber "U-channel" around the gauge panel as I did for the tail light housings.
I am not a fan of flat gauge panels, they do the job but they just don't have the appearance I want so all the gauges will all be recessed at least 3/4" (maybe more) with a raised "surround" for each. It will be much easier to show the design as it progresses as opposed to trying to explain it, but I'm hoping for a clean, almost factory like appearance.
Oh yea, the 2 small circles at the far right end of the panel are for the seat heater switches; they're metal, latching push buttons that glow when power is sent to the seats. If I ever decide to add A/C it will be an under-dash unit so the controls will probably be integrated into the unit, and if not, I'll figure something out at that time.
I plan on using the Edelbrock Pro-Flo 4 efi system, which uses a 7" Android based pad, but I don't want the pad to be visible so I'm working on a way to hide the pad inside the dash so it's hidden from sight and slides out when I want/need it. My intent is to use the pad, combined with an amp and a Bluetooth adapter to play music; I don't want a radio in the dash.
IMG_0631.jpeg


The Speedhut gauges are awesome looking, and Speedhut allows you to customize colors, fonts, ticks, add a custom logo, etc., so below is a mock-up of what the 4" speedo will look like during the day. At night the face turns black and all the fonts glow, including the logo.
The Speedo is a GPS unit and includes a high-beam indicator and turn signals while the Tach includes programmable progressive shift lights. The 4 smaller gauges are fuel level, voltage, oil pressure, and water temp.
Can't wait to see how the Sport Fury logo looks!
Speedo-Day---Small.jpg

Once all the adhesive dried around the edges, AND my sail panels finally arrived, it was time to finish the headliner. For my first attempt at a headliner I am really proud of the results. Yes, there are definitely some areas that I'd like to have turned out better but there is no way I'm pulling this thing out and starting again!
I'm not sure what happened, whether it was something I screwed up or the headliner was a bit off when the seamstress sewed it together, but the rear most bow is not vertical, it's leaned forward, which made the listing difficult to slide into position and finishing the sail areas smoothly, extremely difficult. What makes me consider the headliner being a bit "wonky" is the fact all the other bows are perfectly situated and vertical, no bunching or wrinkling. Having never installed a headliner I have no idea, I mean, maybe all the bows should have been pulled/leaned backwards a bit, which would have made the rear bow closer to vertical. The problem then becomes the center bow, which is where I started; if you lean it backwards it interferes with the dome light assembly.
Like I said, I'm really proud and happy with the results, so here's a couple pix.
IMG_0632.jpeg


IMG_0633.jpeg

I hit the shop at 5am this morning and got all the moldings along the headliner in place, but then forgot to take pix, so I'll post them next time.
 
Been away from the Fury for a few days because of a trade-show but while I was gone my SpeedHut gauges showed up, and DAMN, I could not be happier with how they turned out!

IMG_0640.jpg


IMG_0641.jpg

Made sure the paper templates I'd laid out were accurately sized, and once I'd ensured they were I used a couple different hole-saws to open up the panel.
IMG_0642.jpg

Once the holes were drilled I cut a couple feet of 20 gauge into 1" wide strips, which I used to build a bezel around the holes; I want the gauges to be recessed in the panel, I think it will have a much better appearance when finished. Below is the first strip being mocked up.
IMG_0643.JPG

Before I went ahead and fabbed up all the bezels I wanted to quickly test fit a gauge to see if I liked the look. The tach is simply set in place but I love the recessed look.
IMG_0644.jpg

Moving along one bezel at a time.
IMG_0645.jpg

It took a couple hours but I finally got all the bezels complete. The toughest ones were the small holes on the far right end (for the seat heater buttons), but I finally got them sized, shaped, and in place.
IMG_0646.jpg

Once all the bezels were sized I spot welded them all in place, ground down where the welds showed through on the panel face, and test fit all the gauges. Again, these are just set in place, not secured at all, so their depth in the recesses is inconsistent, but I'll take care of that tomorrow.
IMG_0647.JPG

The bezels will be painted in the same "chrome" Rust-O-Leum I used on the turn signals (a couple pages back in the blog), so they should hopefully blend really well with the brushed aluminum bezels on the gauges. The surface of the gauge panel itself will be old-school black "wrinkle paint". BTW - the gauge bezels are machined aluminum, not plated plastic.
IMG_0648.jpg
 
Been taking some time working on other projects but did finish up the gauge cluster, so below are a couple shots. I'm really happy with the way it turned out and think it will look terrific when mounted.
I spent a day stripping and refinishing the dash itself and painted it in a satin black, but I forgot to take pix so those will follow soon.

IMG_0665.jpeg


IMG_0666.jpeg

Today I took some time to work on the gauge wiring, adding plugs to the various connections so I can easily remove the cluster if/when necessary.
 
the dash looks awesome got a idea for your pad . if you have a speacker grill in the dash cut it out and build a cover and a box to hold it in. put the cover door on those little stuts and then push on the cover and it will pop up. hidden away right in front of you. just a thought
 
Headliner came out really nice, love those gauges too:thumbsup:. Looking awesome!
 
the dash looks awesome got a idea for your pad . if you have a speacker grill in the dash cut it out and build a cover and a box to hold it in. put the cover door on those little stuts and then push on the cover and it will pop up. hidden away right in front of you. just a thought

Hey Bear,

I had considered that kind of a set-up but am REALLY hesitant to cut the dash any more than I already have; the metal is very thin and difficult for me to MIG weld if/when I need to weld it and I don't have access to a TIG, so at this point I think I'm going to pass on "hiding" the tablet in the dash anywhere.

Thanks much for your thoughts, I really appreciate it!
 
Headliner came out really nice, love those gauges too:thumbsup:. Looking awesome!
Thanks Dev!

I'll be finishing up the wiring and moving on to some type of windshield defroster fabrication next; the recessed firewall doesn't have room for the stock heater box so I have to come up with something.

Hope all is well!
 
i'll let you know how mine will turn out. looking for a dash that i can play with. i agree the right welder is needed unless i can find a glass one to mold things together. my second thought of course is to use the glove box with a sliders so drop open the door and pull out pad that is fixed to a slider plate. keep us updated on what you do i'm sure there are many trying to figure out the same thing.
 
Auto Transport Service
Back
Top