• When you click on links to various merchants on this site and make a purchase, this can result in this site earning a commission. Affiliate programs and affiliations include, but are not limited to, the eBay Partner Network.

64 Sport Fury

Also what he said. The Rustoleum may be ok for temporary but remove it when you get to actual paint time. It may give you issues with whatever brand you use for the real deal. Get some good stuff from PPG, Glasurit, Martin Señor etc for all. Primer is porous and not to be used to protect, it must be topcoat. Gun paints are also much higher quality products than spray cans. The primers adhere much better over prepped, clean metal than zip cans. Save the zip cans for smaller stuff that are out of the elements but Rustoleum is great for that stuff. Way better than Krylon and others.

This is incredibly helpful thank you.
 
While I'm thinking of it, check in with Inland Empire Driveline for a better setup on the ball and trunion joint of you driveshaft. Since you'll be upping the horsepower and traction, this would be a needed upgrade.

Another excellent suggestion. I was just thinking about my driveshaft the other day. This is perfect timing
 
Looking Good!

Can't go wrong with a MP cam, but technology and new cam designs have made huge improvements. May consider a aftermarket company for a cam. Have you considered stroking the 383 (440 crank into the 383 or...), or sourcing a 440? The RB 440 makes lots more torque and the build can be milder 440 and get the same results. Also don't forget about your other systems, window cranks, door seals, heater,/AC, wipers, dash (gauges) and electrical stuff. This stuff goes on and on and gets expensive. Consider what the factory did with the all the B-bodies (sway bars, torsion bars, radiators, clutch fans, disk brakes 11" drums on the rear and leaf springs ect) and the Big Blocks. Take the best of what they offered and if it fits into your vision, make it better. The floors look awesome! Keep the pictures coming!

View attachment 1180895

I had not considered the 440 or using the 440 crank. I was using the parts that were available to me. As for the other systems, I have acquired:
door and window cranks
trim that goes around the windows and roof line
glass for the doors and windows (haven't purchased a windshield yet)
lenses for blinkers and back up lights
Painless wiring harness

I'm making progress but I know I'm far from done. You mentioned it before and I plan on upgrading to discs on all 4 corners. I want more stopping power than the disc/drum combo especially on these mountain roads
 
I used the Rustoleum as a paint to cover the bare metal. My plan was to sand it down a bit before applying a primer and real paint. Is that still a good plan?
Play it safe and remove it entirely. Case in point. Years ago at a body shop I managed, we were using WURTH for some of the shop supplies. They also made rattle can weld thru primer and regular primer. The painter decided to use some of the primer on a customers Beemer for a small spot as opposed to mixing up a small batch or waiting till he had some from another job. Topcoated it, blended, done. A year later it comes back with a paint issue in that spot. It was wrinkling up and hazing. The only way to properly remedy this problem was to take that area down to bare metal and redo correctly with gun material. Just something to contemplate for you. You may even consider using only gun paints for all your small stuff plus the engine too as its way more durable and adheres better. For small stuff like pulleys, brackets, hinges, engine etc, just get a bunch ready so you can mix a pots worth and use it all up. That way there will be less waste.
 
Play it safe and remove it entirely. Case in point. Years ago at a body shop I managed, we were using WURTH for some of the shop supplies. They also made rattle can weld thru primer and regular primer. The painter decided to use some of the primer on a customers Beemer for a small spot as opposed to mixing up a small batch or waiting till he had some from another job. Topcoated it, blended, done. A year later it comes back with a paint issue in that spot. It was wrinkling up and hazing. The only way to properly remedy this problem was to take that area down to bare metal and redo correctly with gun material. Just something to contemplate for you. You may even consider using only gun paints for all your small stuff plus the engine too as its way more durable and adheres better. For small stuff like pulleys, brackets, hinges, engine etc, just get a bunch ready so you can mix a pots worth and use it all up. That way there will be less waste.

Alright this is very helpful but I think I made a mistake. I used body filler (bondo) for parts the car (trim holes, quarter panel patch, and dents) then I applied the Rustoleum over it. If I sand over those areas to remove the paint do I have to remove all the bondo as well? Or just what's on the surface?

On the topic of paints, you mentioned: PPG, Glasurit, Martin Señor. For primer what would you recommend? And I want to paint the Fury Tor Red. What paint or manufacturer would you recommend for that color?
 
The trim holes need to be welded closed. Filler will show up down the road as little circles if thats what you used. If you can sand most of it off you should be ok on the other areas. As far as manufactures of paint, see what's available in your area. Check in with local, if any, body shops to see what's available. Since you are out there, the air quality nazi's from the state may not have the pull like in the more heavily populated areas meaning you won't be stuck with water borne top coats and the needed underlayments for said materials. Also you can head east to see what's available in NV. if thats more convenient. PPG, Glasurit, Sikkens, RM, Martin Señor [napa usually] and some others I can't think of would be good. Whatever is available for manufacture, use only their materials for all stages. Some brands don't get along if you crossbreed. If you are stuck with mail order, try tcpglobal.com. They carry several manufactures of materials plus they make their own. They are out of San Diego area.
 
Alright this is very helpful but I think I made a mistake. I used body filler (bondo) for parts the car (trim holes, quarter panel patch, and dents) then I applied the Rustoleum over it. If I sand over those areas to remove the paint do I have to remove all the bondo as well? Or just what's on the surface?

On the topic of paints, you mentioned: PPG, Glasurit, Martin Señor. For primer what would you recommend? And I want to paint the Fury Tor Red. What paint or manufacturer would you recommend for that color?
I'm assuming from your posts you have never done body and paint work before. There are dozens of project threads with in depth body and paint details. Read read read.
Yes, remove EVERY oz of rustoleum and bondo you've applied that rustoleum touched. That is not the way to do it. You will thank us in the end. Go to your local paint store and ask what they recommend. Good luck. Those large flat sheet metal floors are going to flex easily. The connectors should help that some. Weld reinforcements in where your seats bolt to the floor.
 
The trim holes need to be welded closed. Filler will show up down the road as little circles if thats what you used. If you can sand most of it off you should be ok on the other areas. As far as manufactures of paint, see what's available in your area. Check in with local, if any, body shops to see what's available. Since you are out there, the air quality nazi's from the state may not have the pull like in the more heavily populated areas meaning you won't be stuck with water borne top coats and the needed underlayments for said materials. Also you can head east to see what's available in NV. if thats more convenient. PPG, Glasurit, Sikkens, RM, Martin Señor [napa usually] and some others I can't think of would be good. Whatever is available for manufacture, use only their materials for all stages. Some brands don't get along if you crossbreed. If you are stuck with mail order, try tcpglobal.com. They carry several manufactures of materials plus they make their own. They are out of San Diego area.

Fortunately I did weld in the holes. I used the body filler to make panels look seamless.
I'll get off all the rustoleum before I continue with primer and paint. A quick drive to NV might be required for what you are suggesting. I'll make sure not to get my paints crossed.
It is definitely a bummer that I gave myself more work but oh well
 
Learn by doing is great as long as you don't paint yourself into the proverbial corner. Lots of brainpower to pick on this site. Are there any Rod shops or rod gents in the area? Might be another source to get knowledge from.
 
Learn by doing is great as long as you don't paint yourself into the proverbial corner. Lots of brainpower to pick on this site. Are there any Rod shops or rod gents in the area? Might be another source to get knowledge from.

"Paint myself into the proverbial corner" well played!

I'm becoming more comfortable posting and asking questions on this site. There are a few guys in town I can talk to but it seems I'm only one with a Mopar.
 
Aug 2021
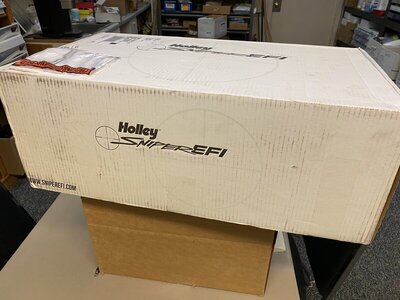
Good news the Holley Sniper EFI arrived in the mail! I'll have to purchase the other accessories later. But it's a step in the right direction

IMG_9633.JPG
 
Sept 2021
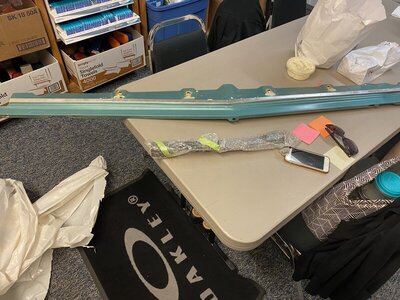
One of the bigger things missing from the Fury was the grille assembly. Through the past couple of months I purchased the grille, headlight bezels, bumper brackets, bumper, and eyebrow moldings. At the time I thought that was all I needed because I was looking at pictures of '64 Plymouths online. I learned from an FBBO member, @justjim, that I needed a lower and upper radiator splash guard. With more patience, I was able to find one. Thanks again @justjim


IMG_9809.JPG
 
Sep 2021
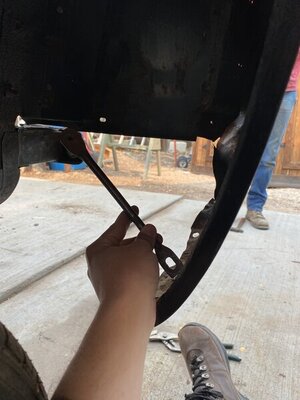
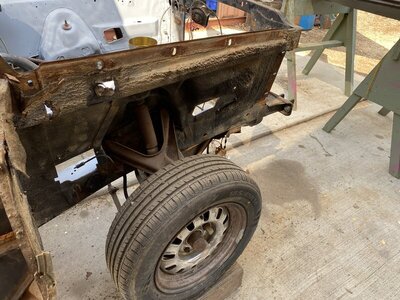
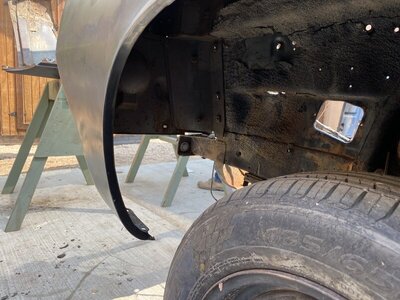
I continue to learn more about the little details that go into restoring a '64 Plymouth. I learned that there is a little bar that connects the lower part of the fender (forward part of the wheel well) to the back of the headlight bucket. I purchased a pair but ran into a problem. It's not long enough. After talking with a buddy, I learned that I missing a piece behind the headlight buckets. I am not quite sure what I am missing, any ideas?
I was thinking that I could just make a bar or bracket that connects the fender to the frame. Would that work?
My goal is to prevent the fender from flapping in the wind.

IMG_9798.JPG IMG_9799.JPG IMG_9800.JPG IMG_9801.JPG
 
Sep 2021
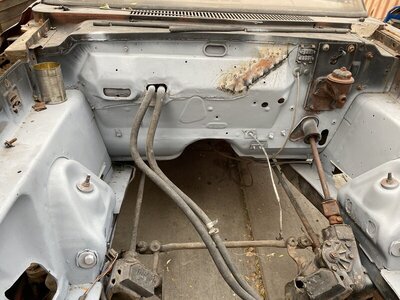
I read the book "Bob Bondurant on High Performance Driving". One of the chapters discusses preparing your car for frequent use and maintenance. He suggested painting the engine bay gray. The lighter color would make it easier to find dropped bolts or see where the oil leak is coming from or going to. I thought it was a great idea so I painted it gray. Has anybody else done this?

IMG_9816.JPG IMG_9819.JPG
 
Sep 2021
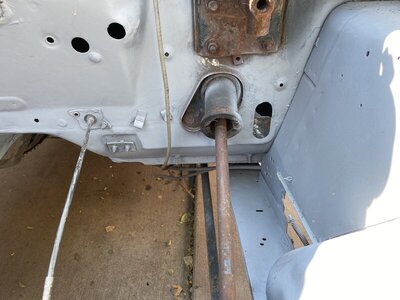
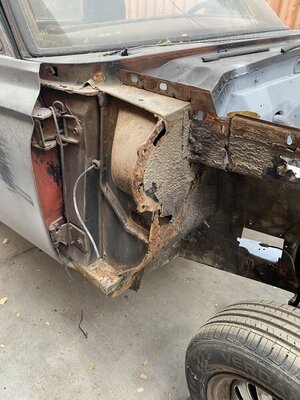
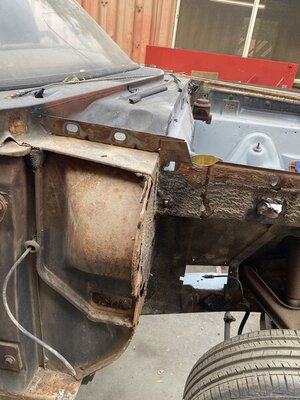
I noticed that the inner fender well differed between the driver's side and passenger's side. On the passenger side, it appears to bow out and has a horizontal oval in it. On the driver side, it appears smooth. Sorry I didn't grab pics of the driver's side. Is that where water drains from the vents underneath the windshield? What should I do with that area?

IMG_9817.JPG IMG_9818.JPG
 
Usually the cowl rusts badly on these, mainly left side, due to leaves and such plugging the (poorly designed) drains. If left unchecked, water will drip on your feet-eventually. The wiper pivots usually require resealing also. Do you have the front and rear fender inner shields? They keep the mud/slop from filling up the door hinge and headlamp bucket areas. The rubber seals for these are available. I fabricated fender braces for my 65 Coronet using hot rolled 5/16" rod, flattening (heat red hot) the ends to accommodate holes for attachment.
Mike

The cowl area had rusted to the firewall. We cleaned up the area and welded patch over the area. It's visible in the engine bay picture.

I purchased the rear fender inner shields but I don't have the front inner fender shield. How do I seal the wiper pivots?
 
Kits are available online. Check with Joe Suchy, he's the 64 EXPERT. Do you visit the 62 to 65 web site? Tons of vendors and info there.
Mike
 
Auto Transport Service
Back
Top