• When you click on links to various merchants on this site and make a purchase, this can result in this site earning a commission. Affiliate programs and affiliations include, but are not limited to, the eBay Partner Network.

69 Coronet 440 project

glad to see you making a U-turn and going down the right road. Sometimes we have to see what we did wrong to know how to fix it right. I'm still putting pieces next to each other to make sure they line up before I pull that welding trigger.

It was a tough decision to make at the time because I had come so far but I'm glad I did it. As I'm learning I'm figuring out that what I did before was not right so better to make it right now then have a finished product that doesn't hold together.

- - - Updated - - -

john i see santa was great to you with all the new toys enjoy, i wish you a happy and prosperus new year.

Thank you Johnny. It feels good to be able to get this equipment. Hope you had a Merry Christmas or whatever you happen to celebrate and a prosperous new year to you and your family as well.

- - - Updated - - -

Congrats, that's a sweet welder! Looks like if your out of work again (I hope not) you'll be set to go, buy up on all the little things needed like cutoff wheels, grinding wheels, etc and at least you'll be able to keep the progress moving along if nothing else. Now if I may ask what in the hell are you planning on measuring????? Some pretty big Mics in there! Good luck 61

This Miller is KickAss!!! right now I have been working with 1/8th steel building my body jig and the welds are B.E.A-utiful. The dials are setup so that you pick your metal thickness with the sizes right on the dial. For the wire speed you can set your speed manually or at the end of the dial you can set it for your wire thickness. When you select the wire thickness the welder automatically sets the speed to the metal size. It's truly a set it and forget it welder.

As for my job it does have an end date and it's coming up quickly, but I knew this going in so I was able to plan for it.

The micrometers that my son got for me are the 1 inch to 6 inch set. When I get around to building my motor they will come in handy. The 4 to 5 inch Mic along with my dial bore gauge will allow me to set my piston to bore clearance perfectly as well as measuring the bearings for a precise fit. Now to save up for the 440 source 528ci kit. :headbang: This will go great with my 6 pack setup. :love10:
 
you are a trooper brother, carry on with the build. is ur son still interested?
 
Thanks 505, my son has moved on to his own vehicles sorry to say. We work on his stuff together so it's sort of the same. He helps out when I need him. His reasoning is that he really doesn't know anything about body work and doesn't want to mess up the Coronet.
 
Hi 61 I am new to the site and after spending the last few days reading threads and staying up to 1pm looking at yours I find them really inspirational. I am in a very similar position to you at the moment on my 68 Coronet as I am just about to weld in the trunk floor. I have also decided to repair my rear light panel after reading your thread as I can't find replacement ones at the moment. Please keep up the great work and I will try and start a tread on mine at some point. Martin
 
Hi 61 I am new to the site and after spending the last few days reading threads and staying up to 1pm looking at yours I find them really inspirational. I am in a very similar position to you at the moment on my 68 Coronet as I am just about to weld in the trunk floor. I have also decided to repair my rear light panel after reading your thread as I can't find replacement ones at the moment. Please keep up the great work and I will try and start a tread on mine at some point. Martin

Welcome aboard Martin and thanks for reading. Are you putting in a one piece or a two piece trunk floor?
 
It's a 2 piece but I wish I had got the single piece now that I am doing it. I spent the whole weekend patching the light panel and it is a very slow process but every patch is a step closer to getting it finished.
 
Last edited:
Ok, I got lost a little here. Where and how did you pooch the rear frame rails?
 
It's a 2 piece but I wish I had got the single piece now that I am doing it. I spent the whole weekend patching the light panel and it is a very slow process but every patch is a step closer to getting it finished.

It's amazing how the little patches add up over time and the next thing you know, you have a rust free car. Keep at it and post some pics. :)

- - - Updated - - -

Ok, I got lost a little here. Where and how did you pooch the rear frame rails?

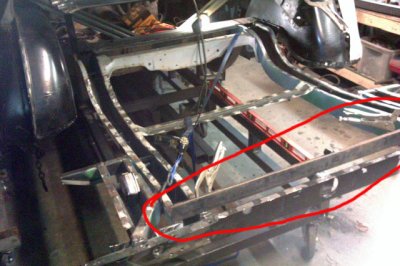
My frame rails ended up being not parallel and too close to each other. As I started rebuilding the back end I was having to reshape and or add metal to make things fit. This in turn made the next parts harder to put on. I know that massaging parts to make them fit is normal but it seemed to be getting worse. I decided as that point to do what it takes to make it right. That's the point I'm at now.
 
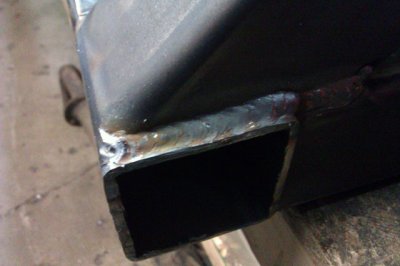
I'm really loving this Miller mig welder. Check out these welds I'm making now. :hello2:

BodyJig10.jpg

BodyJig11.jpg
 
nice looking welds! Why do you think the better welding machine can produce better welds?

I'm not real sure why. All I know for sure is that the only thing that changed was the welder and my welds got better. I still can't weld one handed. I was trying to tack weld a bar on the body jig that I'm making and I didn't have a lot of room to get into a good position. I ended up reaching over with one hand and tacked the bars together. it held but it was a boogerweld.

- - - Updated - - -

Nice looking welds. Practice, practice, practice.

Thanks Superfreak, I am practicing a whole lot with this welder. I love it. :) Any ideas on how to weld upside down? For the life of me I can't get the hang of it. If I had a rotisserie it would be a non issue. Maybe one day I'll make one.
 
Can't help with any welding upside down tips other than "practice practice", but one safety tip about welding upside down is that you should always put earplugs in because if a white hot spark goes in your ear in can be bad, ask me how I know..lol.
 
A nice welder does wonders haha, Looks great! For your upside down welds just play with your settings, you'll likely need to back it off a bit.

- - - Updated - - -

Can't help with any welding upside down tips other than "practice practice", but one safety tip about welding upside down is that you should always put earplugs in because if a white hot spark goes in your ear in can be bad, ask me how I know..lol.

Listen to the Kid. I've had spatter land in my ear...... you hear the sizzle loud and clear as it rolls down the canal. Not fun
 
I agree, hot weld in your ear canal makes you jump around pretty fast.

A nice welder does wonders haha, Looks great! For your upside down welds just play with your settings, you'll likely need to back it off a bit.

- - - Updated - - -


Listen to the Kid. I've had spatter land in my ear...... you hear the sizzle loud and clear as it rolls down the canal. Not fun
 
Found the time to get back out into the garage tonight and start dealing with my tear down. I got the frame jig leveled so now the car is level. I really need to figure out how to mount some sort of jacks to the corners of the jig to make it easier to level. Right now the car is basically on blocks with steel shims between the jig and the blocks to level.

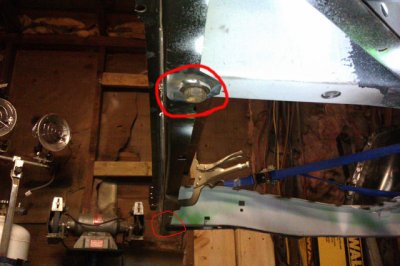
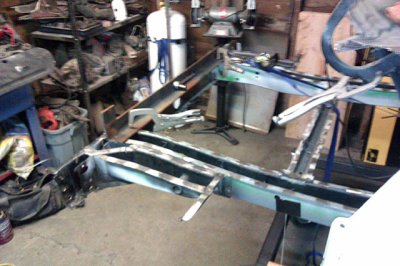
After removing the rear cross rail and gas tank cross rail I could start to realign the frame rails. I welded washers to the bottom of the rear cross rail where it bolts to the frame rails so I had smaller holes that I could center, then I bolted it to the frame rails. This set the rails at 37 1/4" right where they needed to be.

FrameRework05.jpg

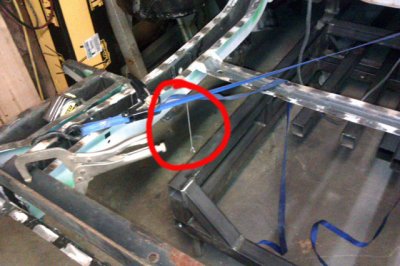
After that I squared the rails using a ratchet strap. from the front of the frame to the back of the frame it now measures 65 1/2" in a cross pattern. Then I clamped a brace across the top of the rails so that they are straight up and down.

FrameRework01.jpg

FrameRework02.jpg

FrameRework04.jpg

I made plumbobs from washers and attached them to the frame where I'm going to put the uprights for the jig to support the rails.

FrameRework03.jpg

Tomorrow I have to put a starter in my daughters car but after that I want to make the jig uprights and weld them in place so the rails will be supported vertically. Then I can start adding support bracing for the body.

I think as long as I have it torn back down I'm going to mini tub the rear wheel wells for maximum tire clearance. :headbang:
 
its miller time! they are nice machines.

The other day I just ordered a Miller Dynasty 280 DX, complete package with cooler, cart, and remote foot control. That is the stick/tig machine.

A cape/hood works great for keeping patter off of you and also keeps you from getting a sun burn around your neck. It looks silly, I call it my Nome hat, but works and is lighter than leathers.
http://www.amazon.com/Steiner-11303...55900&sr=1-1&keywords=Steiner+11303+Cape+Hood
 
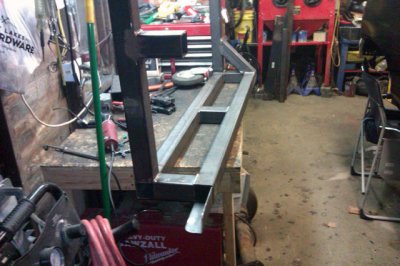
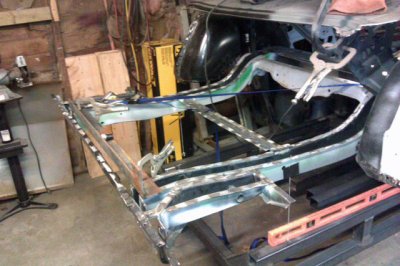
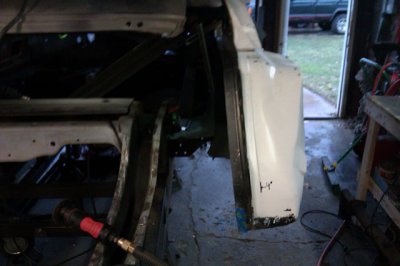
Well I may not be posting much about the Coronet but that doesn't mean that I'm not working on it. Since the last time I posted about it I've finished the back half of the body jig. Got everything level and square and removed a bunch of metal. I figured that part is not worth posting about again. The Coronet is going to get a mini tub and the rear springs relocated. I've got it torn back down this far so now's the time to do it. I bought the spring relocation kit from USCartool. This kit relocates the springs under the frame rails so I should have no trouble fitting any street tire that I want :). As of today I got the inner wheel well cut out as well as part of the floor under the rear seat. I have started cutting off the frame rail lip on the wheel side so I can mount the back half of the wheel well flush with the rail. I'm going to box that section of the frame so I won't loose any strength. More to come soon. :headbang:

MiniTub_R_01.jpg

Music of the day today as well

[video]https://youtu.be/-nGRNEaulQs[/video]
 
Auto Transport Service
Back
Top