• When you click on links to various merchants on this site and make a purchase, this can result in this site earning a commission. Affiliate programs and affiliations include, but are not limited to, the eBay Partner Network.

'72 Plymouth Satellite project - Gone with the green!

jimbob101

Well-Known Member
Local time
4:13 AM
Joined
Jul 11, 2009
Messages
101
Reaction score
28
Location
Idaho
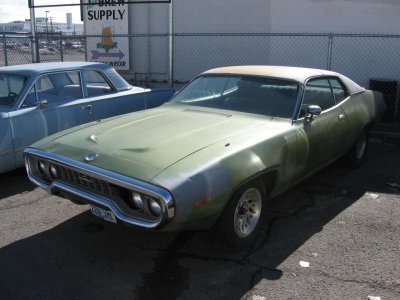
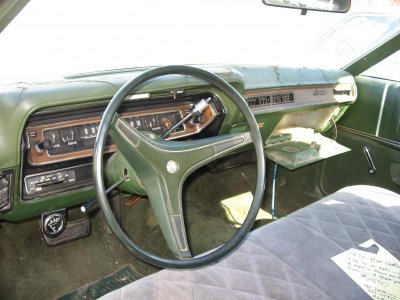
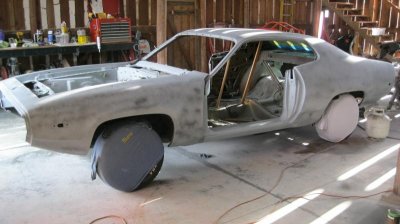
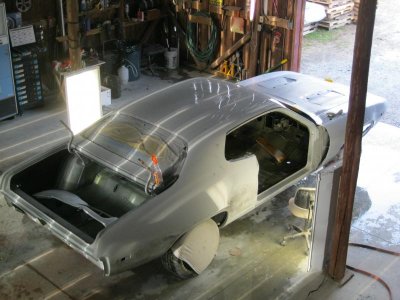
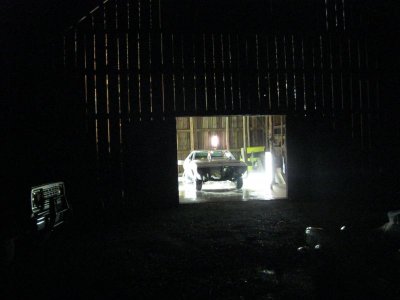
Have posted a few progress pics randomly through the website, but thought it would be nice to add pics/info to keep me motivated to get this done for this Spring! Picked up this 72 Satellite in Spokane, WA in 2008 and was my daily driver until last year! Here's a pic when I first stopped by to look at it. plain jane 318 auto 7 1/4" rear,bench seat, green on green on green, almost zero rust but dents on every panel. Options were AC/PS/PDB and that's it! Acquired 4 different Satellite parts cars to make this the car I'd like!

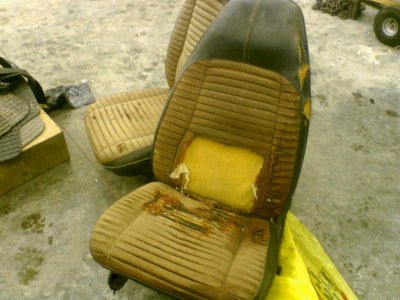
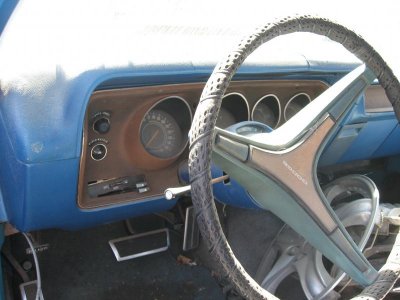
Just about every part was cracked or broke, cracked grille, taillites, windshield, rough interior, holes in fuel tank, brake system shot, worn out 318, worn out rear end but it was a solid car!

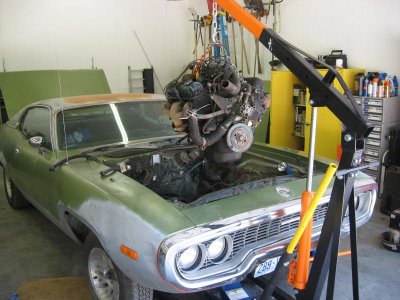
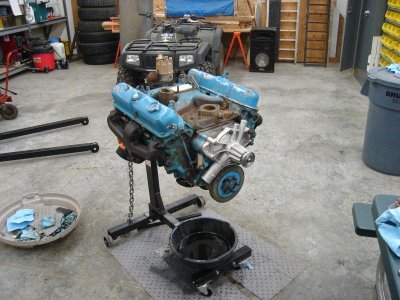
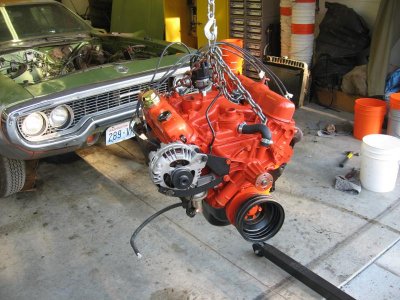
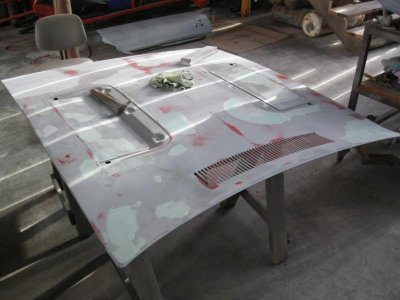
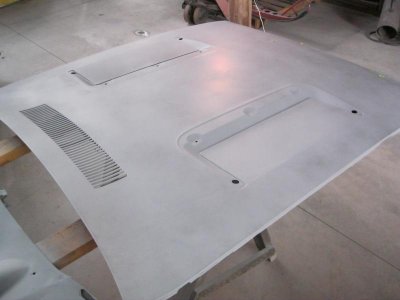
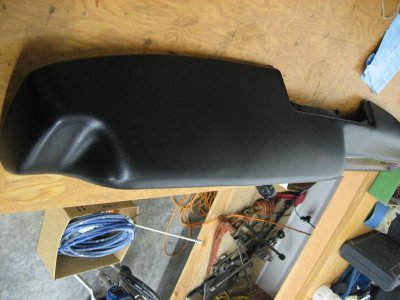
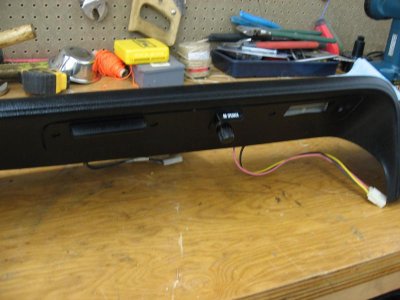
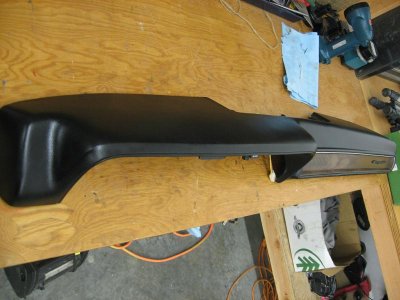
Will have black bucket seat interior with Tuff Wheel, Tor Red exterior, Road Runner hood with hood stripes, ralleye dash with 150mph speedo and tach, front and rear spoilers, front and rear sway bars, center console, 18spine 4speed with pistol grip, 8 3/4" rear 3.55 sure grip, 400 4bbl, dual exhaust with slotted tips, 72 Road Runner rear strobe stripe, 15" police wheels and hubcaps, 245/60/15 tires.

Here we go!

-Jimbo
 

Attachments

  • 72_sold.jpg
    72_sold.jpg
    63.3 KB · Views: 2,232
  • IMG_8839.jpg
    IMG_8839.jpg
    46.3 KB · Views: 1,554
Ah yes, the green everyone loves to hate.

Little known fact- during 1968 through 1973 105% of all Mopars were painted this color.

My interior on the 73 is F6.

I'm thinking of painting an F3/F4 stripe on my Roadrunner hood.

Might see if the Kia Soul color is available in a spray can cheap. It's really close and a bit brighter.

The first Mopar I ever lusted after was a 69 N96 4 speed Super Bee.

F3 with hood blackout and black stripe and interior.

That SOB looked super mean just sitting in the driveway with dull paint and bald tires.........
 
'72 Project

Here's a few pics that I have from being a daily driver, when I first purchased it, two freeze plugs were out, got them installed only to find out the 318 had a burnt valve, so I decided to swap out the 318 from another '72 Satellite and drive it as-is! Did a little degreasing and rattle can orange. : )

- - - Updated - - -

Pulled 318 with burnt valve and swapped in a nice running 318 2bbl from another '72 Satellite, drove it for 5 years as is!
 

Attachments

  • PICT0311.jpg
    PICT0311.jpg
    56.9 KB · Views: 1,091
  • PICT0105.jpg
    PICT0105.jpg
    68.2 KB · Views: 1,119
  • IMG_1661.jpg
    IMG_1661.jpg
    67.7 KB · Views: 1,089
  • IMG_2752.jpg
    IMG_2752.jpg
    76.1 KB · Views: 1,083
  • DSC01081.jpg
    DSC01081.jpg
    87 KB · Views: 1,090
'72 Project

Plain Jane 318..
 

Attachments

  • IMG_2760.jpg
    IMG_2760.jpg
    90.3 KB · Views: 1,039
  • IMG_2863.jpg
    IMG_2863.jpg
    97.4 KB · Views: 1,040
Solid 72. Nice. It has a lot of potential.

Looks just like my parts car which is a 72 green on green on green 318/904 Sebring.
 
'72 Project

5 years later running the 318, time to dismantle and get ready for the big project! All solid sheetmetal!IMG_8843.jpgIMG_8846.jpgIMG_8910.jpgIMG_8912.jpgIMG_8913.jpgIMG_8915.jpg
 
'72 Project

4 weeks of scuffing, banging, filling in dents with 3 coats of primer to finally make dents disappear. The only panel that didn't have dents was the rear window Dutchman panel.. Didn't have to cut or replace any sheetmetal including quarters, rockers etc..

- - - Updated - - -

Scored some good parts! Was having a hard time finding a Road Runner hood to replace the stock Satellite hood, found one locally for ~200$ with a missing boomerang and it will need a lot of dent bodywork done. Also found a '71 Plymouth trunklid that will mount a Gullwing spoiler. Found a guy with a bunch of '71 Charger R/T parts including a rear spoiler so that will be mounted. Will have to order the front spoilers also..

Discovered the rear valence is different between '71 and '72 and AMD doesn't carry the dual exhaust cutout panel for a '72. So was able to make one actually using a Pioneer speaker screen for the cutout. Not perfect but will be fun to put the machine gun tips..
 

Attachments

  • IMG_8960.jpg
    IMG_8960.jpg
    52 KB · Views: 954
  • IMG_0397.jpg
    IMG_0397.jpg
    64.1 KB · Views: 966
  • IMG_0789.jpg
    IMG_0789.jpg
    74.9 KB · Views: 954
  • IMG_8953.jpg
    IMG_8953.jpg
    49.9 KB · Views: 954
  • IMG_8965.jpg
    IMG_8965.jpg
    35 KB · Views: 954
That hood and wing will look great on this project, shes nice and clean and no more green, Sounds like a Ka-ool deal!!! :) Id say "enjoy" but something tells me you are enjoying whats going to be a sweet ride for sure!
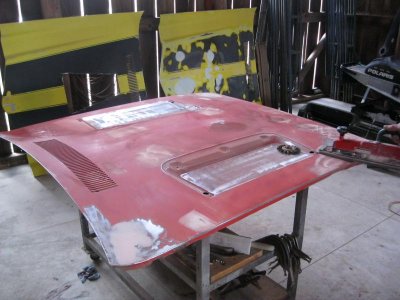
 
Thank you Ron! I really appreciate your comments! I'm sure there will be questions along the way!
 
I like the progress...
 
Nice. I've got a 71 SSP I'll be working on.... interesting tire/wheel covers you got going on there.
 
Tshirts are the best tire covers!

Wetsanding... Is actually my favorite, since end is in sight!

And the hood needs a lot of work, but it's the only one I can find.. It's bent and twisted.. Gonna get rid of hood pins. Got the correct hood insert from Tonys Parts, which are also hard to find..
 

Attachments

  • IMG_8934.jpg
    IMG_8934.jpg
    61.9 KB · Views: 927
  • IMG_9067.jpg
    IMG_9067.jpg
    43.9 KB · Views: 908
  • IMG_9075.jpg
    IMG_9075.jpg
    46.7 KB · Views: 901
  • IMG_9076.jpg
    IMG_9076.jpg
    41.4 KB · Views: 919
'72 Project

Got the hood to line up and look half way decent, more wetsanding...

Found some '71 up bucket seats with the original houndtooth seatcovers, I will just be using black vinyl.

Found a usable ralleye dash and wiring harness from a '74 Satellite that was t-boned by a bus, will replace the clock with a factory tach! It's gonna look sharp with the black interior!

More fun!

-Jimbo
 

Attachments

  • IMG_8962.jpg
    IMG_8962.jpg
    51.1 KB · Views: 886
  • bbody_buckets_2.jpg
    bbody_buckets_2.jpg
    65.9 KB · Views: 882
  • IMG_2385.jpg
    IMG_2385.jpg
    57 KB · Views: 905
  • IMG_9025.jpg
    IMG_9025.jpg
    33.9 KB · Views: 886
  • IMG_9086.jpg
    IMG_9086.jpg
    66.8 KB · Views: 906
'72 Project

Sanding into the night....
 

Attachments

  • IMG_9089.jpg
    IMG_9089.jpg
    38.9 KB · Views: 837
looks like your making some great progress. Everything that you're going to add on is going to make that one fine looking ride,
 
'72 Project

Thank you for the great comments! I have visions of an awesome looking '72 also! Found some other cool parts, some slotted exhaust tips, I think they are the charger style ones but they will work, will keep an eye out for the Plymouth versions, I think they are shorter?

Found an old man that had saved a factory original dash pad from a '72 charger that he parted 100 years ago, the thing is in great shape and will work well with the new black interior! Can't wait to put the dash together with it!

Also ordered and got in First Place's front chin spoilers, will be interesting to figure out where exactly they go with nothing to compare! So got the front and rear spoilers, check!

Might tackle the gauge cluster and dash, need a break from body work...

More fun!

-Jimbo
 

Attachments

  • IMG_0785.jpg
    IMG_0785.jpg
    55.1 KB · Views: 867
  • IMG_0788.jpg
    IMG_0788.jpg
    50.4 KB · Views: 854
  • IMG_0798.jpg
    IMG_0798.jpg
    61.5 KB · Views: 831
  • IMG_1560[1].jpg
    IMG_1560[1].jpg
    48.7 KB · Views: 860
  • IMG_1561[1].jpg
    IMG_1561[1].jpg
    47.5 KB · Views: 856
Nice progress. The car is looking slick.

I know all about getting burned out with body work... Taking a break and working on something else (short term) can be the best method. The last thing you want to do is rush it too much.

Looks like you are accumulating some good stuff. Keep up the good work!
 
'72 Project

Started work on the driveline portion, taking a break from bodywork.

Soo. Am going from a 318 auto column shift car to a 400 4speed on the floor car. 400 is a cast crank, externally balanced, and drilled for 4speed. Am running a 11" steel factory bellhousing. So gotta find a 11" flywheel drilled for a cast crank.. Kinda hard to find since they are balanced different than a 360 also.. But the same as a cast 383 crank too..

Got a 11" 318 flywheel from a 4x4 dodge pickup (neutral balance) and found the correct template to drill out metal for the 400 balance. It better be right.. Kinda hard to find a 31/32" drill bit tho..

Does anyone have a photo of a 4speed mockup setup with the shifter gate and linkage hooked up for a '71 Bbody console car? I need a measurement where to put the tunnel shifter hump to cut the floor... and get the right linkage!

Thank you!

-Jimbo
 

Attachments

  • IMG_1567[1].jpg
    IMG_1567[1].jpg
    61.9 KB · Views: 838
Jim, I wish i did but don't have the photos you need, man you have this coming along super cool! I love that wet sanding look on that ole gal, hard on the arms but the more you go, the better the paint looks when your done... Very nice!!! :)
 
Auto Transport Service
Back
Top