• When you click on links to various merchants on this site and make a purchase, this can result in this site earning a commission. Affiliate programs and affiliations include, but are not limited to, the eBay Partner Network.

'79 'doba ball joint replacement

ybshore

Well-Known Member
Local time
11:14 AM
Joined
Mar 8, 2013
Messages
71
Reaction score
3
Location
New England
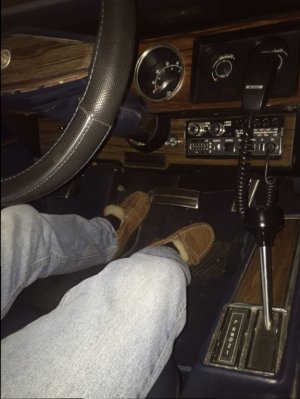
Any tips or leads as I wrestle with 38+ year old upper ball joint and lower ball joints. Using Moog. This Busted Knuckler is always open to learning trade secrets. Threaded uppers, pressed lowers. Thanks for any tips to come. Here is my '79 Cordoba except is it has the "package" of a '300' from the factory. 35xxx miles.
cordobainteriorbest.JPG
 
Nice, mine was beige and brown with beige interior/buckets.

A place like Mancini racing sell's the special sockets for the ball joints.
A little heat is very handy to have on hand. Also a BFH. (Big Freakin Hammer!)
Heat up to a glow, smash with hammer, remove.
 
I know it's harbor freight stuff, but mine has taken several beatings and was the most satisfying tool purchase in a while. No more hammering to get things to pop out!
http://www.harborfreight.com/3-4-quarter-inch-forged-ball-joint-separator-99849.html

For the upper, if you have an air compressor that has guts, a 3/4" impact with the correct ball joint socket should make it come out with out issue.
Good luck!
Where do you hang the rotor from to do the bottoms?
 
This is not "the usual," but if you find yourself in a case where you have a spare pair of UCA's which you want to prep in advance, and your ball joint socket tool hasn't arrived in the mail yet, you can remove the original ball joints with a large (2' or longer) pipe wrench.

Just remember NOT to use that pipe wrench for installation of the new ball joints.

-Kurt
 
Where do you hang the rotor from to do the bottoms?

IMHO, I would just take the rotors off. It would be a good time to take a look at the spindles to make sure everything is ok and replace worn out parts, if necessary. I'm switching from drum to disc, so I took everything off. Bungee cords might be useful, if you don't want to remove them.
 
IMHO, I would just take the rotors off. It would be a good time to take a look at the spindles to make sure everything is ok and replace worn out parts, if necessary. I'm switching from drum to disc, so I took everything off. Bungee cords might be useful, if you don't want to remove them.
I am at the rotor, but she's stubborn. How to remove that without damage?
 
I am at the rotor, but she's stubborn. How to remove that without damage?
Also I have the upper un-threaded but the bolt is still in the socket. Is this where the Harbor Freight tool comes in? to pull/push it up? I also did not disconnect the lower at all. Is this right?
 
I know it's harbor freight stuff, but mine has taken several beatings and was the most satisfying tool purchase in a while. No more hammering to get things to pop out!
http://www.harborfreight.com/3-4-quarter-inch-forged-ball-joint-separator-99849.html

For the upper, if you have an air compressor that has guts, a 3/4" impact with the correct ball joint socket should make it come out with out issue.
Good luck!

Will that tool push out the pressed lower joint? I have the HF service kit but am curious.
 
I have the HF service kit but am curious.
Is this the kit you have?
http://www.harborfreight.com/5-piece-front-end-service-tool-set-60306.html
The tool can press out the upper ball joint from the spindle and the lower ball joint from the spindle. It can be used to press out the tie rod ends from the lower ball joint and so on and so forth. It is a very handy tool. You are supposed to place the lever arm of the tool on to the ball joint stud. The forked prong should rest between the ball joint stud and the piece the stud was originally pressed in to. For example, the upper ball joint. Gently hammer the forked side between the ball joint boot and the top of the spindle. Next, place the lever arm side on the ball joint stud end that you removed the castle nut from. Hand tighten the separator tool stud so that there is enough pressure that the tool won't fall out of place. Take a 19mm socket and tighten the separator tool stud. Doing this causes the lever arm to push out the ball joint stud from the spindle. Rinse and repeat for the lower ball joint.


The passengers side is stuck. Heat and the tool are not pushing it out. I removed the old boot to get the forked side in between for a better grip to no avail. Left pressure on overnight and haven't been out there yet. Can I sawzall the ball joint?
 
The passengers side is stuck. Heat and the tool are not pushing it out. I removed the old boot to get the forked side in between for a better grip to no avail. Left pressure on overnight and haven't been out there yet. Can I sawzall the ball joint?
Just to clarify, you are still working on the upper? I would not recommend using a sawzall at all. Can you take a picture of the ball joint and tool in place?
 
Just to clarify, you are still working on the upper? I would not recommend using a sawzall at all. Can you take a picture of the ball joint and tool in place?

No pic capability...I am 'square' with fork side between control arm/steering knuckle and the 'push' side of tool is directly at center of bolt. I feel as if the tool will break if I tighten any more.
 
If your tool is where this guy has a pair of channel locks, and is under pressure, strike with a good size hammer where they are showing in the picture. Keep the nut in place by at least four or five threads so when it comes apart things don't go flying. Also the nut will protect the threads if you miss with the hammer.

8492-12197-171624.jpg
 
Passenger side done; upper popped with a good smack and with removed knuckle and mounting from lower ball stud, accessed lower without touching torsion bar. On to the drivers side.
 
Auto Transport Service
Back
Top