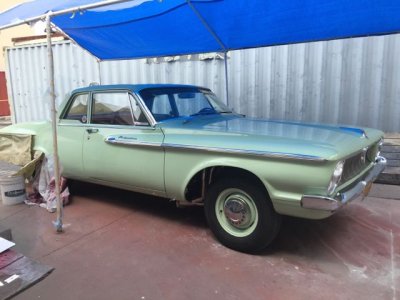
• When you click on links to various merchants on this site and make a purchase, this can result in this site earning a commission. Affiliate programs and affiliations include, but are not limited to, the eBay Partner Network.

80 Grit!

"Kern Dog, how much slack do you have? I've seen some with a lot of back lash and yet still didn't whine. If you are checking with the axles in the housing and drive shaft attached, you may be seeing the slack in the splines too. Also, if the rear has a lot of miles, you may have other issues going on. I had one where the cross pin and carrier was badly worn and that by itself was showing up in nearly 1/8th turn in the drive shaft. Gear back lash vs spline clearance and wear are different things. Back lash on the gears is usually around .008 but with everything installed in the car, your spline clearances will show up to be a lot more than that so grabbing the drive shaft and twisting it back and forth won't give you a good feel of what your back lash really is. The ring gear has to be held still in order to check gear lash correctly."


The 3.91s that I ran when I had the GV were old but seemed fine at first. I had the diff rebuilt and had the gears reset at that time. As I pulled the drive shaft out during the swap back to direct drive, the diff yoke freely moved several degrees before feeling resistance. Maybe I incorrectly thought that this meant too much slack?
Regardless, the new 3.55 gears do not whine at any speed, though I still get a clunk when going into gear. The U-joints seem fine. Maybe there is something amiss in the trans?
 
I had that same type of whine on decelleration! I thought mine was due to excessive backlash in my diff!

Typically, gear whine from the rear end on coast down is caused by the pinion gear being set too deep into the ring gear. Were you driving the car before the installation of the OD unit and hear a whine at that time? I've also heard people saying that they experienced some whine on coast down and it got louder when a new larger drive shaft was installed. I've never experienced that myself so I don't know if it's even possible. Usually gear whine is gear whine no matter what your angles are and I would hope your angles are not so bad that it would cause something to whine.

I installed my upgraded diff about 1,000 miles prior to the GV install. It's a 489-case 3.55 w an Eaton TrueTrac built by Dr. Diff. It's been quiet since installed - from what I can remember or tell. the car is pretty loud to begin with.

That said, differential gear whine is EXACTLY what it sounds like to me. I drove a Ford Explorer at work that whined. I told them the read end was about to go out. They believed me right after it grenaded itself. I wonder if the new larger diameter all-aluminum driveshaft is creating a better amplifier for the sound and NOW I am hearing a differential whine. That makes a lot of sense. I may tape up the driveshaft with painters tape (as a damper) and drive it again. Hmmm.... Interesting...

I assume that to check the pinion/ring gear spacing for sure I have to remove the rear end???

I did talk to the GV folks and they were, as usual, helpful as can be. They said they had worked with plenty of people on vibration issues but that the "whine" was not something they had dealt with before. They seem credible.
 
Just pull the axles then the center will come out and you can then check the pattern and backlash.
 
So I want to know if your happy with the GV's? I want to get one for my A body, 3.91's, 25.6 tire height.
 
I`ve heard nothing but good things about the GV overdrive. Let us know what you think!
 
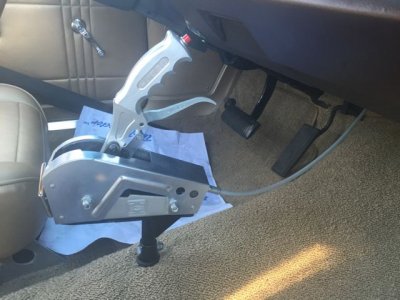
I took mine out partly because of some vibration issues. I also had a sloppy feeling floor shifter feel. The GV I had did NOT have a mounting boss for the floor shifter mechanism and one had to be fabbed. Once I went back to the stock tailshaft, the shifter feel was much better.
Knowing what I know how, I could have pressed on and found cures for every little problem I had. The unit itself worked great.
 
The work continues

Got the car into the muffler shop on Friday night (yup - the guys worked late for me and guy in a Tri-5 Chevy guy)! Gotta love the cash-business car guys. They did a great job getting my main pipe up closer to the body and away from the Gear Vendor. The right pipe was touching the GV after the install, and both were too low anyway - dragging on my driveway as I pulled in and out. The whole exhaust system looks way cleaner than before, mufflers tucked up tight and level, etc.

IMG_3349.jpg

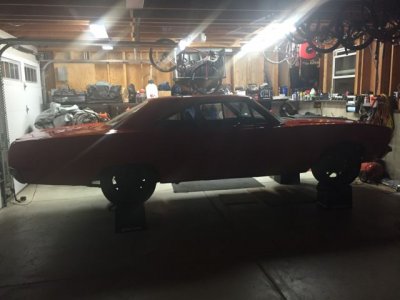
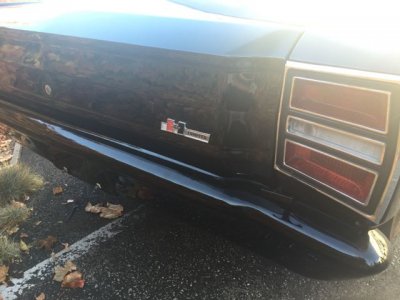
Pulled the car in at home and couldn't resist the evil-looking "shadowy Roadrunner" shot. Hard to tell but the car is up on 12" Race Ramps, which are great for working underneath but very high to get the car onto. My jack requires 3 2-by-4's stacked to get high enough. Sketchy, but I do it in stages with jack-stands.

IMG_3352.jpg

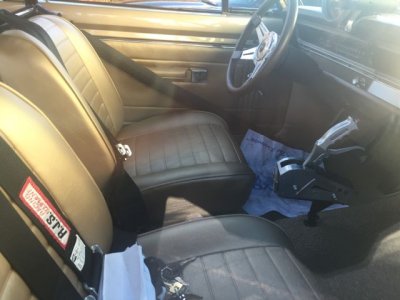
Wanted to add a power on/off toggle switch for the Gear Vendor electronics since they are technically not supposed to be switched on until the car is started - they are apparently very sensitive to voltage fluctuations during engine cranking. Also have a matching toggle switch for for the Gear Vendor Mode, which switches between manual (you turn OD on and off w a floor switch) and Autodrive (The OD automatically engages/disengages at about 47mph). That switch has two small associated "status" lights so I needed a place to mount those, as well as a third toggle switch for the electric fuel pump that is currently sitting on my garage floor - in it's new aluminum fuel tank - waiting for installation.

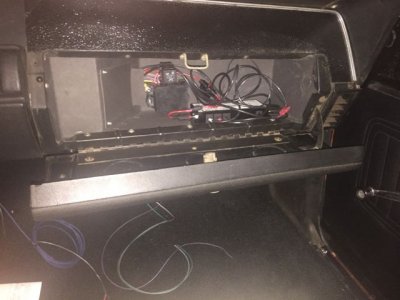
Combined with my Dakota Digital gauge system which itself has three 12v ignition-hot power leads and one constant-hot for the clock, that's another 2 ignition-hot for the GV and Fuel Pump. With all that already in the car plus who knows what future options, I went ahead and installed my all-time-favorite-automotive-accessory Painless Performance Circuit Boss fuse system to power them all with separate circuits. I mounted the unit in the glove compartment which I don't really use for anything anyway. I know it looks like it's not level, but it is. I went back and checked! It's just the photo, and the little rubber cover and relay mount loosely to the unit so they're not perfectly straight.

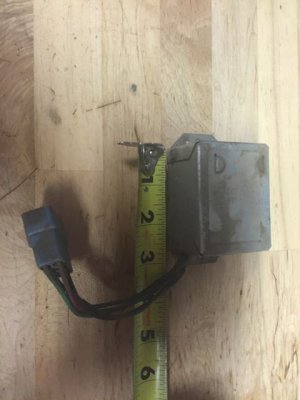
That's the GV computer tucked in there as well. It's just resting there for the time being until I decide how to mount it. It uses a very odd RCA jack-type power input, but with only one lead in each of two RCA jacks, one for power and one for ground. It's the silliest system I've ever seen, when each RCA jack has two poles and could provide BOTH power and ground! You can just see the two RCA plugs on the left and right of the box. They take up about an extra inch on each side of the box too - silly.

IMG_3355.jpg

Found this funky 1970 stereo speaker crossover sitting loose on top of the top of the glove box enclosure. Now I know where that rattle was coming from! Don't figure I'll ever use THAT part gain!

IMG_3350.jpg

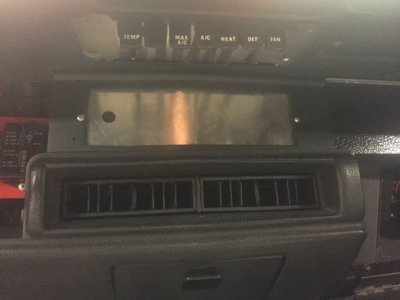
Working on fab-ing up a plate to mount my new switches on in place of the radio, but it's not going very well. It looks OK I guess, but I'm using an aftermarket radio delete plate from something else I bought and it doesn't match, and the recessed part of the plate means the switches aren't fitting very well, and I kinda like the look of my old radio.

IMG_3356.jpg

I went to talk to a guy about making a custom center-console for me to hide all of these spare computers and mount all of my switches. He loved the car and had some incredible cars in the shop including a real Shelby GT500 KR. Even if you're not a Ford guy, that car is BEAUTIFUL, INCREDIBLE and RARE. Unfortunately he was a little out of my league price-wise, though the quality of the work done there was impeccable. I'm sure he'd do an incredible job if I could afford it.

The drive there was about 30 miles, which I did on the freeway at 75! Seriously I used to hide in the right lane so as not to be crushed by a minivan. Now I'm hauling in the left lane and frustrated at people going 70. You know, the way it's SUPPOSED TO BE! My speedometer is jumping all over the place because of the stupid cable-driven speedometer drive I was forced to mount as a result of the GV unit, but using Speedbox on my iPhone, I had the car cruising at 75 and hitting 100 IN A HURRY by shifting to second-over and then to third-over. The Gear Vendor basically works as advertised. The "gear whine" seems to have mostly gone away, and may have been partially the result of the GV unit being brand new. I still have avoided many of the issues KernDog discussed as a result of having the newest generation of GV unit rather than one of the older models. I wish it downshifted a little more smoothly off the gas when coasting down, but in fairness, they DO mention that the unit shifts much better on-the-gas, which seems to be true. Under acceleration it feels no more harsh than the trans shifting, just faster. So far, so good...
 
This post started off sorta strange......
" They did a great job getting my main pipe up closer to the body".

Sorry... I have a silly sense of humor.
 
From page 1 on 6/9/12.....


And a repaint is exactly what I'm doing.

I don't have any interest in tearing the car down to nothing and spending 3 years putting it back together again.


Sorry, someone had to bring this up. :tongue:
 
From page 1 on 6/9/12.....Sorry, someone had to bring this up. :tongue:

I'm actually laughing out loud. Uh... Yeah... About that...

Actually, I'm proud of the fact that, since I started, the car has never been not-running for more than a few weeks at a stretch. I like to take everything on as a discreet project and return the car to running and driving after each one. It's partly fear of becoming overwhelmed by a project with no end in sight, and partly just pure "Engineer-ness". I can't stand machines that don't run.

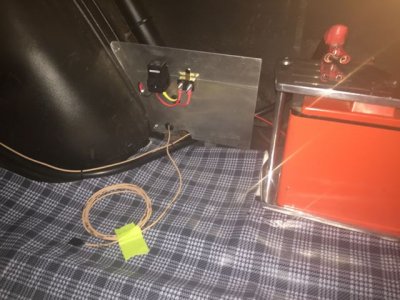
Speaking of discreet projects. This is my latest - you know I love wiring. It's a 30 amp relay run from a low amp switch at the dash to drive a new electric fuel pump. I got the idea for the switch panel on the rear wheel well crimp from another car I saw with a trunk-mounted battery. Eventually my main 12-Volt cutoff will get mounted there as well, hence the oversized panel.

The light brown wire is from American Autowire and is labeled Fuel Pump every foot for the whole length. Pretty neat...

IMG_3375.jpg


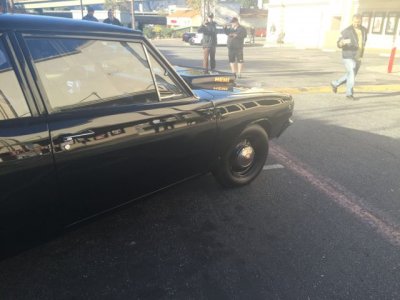
I saw a beautiful Hemi Dart this morning at a local get-together. I probably could have taken a better pic of the whole car! Huge drag slicks, great custom interior and cage, and check out the pedestal mount for the Hurst shifter. Anyone ever seen that before? It's kinda cool...

IMG_3373.jpg

IMG_3368.jpg

IMG_3369.jpg

IMG_3370.jpg
 
And speaking of that fuel pump wire

Well I am off on my latest project - to replace the stock fuel tank with an aftermarket aluminum tank with a tank-mounted fuel pump capable of supporting my current carburetor and maybe eventually a fuel injection system. I found a tank from a place which is local to me called Hot Rod City Garage. They are a Vet-owned business and do very pretty aluminum work. The tank has not only an internal pump, but a linear, vertical fuel gauge sender, a sump near the pickup and internal baffles to keep the fuel from sloshing around. And a drain. As far as I'm concerned, ANYTHING that hold liquid should have a drain. Damn transmission pans! I HATE transmission pans...

Sorry - Not the greatest picture.
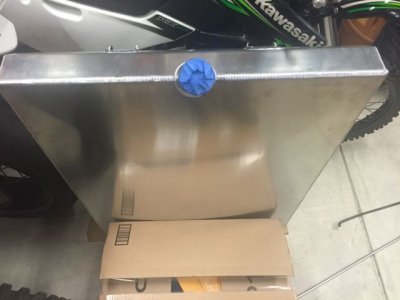
IMG_3395.jpg

I also bought an Aeromotive Fuel Pressure Regulator which has the capability (through changing the internal spring) to support 3 to 10 psi fuel pressure for carburetors and up to 60 psi for fuel injection. That way if I go to fuel injection I don't have to buy a new regulator.
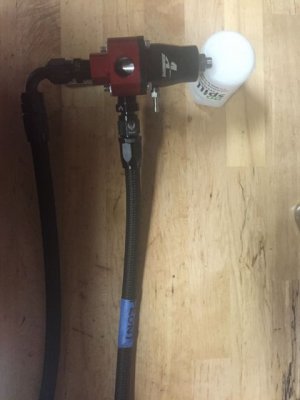
IMG_3394.jpg

I'll admit that what looks like an easy project - bolt the new tank into the stock location - quickly becomes a serious one when you start having to run high pressure fuel delivery and return lines from the tank to the engine bay, and then to mount the regulator neatly. Wiring the power for the fuel pump was the easiest part of the project, that's for sure.

I had originally intended to run flexible braided lines (the black nylon braided type) from the tank to the engine bay, but have had numerous people tell me of the great danger of doing so (some sarcasm here) - What if you have an accident. That line can be easily cut... the options are essentially to run aluminum or steel line from a short "whip" at the tank to another short flexible whip at the regulator. I need to take pictures to do that job justice and share it with you, but boy is that a chore. For now, I'll show you what i ended up with at the carburetor end, because that is what I have pictures of.

Let me start by saying that what appears in the photos to be hundreds of dollars of aluminum AN fittings is, in fact, hundreds of dollars of aluminum AN fittings! To be fair, it's HALF of the total number I bought, tried, and then set aside! Well maybe not that bad, but I have plenty of "spare parts" left...

Here is where I started. Note that the coil is side-mounted using a hemi-type coil bracket and I have a flex-line running between the two carb bowls.
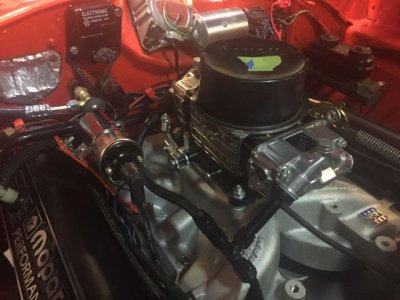
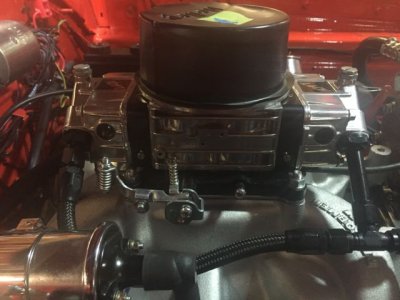
IMG_3411.jpg

IMG_3413.jpg


And here's where I ended up. Fuel comes in from a line which runs up the firewall inside a silver flexible cloth heat shield to protect it from areas where it is nearest the last header tube on the passenger side. It's no closer than about 6 inches, but hey, it's FUEL hose. Can't be too careful. The fuel supply line is in the foreground with the inline filter visible and the ONE BLUE FITTING (I'll get rid of that).

The regulator is mounted to the "fuel rail" in between the carb bowls using both hard fittings and a short section of hose to allow the parts to have some flexibility and to be assembled. The tolerances are VERY tight. The fuel return line is just barely visible in the picture. It runs from the bottom of the regulator into the heat shield sleeve with the fuel supply hose.

I mounted a gauge on the end of the fuel rail but I may use that just for adjustment and then simply cap the end of the rail. Not sure it is really necessary to leave it on there permanently. I know in the end the layout looks simple, and I wrote it up for in 15 minutes, but MY GOD did it take a lot of fiddle-f!@#ing and figuring. This may be my most complicated project yet...
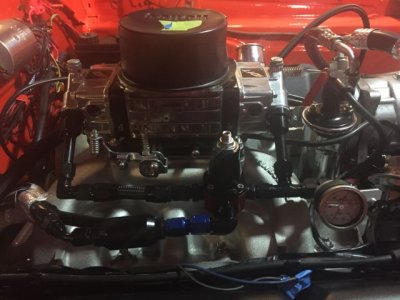
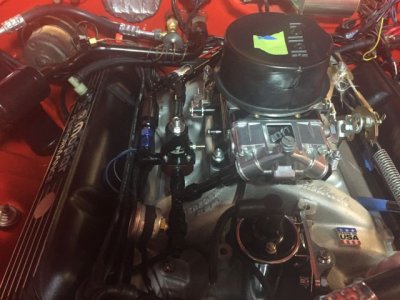
IMG_3416.jpg

IMG_3417.jpg

IMG_3418.jpg

My understanding is that the in-tank pumps run relatively high pressures - up to 130psi - to support all kinds of modern injection systems. This means that I'll have lots of fuel bypassing the rail and running back to the tank, and SPRAYING back into the tank. The guys at Hot Rod City actually said they align the fittings at the pump such that the returning fuel runs over the pump to keep it cool when the tank is low. Even though a fuel injected engine runs higher rail pressures, the actual amount of fuel consumed is no higher than in the same carbureted engine, so my system should not be "circulating" any more fuel that and stock modern high pressure system. Seems odd though. Is that how modern systems work? Or do they simply deadhead at the rail, holding a constant pressure?

I haven't tested it yet as I'm not quite ready with all the lines to fill the tank. I wish I could test it with something other than gasoline just to check for leaks, but I guess there's no real danger in the gas as long as the engine is cold and not running. One advantage of the bypass is that I can test the whole system with the pump on and the engine not even running. The Fuel system shouldn't know whether the carb is drawing fuel or not...

Does this all sound safe and effective so far?
 
Last edited:
I always wanted hood pins.

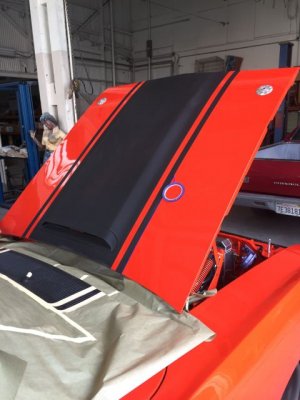
Went down to my buddy's shop to put another coat of Organosol on the front stripes (a little orange showing through) and got finally got the hood pins I always wanted. Looks awesome - and would you believe they actually keep the hood from jiggling around at high speed? Who would have known...

IMG_3643.jpg

View attachment 315985

View attachment 315986

And look what was hiding in back getting some touch up work done. Has a giant cross-ram intake and huge headers through the fender wells.

IMG_3644.jpg
 
Auto Transport Service
Back
Top