• When you click on links to various merchants on this site and make a purchase, this can result in this site earning a commission. Affiliate programs and affiliations include, but are not limited to, the eBay Partner Network.

Hawk-Rod: The Restoration

Great help on the key buzzer. I have my feature restored now. I have the connectors for the headlight on also, but nothing connected. So I am assuming not a RR feature. New question on interior upper windshield trim piece. I have the trim piece but it was not installed. Do you know what length the screws are to hold this piece in place. Also is there a special clip it screws into, or holes in the headliner mount? I really can figure out how this should mount. If you have pictures of the headliner area at the top of the windshield and any mounting devices that would help me figure it out. I could not fine any info on my searches. G
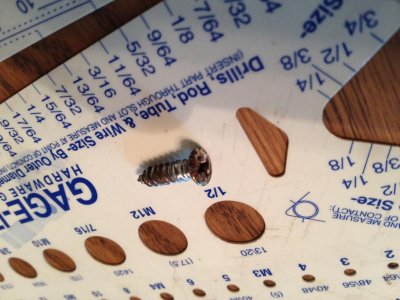
 
New question on interior upper windshield trim piece. I have the trim piece but it was not installed. Do you know what length the screws are to hold this piece in place. Also is there a special clip it screws into, or holes in the headliner mount? I really can figure out how this should mount. If you have pictures of the headliner area at the top of the windshield and any mounting devices that would help me figure it out. I could not fine any info on my searches. G

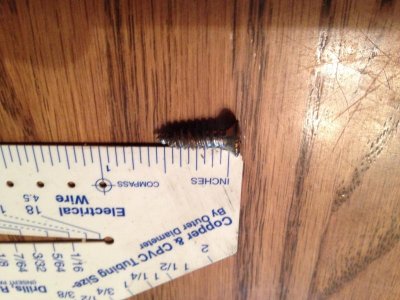
Here are a couple of pictures of one of my screws for that trim piece. They are 1/2" long. Sorry, once again these got flipped upside down when I added them to the post. Hopefully you get the idea.
IMG_2971.jpg

IMG_2970.jpg

It turns out I don't have a good picture of the clips - which annoys me because I wanted to try and take a picture of EVERYTHING so I could more easily put it all back together. I had a friend help me with the interior, so my 'photographic evidence file' is weak for the interior. Here is a picture of the clip from outside the car. I am afraid it is the best I got...
IMG_1750.jpg
 
Thank you. Ok, I got the right screws. So there are clips required for the interior trim? That I don't have. G
 
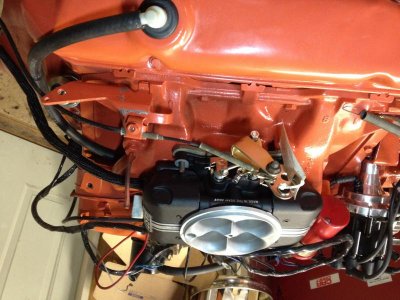
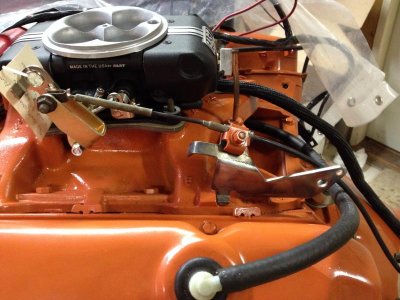
So tonight I tackled my throttle cable. The FAST EFI has the throttle shaft mounted higher in the unit than a stock Holley carb, so the alignment of the cable was all wrong. The throttle would not pull smoothly and had a sharp bend in it. Not workable at all.

The first thing I did was bend the top of my throttle cable bracket to open up the angle some. 'Lifting' the mounting pad helped bring the cable closer to where it needed to be, but the angle, although better, was still bad. At that point, it looked like this: (This is really annoying, the pictures on my PC are NOT rotated like this, and once I upload them there is no way to rotate them - WTF!?!?!?)
IMG_2985.jpg

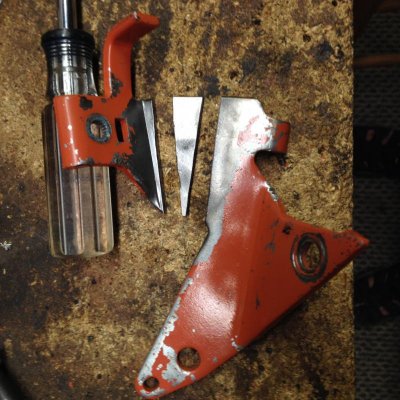
So I cut the bracket and cut a custom piece of steel to sit in the middle. Again, this isn't rotated properly, but this one is a bit easier to see the piece that I added:
IMG_2994.jpg

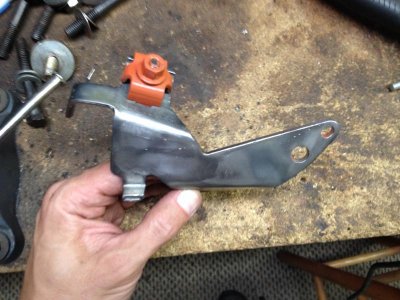
The end result after some welding and grinding:
IMG_2996.jpg

Here it is mounted on the engine. At this point, the geometry of the cable is perfect, and the throttle cable pulls the throttle smoothly from idle to WOT. I am really happy with the way this bracket turned out - it looks like it will now work perfectly, and look at least similar to stock. Now just to throw on a little paint and we are good to go...
IMG_2999.jpg
 
Nice job on the throttle bracket, you took care of that nicely.
No idea on the pic, mine have always posted the same way they looked on my computer.
 
Great work your keeping up with and those bumpers are just great looking!
 
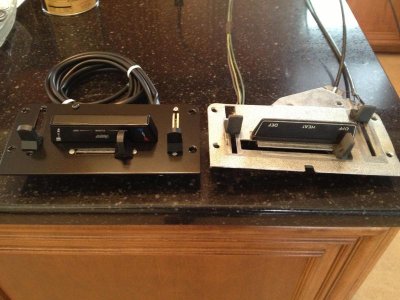
As some of you may recall from earlier posts, I bought a Classic Air system so I could add air conditioning to my car. The kit seems really nice, but there was one thing that bugged me.

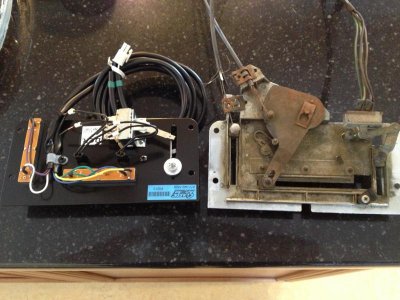
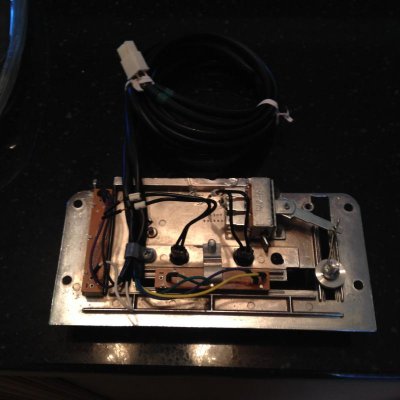
I purchased a DER system which was a "Direct Electronic Replacement" for the mechanical controls of the old system. While this was nice, what bothered me was that it was mounted on a black painted plate, rather than a chrome plate as original. This is what I received, compared to my original controls:
IMG_1836.jpg

IMG_1838.jpg

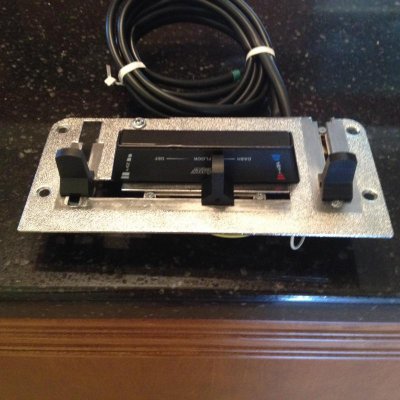
So I decided I wanted to mount the DER controls on the original plate. I ended up getting it all adapted to the old plate, although this was NOT as easy as I had hoped. There were several things that made the swap a bit challenging. One is that the new black plate is thicker than the original chrome plate. Also, the switches do not mount the same way, so I had to find alternate ways to mount them. Also, the old, chrome plate had to be modified with several parts cut off, drilled, etc. so the new controls could be mounted and work properly. Here is my end result:
IMG_3009.jpg

IMG_3011.jpg
 
Looks great, You are fast becoming a new fabricator in equipment man! Everything looks as it should or better!!
 
Looking good! I'm envious on the AC add (especially here in the heat of the Florida summer) and the EFI should make for a very reliable setup.

- - - Updated - - -

Thank you. Ok, I got the right screws. So there are clips required for the interior trim? That I don't have. G

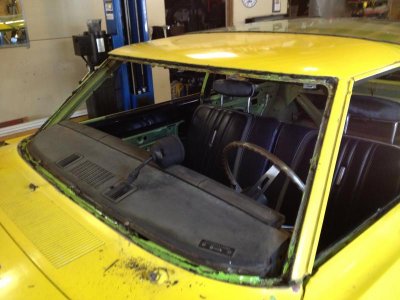
If you look at the pic that Hawk posted of the car without the windshield, you can see the "tangs" with the long slotted holes in them hanging just below the lip of the winshield opening (look like 4" over from the A Pillar). This is where the screws for the interior upper headliner trim go.

I think that is what you were looking for.
 
Apex is back on the Road Runner now. Fantastic!

Mark, here are the specs for the hood paint, just in case you don't have them:
70RR-hood blackout.jpg
 
Finally got back on the car after several days of being tied up with other stuff.

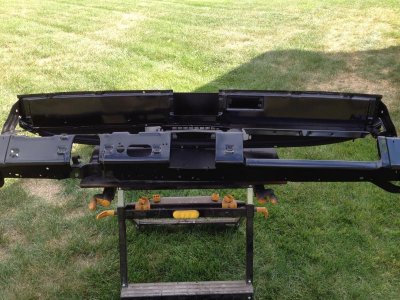
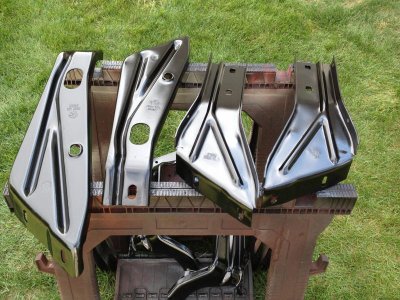
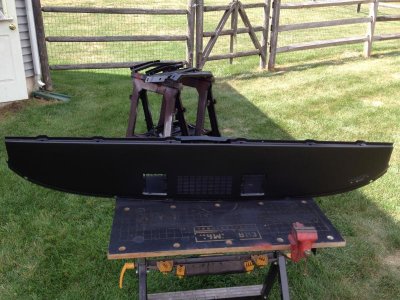
Nothing too exciting, I cleaned and painted the front and rear bumper supports (man is this ever dirty work!), and then sanded, cleaned and painted my dash too. Painting outdoors isn't too great, but conditions today were good with almost no wind and low humidity.

Here are the bumper supports - I painted them semi-gloss black:
IMG_3041.jpg

Here is the dash. I painted the top of the dash flat black. I found the Rustoleum paint recommended and tried that - seemed to work well:
IMG_3050.jpg

I painted the face of the dash semi-gloss, although it really doesn't matter - the only part that is visible is the underside where the heater controls and map light mount. All the rest is covered up by the instrument cluster and dash panels. To be absolutely correct, this should also be textured (almost flat) back too...
IMG_3049.jpg

Boring stuff, but necessary. :icon_neutral:
 
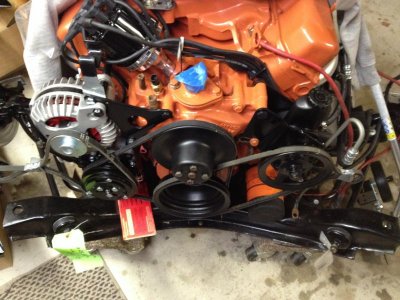
Nice!!! Looking forward to seeing the A/C pump mounted (I'll be doing that this winter and want to get some ideas on the pulleys etc). Looking good and I love the black throttle body.
 
Nice!!! Looking forward to seeing the A/C pump mounted (I'll be doing that this winter and want to get some ideas on the pulleys etc). Looking good and I love the black throttle body.

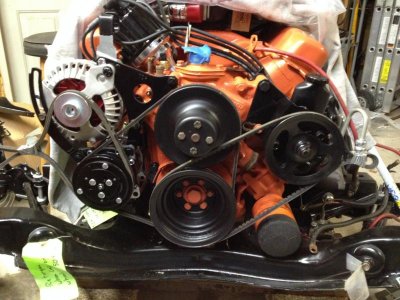
Thanks. My A/C compressor is mounted. I don't yet have the proper belts for it, so I mocked it up with some duct tape to hold the long belts. LOL, I don't think that will work very well in operation, but at least you will get an idea of where they are to run. Hope this helps...

Hawk

IMG_3057.jpg

IMG_3054.jpg

IMG_3054.jpg IMG_3057.jpg
 
Auto Transport Service
Back
Top