You are using an out of date browser. It may not display this or other websites correctly.
You should upgrade or use an alternative browser.
You should upgrade or use an alternative browser.
Hawk-Rod: The Restoration
- Thread starter HawkRod
- Start date
- Local time
- 5:19 PM
- Joined
- Jul 17, 2008
- Messages
- 26,908
- Reaction score
- 84,360
- Location
- South Jersey USA
i hope to only have Hawks car on the rotisserie for a week or so.
ok....... so i spoke too soon
we had a wave of collision work come in and pushed things back a couple weeks, but we will be back on track in the coming days, complete with new pictures....... Hawk, your patience is greatly appreciated
ok....... so i spoke too soon
we had a wave of collision work come in and pushed things back a couple weeks, but we will be back on track in the coming days, complete with new pictures....... Hawk, your patience is greatly appreciated
Heck, I am hoping to catch up to you guys!!! I'm not sure how much longer I have before the entire K-Member assembly is ready, but I will keep plugging away at it. It's "small stuff" like this plug that can eat your lunch and take more time...
Hawk
Doing some work today - making some progress.
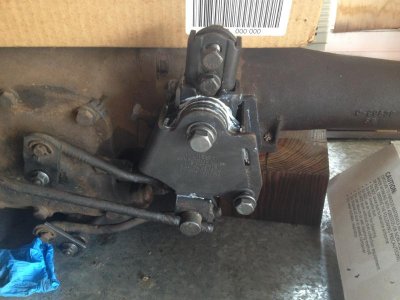
Cleaned up my Hurst shifter. Nothing too wild, just took it apart (with lots of pictures), cleaned and re-greased it.
Here is the finished product loosely attached to the tranny.
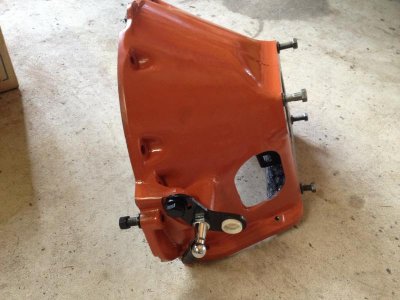
Also finished cleaning up the bellhousing. I bought a kit from Passon for the Z-bar since I had to replace several pieces that were worn or broken. Bellhousing is now ready to go...
Cleaned up my Hurst shifter. Nothing too wild, just took it apart (with lots of pictures), cleaned and re-greased it.

Here is the finished product loosely attached to the tranny.

Also finished cleaning up the bellhousing. I bought a kit from Passon for the Z-bar since I had to replace several pieces that were worn or broken. Bellhousing is now ready to go...

Redhorse719
Well-Known Member
:sSig_goodjob:
- Local time
- 5:19 PM
- Joined
- Jul 17, 2008
- Messages
- 26,908
- Reaction score
- 84,360
- Location
- South Jersey USA
my turn........
Hawk, i fought the temptation of texting these pics to you......figured i'd let you discover them here.
hope to get the hood compartment and trunk done in the coming week......... have a great weekend!


- - - Updated - - -
Hawk, i fought the temptation of texting these pics to you......figured i'd let you discover them here.
hope to get the hood compartment and trunk done in the coming week......... have a great weekend!
- - - Updated - - -
Sweet!!!
:hello2:
Awesome. Now I am stoked to get back out in the garage! I was just cleaning paint off of old brackets to get them ready for paint. What you are doing is MUCH more exciting!!!
Hawk
P.S. And yes, ladies and gentlemen, that IS the original color of my car (although more of it on the bottom than original ;-)
Last edited:
Redhorse719
Well-Known Member
That is beautiful! Can't wait to see the topside. :happy1:
- Local time
- 5:19 PM
- Joined
- Jul 17, 2008
- Messages
- 26,908
- Reaction score
- 84,360
- Location
- South Jersey USA
the factory didnt put much of anything under this car........ was pretty much bare with a bit of surface rust, a little overspray, and a small spattering of undercoat here and there.........
so the choices were undercoat or paint........ there was a good amount of undercoat in the wheelwells, and i plan to replace it there and under the fenders where stuff gets kicked up by the tires
the green should make for a nice backdrop for the rest of the under car stuff.......... mine is on deck
so the choices were undercoat or paint........ there was a good amount of undercoat in the wheelwells, and i plan to replace it there and under the fenders where stuff gets kicked up by the tires
the green should make for a nice backdrop for the rest of the under car stuff.......... mine is on deck
Phils68RR
Well-Known Member
70rr
Great photos, doing the same to my 68 RR, trying to assemble, lots missing of the car when I got it, Phil
- - - Updated - - -
Great photos, doing the same to my 68 RR, trying to assemble, lots missing of the car when I got it, Phil
Great photos, doing the same to my 68 RR, trying to assemble, lots missing of the car when I got it, Phil
- - - Updated - - -
Great photos, doing the same to my 68 RR, trying to assemble, lots missing of the car when I got it, Phil
the factory didnt put much of anything under this car........ was pretty much bare with a bit of surface rust, a little overspray, and a small spattering of undercoat here and there.........
so the choices were undercoat or paint........ there was a good amount of undercoat in the wheelwells, and i plan to replace it there and under the fenders where stuff gets kicked up by the tires
the green should make for a nice backdrop for the rest of the under car stuff.......... mine is on deck
Mark and I went back and forth on the bottom. One option was to have gray "primer" color paint on the bottom and then have the green overspray to better mimic what the factory did. However, I really wanted to have protection from the elements, so something more than primer was essential.
Mark talked about how nice some of the cars he has seen are with the painted undercarriage. I have seen a few that way too. Yeah, I know it is not "correct", but I know it looks nice. Also, it certainly will help protect the underneath.
...Can't wait to see it cut in. I need to get the Engine/trans cradle done so we can drop the car onto its wheels again! It is cool when you make the turn and start putting stuff back together!
maxwedge1962
Member
Hawk, I would say the project is progressing very well. This should be one fine machine when you are done with her. I really like the color and doing the underside looks really great. Who cares if it is not what the factory did, you aren't going for a show car, but a car you can drive and enjoy like it was meant to be when designed and built.
Keep on doing your magic and it won't be long until you can turn the key, fire her up and take that long awaited first drive.
Bruce
Keep on doing your magic and it won't be long until you can turn the key, fire her up and take that long awaited first drive.
Bruce
Hawk, I would say the project is progressing very well. This should be one fine machine when you are done with her. I really like the color and doing the underside looks really great. Who cares if it is not what the factory did, you aren't going for a show car, but a car you can drive and enjoy like it was meant to be when designed and built.
Keep on doing your magic and it won't be long until you can turn the key, fire her up and take that long awaited first drive.
Bruce
Thanks Bruce - appreciate the kind words!
Like any restoration project, it is over budget already. I hate to say it, but I guess that is par for the course.
I really don't care what the car is worth in the end, because I am not doing this to sell it, I am doing it for ME. Of course, there are realities of money and time, both which are limited. So, I am trying to take some shortcuts with things I can either do later or that might not be noticed. For now, the original 80,000 mile engine will go back into the car. It runs great, so I won't spend the money now to fix it up. A stroker will be in the future, but that will be when my savings account builds back up.
In other cases, I am taking some shortcuts. For example, I only painted the brake and clutch pedals and put new pads on them. The rest of the whole assembly I left alone. It worked fine and no one will ever see that there is some very light rust on the assembly unless they crawl under my dash. Guess I'll never show the car at Pebble Beach!
I am working hard now to get the K-Member back together so it is ready to go back in the car. I want to be ready when Apex gets the car cut in so I can get it back on its wheels quickly. Then it can go back and get the rest of the paint done without me screwing it up too much with engine and suspension installation!
Making progress...
Some Progress, Some Setbacks
So I made some progress, but I had some setbacks too.
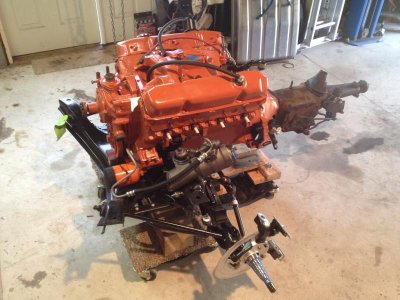
On the good news side, I got the engine and trans back on the K-member. This means that I got a lot of other parts cleaned up and ready to get these items back together.
The bad news is that my rear "roller jack" support was not a good plan. It was too tall and without a wide enough base. Once the engine and trans were back on the K-member, I swung the trans tail shaft sideways to move it. The jack wheel hit a small metal fragment and stopped suddenly. The jack toppled over and the trans tail shaft crashed to the floor. I had only gotten one of the bottom transmission bolts in at this time, and it ripped that bolt right out of the aluminum bell housing. CRAP!!! :angryfire:
I assume I should helicoil it to repair? I haven't done this before, but if anyone has any suggestions I would appreciate it...
Thanks,
Hawk
Here is a picture after I changed the "roller jack" and made it sit on two wheel dollies. the wood structure holds the dollies from separating, and this is now much more steady - what I should have built in the first place...
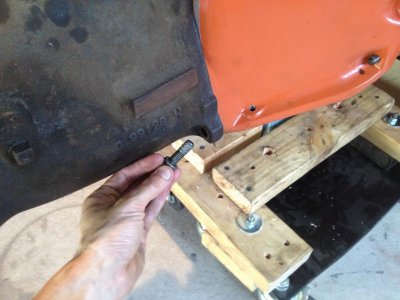
Here is the bolt I tore out of the bellhousing... :sad10:
So I made some progress, but I had some setbacks too.
On the good news side, I got the engine and trans back on the K-member. This means that I got a lot of other parts cleaned up and ready to get these items back together.
The bad news is that my rear "roller jack" support was not a good plan. It was too tall and without a wide enough base. Once the engine and trans were back on the K-member, I swung the trans tail shaft sideways to move it. The jack wheel hit a small metal fragment and stopped suddenly. The jack toppled over and the trans tail shaft crashed to the floor. I had only gotten one of the bottom transmission bolts in at this time, and it ripped that bolt right out of the aluminum bell housing. CRAP!!! :angryfire:
I assume I should helicoil it to repair? I haven't done this before, but if anyone has any suggestions I would appreciate it...
Thanks,
Hawk
Here is a picture after I changed the "roller jack" and made it sit on two wheel dollies. the wood structure holds the dollies from separating, and this is now much more steady - what I should have built in the first place...

Here is the bolt I tore out of the bellhousing... :sad10:

Working on the front pulleys and A/C compressor.
Alternator bracket is original, but the small bracket under it is part of the A/C kit. Also note the bracket that replaces the fuel pump. It is not just a block off, but also has a bolt hole for the compressor.
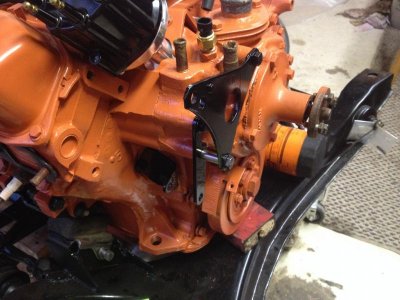
Here is a shot with the lower compressor bracket. This uses the two lower passenger side timing cover bolt holes.
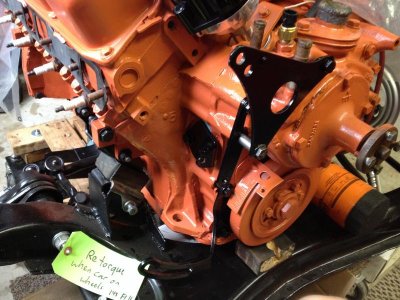
Here is the compressor loosely mounted.
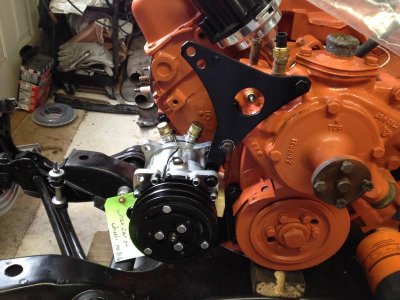
One issue I am having is with the grooves lining up. I put my original water pump and crank pulleys back on and they do not seem to line up?!?! It is as if the water pump pulley needs a spacer behind it? I don't remember taking one off... :eusa_think:
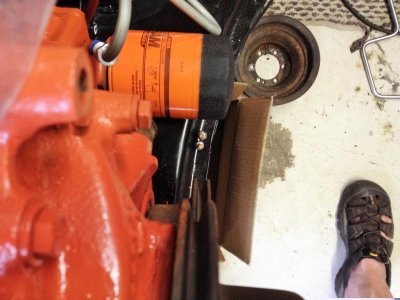
Alternator bracket is original, but the small bracket under it is part of the A/C kit. Also note the bracket that replaces the fuel pump. It is not just a block off, but also has a bolt hole for the compressor.

Here is a shot with the lower compressor bracket. This uses the two lower passenger side timing cover bolt holes.

Here is the compressor loosely mounted.

One issue I am having is with the grooves lining up. I put my original water pump and crank pulleys back on and they do not seem to line up?!?! It is as if the water pump pulley needs a spacer behind it? I don't remember taking one off... :eusa_think:

GearAddict
Well-Known Member
Nice progress Hawk! The green looks great on the underside and I like the matching green LCA shaft "Torque to 145lbs" reminder note.
Sorry to hear about the bell housing, that sucks.
Sorry to hear about the bell housing, that sucks.
Transmission Woes
So the family and I went on vacation for a few days, and work has been doing its usual to put a toll on my time.
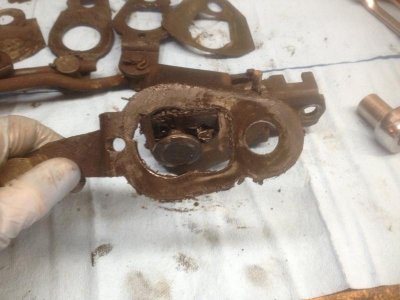
Today I got a chance to separate the transmission from the bell housing to fix the stripped threads in the bell housing. This happend from when transmission jack slipped and the trans, while attached to the engine, fell. Unfortunately, I found this: :sad4:
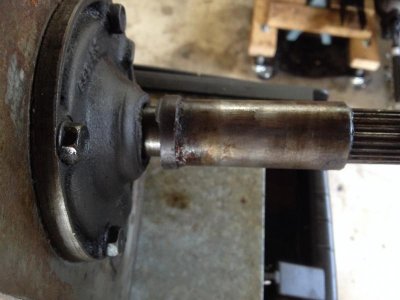
I'll be starting a separate thread on how to properly diagnose/fix this. As always, help is appreciated...
So the family and I went on vacation for a few days, and work has been doing its usual to put a toll on my time.
Today I got a chance to separate the transmission from the bell housing to fix the stripped threads in the bell housing. This happend from when transmission jack slipped and the trans, while attached to the engine, fell. Unfortunately, I found this: :sad4:

I'll be starting a separate thread on how to properly diagnose/fix this. As always, help is appreciated...
Bigbehr21
Well-Known Member
I will say this as succinctly as I can: That sucks!!
I will say this as succinctly as I can: That sucks!!
LOL. I am with you there! S**t happens, and we have to deal with it. Unfortunately, based on a couple of responses I have received on my transmission thread, it looks like this one might cost me...:angryfire:
Well, while I was waiting for this fine forum to help me figure out how much I had screwed up, I fixed my bolt holes in my bell housing. I put HeliCoils in the holes. Only one was stripped, but HeliCoils are actually much stronger than aluminum, so I decided to HeliCoil all four holes to ensure I don't have any issues in the future.
If you have never used HeliCoils before, the basic process is this:
(1) Drill the hole out with a specific size drill bit (for these it was 29/64").
(2) Use their tap to cut new threads.
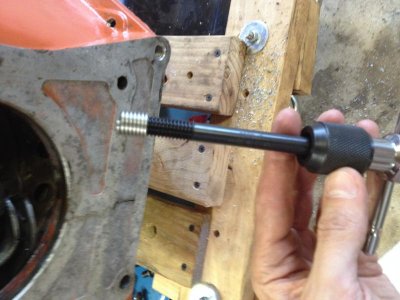
(3) Insert a Heli-Coil using their special insertion tool. It grabs a "tang" on the bottom of the coil. As you thread it in, it stretches the coil out and makes it easy to insert.
(4) Once inserted about 1/2 turn below the surface of the metal, use a punch to break off the tang.
It is now done!
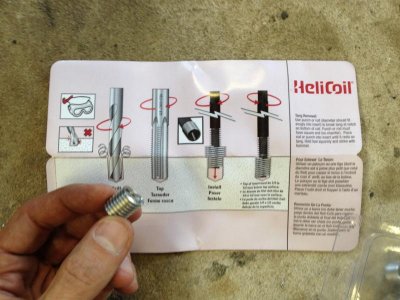
Here is a picture of the kit instructions along with a HeliCoil. Note tang on bottom.
Here is the HeliCoil on the insertion tool. Simply thread into the hole, then break off the tang.
Similar threads
- Replies
- 41
- Views
- 5K
- Replies
- 29
- Views
- 1K
- Replies
- 5
- Views
- 389


