• When you click on links to various merchants on this site and make a purchase, this can result in this site earning a commission. Affiliate programs and affiliations include, but are not limited to, the eBay Partner Network.

Hawk-Rod: The Restoration

I hope your epic trip goes threw Ohio (70 or 77), if so you might be met by a Charger along the way "I've got to see that car" haha.

There is a good chance we are going through Ohio, and if so, I want to see YOUR car!!! I am sure I will be more impressed and be able to learn more from your car than you with mine! :headbang: Either way, it would be fun to meet over a cold beer and argue about it! :VB toast:
 
LOL, this IS the case already, as I have been working on car stuff and not home projects, cutting grass, etc. Most hours I do have free are dedicated to the car.

LOL, I know what you mean. The landscaping around my house has taken a turn for the worse this past summer for the same reason. Beautiful paint job btw. Your thread helps keep the fire lit under my arse....
 
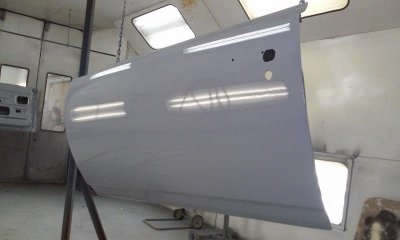
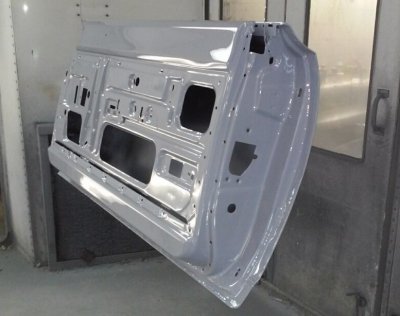
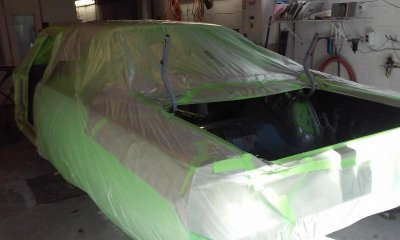
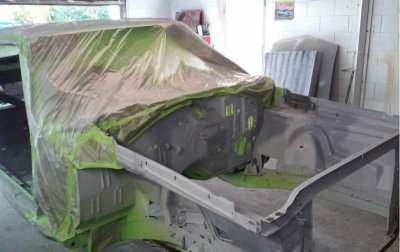
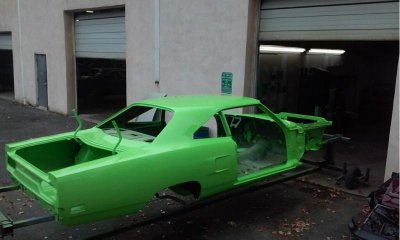
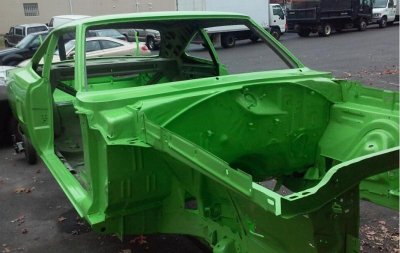
Marks doing some more work on the car - now doors, trunk and engine compartment. The hope is to get the main body shell back to me as soon as possible so I can start measuring the firewall for fuel pressure regulators and other relocated components.

Progress!

IMG_3276.jpg

IMG_3277 (2).JPG

IMG_3280.jpg

IMG_3279 (2).jpg
 
the reason i painted the outer body before the engine and trunk compartment was because i didnt want any overspray from the body to get on it...... even tho it wouldnt be visible, the slightest bit of overspray can be felt if you rub your hand or rag over it, i have no plans on buffing these areas so painting them last works for me......... i dont mind buffing a little overspray off the body if some gets on there, although i have it sealed up pretty good...... bottom line is, i want the engine bay to feel nice and "soft" with minimal work.

anyone mind a couple pics of Al's dart just to keep with the finish paint theme?....... this page could use a little color...... this one is headed home

dartfront_zps2a3d62e2.jpg

dartfront2_zps3e731731.jpg
 
Last edited:
ok........ this train is on the downside of the mountain and picking up steam

love it when a plan comes together

1414785912113_zps77446411.jpg


1414780868238_zps419ac626.jpg


1414786713417_zps297e42a3.jpg


1414788458417_zpsa98fbb65.jpg


1414785866951_zps9a78bde0.jpg


- - - Updated - - -

i accidentally put Hawk's hood treatment on Al's dart....... hope he's not pissed

alrrdart_zps1f47c062.jpg
 
Last edited:
That's what I'm talkin' about!!!!

Looks great - I cannot wait to get it back in the garage and start on the engine compartment!

Just tonight I put my first AN fitting together for my high pressure FI fuel line - kind of a PITA, but not too bad. Once the car is back in the garage, I want to mock up the lines. My plan is to mount the pressure sensing "T" and the pressure regulator "T" lower on the firewall towards the transmission tunnel. This way, they will be largely out of sight. Since my ignition system will use a new electronically controlled system, the ballast resistor won't be needed either, but I plan to dig that out and make the ballast resistor be a straight wire with no resistance. This way, it will look stock but perform no function.

Of course, the above are only ideas. Once I get everything mocked up I can figure out where everything will fit on the firewall so it looks decent and professional... I reserve the right to change LOL
 
OK, so a few updates:

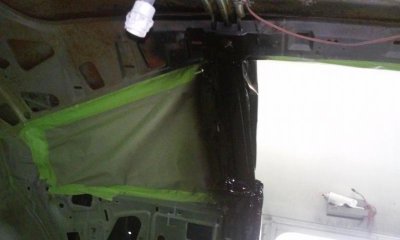
1) Mark continues to make progress on the car. The car is all green now, with some undercoating in the wheel wells and black inside on the post (for the black interior). Except for the hood stripe on the cowl area, the body shell is all but done. Man, it's getting close!

IMG_3333.jpg

IMG_3334.jpg

Inside Post - gotta have a LITTLE black...
IMG_3335.jpg

Undercoating (only in the wheel well)
IMG_3332.jpg

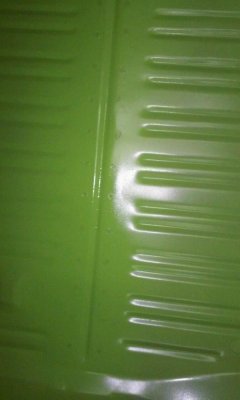
Check out the detail with the trunk "spot welds" that have been reproduced.
IMG_3330.jpg
 
hope to get the doors painted and hung very soon......

gonna leave it on the spinner for easy buffing of the roof and rocker panels....... then the rear and springs go in along with front castors......... then i take my rotisserie back home where a buddies 70 challenger r/t is patiently waiting


here, you forgot one :toothy6:

hawkgreen3_zps575662a6.jpg


and check out the paper monster ..... took almost an hour to unmask this thing, lol

hawkgreen4_zpsa23bccca.jpg
 
Also, just in case you think I have been slacking off: I have been working on wiring and plumbing. :icon_winkle:

For the wiring, I laid out three wiring harnesses and began working to merge them all together. The wiring harnesses are (1) The FAST Fuel Injection harness, (2) The MSD 6A harness, and (3) The factory wiring harness. As much as possible, I want them to look "factory-ish" so they don't look like an ugly add on. My FAST system will control my advance/timing, so all previous electronic ignition and distributor wiring has to be deleted. Also, I am changing my alternator gauge to a voltage gauge so I am not passing so much voltage through my firewall connector. No pictures of this as tons of wires laid out on the floor are kind of boring - pictures to come when I add this stuff to the car. For now, I am just planning and learning with schematics.

For the fuel plumbing, I planned and purchased the -6AN fittings and lines to build my fuel supply and return. I can't believe how much some %$#@! AN fittings cost! Four fittings and two 3' hoses for my throttle body cost $88. YIKES!!!

Here are the supply and return to the throttle body. Rather than coming from the front like the stock fuel line does, these will go to the firewall. The supply line will come from a "T" with a fuel pressure sensor, while the return will go to a fuel pressure regulator. My idea is to mount these lower on the firewall so they are not easily seen, yet out of the way from transmission, headers, etc. Once the body comes back to the house, I will mock up and fit those lines.
IMG_3321.jpg

Here is a shot of the front of the engine with a belts and low mounted A/C compressor. The A/C lines need to be routed as well, and I plan to route these low as well if I can...
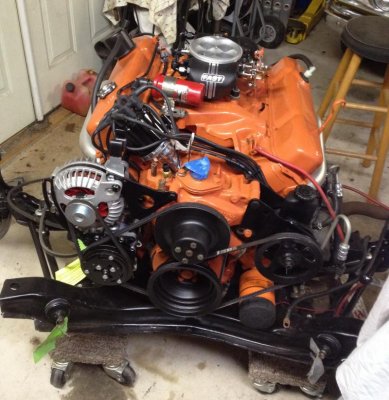
IMG_3324.jpg

- - - Updated - - -

here, you forgot one :toothy6:

Hey, you never sent me that one!!! That one is better than the one with my ugly mug in the reflection!!!
 
btw...... the trunk pic of the spot welds was taken mid-coat........... thus the "dry appearance" ............. all shiny now :toothy6:


Hawk, the engine, a/c and injection look great ...... looks like you will be having lots of fun over the holidays!
 
Are those real spot welds? or plug welds?
If you plug welded them, how did you get them to look like that?
 
Are those real spot welds? or plug welds?
If you plug welded them, how did you get them to look like that?

ancient chinese secret...........

seriously though....... i put them in the paint.......... the pans were plug welded, ground down, finished with a little filler, primed, and then sanded; not quite to the standard of the exterior, but enough to hide all the work. pretty labor intense, but worth it. I have several days in that trunk area, believe it or not. I put the "welds" on every visible area they are supposed to be.
 
so when you welded them, you left the weld pool below the top of the pan. Then you came back and prettied them up with filler? Wow that would be a lot of work! But they sure look factory.
 
so when you welded them, you left the weld pool below the top of the pan. Then you came back and prettied them up with filler? Wow that would be a lot of work! But they sure look factory.

nope!
he said he put them in the paint!
with a pencil eraser would be my guess..
 
lmao..... i feel sorry for the next poor bastard who attempts to disassemble this car by drilling the welds!
 
Well, however they are done, they look cool and the car looks sweet - I can't wait to get it on the road. You won't be able to wipe the grin off of my face for at least a month!

As far as any poor bastard who attempts to disassemble the car: It will most likely be my son, as I am never getting rid of it, so maybe many years from now he will be scratching his head as he attempts to restore it again - and maybe upgrade it with a warp drive or something! I do hope to be around a good bit longer, but certainly everything humanly possible has been done to avoid the need to fix it again.

LOL, I could see me approaching Mark 30 years from now to touch it up!
 
lmao..... i feel sorry for the next poor bastard who attempts to disassemble this car by drilling the welds!

its not that bad..
i took out a 2 piece trunk floor to put a one piece in its place
and i had to grind all the welds to get it out.
drilling would of been a big waste of my time.
 
Auto Transport Service
Back
Top