• When you click on links to various merchants on this site and make a purchase, this can result in this site earning a commission. Affiliate programs and affiliations include, but are not limited to, the eBay Partner Network.

Hawk-Rod: The Restoration

Hawk,

I should have been clearer, I will begin disassembly this summer, gotta finish the garage first, haha. I am 50 and this will be my first performance car since I was 19. Life has a way of taking over. I am looking at your project and seeing what may very will be my own, so it is with great interest that I am watching your efforts. Loving it so far.

The Behr.
 
Drilling for A/C

To "The Behr": Looks like you and I are about the same age and in about the same situation. I hope you can learn from my project - both the good and the bad!

I spent a good part of the day finding places for all the sheet metal that is arriving at my house. Two quarter panels and an outer wheelhouse came in ONE BOX. I swear, it was one of the biggest darn boxes I have ever seen!

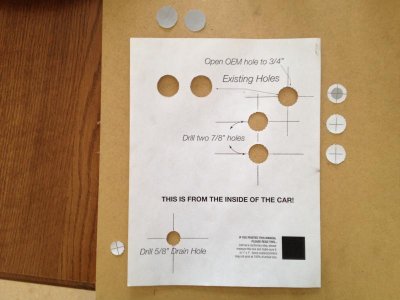
I did drill and roughly mock up the A/C today. This first picture is the template that Classic Air provides. I extended the straight lines beyond the holes and then I cut out the holes. This allowed me to lay the template over the existing firewall holes and then I scribed the cross onto the metal of the firewall. Finally, I used a punch to make a centering mark and drilled them out.
IMG_2010.jpg

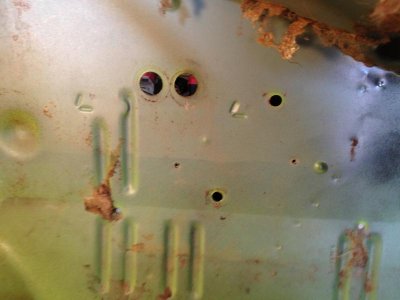
Here is the firewall pre-modification:
IMG_2012.jpg

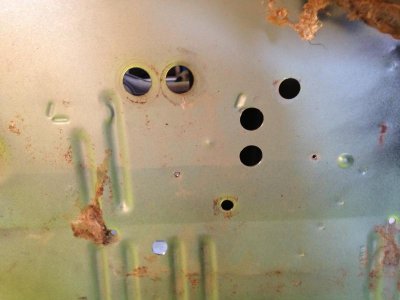
Here it is after cutting the new holes:
IMG_2013.jpg

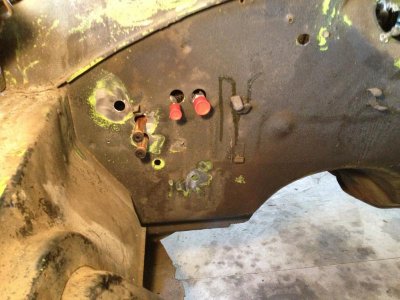
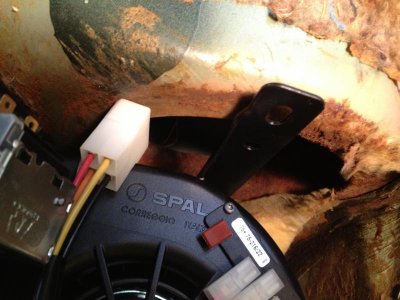
Here is the firewall from the engine side with the unit very roughly placed in its location. Although the lines are not in perfect position, partly this is due to the lack of proper installation. The lines also have some flex in them, so they can be moved a little bit for final installation.
IMG_2017.jpg

As mentioned in an earlier post, the passenger vent will end up with a plate that blocks it off. I had wanted to see if it was possible to make some kind of alternate unit to preserve the vent. Unfortunately, there is basically no room, so it will be nearly impossible to do.
IMG_2018.jpg

Here is the unit from the inside. Note my very sophisticated hammer holding the unit in place!!!
IMG_2019.jpg
 
awesome...... my heater box is nasty......... great reason not to deal with it!
 
Hey Hawk,

It is nice to see what the install actually will look like. I have a copy of the instructions to get an idea of whats involved. Like I said earlier, loving the photos and the overall documenting.

Behr
 
wow it has been awhile since I`ve been on ,your post is looking very thanks for taking the time to post a lot of photos for a to view ,thanks man :headbang:
 
wow it has been awhile since I`ve been on ,your post is looking very thanks for taking the time to post a lot of photos for a to view ,thanks man :headbang:

Thanks. I realize I might be posting too many pictures in some cases, so I am trying to think about what might be either interesting for folks to see or valuable as references. I have TONS of pictures, and I am hoping they help me get this beast back together correctly later!
 
Christmas in March!!!

So, I arrived home today to TWO "gifts".

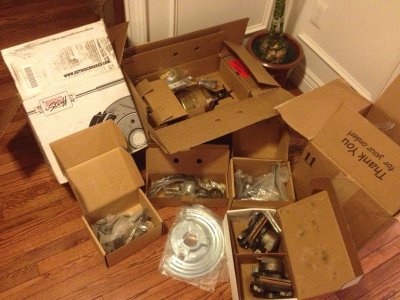
1) My power disk brake conversion kit from Right Stuff. Kit is very complete, right down to brake lines, clips, hardware, even brake shoes! It will be awhile before I can install this, but here are the boxes for your viewing pleasure...
IMG_2029.jpg


2) FINALLY - my body dolly kit. This means my car is now ready for Apex to come get it and start working on the bodywork. This picture is what comes in the kit. The ruler might be hard to see, but the casters are 8", so they are pretty big to help roll the car around.
IMG_2031.jpg

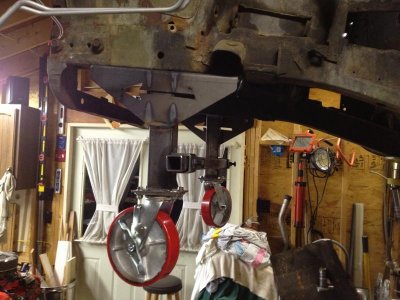
Attached to the front of the car. They attach with the K Member bolts. and a cross member helps give them lateral strength.
IMG_2034.jpg

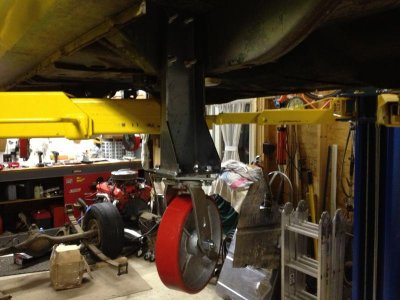
Here is the rear. The caster is not fully bolted up since I have to take it back off to park the 73 under it, but you get the idea...
IMG_2037.jpg
 
Lots of cool stuff going on over there!
 
Hawk, Where did the dolly kit come from?? Project looking awesome!!

I bought it from auto twirler. It was a bit over $400 with shipping, and looks like it will work well. Shipping took awhile, and when I called to inquire about it (three times) I never got a call back. But, it finally did arrive. I like the front supports a lot; they are braced in a way that both front to back and side to side have some support and strength. The back are bolted to the front spring supports, but have no additional bracing. More than likely, the four bolts are more than strong enough to provide all the support needed, but I might add a 2x4 for trailer transport. We will see. I have not yet had the car off the lift yet...
 
Next Phase Milestone Today!

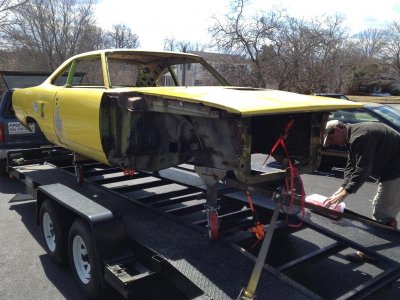
I am excited to report that a major milestone has been reached. My garage has now been significantly emptied, as Mark and Tom from Apex Collision came and picked up the car today. Mark is a fellow FBBO member, "eldubb440".

Mark and Tom are great car guys, although Tom has a minor fault that he like Pontiacs. However, I promised that I would tell the forum that he is a good guy so he doesn't fill my quarter panels with mud and newspaper! :icon_fU:

So now eldubb440 and I will both be making updates to this thread. He will make updates on bodywork progress, and I will update based on other parts I will be working on.

Making Progress!!!! :hello2:

Getting loaded onto the trailer
IMG_2054.jpg

Safely down at Apex
IMG_2057.JPG
 
lol...... trailer fit between the lift posts with 6 inches to spare on each side....... needless to say, it was off in less than five minutes.

with the heavy collision season winding down, we are looking forward to getting back into some resto work....... will also be bringing my GTX up to the shop......stay tuned
 
Great Progress Today

All I can say is WOW!

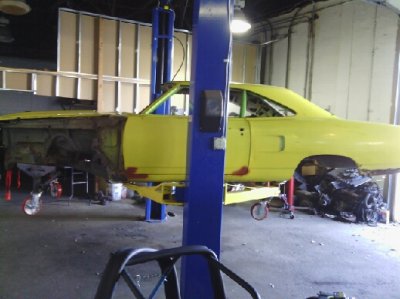
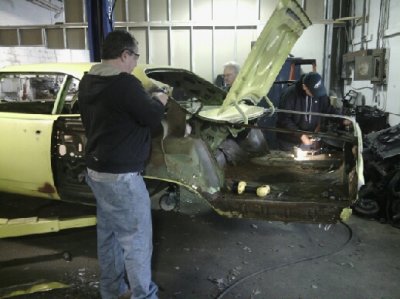
Apex hit it hard today and made great progress! I am amazed at how quickly the car got torn down - I would still be working on trying to drill out my first three spot welds, and would probably have screwed those up too!

Sorry for the small pictures, these are MMS texted pictures, so they don't have too much resolution:

Pulling off quarter panels
IMG_2069.JPG

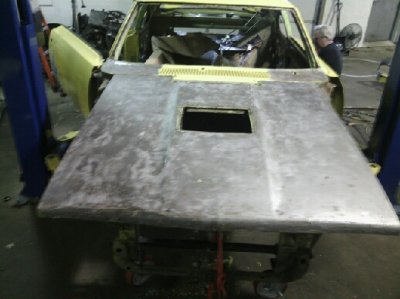
Hood stripped down
IMG_2072.JPG

This will be reused - it has a dent but can be fixed.
IMG_2073.JPG

What's left of the back of my car
IMG_2074.JPG

In some of the other pictures, my inner rockers look solid. To the best of my knowledge, no additional major issues have been found - yet. Let's hope things continue to go well.

Apex's great progress means I need to get my a$$ in gear on the weekends and get my parts restored. I have obtained many of the parts I need but now need to get some suspension elements. I have been delayed getting my PST order in. I guess I need to get all that finalized and ordered so I can get the whole K member assembly fixed up and ready to go back in (amongst many other items)...

Moving right along! :blob1:
 
first B body i took apart that didnt have rot holes at the rear of the rockers behind the quarter........ even the outer wheelhouses have very minimal issues......... will be removing the trunk pan in the next day or two

the hood is awesome, had one small dent repair at the very front.........

we also have another 70 RR in the shop, and a 69 Dart GT.......... all getting attention in and around the usual collision work....... this will never become one of those "bodyshop nightmare" threads..........


Hawk, you are the model client............. you make our job easy........ we appreciate it and you will be rewarded :eek:ccasion14:
 
.....all you guys make this process transparent and educational. I love my mopars and the tech behind them. Keep it coming!
 
What an awesome thread...Getting the view from both sides of the fence. I wish there were more collision shops like yours Mark, it would have made my life a lot nicer for the last three years. On the plus side my "nightmare" experience has lead me to purchase my own MIG welder and start practicing.
 
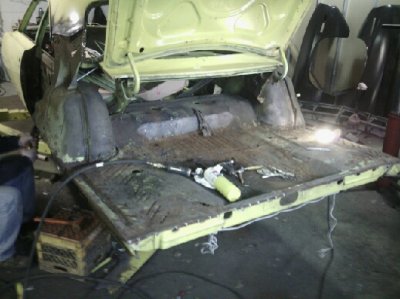
got her ripped down to the rails today and pretty much trimmed out for the trunk pan........ little cleanup followed with zinc weldable primer and the pan will go in........ got to break away tomorrow to put a lincoln front together, then back on the Hawk-Rod :headbang:

hawk2_zps07a77e19.jpg


hawk1_zpsfd10358e.jpg


other than the trunk pan and lower quarters, this is by far the nicest B body I have torn into :sunny:
 
other than the trunk pan and lower quarters, this is by far the nicest B body I have torn into :sunny:

Thank You California!!! If it hadn't of sat outside in PA weather for two years, imagine how nice it would look!
 
Thank You California!!! If it hadn't of sat outside in PA weather for two years, imagine how nice it would look!

it's almost like someone put a bag of salt in the trunk and forgot about it :nono:
 
It looks like things are really starting to progress in the right direction for you with the build. It should be really sweet when you get her done! Look forward to taking a ride and having that beer. Bruce
 
Auto Transport Service
Back
Top