• When you click on links to various merchants on this site and make a purchase, this can result in this site earning a commission. Affiliate programs and affiliations include, but are not limited to, the eBay Partner Network.

Hawk-Rod: The Restoration

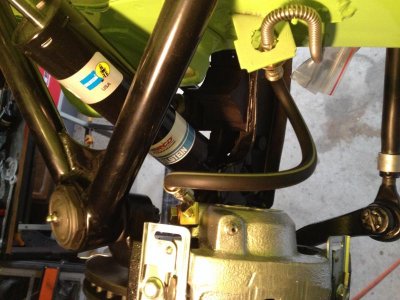
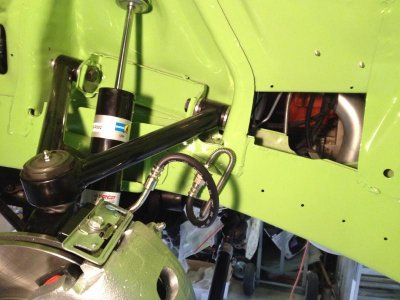
Here are a couple of more detailed pictures of the issue. My concern is that this is with the suspension fully unloaded and hanging. As the suspension travels up, the line will kink hard.

Maybe try and put a bend on the hard line so it angles towards the center of the car instead of pointing backwards and up??? :shruggy:
IMG_4259.jpg

IMG_4261.jpg

- - - Updated - - -

not the best angle but you can see the the steel line section of the line is pointing up.
I was surprised to see with all of the other trick parts, you aren't installing steel braided brake lines?
View attachment 241974

Interesting. That looks like my setup. It just looks like the rubber line will take a beating having to make a couple of sharp u bends.

As far as trick parts, I figured rubber lines have worked great on these cars for many years. I guess I like the "stock" look as much as possible while trying to "hide" the trick parts... :grin:
 
look pretty good to me
looks like the suspension is "not" setting at ride height in that image?
is should look better once the weight of the car is on the suspension.
Me thinks the U bends are what makes the line work correctly giving line when tuning and movement up and down.
This is how mopar doses it so good enough for me..:}

OK. Thanks. I will mount it up, get some weight on the wheels and see how it works. In the mean time, I found some cheap 73 Road Runner lines. I will order a couple of those, as they can always be used for my son's 73.
 
If you are still concerned get some Russel or other steel braided lines with flare on the body side and a banjo fitting on the caliper side which will eliminate the steel line part of the OEM lines giving you concern. Steel braided lines are always a good upgrade.. Firmer brake pedal and would look nice against the aftermarket upper A arms you have. Hope the arms have plenty of caster built into them. As we all know these B bodies can use more caster than we can get a lot of times. I've used off set upper A arm bushings to get that little bit more they need. I'd guess my 70 Satellite has none or very little caster the way it drives and how the steering wheel returns to center. or how it doesn't return :{
Cheap and brake lines shouldn't really be used in the same sentence? IMO

Rodney - thanks again.

Agreed, if I still have issues I can look into the braided steel lines. Also, yes, the upper control arms DO have additional caster built in to them, which is why I bought them. They are from PST.

LOL, with cheap and brakes not being used together. Agreed! The lines I found are Raybestos and were on manufacturer close out, so they were cheap for that reason. Hopefully NOT cheap as far as quality!

Hawk
 
Sorry to interject here Hawk but I can't find that part with the hard line .. where did you get it? Brand and part number if you have it please ;)
 
Sorry to interject here Hawk but I can't find that part with the hard line .. where did you get it? Brand and part number if you have it please ;)

Hi Bryan,

They came with my kit from Right Stuff Detailing. I am pretty sure that they are their part number FH111. Note that RSD also makes a braided stainless steel unit that has part number FH111S. Here is the link for FH111:

http://www.getdiscbrakes.com/fh111

Hawk

- - - Updated - - -

I now have the torsion bars back in the car. They went in very easily, as everything is now clean and painted and restored. Finally something went easily!!!

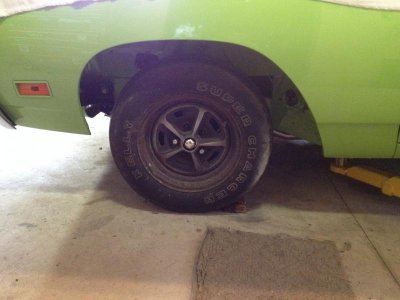
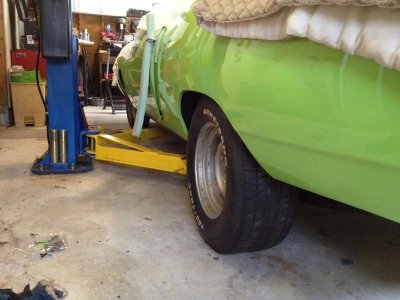
Here are a couple of shots of the car (mostly) holding itself up on its own four wheels for the first time in about a year. Yipee!!! By the way, note how tiny the 205/70B14 tires look on the front! Definitely need something bigger!

IMG_4264.jpg

Back wheels/tires are 275/60R15's with a 4.5" backspacing. These won't stay as I am going with new tires and Magnum 500 style rims, but the size will be the same.
IMG_4265.jpg
 
its great to see it as a roller again!!!!!! cant wait to see a driveway shot........ got your battery tray brace yet?
 
Thanks Hawk. FYI the braided version are out of stock

The 70 RR, especially, needs 15" wheels IMHO.

Did you stay with the 383 T bars or or move up to 440/Hemi or something else Hawk?

- - - Updated - - -

Hi Bryan,

They came with my kit from Right Stuff Detailing. I am pretty sure that they are their part number FH111. Note that RSD also makes a braided stainless steel unit that has part number FH111S. Here is the link for FH111:

http://www.getdiscbrakes.com/fh111

Hawk

- - - Updated - - -

I now have the torsion bars back in the car. They went in very easily, as everything is now clean and painted and restored. Finally something went easily!!!

Here are a couple of shots of the car (mostly) holding itself up on its own four wheels for the first time in about a year. Yipee!!! By the way, note how tiny the 205/70B14 tires look on the front! Definitely need something bigger!

View attachment 242016

Back wheels/tires are 275/60R15's with a 4.5" backspacing. These won't stay as I am going with new tires and Magnum 500 style rims, but the size will be the same.
View attachment 242017
 
its great to see it as a roller again!!!!!! cant wait to see a driveway shot........ got your battery tray brace yet?

Sorry, the weather has been holding me up. I finally got the battery tray brace fitted, removed and bead blasted. It is in a box with a fuel nozzle brace ready to send to you!

- - - Updated - - -

Did you stay with the 383 T bars or or move up to 440/Hemi or something else Hawk?

- - - Updated - - -

My car came with the A36 option. This included 3.55 sure grip, HD cooling and HEMI suspension, so I had the HEMI bars all along. They were in great shape, not bent, rusted or dinged, so I figured I would reuse them. I am hoping they will give me a decent ride/handling combination. If I want more later on, I may consider upgrading to bigger bars...

Hawk
 
Sorry, the weather has been holding me up. I finally got the battery tray brace fitted, removed and bead blasted. It is in a box with a fuel nozzle brace ready to send to you!

- - - Updated - - -


My car came with the A36 option. This included 3.55 sure grip, HD cooling and HEMI suspension, so I had the HEMI bars all along. They were in great shape, not bent, rusted or dinged, so I figured I would reuse them. I am hoping they will give me a decent ride/handling combination. If I want more later on, I may consider upgrading to bigger bars...

Hawk

My apologies Hawk .. I couldn't remember for sure and didn't want assume. The big T bars are one of the reasons those little tires look so small ;). Mine has the A31 option and I'd never drive another B body w/o the big t bars and springs out back.
 
ine has the A31 option and I'd never drive another B body w/o the big t bars and springs out back.

Sweet. That was the 3.91 if I recall properly. Eventually, I might want to put steeper gears in my car but it depends on the OD level. LOL, for my drive across country, I have a 2.73 open rear set that I might have to throw in to get some highway gears - that's going the opposite direction!
 
I think you'll like that suspension, I'm running the tubular a arms as well along with the heavier springs and the car drives great especially threw the turns. Looking great and I agree "it's nice to see a roller again"!
 
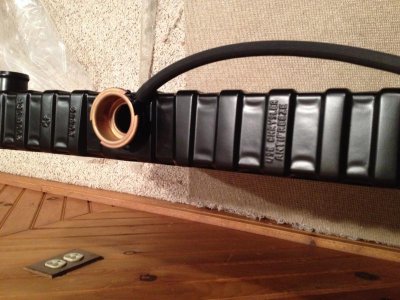
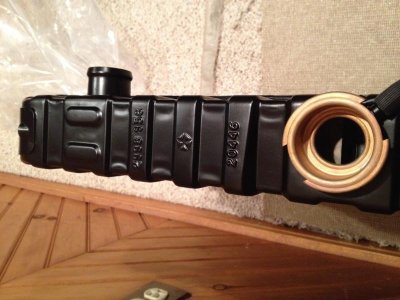
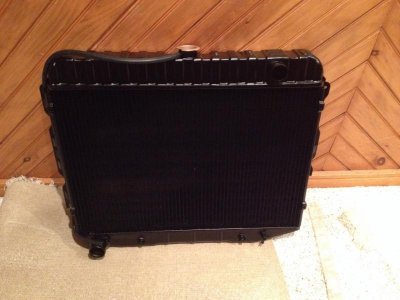
I got a present from the UPS delivery person today. My radiator is back from Glenn Ray Radiator.

I expected great things from them, having heard so much about them. Well, they delivered - the radiator looks absolutely brand spanking new! It also has a new core that can easily handle the added A/C. They also included all the proper hardware and proper hose clamps. Nice! Now I can drive in the desert with A/C on and not worry about it :hello2:

IMG_4275.jpg

IMG_4276.jpg

IMG_4277.jpg

Can't install it tonight - too much going on - but installation of this should be a snap!

Hawk
 
OH MY GOD..!
all this pictures reminds me of the times I started my project about 12 yrs ago..!
now that I have almost done , I hope you can keep a good memory or build a log on how and where all goes..
is gonna be a killer car ..!
Congrats..!
Apolo 1100
 
OH MY GOD..!
all this pictures reminds me of the times I started my project about 12 yrs ago..!
now that I have almost done , I hope you can keep a good memory or build a log on how and where all goes..
is gonna be a killer car ..!
Congrats..!
Apolo 1100

Thanks Apolo! I am looking forward to driving it soon.

I learned a long time ago that I will NOT remember how the heck stuff goes back together, so I took LOTS of pictures of the car before disassembly as well as during disassembly. They have been serving me well, although I STILL end up with some crazy angle or shot I need that I don't have. But that's where the forum is great! Any questions, and I have a world of help right here! Awesome! :headbang:
 
Looking great Hawk, those 14" rims do look small, the magnums will be perfect. Wow that radiator is fantastic.
 
I got a present from the UPS delivery person today. My radiator is back from Glenn Ray Radiator.

I expected great things from them, having heard so much about them. Well, they delivered - the radiator looks absolutely brand spanking new! It also has a new core that can easily handle the added A/C. They also included all the proper hardware and proper hose clamps. Nice! Now I can drive in the desert with A/C on and not worry about it :hello2:

View attachment 242326

View attachment 242327

View attachment 242328

Can't install it tonight - too much going on - but installation of this should be a snap!

Hawk

LOL.... I talked to Bob last week, ordered a 26" rad. He said he was in the middle of restoring one first and then he would start on mine. I'll bet it was yours.
 
LOL.... I talked to Bob last week, ordered a 26" rad. He said he was in the middle of restoring one first and then he would start on mine. I'll bet it was yours.
CoronetDarter: You won't be disappointed!

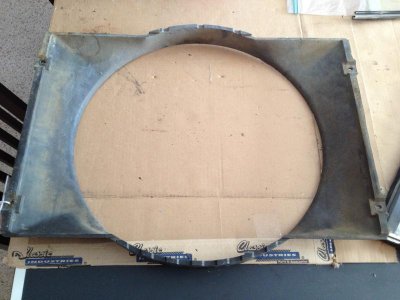
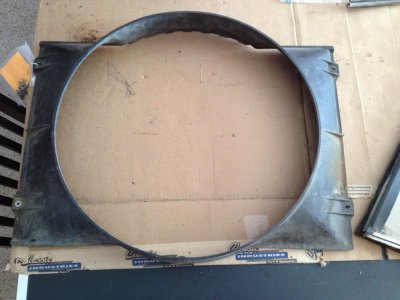
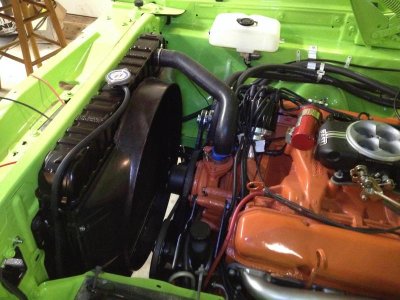
So speaking of the radiator, I got mine installed today. I also cleaned up my fan shroud too. My wife suggested I try some shutter renew stuff that is intended to clean up chalky plastic shutters. I tried it and it worked well. Here is what my fan shroud started off looking like.
IMG_4297.jpg

IMG_4298.jpg

Here it is installed in the car after cleaning and the renew stuff. I still have to attach the return hose to the engine, but I will wait with that until the fan is installed.
IMG_4309.jpg

I also completed a few suspension items, like finishing torqueing my suspension, adding front suspension bumpers, putting polyurethane into my sway bar and tightening up my torsion bar. No pictures of this - pretty boring stuff...

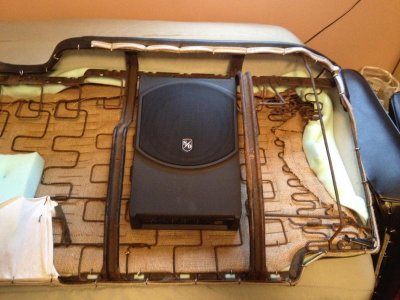
I then spent way more time than I should have working on my stereo system. First, I will be mounting a subwoofer under the back seat. I bought an 8" unit from Crutchfield that will fit between the rear seat rails. Here is a shot (with the subwoofer upside down from the way it will sit in the car just so you can see what it looks like).
IMG_4285.jpg

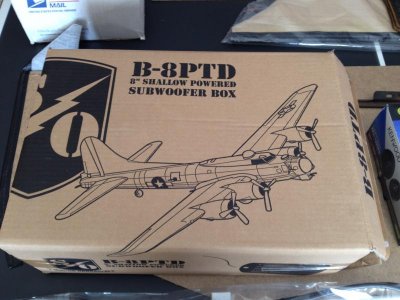
Here is the model number in case you like the idea - plus I like the box!
IMG_4284.jpg

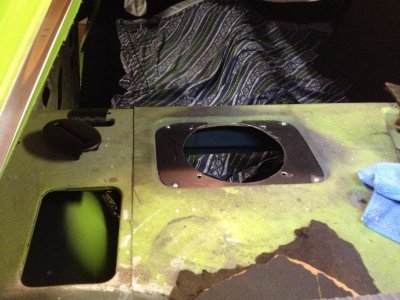
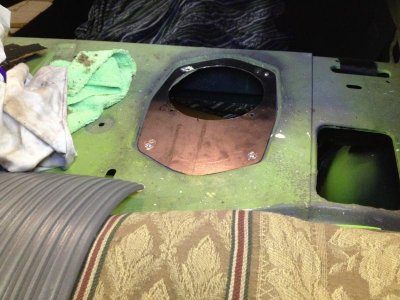
With my obsessive compulsive and symmetry sickness, I had to have the back speakers mounted so they look equal in the package tray. I bought 6.5" speakers that will surface mount, but I made metal plates so I can place them in the same mounting location on each side. I made custom metal plates that mounted in the original package tray so I didn't have to screw with the original package tray. Although ideally I wanted to hide the speakers, I had to give in on this to get decent sound. The rear speakers will be visible - oh well. Here are what the plates look like - not pretty, but they will get the job done.
IMG_4302.jpg

IMG_4303.jpg
 
Hiding Front Seat Belt Retractors

So I have now moved to working on the rear seat belt retractors. I want to maximize the space to get to the back seat without a back seat passenger having to trip over the retractor. Also, I want them hidden so you don't see them. Here is a mock up of my idea.

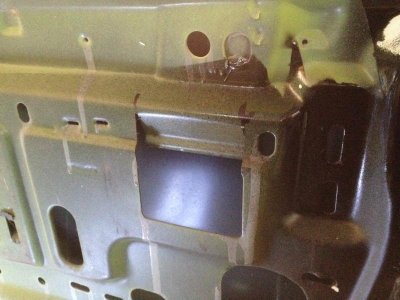
The first thing I had to do was cut two notches in the side of the car. I didn't like doing this, but it would be easy to weld these cuts back up if a future owner ever wants to return the car to stock. This creates the passageway for the belt.
IMG_4315.jpg

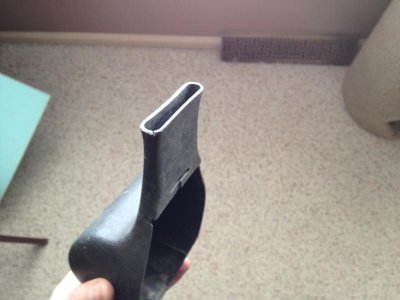
I am using two old junk seat belt retractor covers. I will cut off the bottom portion. The top portion will allow the seat belt to safely and smoothly travel through the channel.
IMG_4320.jpg

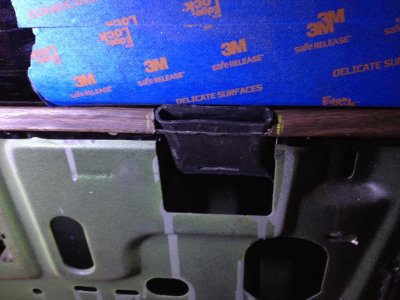
Here you can see it with portions of the interior pieces installed and how it will travel through the channel. Note that I had to cut a similar set of notches on the black upper bezel (with the blue protective tape).
IMG_4317.jpg

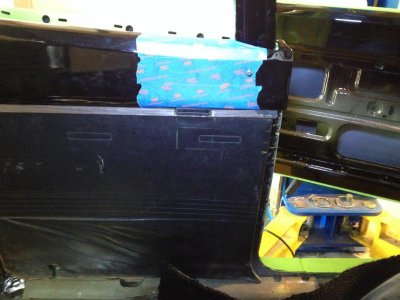
The door panel is an old beat up door panel I used as proof of concept. I notched the very top of it, and then cut out about an inch of the hard board behind the vinyl without cutting the vinyl. This creates extra room for the plastic seat belt guide, but cannot be seen from the interior. To me, this proves that the idea will work. Now to cut the new interior door panel and clean up and paint the trim above the panel. The old trim had fake wood grain on it, and it has grown on me since my car has the "wood" steering wheel and "wood" pistol grip shifter. I guess I will either leave these black or put the fake wood trim on them. I am open for opinions...
IMG_4319.jpg
 
Auto Transport Service
Back
Top