• When you click on links to various merchants on this site and make a purchase, this can result in this site earning a commission. Affiliate programs and affiliations include, but are not limited to, the eBay Partner Network.

My 1967 Belvedere Convertible Plans and Restoration (aka - Mad Scientist Build)

Been there, done that....turned my garage upside down and wasted half a day to find something that was in 'plain sight'. :rolleyes:

The project is looking good Larry.....keep it up. :thumbsup:
 
And Happy New Year to you too!! Right now I'm on the look out for a small but very bright flash light that I use to see into small places and even drawers and tool boxes. When you get old, ya need more light. I also like it because it turns on every time and then turns off with one push of the button. I have another bigger one but it takes one push to turn it on, another for dimmer and then rapid flash. Screw that crap plus it uses a rechargeable battery and it doesn't last long and it gives out quickly once it's done. I quit looking for it so maybe it'll turn up. And not even going to talk about looking for parts or nuts and bolts. One time I looked for a week for a part and it hit me to look in the wash vat.....there it was. If I'm not working on someone else's junk, I'm looking for stuff for mine!
 
I lost a 35ft tape measure once. Looked for weeks and off and on for half a year. When I went to do some nailing up wood i put my carpenter belt on and there it was, in one of the deep pockets. I had checked the tape measure pocket a couple of times. lol.
 
A couple of months ago I was in my bedroom closet (but I came out!) looking in an ammo drawer and left a different flash light in it. I was 'lost' for about a month.....
 
I wish I had all of the hours back I've wasted looking for parts, so frustrating!
 
We all have had those moment's. If you have ordered part's twice for the same thing then your not alone. :lol:
 
I get like that with small tools. I dunno how many little spanners and sockets that i have two of now. :)
 
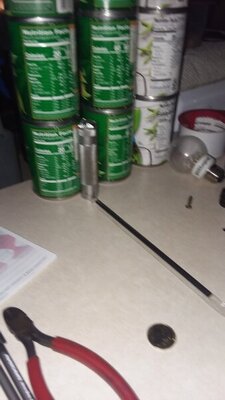
Found my flash light.....almost right in from of my face but isn't that usually the case? It's been sitting in this spot for a full week. There's a straw pointing at it and the can goods are waiting to be donated. Maybe I need to clean up my wreckage.

20210105_074641.jpg
 
Had a good day looking for parts today . . . and I'm pumped up about my potentials . . .

First of all - the wiper motor, decided to take a trip to the local Tear-a-Part (that's literally how they remove the parts at these places - wow)
and I stumbled on a 2001 Dodge Pickup Truck
( but I've been doing some research and I liked the way the whole "assembly" was done on the truck . . .

So . . . I picked the thing up . . . and BOY was I surprised ! ! !
Here it is set beside the one that comes out of the Belvedere . . .

sm_wipermoter01.jpg


DANG . . the motor is 1/4 the size and it can operate the wiper on a pickup truck, it'll do just FINE on my Belvedere ! !
AND . . . my plan is to "tuck" it up under the dash, so the smaller motor is a BIG plus . . . and I like the "assembly" idea and might try and incorporate that into my fabrication too.

Got some fabrication work to get done in my near future . . . things are looking UP for me . . .

Then, while I was down at the yard, I decided to look around for wheels and tires (only to make my car a roller), but to find out HOW much tire I'll be able to pack up into my wheel wells now that they've been mini-tubbed and de-humped . . . and I stumbled on these bad boys . . . so . . . I had to fight with wheel locks . . . but I got one off and decided to bring it home . . .

sm_rollertires01.jpg


Now . . . I know you're going to say that they're 6 bolt pattern rims . . . SO WHAT . . .
These are only EVER going to be for making this a roller ( and for fitment of how much tire I can put up in there )
So I might be doing the fabrication by hand drilling these and making them capable of being bolted on . . .

And the best part of all . . . tire and wheel - $37.00 . . . no CHIT ! !
Now I have to go back and get the 2nd one ( for the other rear tire )

Now . . . are you wondering how much tire I've got here . . . I'll show you . . .
( yes, probably should have cleaned these things up before putting up here . . . oh well )

sm_rollertires02.jpg


Diameter is 31" . . . and I think I've got 32" MAX on the opening ( yes, I did additional mods to the wheel openings too )
I'm excited to see if I can make this thing fit and HOW IT LOOKS . . .
( no, I don't like the thin tires, but If I go smaller rims and thinker tire . . . I might be in the ball park with what I really want )


Got some things that I'll be working on here ( keeping me out of trouble )
 
picked up the 2nd tire today from Tear-a-Part . . . and the name was fitting for me today, 2 hours trying to get the darn wheel lock off this time, where yesterday the thing came off in about 2 minutes . . .

Guess that's paybacks . . . then when I went to pay for it the same lady charged me $27.00 for this one ? ? I didn't say a word, just paid the bill and high tailed it out of there as fast as I possibly could so that she didn't have time to re-think her billing . . . LOL

Now to get them cleaned up, and get the proper holes drilled into them so that I can get them on the car ( if I can make them fit )
Basically - I think I can fit a 335 on this car so that should give me 1/2" on both sides for clearance, and my modifications to the front of the wheel well gives me as much room as I can possibly muster in that direction, and if my quick measurements were accurate, I should have 1/2 - 1" clearance at the front of the wheel wells . . . I think it should look awesome (size wise only)

Do NOT plan on putting a 22" rim under this car . . . it's the only tire this size I could fine and it's 31" in diameter . . . so - this is ALL about fitment.
 
Maybe the 37 bucks was 10 too much the first time around lol
 
To get the holes lined up very close to where they needed to be, I needed to mark the holes on the rims . . . didn't want to "guess" and I wanted it to be real close . . .

So this is what I did - made a wood block that fit in the wheel snugly and into my wheel gauge snugly . .

sm_rollertires04.jpg


When they're put together, it lines them up on the rim very nicely - marked them and hand drilled them . . .

sm_rollertires05.jpg


Well . . . I'm so close . . . and I've got an idea . . .

sm_rollertires03.jpg
 
Last edited:
Collection spots for dirt . . . what got into me ? ! ? ! ?

The weatherman said ( we know we can always believe them ) that the humidity today was going to increase - uh, how can it increase when it feels like it's already 100% humidity ? So I got out to the shop early and wanted to take pictures of an interesting thing I noticed on the passenger side, and forgot to take pictures. Places where the dirt can collect.

Both my passenger and driver side looked like this when I started:

View attachment 139588

The only way to compare it is to see what it "should" look like . . . this is after the cleanup . . .

View attachment 139587

There are (2) spots that i noticed collect dirt - noted by the arrows below . . .

View attachment 139594

Here's what got cleaned out of those spots . . . and I started to scrape the undercoating too . . .

View attachment 139590

Don't know what got into me . . . got in the zone and started scraping ( had a fan blowing on me to keep me cool, and music blaring in the background . . . ) I didn't think about it . . . just let it happen . . . Next thing I knew, this part was all cleaned up . . . Notice bucket 3 is starting to fill up ! ! !

View attachment 139592

I must have really been in the zone . . . here it is, before lunchtime, and the driver side is all cleaned up ( I know, this is NOT helping you with your plan to get the K-member dropped ) but removing undercoating is so much fun, when the mood strikes, you let it go ! ! !

Notice the collection on the floor . . .

View attachment 139596

Quite a difference from the picture above with all the ugh-dercoating all over the place . . .

View attachment 139591

In case you thought I was kidding, here's (2) bags full of (2) buckets full of junk that has been removed form the car . . . at the end, I'm going to weigh them and find out the grand total of junk removed . . . should be interesting.

View attachment 139593

Okay, now if I'm going to get the K-member out, I better get to work on it now ! ! ! Stop scraping ugh-dercoating ! ! !

- - - Updated - - -


Go take a look at the one that is offered by XV Motorsports . . . it's right along the same lines too . . . but, are they only for cars that are meant for the track ? ? ?


Just a suggestion, don't throw anything out until you're done.
 
So . . . the plan for the wheel spacer ( and now conversion ) . . . is as follows . . . Wing It ! ! !

Needed some 1/4" flat stock, and all that I had this past weekend in my shop was this . . . oh well, it's a start . . .
Split it, cut off the tabs . . . and it's "almost " flat-ish ( kinda sorta

maybe )

sm_spacer08.jpg


Sure didn't like the idea of turning this in the lathe with that "horrible" interrupted cut . . . looked like trouble to me . . .

sm_spacer04.jpg


So . . . over to the bandsaw and cut off some corner and get it closer to "looking" round-ish . . .

sm_spacer05.jpg


Then to remove the bad stuff . . . clamped them together in pairs to try and make it easier . . .

sm_spacer02.jpg


Get the outside edges cleaned up and saw that the middle needed a bit more . . .

sm_spacer03.jpg


sm_spacer01.jpg


This will never go on the car on the street - only to make my a car a roller in the shop . . . so now I get to hand drill them . . .

sm_spacer06.jpg


Not too shabby . . . they fit ( first try too ) that shocked the hell outa me . . .

sm_spacer07.jpg


Then take the 5 lug flat, add the 2 1/2" spacers in a star-ish pattern . . . 2 1/2 + (2) 1/4" flats = 3" . . .
Isn't it funny that it's the same 3" that Devin and I cut out of the axle to narrow it ! ! ! WOW ! ! !

sm_spacer09.jpg


Then add the top of the sandwich . . . and I add a spacer to check fitment, and convert a 5 lug into a 6 lug, and make my car a roller . . .
With some pretty impressive big arse meaty tires to boot . . . and not too pricey either . . .

sm_spacer10.jpg


Now for the fun part . . . trying to make this all happen and keep them all lined up so the tire can spin "fairly" true . . .
 
Finally got the first one knocked out . . .

Here's the top plate with the 6 bolt pattern . . .

sm_spacer11.jpg


And the entire thing all welded up . . . thought I cleaned all the galvanize stuff off the metal, but boy was I wrong

sm_spacer12.jpg


And the resulting tire placement in the wheel well . . .

sm_spacer13.jpg


So . . . my thoughts . . .

Do not think much of the rim styling . . . I wanted the deep dish look ( which will happen when I get the proper back spacing on my rims )
Not really keen on the skinny tire, but remember these are 22" rims - if I drop to 20 or 18, I'll add 1" or 2" additional tire
Really need to see the car on the ground, on the tires, and see how it looks . . .

But I do know that I can fit a 31" tall tire into these wheel wells (do to all my fabrication efforts) and that's what I needed to know . . .

And now I'll have to start looking for tires and wheels for this thing . . .
 
Got the other side adapter welded up and got the wheel installed on the car . . . so the rears are DONE . . .

Now, to focus my attention on the fronts . . . think I recall that a 15" wheel will NOT work with these parts . . .
Sooo . . . . I'm off to Tear-A-Part (Pull-A-Part as it's better known) to try and find me some wheels to make this a "roller" . . .

Had no idea what would work, nor where to look - so I just started wandering and looking . . .

And found these . . .

sm_fronts01.jpg


Good size tire, and they were 17" tires . . . so I thought I'd give them a "go" . . .

sm_fronts02.jpg


First thing I noticed ( actually forgot ) when I got back and "thought" about testing the tires for fit . . .

The center hub on the new front end . . . Ruh Roh . . . . Go back and look at the center hole on the top picture . . .

sm_fronts03.jpg


Easily resolved . . . these are "only" top make the car a roller and test fitments of tires . . .
So I pulled out the "bug gun", the tap magic, and a 2 3/4" hole saw . . . and begun my journey . . .

sm_fronts04.jpg


A little while later, I had the "slug" drilled out and ready to go - after some deburring on the edges and a lot of metal shaving to clean up

sm_fronts05.jpg


And the result . . .is a "much" bigger hole to allow the center hub to pass through . . . Uh, I hope . . .

sm_fronts06.jpg


Can "anything" go right on the first "try" . . . Nope . . . was wondering why the wheel was not wanting to spin . . .
Nothing looked like it was rubbing . . . till I looked behind and saw this . . . Argh . . .

sm_fronts07.jpg


Simple fix for this . . . flipped the bolt over and now I've got "plenty" of clearance ! ! !

sm_fronts08.jpg


And this is how the front of the tire looks with center hub through the center . . .

sm_fronts09.jpg


And how the tire looks on the front of the Belvedere . . . It's a nice wide tire, but I think I'll need a taller tire . . .

sm_fronts10.jpg


Next on the list of things to do . . . the A/C and wiper motor fabrication, move, and new "installation" . . .

You'll have to wait and see what I've got up my sleeves for the wiper motor . . . I think it's going to work out Awesome ! !

( uh, I hope . . . )
 
Finally got some time in the shop to finish up the Wiper Motor mods . . . and I'm really happy with the results . . .

If you haven't been under your dash to see what the wiper connections look like, this is how they looked in 1967 . . .
And they are NOT fun to try and remove . . . ( ok, they're not that bad )

sm_wipermods01.jpg


This is how the connections look on the newer cars - okay, this is actually from a 2007 (?) Dodge truck - a ball and cup . . .

sm_wipermods02.jpg


And the snap on the ball - and they can be greased - and they're a plastic so no metal on metal sounds . . . Quiet !

sm_wipermods03.jpg


and the connections are night and day different too . . .

sm_wipermods04.jpg


Plus they have a rubber piece on them that "should" help keep the grease in the cup . . .

sm_wipermods05.jpg


So . . . I removed the connection parts from the Dodge truck assemblies . . .

sm_wipermods06.jpg


So that they can be put on the 67 Belvedere . . .

sm_wipermods07.jpg


And the final results are as follows . . . it's ALL tucked up under the dash and I will no longer have it on the firewall . . .

sm_wipermods08.jpg


2 connecting brackets were welded to the top - ALL of the rubber sounds dampeners were utilized . . .
( yes, I've got 1 more bracket that need to be made to hold that bottom bracket - but the motor is Stock, no mods, and can be easily replaced if needed )

sm_wipermods09.jpg


This connecter needed to be adapted, shortened, and one side had to be flipped 180 degrees . . .
The other side is the stock connector . . .

sm_wipermods10.jpg


I hooked it up to a 12 volt power supply ( uh, battery charger ) and the thig works GREAT - very quiet ! ! !

I'm really happy with the results. . .
 
This DID make a HUGE difference in working in the shop this weekend . . .

Last week, this is what I had in my shop to work in . . .

sm_temp01.jpg


Compared to what I had in the shop today to work in . . . What a difference a couple days makes . . .

sm_temp02.jpg


Which means . . . that this will be getting some attention . . . and get cleaned up ! !

sm_firewallmods01.jpg
 
Auto Transport Service
Back
Top