• When you click on links to various merchants on this site and make a purchase, this can result in this site earning a commission. Affiliate programs and affiliations include, but are not limited to, the eBay Partner Network.

My 1967 Belvedere Convertible Plans and Restoration (aka - Mad Scientist Build)

Need to get out to the shop and remove a bracket

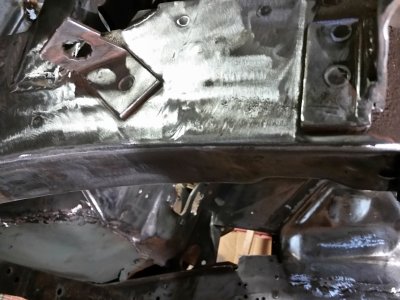
Last night I had the MagnumForce front suspension out in the shop and found out that I've got a couple of brackets on the front of the car that I'll need to remove to allow the suspension to sit flush against the frame rails . . .

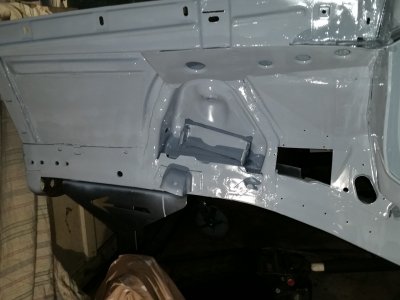
Here's what I found out . . . these (2) brackets on the front frame . . .
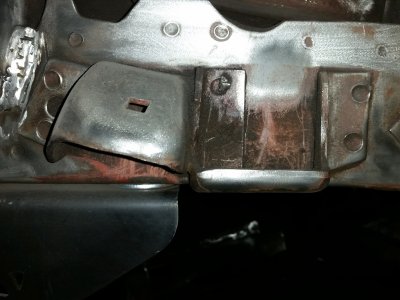
sm_removebracket01.jpg

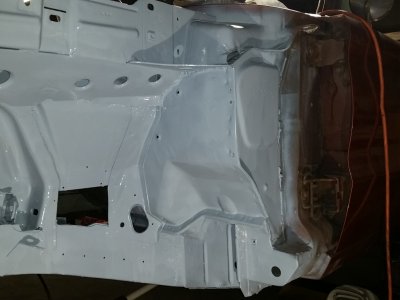
The one on the right has a portion of it that rolls under the frame and will have to be removed . . .
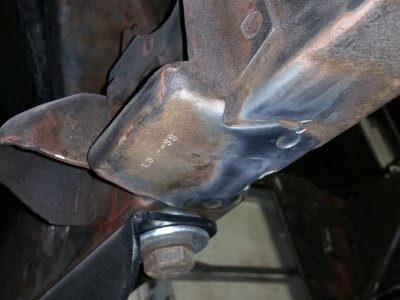
sm_removebracket02.jpg

This ought to be a whole lotta fun ! ! !


Can you just add spacers to the other A/C mounts and mount it on top of your motor mount?

I've had that idea, plus the option of shaving a little off the bottom to accommodate the bracket thickness . . . but until i get the engine in the front K-member and in the car - I'm only guessing . . .

I'm hoping that I'll be able to modify the brackets to allow the A/C to stay in that location - notice, being a car 5.7L hemi, the accessories are all in different locations then the truck version ! !

I'm sure I'll get something figured out - got a long weekend ahead of me and a goal to have the engine in the car this weekend and the tunnel hump figured out !


Evening Shop Session

Need to get these brackets off if I'm going to make my goal to get the Hemi in the Belvedere this weekend . . . so off to the shop I went . . .

Since I've got more room on the driver side of the car now, I attacked the driver side bracket first . . . and an hour later ( had to weld some mess ups ) . . .
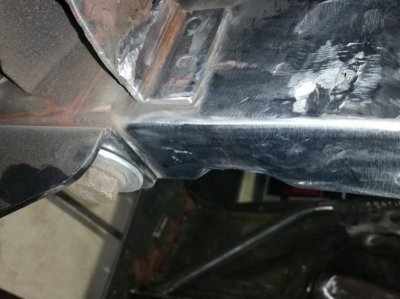
sm_removebracket03.jpg

OH . . . and walking back from lunch this afternoon I stumbled on this little beauty . . . and it was for sale too . . .
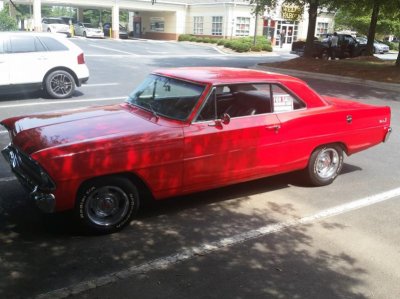
sm_foundahoebox4sale.jpg

67 - Had a 350 / Auto and sounded really good ! ! Got my hands full with my Belvedere . . . so I drooled all over it and left . . . ( he got a free car wash ! )
 
Last edited:
Passenger side bracket removed . . .

Got the passenger side bracket removed this afternoon . . . now to get the Magnum Force K-member mounted in the car . . .

this one went a whole lot faster ( and easier ) than the last one - if I had (2) more to do I'd be an expert at it ! !

sm_removebracket04.jpg

Still looking to reach my goal and get the Hemi in the Belvedere this weekend . . .
 
Time to install a hemi in the car

Set a goal - to get the hemi in the car today . . . and I was "going" to make it happen . . . even with the 120% humidity here . . .

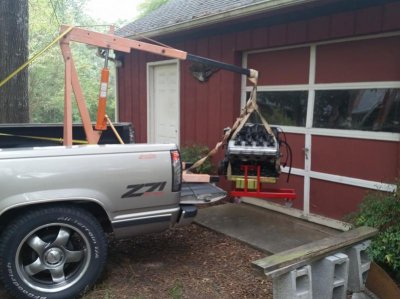
To make the process happen, I had to get the engine from my attached garage to the shop - across the grass . . . it wasn't going to roll on it's cradle . . .

So - time to improvise . . .

sm_installhemi01.jpg

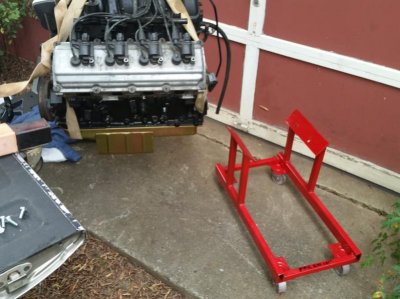
Then remove the cradle from the engine . . .

sm_installhemi02.jpg

Then I had the brilliant idea to "test fit" engine into the Magnum Force front suspension . . .

And that, my friends . . . ( very glad that I tried to test fit it first )

is where the whole thing fell apart . . .

I could not get the engine brackets, isolators, and front suspension to line up and work . . .


Calling this a bust until I can talk to MagnumForce and find out why nothing is fitting - wonder if this a car vs truck engine difference ? ?

ARGH ! ! !
 
DOUBLE ARGH!!!

Sorry to hear about the roadblock buddy! Hopefully Magnumforce has a quick fix in mind. There definitely seem to be enough differences between the car/truck engines that definitely could be the issue. Is that V10 still for sale? :)
 
Engine plate update

I've posted my curiosity of the passenger side 4 bolt pate and the driver side 3 bolt plate - when the 4 bolts are present on the driver side too . . .

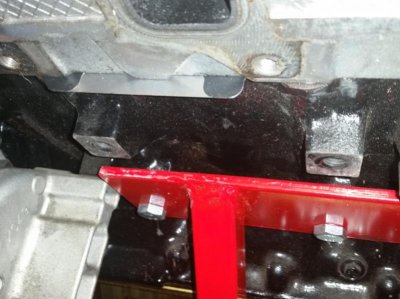
This picture shows the (5) mounting locations on this side of the block

sm_enginemounts03.jpg

And this picture illustrates the difference in the mounting brackets from passenger and driver sides . . .

sm_enginemounts01.jpg

However . . . I'm mounting a 5.7L Hemi in my car ( I'm not mounting a small block Chevy - ha ha, had to say that . . . )

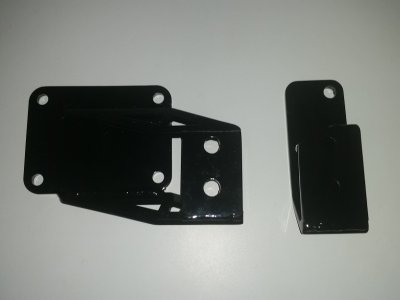
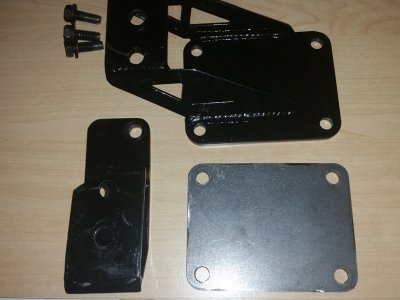
So I'd feel much better with the (4) bolt version on the Driver side ( plus on of the mounting holes is for my A/C compressor. They only make the (3) bolt version.
Worked out a deal with them to allow me to fabricate up my own version of the plate for the driver side. Got it in the mail today ! ! !

sm_bracketmods.jpg

Using the original (3) bolt plate, I'll cut the metal to fit the new (4) bolt plate into the existing one and convert it to the (4) bolt plate I prefer !

then I'll feel better with (4) bolts holding the Driver side in place on my HEMI ! !

One more item almost checked off the list . . .
 
I used all 4 bolts on each side also when I made brackets for my 5.7 in the Cuda. I welded a flat plate to a spool type engine mount from a small block Mopar engine.
Build here: http://www.forabodiesonly.com/mopar/showthread.php?t=293725

I have been following your build from the beginning. Lotsa work there, bro. Can't wait to see it all come together. Nice job! :headbang:
 
Well Kahn it's Friday and I'll be expecting to see that motor in the car by Sun!!!!! Good luck
 
Well Kahn it's Friday and I'll be expecting to see that motor in the car by Sun!!!!! Good luck

Well . . . that was my plan for last weekend, and I would have had it done, but the K-member design and the engine with the engine mounts are 1 inch different - I've sent pictures and a description of the error to Magnum Force and I'm waiting to hear back from them on how there planning on correcting the error.

I could cut the "really nice" powder coated K-member, and re weld the bolt attachments outboard 1/2" on each side and make it work - but that will mess up the powder coating . . .

I'm really stuck on waiting to hear back from Magnum Force . . . ARGH

I want that engine in the car so I can finish up the tunnel hump mods/fitment so I can move on with my build . . .


Little side venture

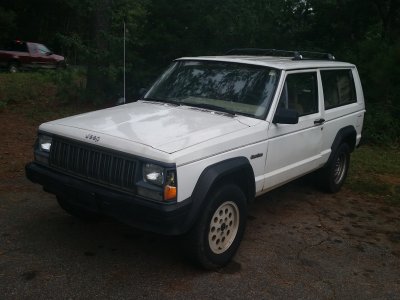
Took a little side road trip, with a friend, to help him pick up a new project car for him . . . he had one of these years ago and has been kicking himself ever since he sold it - and has wanted to get another in it's place for years -

1996 Model - he will convert it to 4WD . . .

am_jeepproject.jpg


Good news . . . welder related

Been having a little "odd" thing happen with the welder every now and then . . . when Rocky came over to help me design the shock arrangement ( now that the rear end is 3" narrower ) . . . he helped me dig into the cause . . . and it turned out to be the female plug on the extension cord - the male plugs were just barely making electrical connections in the junction - and possibly causing the welder to lose a leg on the 220 and not work "quite" as well as it should . . . the correction to the plug has made a very large improvement on the continuous performance by the welder

( hope this will help with my welds on the car - too bad all the past welds are done and I didn't find this sooner )
 
Last edited:
Bummer, sucks to be held up by someone else's mistakes especially on something like that.
 
Hopefully magnumforce will make it right and get you some replacements. Seems they should not have this problem or maybe they never built any before?
 
Got a hold up on the engine and tunnel hump - working on other areas . . .

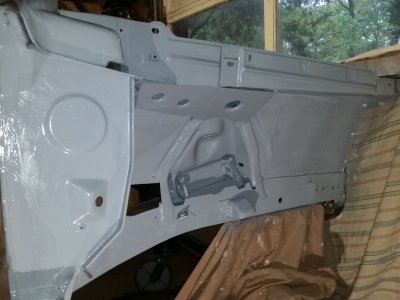
Since I've got a little road block on the engine an tunnel hump, I figured I that this little detour to focus my attention to some of the other areas of the car that can be worked on in the meantime . . . so like any other car re-builder, if you're not in the wheel wells, then you're in the engine compartment or the trunk . . .

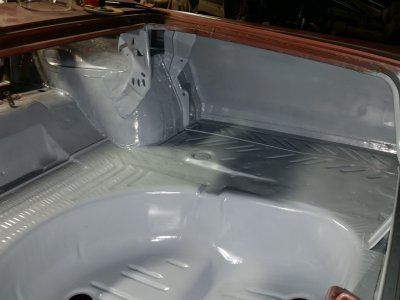
So I'm back in the trunk trying to get the bare metal in primer so I don't have to worry about the humidity attacking the bare metal . . .

Working on the driver half of the trunk first . . . got it in epoxy primer . . .

am_trunkinepoxy01.jpg

Now it's time to get to the passenger side of the trunk . . . not the best job - but it's protected now ! ! !


- - - Updated - - -

Bummer, sucks to be held up by someone else's mistakes especially on something like that.

Yes 747 Mopar, it is a bummer on the wait - but I'm not letting it stop me from making some progress on the car ! !


- - - Updated - - -

Hopefully magnumforce will make it right and get you some replacements. Seems they should not have this problem or maybe they never built any before?

Magnum Force said that they'll get it right - but I don't know what their plan is to make it right . . . still waiting . . .

Agreed - they said it was bolt in . . . ? ? ? . . . so I don't know how my engine is not "bolting in" as instructed ( don't think it's me )


Evening Session in the Shop

Got a quick bite to eat and then back out to the shop to tackle the passenger side of the trunk . . . got a head of steam and I'm making some progress, so I wanted to keep pushing this thing forward ( I'm ready to drive this thing )

So I did a bunch of prep work on the passenger side ( probably not as much as I needed to get done ) . . . and shot it with primer

sm_trunkinepoxy02.jpg

Glad to see this in primer - got a couple nasty welds that I missed and will have to grind down a bit . . . then I'll just shoot more primer on top of it.

But the majority of the trunk is in primer ! ! !
 
Last edited:
Looks like your getting the hang of it, primer looks great Kahn! Like everything else, you seem to figure it all out.
 
Looks good! Sorry to hear about the K member. If MF doesn't step up, you might have to take things into your own hands, er, welder. :icon_super: I have done that on many things that were supposed to be "bolt in." When you work on hotrods and customs all the time you find this out.
I am sure you'll make out just fine! :icon_cheers:
 
Looks like your getting the hang of it, primer looks great Kahn! Like everything else, you seem to figure it all out.

Thanks 747 Mopar . . . those words coming from you mean a lot - Just trying yo work my way through this build . . . Whooohooo !


Looks good! Sorry to hear about the K member. If MF doesn't step up, you might have to take things into your own hands, er, welder. :icon_super: I have done that on many things that were supposed to be "bolt in." When you work on hotrods and customs all the time you find this out.
I am sure you'll make out just fine! :icon_cheers:

Should be no need to worry - heard back from Magnum Force Racing already, and they have told me that they're going to make me some new engine plates that'll move the mounting holes inboard by a 1/2" on each side so that the K-member does not need to be modified ! !

Great news - and I'm looking forward to getting the new plates so I can get the engine mounted in my car . . . that's pretty good customer service.
 
I knew they would help you out. They have a good reputation. A lot of places out there do not. "It's your fault, you did something wrong, can't help you." Bastards.
Hope to see the engine in soon!!!
 
Time for things to start getting interesting . . . look out . . .

Just went to log into the thread and make an update and I noticed that this thread has had

100,000 views

And . . .

it's about time for things to start getting interesting . . .

and here is what I've got to report . . .

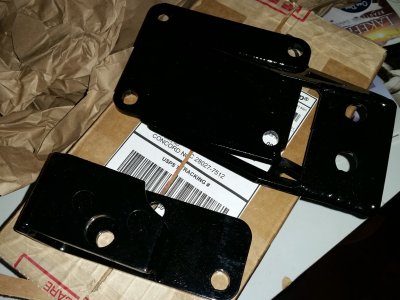
First . . . look what showed up on my doorstep today . . . my modified engine plates from Magnum Force Racing !
( last week the guy was sick - got in Monday, had them done by Wednesday, shipped on Thursday, and on my doorstep Saturday - less than one week !)

NOW THAT IS CUSTOMER SERVICE

Now it's time to "test fit it again" and then get this thing mounted in the Belvedere ! !

sm_newplatesarrived.jpg

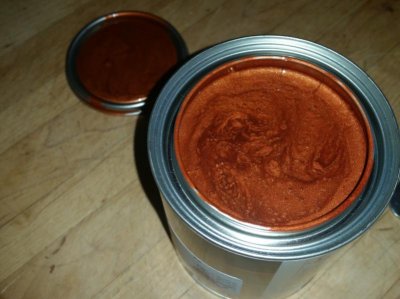
In addition, made a trip to the paint store, and got a gallon of 2K high build primer, a pint of Charcoal Gray, and a pint of this Toxic Orange paint ( to test it )

sm_orangepaint.jpg

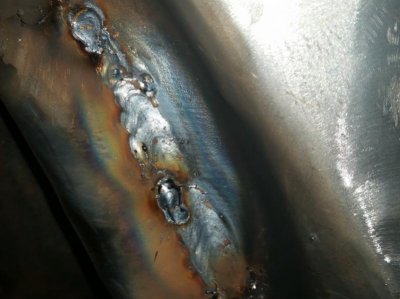
The minor tweak on my welder, to keep the plug firmly seated in the plug has got my welds looking better too ( wish I found this 2 years ago )

sm_weldsnow.jpg

The plan was to get the Hemi in the Belvedere today - but my Golf League stuff got in the way - last 2 weeks of the season and tournaments had to get attention.

BUT . . . plan is to get it in the car ASAP . .

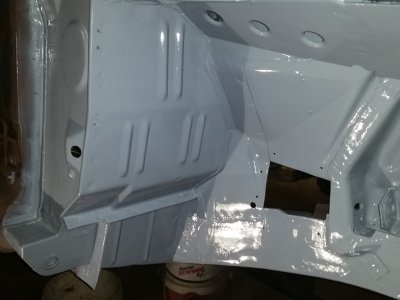
Spent the day welding on the driver side wheel well area, trying to get it ready for Epoxy Primer, along with the engine compartment, and the passenger side wheel well area - from the firewall forward needs to be gotten in Epoxy Primer.

The Charcoal Gray will be used for the drive train, leaf springs, axles ( to match the Magnum Force K-mrmber color ) and frame rails - probably the whole underside of the car . . . still thinking through that as I work on the car . . .

Lot of things starting to pile up . . . and completing the tunnel hump is priority #1 . . . Engine in, trans in, tunnel hump modified and tacked - engine back out to weld and finish all those fabrications - then the body work starts . . .

LOTS OF WORK TO DO ! ! !
 
Still trying to move forward . . .

Got a couple things that I'm working on trying to get things moving forward while I'm waiting on a solution for my motor mounts from Magnum Force Racing.

While I'm working on primer, and trying to figure out my paint color, I've been doing a little more "practicing" with my painting skills ( or lack of skills ) . . . Got a lot of bare metal on the car and I'm trying to get it covered with epoxy primer to protect it.

The Driver Side Wheel Well has been the focus of attention for me all week - MAG technology again ( Mig And Grind ) - along with sanding, and overall cleaning up the area . . . finally got the whole area to a point where I thought it was ready for primer . . .

sm_dirverwheelwell01.jpg

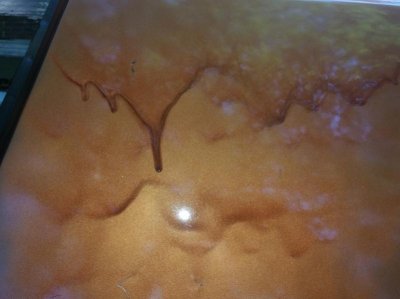
Yes, I've still getting a little bit of runs, but I'm working on it and this is only primer . . . It'll have to be cleaned up before paint.

sm_dirverwheelwell02.jpg

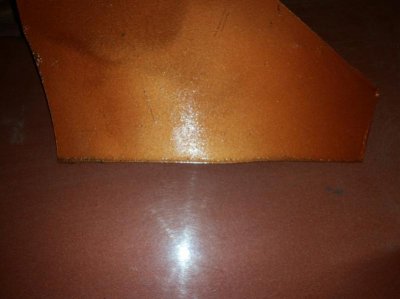
Shot some of the base coat ( never done that before ) and when it was on the sample piece, I thought it was TOO COPPER for what I wanted . . . so I compared it to the copper that was on my car currently . . . and this is the comparison . . . I'm still working on it, but I'm liking the color . . . more and more . . .

sm_coppercontrast.jpg

Also took the base coat and one of the fenders that I had from the 2013 Challenger that donated the rear seat metal supports and shot it . . . needless to say, my LACK of painting skills are pretty evident in the this picture - BTW - base coat is REALLY THIN and I need a whole lot MORE practice if I'm really thinking I'm going to paint my own car ( what am I thinking ? )

sm_heavyhandpaint.jpg

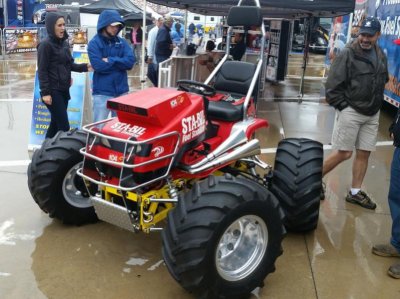
Car show weekend in Charlotte - The Food Lion Auto Fair - and this is the first weekend that it decided to rain all weekend - all Summer ! Stayed there for a couple hours, got tired of the rain and headed home . . . but wandered up on this beauty of a tractor . . . Now that is a tractor that I'd love to have at my house ! ! !

sm_coolesttractor.jpg

Next - attack the passenger side wheel well - then the engine compartment . . . and wait on the mods to get my engine installed ! ! !

- - - Updated - - -

It's the WEEEEKEND where are the UPPPPDATESSSSS!! lol

Roger that Goon . . . I'm working on it . . . you're just a little bit quicker than I am ! ! !

Updates posted . . . progress on the car ! ! ! YAY ! ! ! !
 
And still trying to move forward . . .

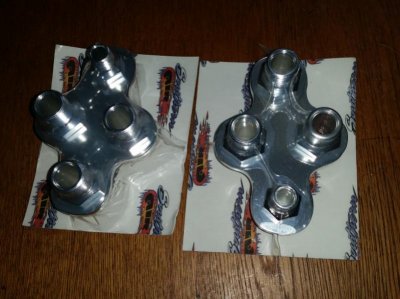
The car show today, was "mostly" a rain out . . . went back to talk to the Tremec People - they were all packed up, and check on the bulkhead connectors that I'll be needing for the heat/AC connections . . . and they were packing up too . . . they had the parts I wanted on Saturday for $49.00 . . . and that beat the price I could get on Amazon, so I went back to get them . . .

Well . . . I thought I was going to get them . . .

Caught one of the guys packing up and he said, he was all wet, all his parts were wet, and they called it a day . . .

so I asked if the Heat/AC bulkheads were readily accessible because I was in need of them. He asked which style - I wanted the diamond shaped ones. He quickly pulled one out of the drawer - I told him I needed (2) of them - asked if they sold the connectors separate from the plate - they were $10 each - so for $10 more I got the billet plate . . .

sm_carshowscore01.jpg

He came back, with my parts in a bag, with change of $20 from the $100 cash I handed him - and he stated, you got the plates for the Bulkheads for "FREE" . . . I kept my mouth shut, and checked the book he included in the bag with my parts, they listed in his book for $59.00 each . . . I paid $40.00 each ( somehow ? ? ) and I thanked him and quickly walked on my merry way ! ! !

SCORE ! ! !

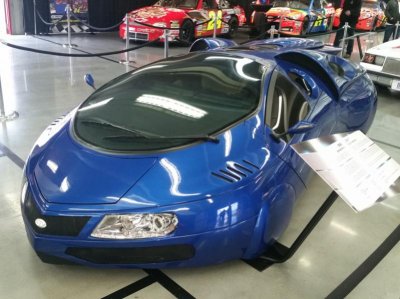
Then I stumbled on this "odd ride" in the garages ( it was out of the rain and dry . . . )

sm_etv01.jpg

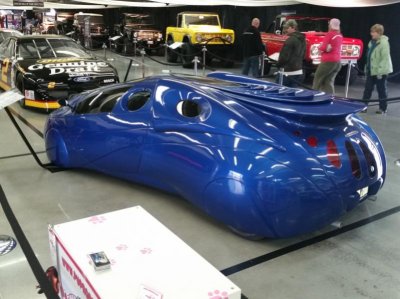
It was called an ETV - for Extra Terrestrial Vehicle . . . and it really looked weird ! ! !

sm_etv02.jpg

Was back home before noon, had lunch on the way home, and back out to the shop to work on the passenger side wheel well - getting it in Epoxy Primer . . . and I got it shot tonight
( BTW - I think I'm starting to figure out this gun, and the settings, as this side sprayed much better for me )

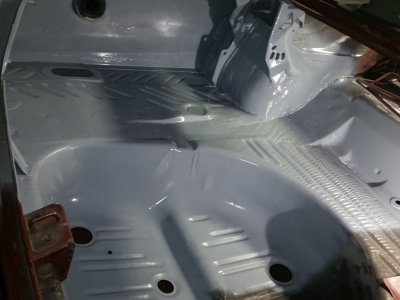
sm_passsideinepoxy01.jpg

And the back half of the Wheel Well in Epoxy Primer too . . . Whooohoooo ! ! !

sm_passsideinepoxy02.jpg

This week will be clean up and sanding in the engine compartment - so that I can get it in Epoxy Primer too . . .

The dehumidifier has been running all weekend trying to keep my metal from rusting due to the humidity . . . YUCK ! ! ! !
 
Great to see some more progress, it makes you feel allot better getting the metal all covered for sure. A little secret to spraying paint with flake...... put your last coat on fairly wet, then immediately hold the gun about 2ft away and lay a dust coat on by randomly whipping the gun around (quickly and not in a pattern). Doing this should even out the flake pattern. Good luck

- - - Updated - - -

That tractor is to cool!
 
Auto Transport Service
Back
Top