• When you click on links to various merchants on this site and make a purchase, this can result in this site earning a commission. Affiliate programs and affiliations include, but are not limited to, the eBay Partner Network.

'My first': rear end refresh - on going questions

Wow thanks for that 747. Seams pretty straight forward then?

A couple of questions, I have a small amount of forward and aft (end?) play in the yoke. Does that indicate the need for a new bearing?

Also the side bearings; if I'm going to go to this much trouble, whats involved in replacing them? they look like you could just pop them out easy in your pic, is that the case? or would I need a 'tool'?

Shot an email off to doctor diff to see what I'm up for.

On a side note, a local diff builder quoted me $930 to change the bearings, seals, solid sleeve and set it. So yeah I'm gonna go balls deep and try and do it my self.

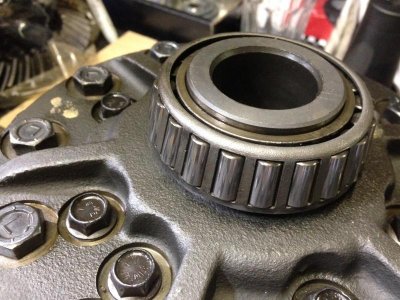
If the yoke nut has been loosened it will cause allot of slop but if it hasn't I would definitely check those bearings out. As for changing the bearings it shouldn't be a big of a deal, I didn't look to see if you could get a puller on them. Worst comes to worse you could cut the bearing cage off and then heat up the inner races to get them off (get them hot enough they should grow enough to come right off). The first pic is only the outer race too, the other half is on the carrier which will be the tougher ones.

- - - Updated - - -

Here's the listing for the solid spacer from Richmond Gear. It's like $27. I hear ya on the shipping and availability, but i don't understand how a spacer could be 6x the price.

http://www.summitracing.com/parts/rmg-040013s/overview/

I wish I had bought the solid spacer because those crush sleeves are a pain.
 
Both sides of the ring are important to a good patterned but the drive side is more important than the coast side which 747 showed....
 
Cranky; are you refering to checking the pinion to ring pattern? or the bearings?

HT413: thank you HEAPS for that link! I found the bearing kits on summit but no sleeve. Summits is great to buy from for internationals as the shipping is very competitive and fast.

Side note; here are the links to the bearing kits on Summit:
Bearing Kit
http://www.summitracing.com/int/parts/mgr-r8-75rl
Master Kit:
http://www.summitracing.com/int/parts/mgr-r8-75rlmk

Also, what are you guys using as the tool for adjusting the backlash (side bearing 'screw')? Home made or brought them from some where? Searching summit now. Hoping to kill all birds with one postage payment.
 
Preload bearing tool:
http://www.summitracing.com/int/parts/yga-56027/overview/


Whats the name of the indicator chalk / dye that used to check the pattern? Need to find some. <- Forget this, found some "Bearing Blue' in a ring around.

Thanks for the help guys, I'll be back with more stupid questions once I get all the pieces in and get started.
 
Cranky; are you refering to checking the pinion to ring pattern? or the bearings?

HT413: thank you HEAPS for that link! I found the bearing kits on summit but no sleeve. Summits is great to buy from for internationals as the shipping is very competitive and fast.

Side note; here are the links to the bearing kits on Summit:
Bearing Kit
http://www.summitracing.com/int/parts/mgr-r8-75rl
Master Kit:
http://www.summitracing.com/int/parts/mgr-r8-75rlmk

Also, what are you guys using as the tool for adjusting the backlash (side bearing 'screw')? Home made or brought them from some where? Searching summit now. Hoping to kill all birds with one postage payment.

When referring to the pattern it's the ring and pinion (no patterns on bearings). For an adjusting tool I just use a spanner wrench for a 4 1/2 angle grinder, it doesn't have the correct spacing but it doesn't have to you put one prong in a hole and hook the other in the center hole (they don't turn to hard). You could even just drill a set of holes in some flat stock and drive poll pins in them (whatever works). Summit had the sleeve for only $9.00 too.
 
Years ago I bought a pinion depth checking tool but after checking the pattern on the ring and pinion, it never looked right to me so I started sticking them into my 'test' car. Yeah it's some work but I was curious to see how they drove and wanted to break in the new ones myself before selling the unit. Also, I just ran them for myself to play with with a 4.56 being the most fun for light to light stuff. Anyways, once the pinion is set and checked with the tool and the backlash was set, I quit plugging them in for a test drive and never had anyone come back with them. 25+ years later, the pattern still doesn't look right to me lol....
 
Sorry I read Cranky's reply too quickly and missed the 'patterning' mentioned. Should have re-read before asking a stupid question!

I might have a look at making a tool on the weekend. I need to hold off ordering until next week's payday any how.
 
Somewhat. All the parts arrived yesterday, so I'm going to clear off the bench and give this a go on the weekend. We have a long weekend here, so I have some time to stuff it up a couple of times!

My coronet also came with an extra crown and pinion, so I'll try and work out what each of them are and maybe change over at the same time.

As an FYI, I went with Diff Doctor rather then summit for the parts. Thought I'd support the smaller retailer.

I'll post pics and, almost guaranteed, questions over the weekend.
 
Ok first question: I have the centre apart. I've got a full 'rebuild' set with bearings so I had the intention of swapping them over as well, however I don't have a press or the special tool listed in the fsm. So what tools would I need to swap the bearings over? Can it be done 'normal' hand tools?

Or how can I check the bearings that are on the centre? They are Timkin and seem to be good, so if I don't need to swap them and I don't have the tools to swap them then why not just reassemble?
 
You can cut them off, cut the bearing cages off letting the bearing all fall out then grind the inner race all the way down until it lets loose (be careful). Really the only way to decide whether or not they are good is just looking them over.
 
Timken bearings are pretty tough. Inspect them closely and make sure there's nothing imbeded in the outer races. Look them over first because if you see anything in them, chances are the rollers won't be in that good of condition either. If you replace the pinion bearings, they should set up where the old ones were but it's good to at least check the pinion depth before and after. I have a set of 'dummy' bearings (they have been honed for a slip fit to make initial setup easy) I use to check the depth before slamming on new permanent bearings. Once they are on, they are pretty much in place. Removing pressed on bearings can be tricky and you take the chance of messing them up when pulling them off. I also like to mic the fits before mounting new bearings.

If the pinion shaft is over size, the bearings can end up being too tight which generally makes them prematurely fail. Had a Dana 60 pinion that was .005" too tight. Don't know how the bearings lasted as long as they did but it sounded like the press exploded when the bearing finally turned loose! It also pulled some metal off the pinion. .001" tight is more than plenty and .0005" is even better. It's also a good idea to warm the bearings up before sticking them on. 250 degrees should be your max heat. If the clearances are good, they should slip right on at that temp. The front pinion bearing usually slips on but the back bearing is an interference fit.

That's a really good idea, I'll definitely take note for my next one.

- - - Updated - - -

I will admit this is the one area where I really like the Ford 9" (separately adjustable pinion depth).
 
So after the bearings are cut off, do you need a press to install the new ones? I'm assuming so?

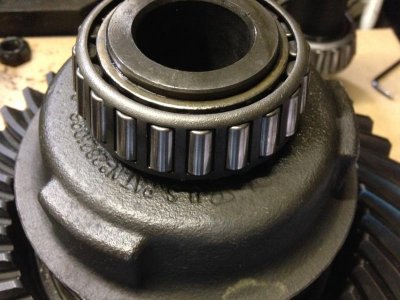
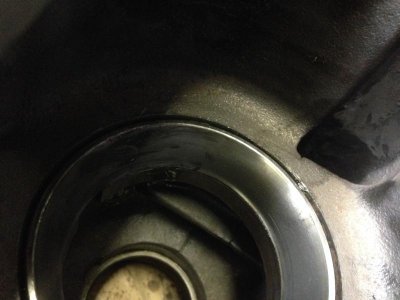
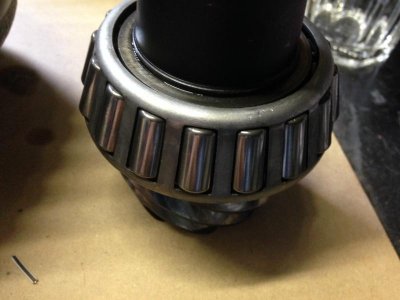
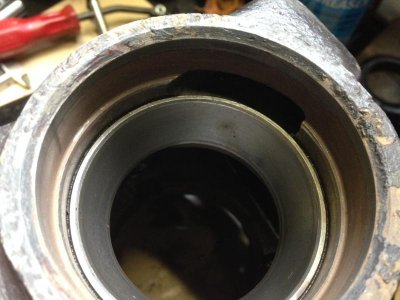
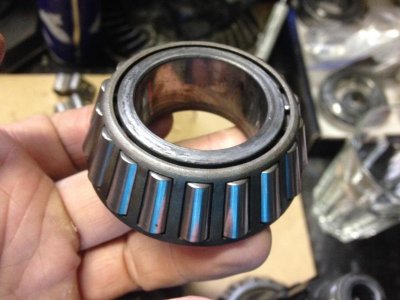
Being its my first crack at the dif, I don't think I'm qualified to comment on the bearing condition. They look good with no sign of wear on the bearings, but here are some pics. Are they fine to reuse? The only contamination I found was small bits of silicon gasket that had fallen in. No obvious signs of damage, pitting etc. Can't comment on the movement though. Also the front smaller bearing that was on the pinion dropped off with just the weight of the pinion pulling on it, is this fine? or is my pinion undersized? I can't find any specification in the '69 FSM

Also I cleaned every thing with brake cleaner, I'm assuming I need to re-grease the bearings, is there a fitting for a grease gun to make this easier? Or do you just keep smearing grease over the outside and rotating them to get the grease through them?

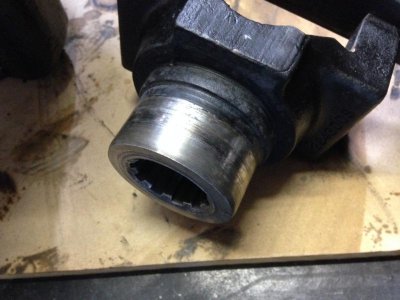
My only area of concern is the marks on the 'flange' surface where it touches the seal. Can I sand this back or will it need to be replaced?

photo 1.jpg
photo 1a.jpg
photo 2.jpg
photo 2a.jpg
photo 3.jpg
photo 4a.jpg
photo 3.jpg
 
Thanks sure grip, I'll check that out as soon as I finish this post.

So I have decided to continue with the old bearings. When I looked at the old and new side by side there didn't appear to be enough of a difference to swap them. Plus I'll probably look at rebuilding this again in a year or two as I've worked out I have the 4.56 gears, not great for highway!! So I might go the full hog then. Also means is I significantly stuff up here I'm only killing the old bearings as well.

So I have set up the diff twice now including adjusting the back lash, here's why. When I set the pinion in the first time I adjusted the shims to remove the end play, which was the solid spacer and the smallest shim. It seamed fine but once I'd set up the centre in it and removed the back lash there seamed to be too much play in the front smaller bearing. When hanging drive shaft side down, I could reach in and touch the front bearings (test set up so no pinion seal) and wiggle them easily.

So I have just set the whole thing up again this time with out the shim on the spacer, adjusted the backlash etc. now hanging drive shaft end down again, there is a small amount of play in that front bearing, no where near as much as previously. But when I lay it on it's side, as it would in use, there is no play in the bearings at all.

So have I now set it up correctly? Or does it need a little extra room (with the shim, looser front bearing while hanging)? Or do I need to shave the solid spacer down and have no play in the front bearing even while hanging drive shaft side down?

I'm going to have some lunch, then do finally assembled without the shim. So if some one can give me advice in the next hour, that would be perfect!

Thanks!

- - - Updated - - -

Oh, I've also sanded the flange surface where it touches the oil seal with 240 then 400, seams to have smoothed it out bar to groves. There's no sharp edges on them the grooves, I think it'll be good to go.

- - - Updated - - -

Actually I think that video may have answered it for me. I'm going to do a tooth pattern test on the current test set up. If it comes back correct then I'll blow it apart and do final assembly.
 
So here is where I am at the end of the day: no where.

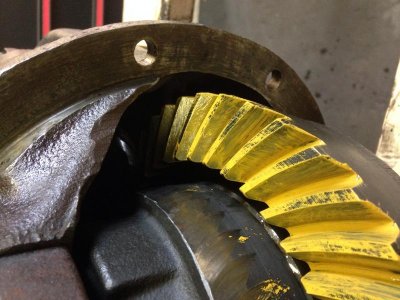
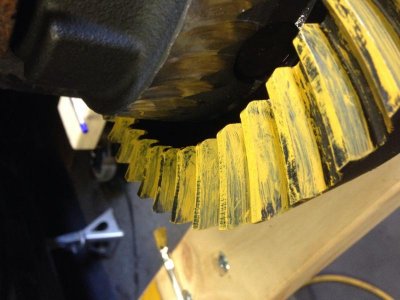
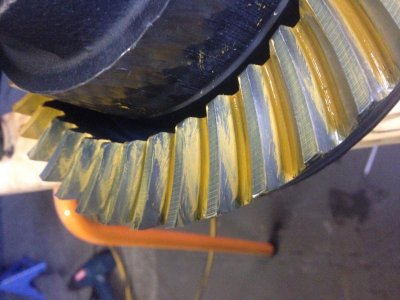
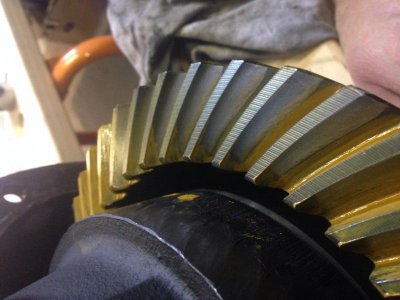
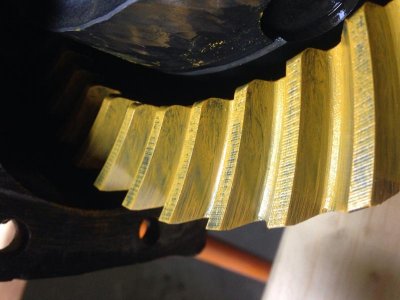
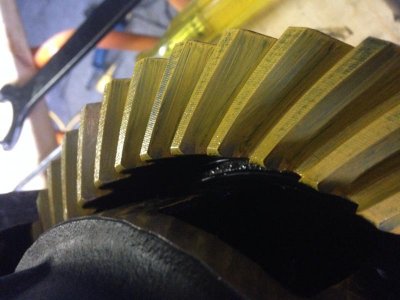
I have put the yellow Indicator on the drive gear with the .001 shim and with out it. And am still at a loss as to how it needs to go. The patten on the drive gear was hard to see and kind of confusing. Or should I say deciphering it confusing. The 'instructions' that came with the bearing kit indicates that the pinion is too close, reading the FSM it's apparently too close.

From what I can tell the drive side is meshing nicely but the cruse edge is high on the toe.

To get that cruise edge in I need to add shims to the spacer yeah? But if I add shims I'll end up with end to end play at the flange. Incidentally this is how it originally was - the crush spacer was too long rather then too short.

So some other details that might help. The pinion is 9 teeth. The drive gear is 41 teeth. The spare drive gear I got with the car is 42 teeth but I can't find a pinion to match I'm hoping that they haven't re-used the pinion. The pinion has 2.794 scribed into the head. The solid spacer with out any shims is about 2.974".

Lately here's the pics if the patter on the drive gear first with out the shim:
image.jpgimage.jpg

I didn't think it was clear enough so added more indicator, still no luck so I wiped it down and ran it though again. The indicator on the pinion marked the clean drive gear giving me this:
image.jpgimage.jpg


With the smallest shim:
image.jpgimage.jpg
 
So tonight I tried adjusting the backlash in and out to see if it made any difference to the pattern on the gear drive. No good. Same or very similar pattern, good middle diagonal pattern on the drive side, high toe on the cruise side. I'm pretty sure this isn't a good enough pattern?

So I'm guessing that it comes down to how far in the pinion is compared to the drive gear, pinion depth? I could assume I need to add more spacers, going by the FSM. Although, the instructions with the bearings would indicate less spacers. I can't get the solid spacer smaller with out some precision machining, but I do have the crush spacer that is in good nick. So I was thinking I might try assembling it with the crush spacer and start crushing down to roughly 2.794", the number on the pinion, see if that works.

The next option is to discard the front bearing and start with fresh front bearings. Maybe the current set have an over enlarged centre bore, causing the end to end play when it is actually at the correct pinion depth. Although in my head I don't think it works that way. Or it needs shims behind the larger pinion bearing?

I'm thinking if the crush spacer doesn't work I might have to pay someone to do it. Pretty sure I'm out of my depth with it.
 
Auto Transport Service
Back
Top