• When you click on links to various merchants on this site and make a purchase, this can result in this site earning a commission. Affiliate programs and affiliations include, but are not limited to, the eBay Partner Network.

Rust revival

I know you've heard it alot already, but your work is awesome! You have given me inspiration to keep plugging away at my latest project ( 69 Charger ) I have bought my self a Lincoln mig welder and have got my oldest son motivated to get involved too. If you can complete a car as far gone as your 63, I have no excuses not to complete mine. My hat's off to you to help us all keep in mind that elbow grease can still keep these projects less costly. Thanks for the step by steps. Two thumbs up!!
 
Man it is obvious you must enjoy this challenge. If it wasn't fun for you,you wouldn't have gotten this far this fast. The skills required to do this level of fab work are WAY beyond my capabilities. I do enjoy watching your progress and know the amount of time spent on just the planning and template making would scare off the average bear. If you don't mind my asking, what do you do for a living? I know as an electrician the last thing I wanted to do for fun was electrical chores around the house, just ask my wife,LOL. Keep up the good work and thanks for all the pics and commentary!

I know what you mean...Mom always said I should have been a brain surgeon. Hahaha

I'm a Collision Tech at a privately owned bodyshop. (Groan...)
My day is usually spend realigning bent frames, repairing dents and replacing the odd fender, door skin or quarter panel on late model import cars for the Insurance industry.
Doesn't really apply itself to this sort of rust restoration but it does at least give you a leg up on the welding and having an idea on how the different panels align to each other etc.
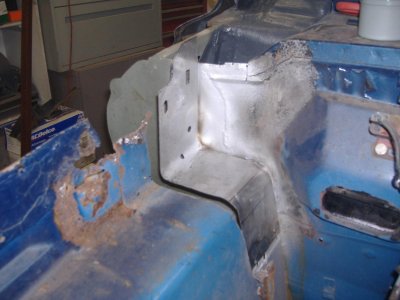
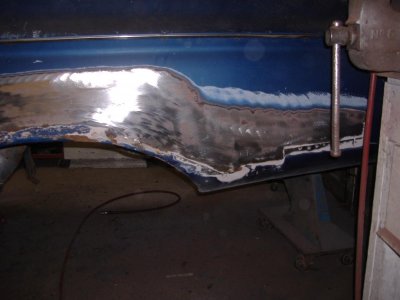
I know one thing...modern stuff is crap compared to these old girls!
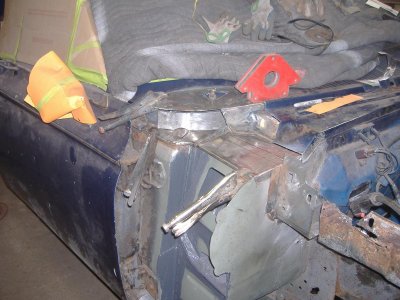
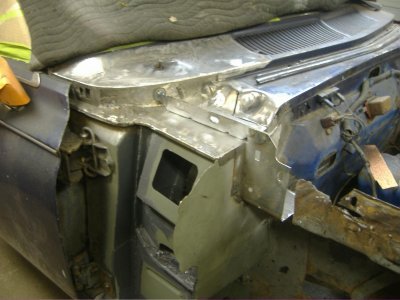
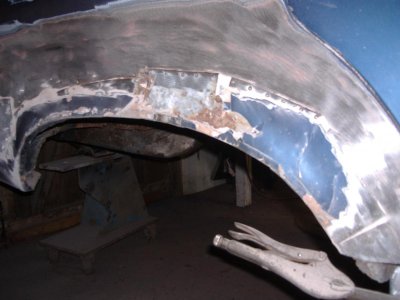
The metal is like tin foil in many.

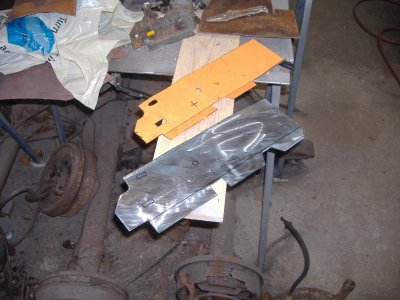
Most of what I know for THIS stuff comes from building compact junk into V8 powered street/Drag cars and repairing rusty beaters for myself or friends in my home shop.
Sometimes both combined! ;)
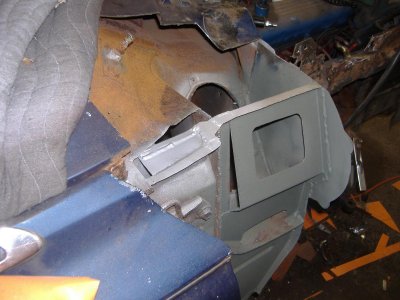
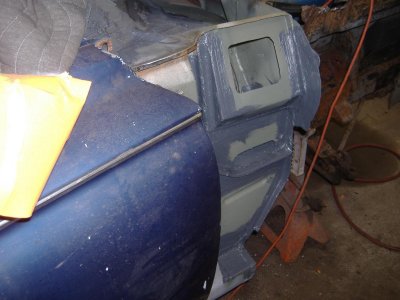
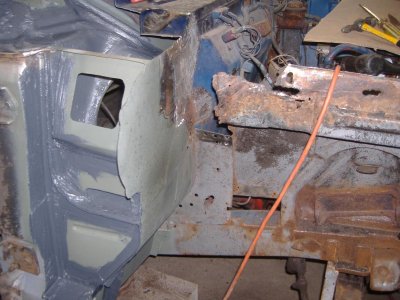
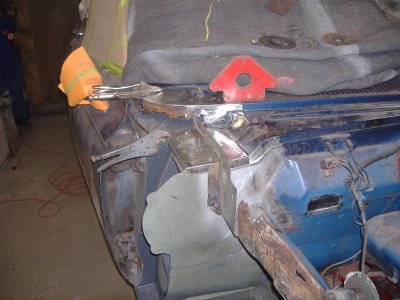
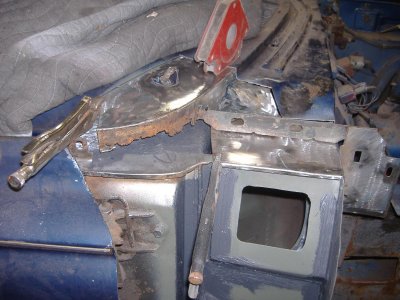
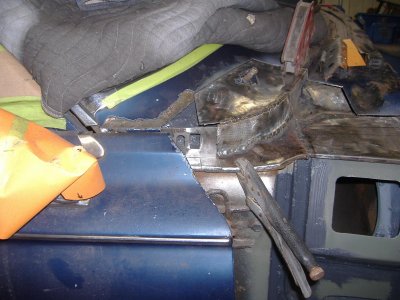
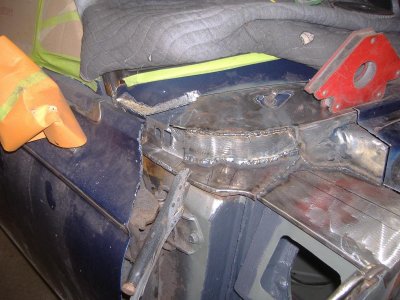
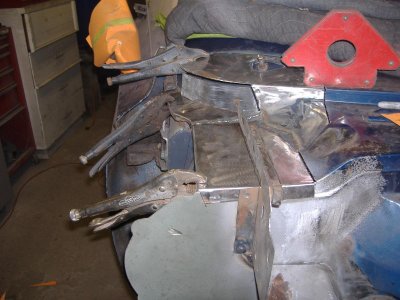
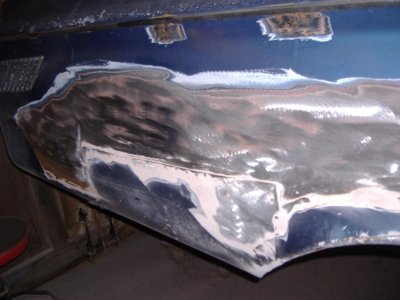
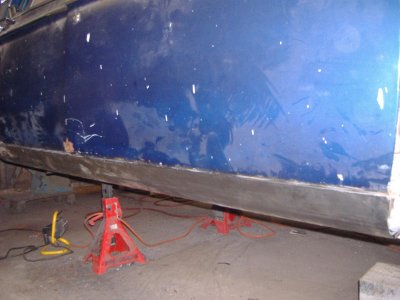
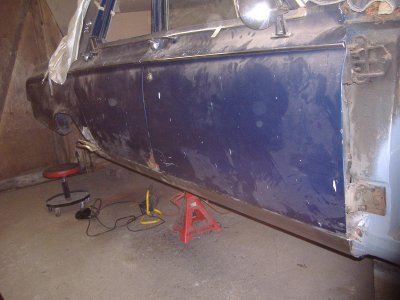
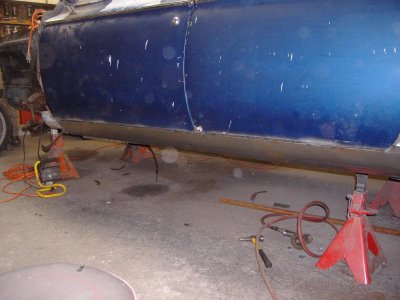
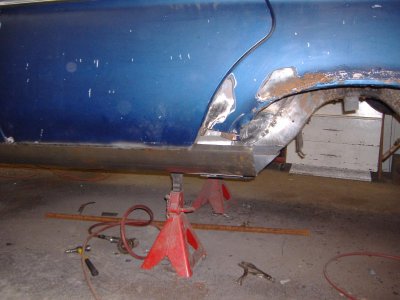
This Ol' Dodge is "Rusty beater" on CRACK...but I'm determined to win out in the intervention! LOL

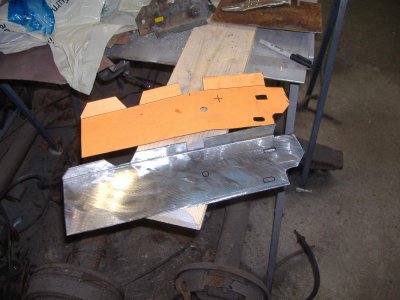
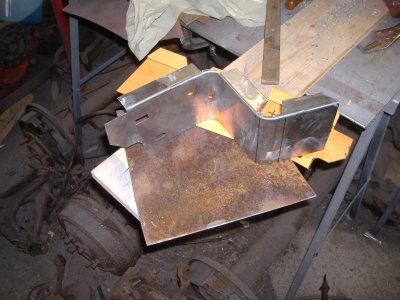
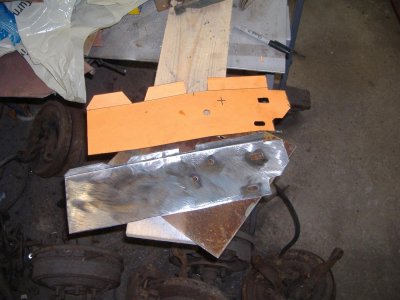
I've always approached this stuff as a little job at a time so you don't get burned out by the size of it all.
This one is testing my dedication I have to admit!!!
 
I know you've heard it alot already, but your work is awesome! You have given me inspiration to keep plugging away at my latest project ( 69 Charger ) I have bought my self a Lincoln mig welder and have got my oldest son motivated to get involved too. If you can complete a car as far gone as your 63, I have no excuses not to complete mine. My hat's off to you to help us all keep in mind that elbow grease can still keep these projects less costly. Thanks for the step by steps. Two thumbs up!!

One little step at a time is all it takes 440!
Excellent on having your son involved!!!

A response like yours is great! Being able to help even one person makes the typing and picture loading all worthwhile!
Thank YOU.

If you've never welded on sheetmetal before, practice on some old panel pieces first and make sure you grind off all the paint where you are welding. makes it much easier!
It's not hard with a bit of practice.

(Man...I love those Chargers. A good friend of mine had a beautiful wine colored one with a white vinyl roof and a 440 auto.
She was so classy in those colors...)
 
Man, you, Prop, Matt and Donny are my heros.
I have my own rust revival going on so keep the pictures coming I need all the insperation I can get.
 
Just can't tell you how much I've been enjoying seeing your progress. Your fabrication and welding skills are excellent, but so are your photograhy skills. This has been very enjoyable to follow.
 
Your patience is amazing. Hand built panels? Wow. Nice.
 
i'm speechless the work that you are doing on this project!!!!! You can't even tell where the old meets the new.
 
You've got a real future ahead of you young man.

you raise the bar with every post.

nicely done.
 
It’s funny how others who don’t do what we do can’t understand this is fun and not work. Looking better every post along with dropping my jaw each time I tune in. Way to go Black63!!!
 
Wow...can't believe its been two weeks already since I last updated!

Thanks for all the good vibes on this. Really keeps you motivated to get it done!

Cut the top off the cowl on the pass side. Some hidden rust but not as bad as it could have been.
A bit of welding and one large/one small patch took care of it.

Had to replace a couple of innerds on the top of the door post and then get everything tided up for sealer in the lower sections.

The apron extension was bad on top so I made a new one. The holes were tricky!
 

Attachments

  • 002.jpg
    002.jpg
    133.8 KB · Views: 652
  • 018.jpg
    018.jpg
    115.6 KB · Views: 634
  • 019.jpg
    019.jpg
    143.5 KB · Views: 666
  • 020.jpg
    020.jpg
    138.1 KB · Views: 671
  • 021.jpg
    021.jpg
    119.9 KB · Views: 653
  • 025.jpg
    025.jpg
    91.5 KB · Views: 634
  • 023.jpg
    023.jpg
    139.5 KB · Views: 631
  • 022.jpg
    022.jpg
    120.3 KB · Views: 625
Started to repair the cowl top panel. Real pain in the butt as it ended up being a load of small sections that needed to be welded inside and out to make sure the joints didn't let any moisture thru.
It worked out...just a bit more work than i figured.

The access hole in the side will make it much easier to rust treat the inner parts of the cowl in that area.

Next up is to replace that right apron with the donor one I have from the donor front I picked up to get the Torsion crossmember.
That front was a really good score!
 

Attachments

  • 027.jpg
    027.jpg
    136.5 KB · Views: 631
  • 028.jpg
    028.jpg
    156.8 KB · Views: 634
  • 036.jpg
    036.jpg
    147.2 KB · Views: 632
  • 035.jpg
    035.jpg
    162.4 KB · Views: 633
  • 033.jpg
    033.jpg
    137.7 KB · Views: 620
  • 031.jpg
    031.jpg
    151.4 KB · Views: 623
  • 002.jpg
    002.jpg
    108.8 KB · Views: 610
Very nice work. You give patience its true meaning. Press on and keep the pics coming.
I really enjoy this thread.
 
I am just amazed at the work you guys do. Makes me want to take a welding class and buy an old chevy to practice on, that way its ok to make lots of mistakes. Seeing this stuff make you believe that nothing is too far gone. Great work/fun.:icon_pray:
 
thats ridiculous..i barely have the motivation to pick up the dirty clothes off my bedroom floor. much less build a car from scratch
 
Forgot to mention that I have the rocker panels on now as well.

VERY important note for anyone who intends to get rockers made at a local sheet metal shop...get at least 18g metal as thats what the originals were...or even go to 16g as the things are dead straight anyway.

I made a mistake and told the local guy to use 20g and I also didn't tell him it was for a car under restoration and needed to be good.
He gets lots of rusty junk needing rockers where its just for a patch up so being exact isn't an issue.
It was MY mistake not to make it clear to him that these needed special attention!

The combined result was that the bends were off a bit, he didn't round the sides - just broke them in a full length line AND they were a bit floppy due to being a bit thin.

I used them after much work to correct the mistakes and the thinner metal isn't a real problem for me due to the subframe connectors...but it COULD be for you!

Basicly, i took them to a good friend who English wheeled the line out and gave them the proper crown...totally saving them from the dumpster...then I cut off the flange and made new ones to weld on at the correct position.
The floppy nature of the required low crown and the 20g metal made installation an alignment nightmare.

I SHOULD have just went back as soon as I got them from the shop and ordered new and better ones made from 18 or even 16g.

All this in order that you guys DON'T make the same mistake I made...although they DID work out OK in the end.

I don't have a load on installation pictures as I was too pissed off to worry about pics!
Not everything goes as planned and sometimes you get a bit stressed out.
Rockers are usually kinda EASY!

Oh my...LOOK at those wheel arches and all the pop rivets in the quarters...sigh.

I was told that the arches you can buy are total crap.
That true???
 

Attachments

  • 003.jpg
    003.jpg
    143 KB · Views: 563
  • 006.jpg
    006.jpg
    86.6 KB · Views: 570
  • 005.jpg
    005.jpg
    92.4 KB · Views: 555
  • 004.jpg
    004.jpg
    80.2 KB · Views: 560
  • 002.jpg
    002.jpg
    112.7 KB · Views: 597
  • 001.jpg
    001.jpg
    138.9 KB · Views: 556
Hmmm...a couple of pics didn't go thru!
 

Attachments

  • 001.jpg
    001.jpg
    137.9 KB · Views: 539
  • 002.jpg
    002.jpg
    117.2 KB · Views: 556
Auto Transport Service
Back
Top