young99
Well-Known Member
Hey guys,
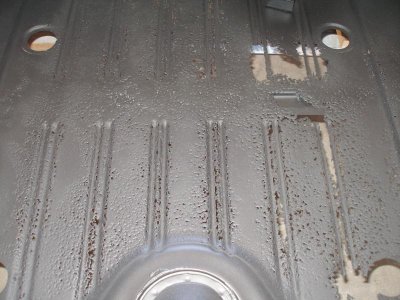
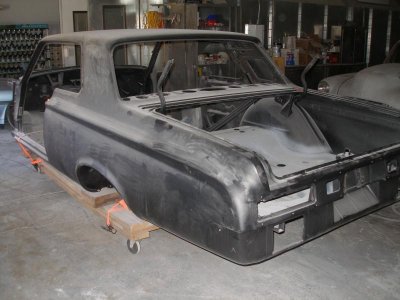
I am working on a 1969 Dodge Coronet that I am building into a road track car. This is a Texas car that I picked up in Mississippi about 4 months ago. Overall the car is very solid but has quite a bit of surface rust and a few places it was pretty deep. This car had the rear window issues where the channel rotted and allowed water to leak into the trunk over the years.
I have used POR15 products many times in the past but only the rust preventative coating. I decided to test the POR15 rust preventative coating with the POR15 Primer and paint over with mixed W1 aerosol paint.
Steps I took were:
I removed any seam sealer that was flaking off or loose. It appears that seam sealer may pull water in and hold it against the metal. I used a screwdriver or box blade until I seen clean metal.
I cleaned the trunk with the cleaner degreaser and a brush. The trunk was fitly with dirt and other stuff. Washed it out with a water hose then allowed the area to dry.
I then used the metal prep over anything that showed surface rust. I kept it wet with the product for about 45 minutes. I allowed it to dry some and the metal started turning white so I know it was working. After it dried well i washed it out then allowed the area to dry over night.
I took a shop vac to get every piece of trash or debris left over. I also took a can of prep-all and a rag to go over the metal just to make sure anything loose was not still around.
After making sure the trunk was bone dry I coated it with the rust POR15 preventative coating 2 times letting it dry to the touch before a second coat.
I allowed this to dry for 3 days then tried out the POR15 Primer for the first time. What I learned is that it dries super fast so you will need to be quick when brushing it on. I put 2 coats over all the preventative coating spots. I allowed this to dry 2 days.
I stopped by my local O'reilly that has a paint shop and had a can of W1 Paint mixed. I cleaned the trunk again with a shop vac then painted the trunk with 2 coats. This is the first time I had paint mixed so was not sure how much I needed. I will probably put another coating on. I also re-added any spots of seam sealer I removed before painting.


I like how it turned out and I know it will for last many years. I did not take my time because this car is not going to really be a show car. If you took your time and sanded the entire area before and in between coats you could really make this look much better.
I am working on a 1969 Dodge Coronet that I am building into a road track car. This is a Texas car that I picked up in Mississippi about 4 months ago. Overall the car is very solid but has quite a bit of surface rust and a few places it was pretty deep. This car had the rear window issues where the channel rotted and allowed water to leak into the trunk over the years.
I have used POR15 products many times in the past but only the rust preventative coating. I decided to test the POR15 rust preventative coating with the POR15 Primer and paint over with mixed W1 aerosol paint.
Steps I took were:
I removed any seam sealer that was flaking off or loose. It appears that seam sealer may pull water in and hold it against the metal. I used a screwdriver or box blade until I seen clean metal.
I cleaned the trunk with the cleaner degreaser and a brush. The trunk was fitly with dirt and other stuff. Washed it out with a water hose then allowed the area to dry.
I then used the metal prep over anything that showed surface rust. I kept it wet with the product for about 45 minutes. I allowed it to dry some and the metal started turning white so I know it was working. After it dried well i washed it out then allowed the area to dry over night.
I took a shop vac to get every piece of trash or debris left over. I also took a can of prep-all and a rag to go over the metal just to make sure anything loose was not still around.
After making sure the trunk was bone dry I coated it with the rust POR15 preventative coating 2 times letting it dry to the touch before a second coat.
I allowed this to dry for 3 days then tried out the POR15 Primer for the first time. What I learned is that it dries super fast so you will need to be quick when brushing it on. I put 2 coats over all the preventative coating spots. I allowed this to dry 2 days.
I stopped by my local O'reilly that has a paint shop and had a can of W1 Paint mixed. I cleaned the trunk again with a shop vac then painted the trunk with 2 coats. This is the first time I had paint mixed so was not sure how much I needed. I will probably put another coating on. I also re-added any spots of seam sealer I removed before painting.
I like how it turned out and I know it will for last many years. I did not take my time because this car is not going to really be a show car. If you took your time and sanded the entire area before and in between coats you could really make this look much better.