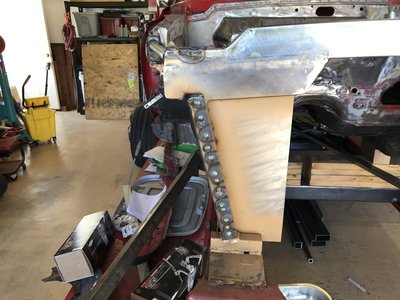
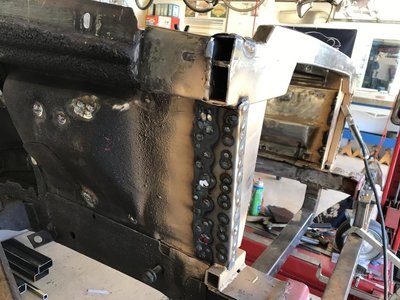
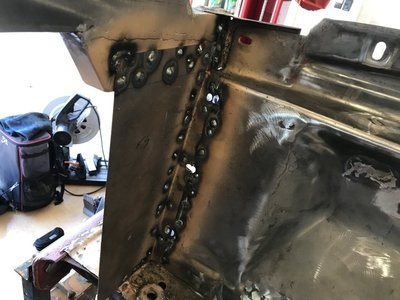
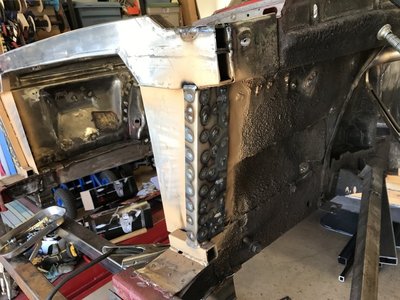
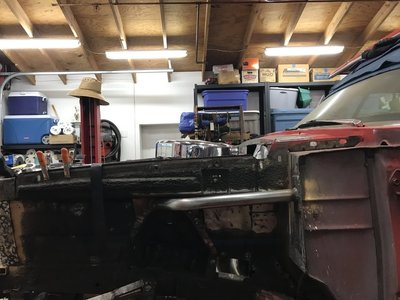
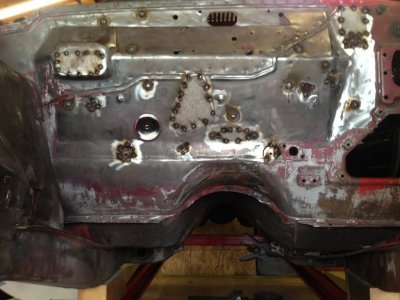
You are welcome Riverdawg. Several of the items being removed are going to get updated replacements. Like that boat anchor HVAC unit. The cast off goodies will be sold, to someone doing restoration etc, so that will add to my car fund. Will have that box, center console w/shifter, instrument cluster with trim, a/c controls, steering wheel with horn ring and several other pieces. When I get home tonight from work, I should be able to have the firewall stripped of inner parts so I can start welding up holes.
You are using an out of date browser. It may not display this or other websites correctly.
You should upgrade or use an alternative browser.
You should upgrade or use an alternative browser.
Updating the Super Street Mopar
- Thread starter ckessel
- Start date
Crumley
Well-Known Member
ckessel, looking good. I wish my car was as rust free as yours...I would be a lot further along on the build.
So far I have found the easiest way to remove the old undercoating is with a long flat, narrow bladed screw driver and a bunch of adult beverages.....lol. Also need good tunes blasting over the stereo system to help with a very monotonous job.
Keep at it.
So far I have found the easiest way to remove the old undercoating is with a long flat, narrow bladed screw driver and a bunch of adult beverages.....lol. Also need good tunes blasting over the stereo system to help with a very monotonous job.
Keep at it.
BBishere2
Well-Known Member
Definitely will be watching this build!
This will be awesome when it rolls out of the shop!
This will be awesome when it rolls out of the shop!
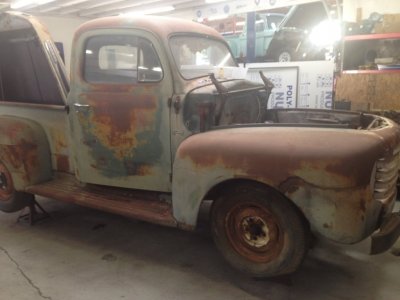
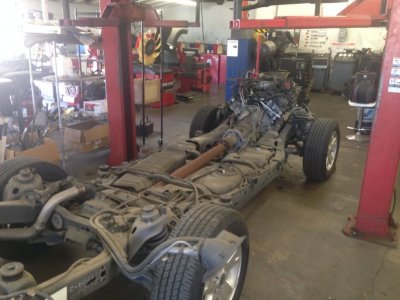
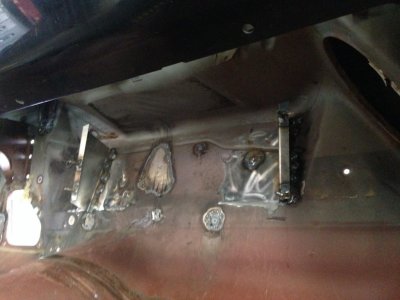
The inner/backside of the firewall is empty now. Needed to get this done for the welding and so I didn't end up with a car b que. Old cars definitely did not have any rust protection on the back of panels as mine have surface rust but not like the rust belt boys. This week after work I'll be making plugs for the soon to be covered holes. At my work, this is my new project. Melding a 49 Ford F1[ used to own a 50] with a 04 Explorer chassis and keeping it knappy in appearance.
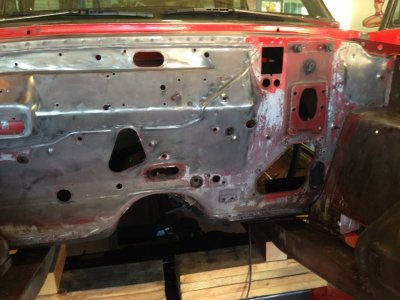


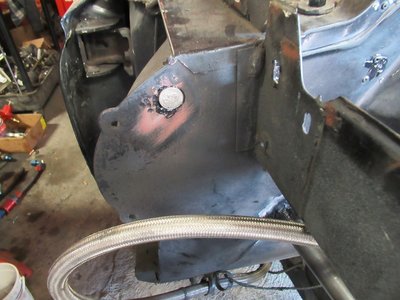
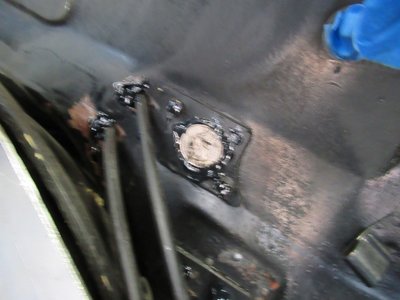
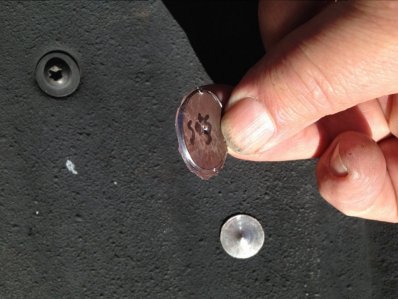
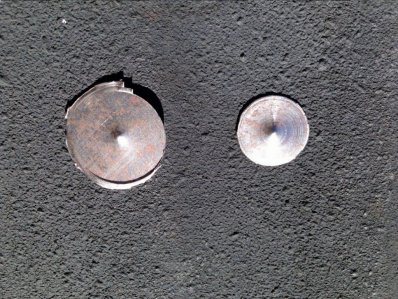
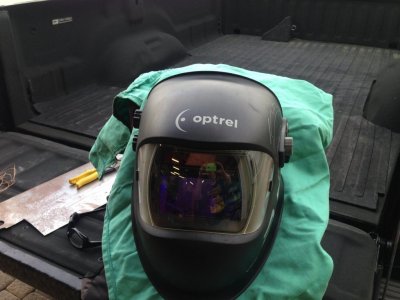
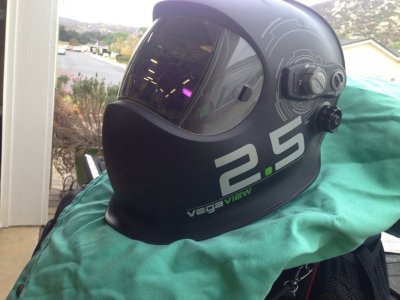
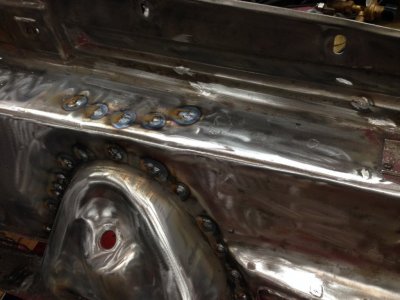
Yesterday was productive on the car. I got started on welding in the patch pieces I made for the firewall. On the round holes I found that the plug you would normally toss from a holesaw works great for filling larger round holes. You just need to measure the od of the hole in the body then measure the id of your cutter and come up with the appropriate one. I'm using Blair Rota Broaches mostly. You end up with a minor flange too thats helpful for keeping in in place in the hole. The odd shaped units I just put poster board, old cereal boxes etc, on the back to outline the shape. From there cut them out and transfer to your metal, cutout the unit, then fit it up to the hole and file if needed. For those among you that are having light issues as you get older, as in need more to see, try out this Optrel Vega View 2.5 helmet. It lets more light through so you can see the weld pool and be less likely to burn the material. I had a Miller Elite and even set on 8, I could not see what I was doing on lower welder settings. When I finally could see it, the material was torched. I borrowed a couple of other helmets from fellow students, was taking a class to improve skills, to see if any changes would come about. Tried a Lincoln set to 7, no change, then an older Speedglass and bingo! I had recently received a catalog, at that time, from USA Welding which showed the Optrel helmet. Called them up and explained what was happening and they told me this unit would be an improvement over my Miller and it was. I do wear some closeup glasses under, which I did before, so things are in focus. The issue for me was not focus, it was not being able to see the weld pool because it was too blocked out. With this unit, welding ferrous materials became way better, doing TIG. Aluminum was never an issue as you generally are running higher amps, i.e. brighter light. Later on today I'll continue plugging up holes in the fender wells and then whip out the grinder and start facing them off.


Last edited:
Crumley
Well-Known Member
Carl, the mating of the old F1 body to the later model chassis is looking good.
Isn't it crappy getting older and can't see as well....lol. I now need a pair of 2.5 reader glasses under my hood just to see the weld puddle when Tig welding.
Keep at the 65 build, following along here.
Isn't it crappy getting older and can't see as well....lol. I now need a pair of 2.5 reader glasses under my hood just to see the weld puddle when Tig welding.
Keep at the 65 build, following along here.
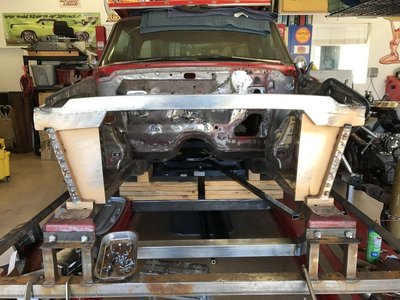
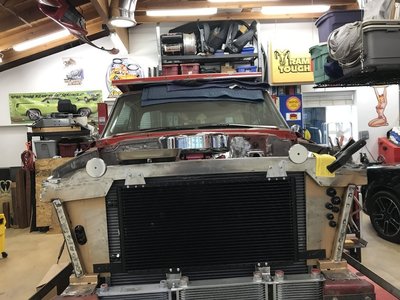
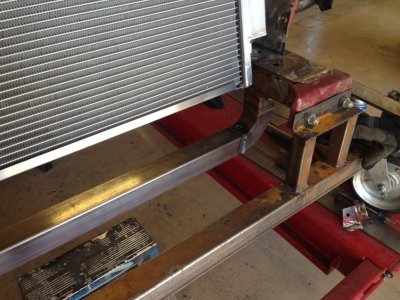
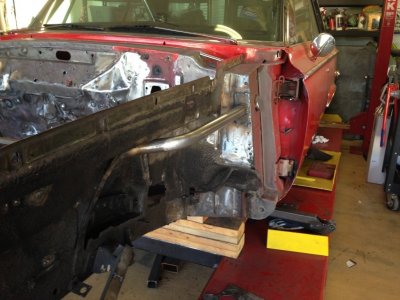
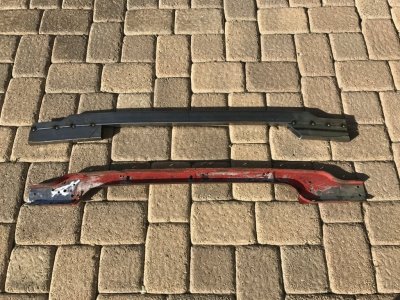
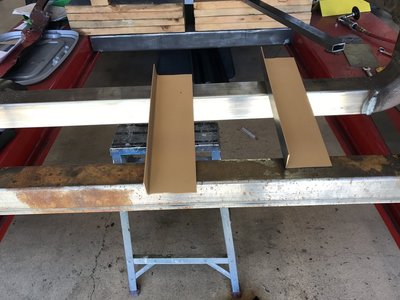
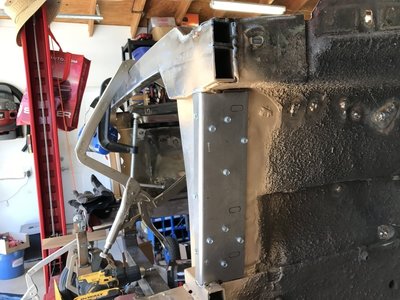
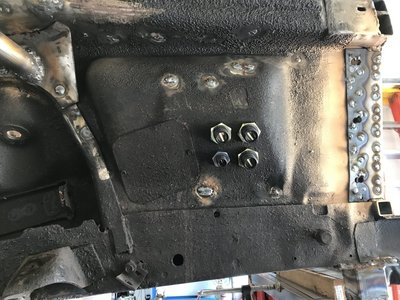
Time for some updates! Been busy with life but have been making some progress on the car. I have all the un needed holes filled in now in the engine bay. Added on some structure reinforcing bars between the shock tower area and the firewall. I was trying to make a less expensive version of what U.S. Cartool makes for the b's, but it was going to be a pain trying to get them to fit up well with the various attachment points, so I ended up doing a version of the XV style units instead. Where I placed them on the rear, there is some north/south sheetmetal structure to back them up so they don't just push on an area with no backup. I took my Rotabroach units to the shock tower attachment points plus where the lower portion hooks onto the frame rails/upper control arm boss s that I could get some more welds in those areas to help further solidify them together. I rented the a/c mock up unit from Restomod Air, going to use the Haymaker unit, to get that fitted up on the backside as the attachment either welds on bolts to the firewall. I went with the weld on. There is a a 2" step in the mounting plate and a 15* slope on the firewall in the area that I chose to mount it, so I made up some brackets from 16ga material that allows for the 2" step, on the one side, plus the 15* slope on both. The studs they supplied me with got welded to the brackets and the brackets got welded to the firewall. I also ordered the bulkhead units so I can get them layed out and punched in before I start the mud and paint work in the bay. I've been working on my radiator core support and have that starting to come together. I decided to make my own as the original had been hacked over the years, wanted one to accommodate the new Be Cool unit and not restrict the air flow, plus wanted something with some structure to it to help strengthen up the car. The lower tie bar was done with some 2" square .095 wall, radius bends from a local metal supplier to make the 90's and some 3/16" pieces I have that weld to the rails with the rest of the bar welded to them. The upper part of the bar holds the same depth dimension as the old wobbly unit that got cut out. On the upper, I found someone local who could bend 1X2 .120 wall rectangle so that got me the main radius that the old upper tie bar has. He could not do the sharp/short bends at the end, so on those I traced the old bar onto the new, where available, then trimmed areas away and added material in others to get me to the required shape. I will make further structure framing to attach to the vertical portions of the inner fenders with some more 16ga reinforcing straps to hook the framing together to the inner fenders plus make new side air baffles, which will be welded to all too, so that the radiator cooling airflow will be focused with less escaping where it need to go. I have the dimensions from Restomod for the condensers so I'll pick one that fits best and is the largest that I can get away with. For the fluid coolers, I had been thinking about making a duct in the lh fender behind the lh lamps, which would focus air flow to the units that would be mounted in the space ahead of the wheel but behind the lamps. I thought of another way to do them, at church[ sorry Lord], where I'll put them side by side in a duct/mount panel behind the bumper. There looks to be enough space there so I'll consult my Earls book and figure a combo out. The park/ts lamps will be going bye bye in the bumper, going to go LED with halo's so the halo's can be the park/ts units, and let the holes in the bumper be ducts to the brakes or split then to do brakes and coolers. Before I weld all the upper rad structure stuff in, I'm going to slip the engine/trans unit back in to make sure everyone plays well together, then whip out the Lincoln glue gun and lay some hot metallic glue on them all. Having the engine back in will enable me to figure out where I can put the o2 bungs in the collectors, need them accessible and at the correct angle of the dangle down, then I can get them coated. For the bay, backside of the hood, fender jambs, door jambs etc I'm going to paint them the original color which is ruby red ploy but go with a firemist on the metallic as it shows up better than the ploy which is the finest of grit size. Should look nice when done. Doing all the inner stuff now will make the exterior portions easier to do at a later time when its in the works to redo the outside.
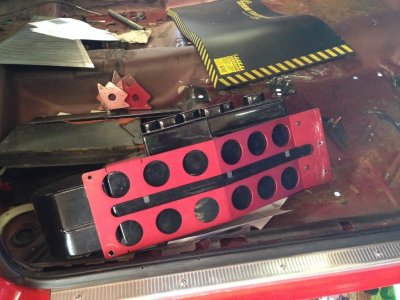
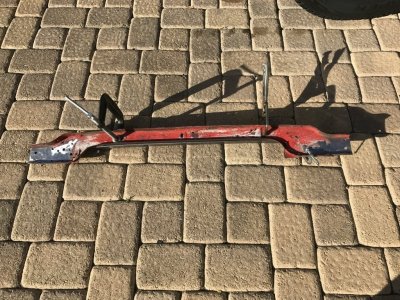
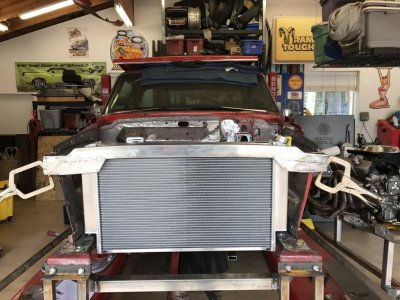


I made up a pair of side baffles for the radiator support, bent up some 16ga pieces to attatch the various components together with the framing and inner fenders. At my work we have a stomp shear, which I love for straight cuts. I will get the vertical square tube units made up when I get off the disabled list, just got home from having my thyroid cut out. Doc said I'm couching it for 2 weeks. Oh well! I can at least use the time to further think things out on the bay and plan for the continued work.
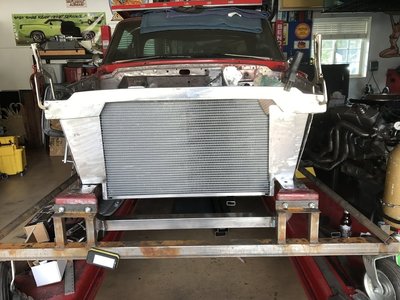

Since I'm feeling better after the surgery, I worked on the car yesterday. I removed the remnants of the old core support since they will not be needed. Before they got removed, I punched in two self tappers each so I could line them back up as they contain the cutouts for the fender attachment and I needed them to mark out on the new pieces where the cutouts would need to be. Hammered and dollied the inners flat. Then I cut some .095 1" square out for the vertical portions of the framing and got them welded in. Today I'll continue getting pieces attached for the side baffles and to attach the inner fenders to the framing so all will be tied in together.
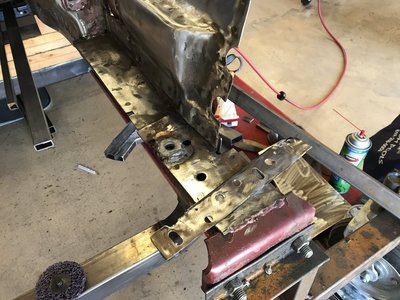
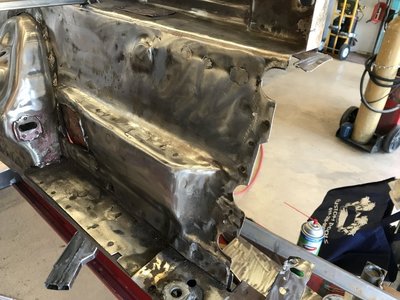
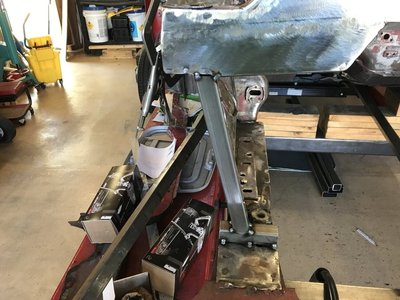
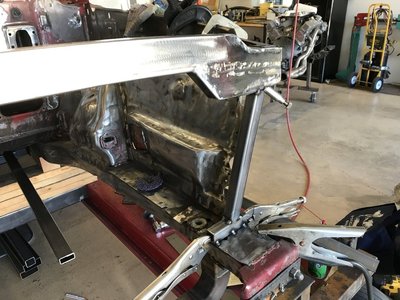
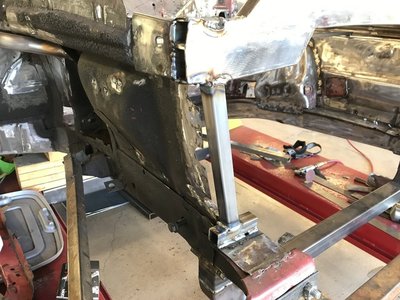
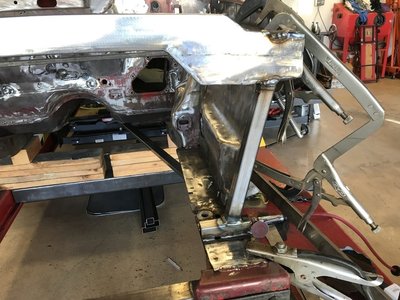


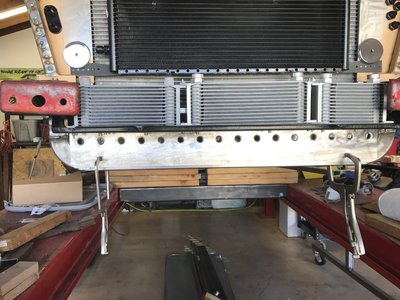
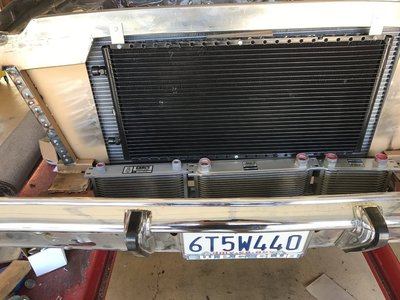
I made some pretty good progress today. Got the side baffles positioned up, made them out of some 20ga material. The outside support units I made out of some 16ga material. I got them into position on the car with a little trimming then held them in place with the vise grips after which I punched in some self tappers to hold all together. After all the pieces were in place, I center punched then drilled a grip of holes so I could rosette weld all the parts together. The sheetmetal pieces are now attached to the inner fender plus the core support frame I made. Should hold up much better than the original unit plus add a bunch of strength to the front portion of the frame. I need to make the lower portion of the support as well but I'll need to get the new condenser plus two more oil coolers to line up with the one I already have. The p/s, engine oil and trans will all have Earls coolers mounted in line abreast with ducting to feed them from behind the bumper and exit under the radiator.
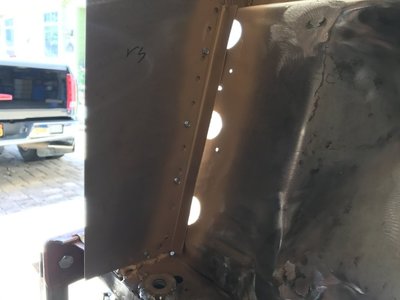
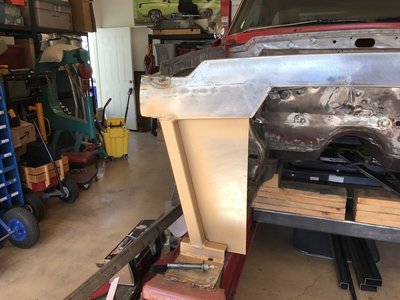
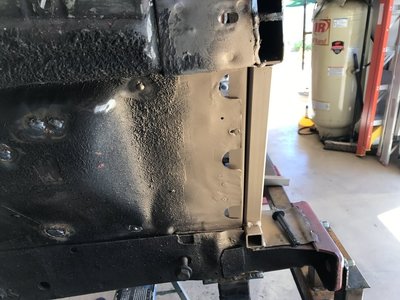
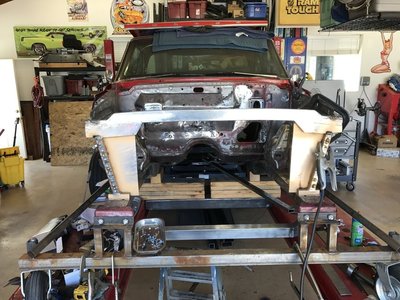


Sure, you are welcome. Along with needing to replace the old, hacked up core support, I wanted the new one to better work with the Be Cool radiator and not cut down the airflow plus maximize the airflow through the engine compartment as much as possible to held keep things cool. I'm trying to utilize what I see on newer cars for airflow management plus information I've gleaned from reading Racecar Engineering. This is a way cool and informative publication out of the UK that pretty much covers anything on 4 wheels. Expensive but neat stuff inside. You can find it at Barnes and Noble in the car magazine section. For those who love and understand complex physics, FEA and other intense programs[ me, I don't understand some of it but it makes me ponder] this is your magazine.
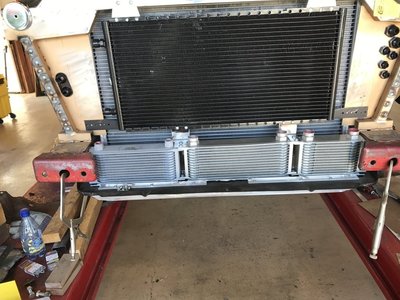
Spent some time yesterday mocking up the heat exchangers on the car. I believe I've got the basic locations figured out and today will continue on. I put a couple of pieces of Trex lumber on the condenser to get it spaced out from the radiator and made a couple of simple hangers to get it in the general area. From there, I put the stone shield back on to the front frame horns to see where it hangs and used some wood to space and support the oil coolers. One each for the p/s[ small one], engine[ large one] and trans[ medium one]. It looks like if I take out most of the front bumper license mount area, moving the plate either down or to the side, that the coolers will get good airflow across them and especially if I do a little deflecting to direct the flow. The lower portion of the radiator support will get planned out today and I'll figure out a mounting arrangement for the coolers. Also today I'll punch in the a/c bulkhead units in the radiator support and the inner fender plus on the other side of the radiator for the cooler bulkhead fittings. My main goal is to have this area ducted/deflected/sealed up as much as possible to help channel the airflow through the cooling units and from there across the engine and trans so they can stay a little cooler too. I may make up some sort of front lower splash shield to help direct the flow and introduce some more outside cooler air the the area.
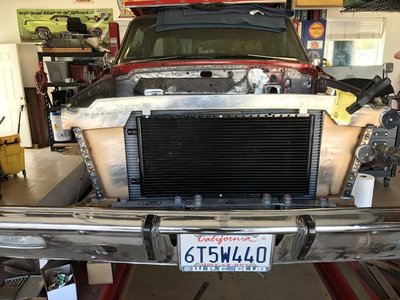
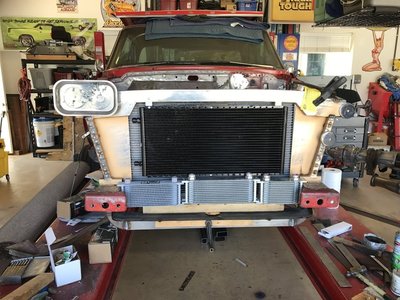
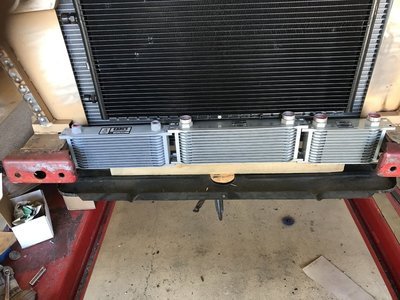


Fat fingered
- Local time
- 6:13 PM
- Joined
- Dec 14, 2008
- Messages
- 12,724
- Reaction score
- 17,110
- Location
- Long Island,New York
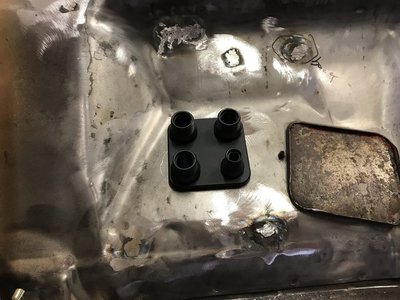
I was able to plot out and punch in the bulkhead units yesterday. Since the areas to the side of the radiator taper and I want to be able to get to the fittings, they ended up in these locations. The square unit gave me more leeway for its mounting. I think I got something figured out for mounting the coolers to the stone shield and will be working on that the next few days. I may get ahold of a core front bumper and do some cut and splice to widen out the opening in the center so it will feed more air through to all the coolers/rad/condenser.
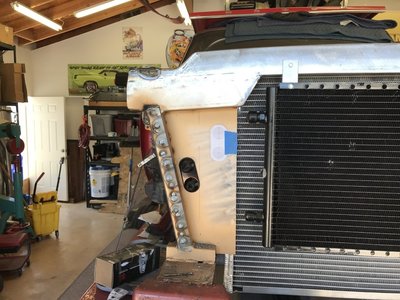
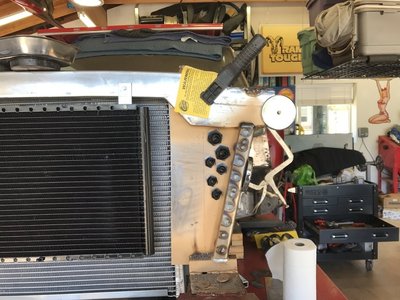
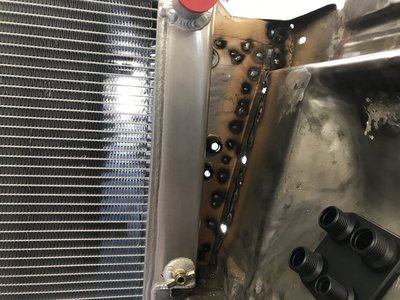
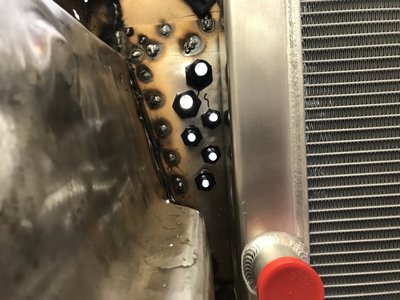


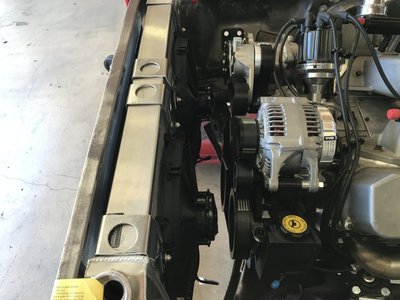
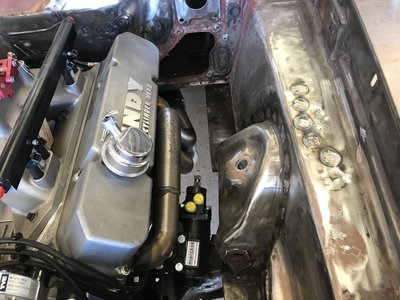
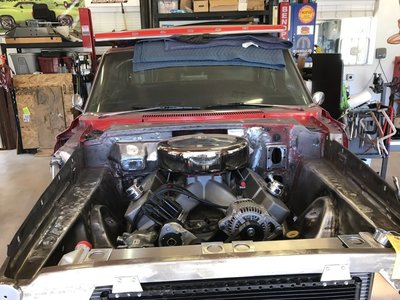
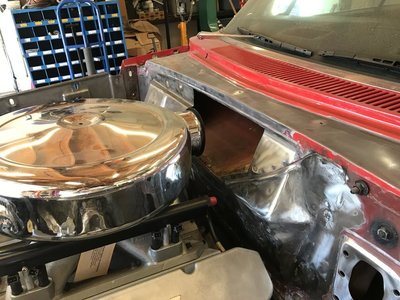
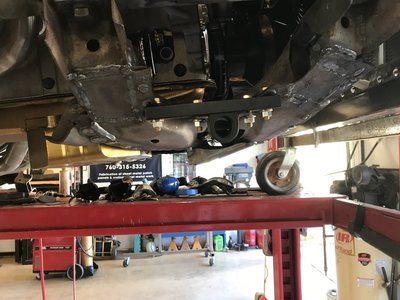
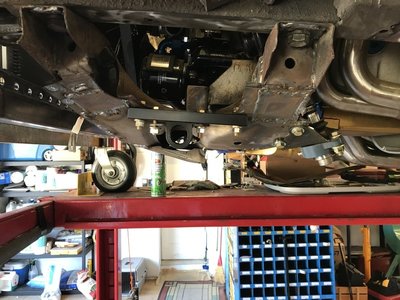
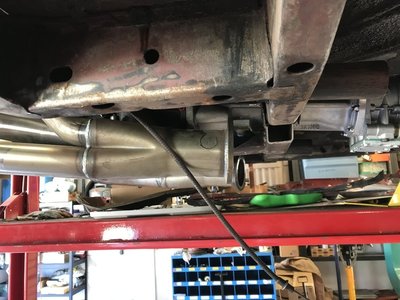
I've been working on the car in spurts. I got the oil cooler mounting pretty much figured out. Made up a filler piece to go between the stone shield behind the bumper, where the coolers are now mounted, and the lower tie bar for the core support. This helps to stiffen up the stone shield so its a little less wiggly. I took advantage of my latest purchase when making it. Picked up a trio of dimple dies. I measured out the hole spacing, cut them out them hit them with the die. Looks nice and will help focus the airflow through the engine compartment. Today I popped the engine/trans back in. Needed to mark out on the collectors where I could put the o2 bungs that would be accessible and have them in the right angle of the dangle so the sensors don't get killed from moisture. Next item was to check the engine to electric fan clearance. Good to go on that too. I'm not thrilled with the mount bracket setup on the Be Cool unit. They will allow too much movement for my taste so I think I'll Tig them on to the upper and lower frames of the radiator. The steering box, Borgeson, might need to be swung closer to the engine for fitment to the column but will tackle that later. Put the Firm Feel lower pittman shaft support on. I needed to do some grinding on the skid plate to get the Firm Feel sway bar through [am using a 70 k-frame in case you are wondering why through instead of in front] to check fit on that. Took a little while since its a big one. I put my air cleaner unit on, got it from Spectre, to see how its going to work with my proposed cowl induction. From the side view it may not work as its kind of tall, will need to check another 65. Maybe just slam the hood! I may have to make a unit from scratch instead of modifying the Spectre unit. We'll see. The rest of the day was spent grinding some welds down. A nice day spent in the garage with some Pandora playing in the background.


Jarven1977
Well-Known Member
Cool build, keep it up!

Thank you for checking it out. I'm using some of the skills that we learned from one of your ex countrymen. Lazze Jannsen who owns Lazze Metal Dreams up in Pleasanton.
Similar threads
- Replies
- 20
- Views
- 1K
- Replies
- 6
- Views
- 266
- Replies
- 126
- Views
- 4K
- Replies
- 70
- Views
- 2K

