ma mopar nutz
Well-Known Member
lookin good!!! good start to a cool project !!:headbang:
I decided on a name for my project....
YANKEE EXPRESS.
")
I am sure you already have it handle but worth mentioning..
it is a good idea to install a piece of sheet metal behind the rear seat as a fire barrier when putting a fuel cell in the trunk.
and NHRA required, Sorry for preaching safety but being an NHRA tech in the past I can't help myself.
my wife named the Coronet the "other woman" I spend more time with her than the Wife.. So whats wrong with that?
yes a roll bar and sub frame connectors are a good deal if your going to have some serious power and hooking hard on launch.


I think both concepts would work.
very impressed with your drawing skills!
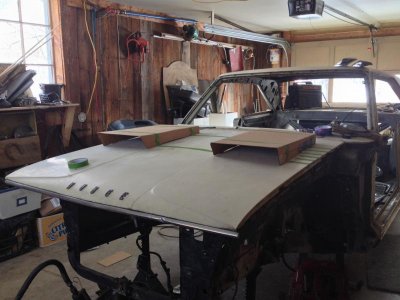
JMO I'd keep the height of the scoops the same as the hood {Symmetrical I guess}
having height different from one side to the other might be an eye catcher?


the center power bulge thing you have going on might work?
build the back piece tall enough and you could mount a fuel PSI or other gauges in it?
might not be enough room?

I like following your work. I want to see how it will look. I think that you are doing a great job.


It took me 3 years to get IU, and that was with a 90% scheduler rating also. My CRSC is only 60 bucks a month, but I only had 2 yos, so yours should be more, but be mindful of the "glitch", which means you might get squat compared to your yos.
The car is looking good and if I can help out in anyway, just let me know, one Vet to another!!
I don't see any reason you couldn't cut the hood and use the existing panel to shape the bulge.
I'd lay a straight edge of some sort for a guide and use one of these 1/8 '' cutter discs on a grinder..
we call them the Danger disc's for a good reason but they do make fast cuts
View attachment 235902


 View attachment 265668
 View attachment 265671View attachment 265672