• When you click on links to various merchants on this site and make a purchase, this can result in this site earning a commission. Affiliate programs and affiliations include, but are not limited to, the eBay Partner Network.

My 1967 Belvedere Convertible Plans and Restoration (aka - Mad Scientist Build)

I've never moved the springs but have read plenty on it "not to hard" but the tubbing is a little involved but nothing to sweat. They sell relocation kits for the springs which are basically a chunk of box tubing cut to be fitted into the rear frame rail. The tubbing I've seen done that I like used the stock parts, you move the tub in against the frame splitting it in half inside of the factory seam then weld a filler in to make up for how much you moved it.http://www.hotrod.com/techarticles/body/hrdp_0903_diy_mini_tubbing_guide/photo_12.html relocator003.jpg
 
More progress . . . undercoating removal . . .

Once again, back in the shop to remove ( and inevitably eat ) more undercoating on the Belvedere.

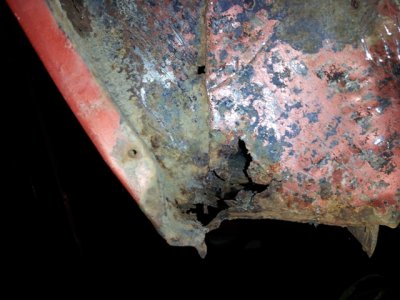
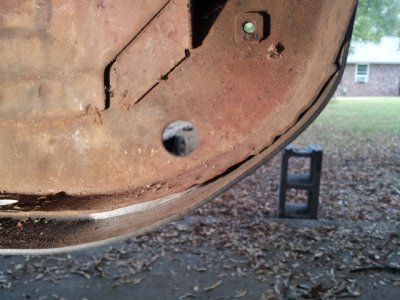
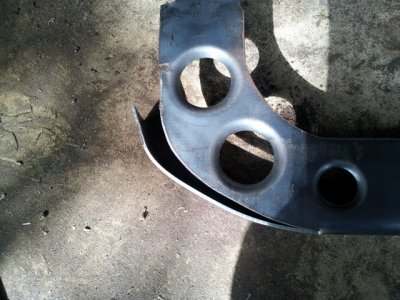
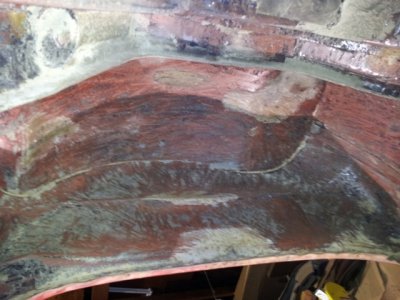
In the process, I've found that the driver's front corner of the rear wheel well will need much needed attention - as seen in the following picture:

sm-badcorner.jpg

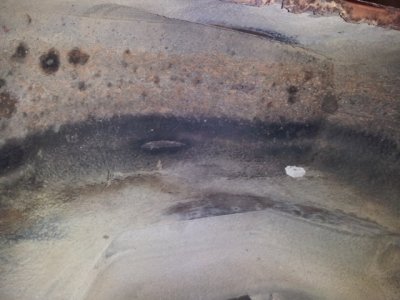
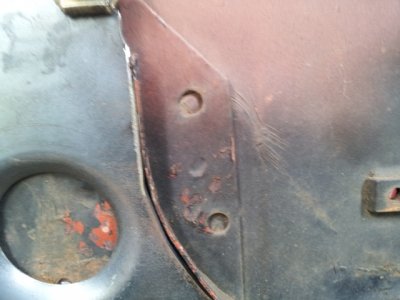
Here's a shot of what the wheel well undercoating looked like to start with:

sm-wheelwell.jpg

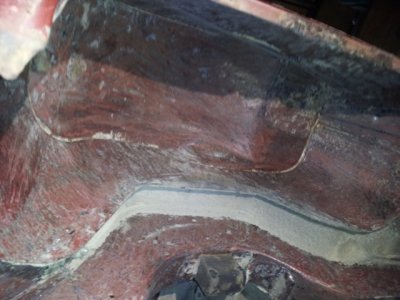
And the final product, a wheel well clean of undercoating . . . YAY !

sm-drrearwheelwell.jpg

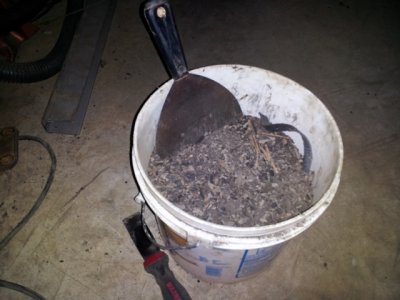
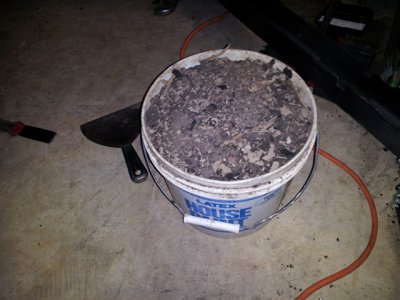
Bucket number 3 is filling up pretty quickly . . .

sm-bucketnum3.jpg

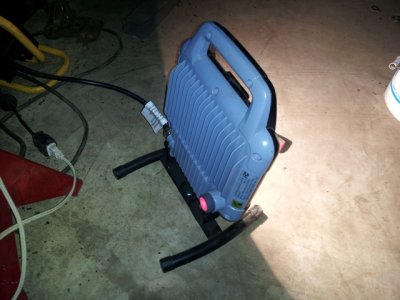
Found a neat shop lamp at the local home improvement store, it's listed as a 15 WATT LED shop lamp, that has the equivalent of 1000 WATTS of output . . . and this thing can light up your work. The good thing is that it doesn't get as hot as the Halogen lamps - and the electricity usage is dramatically less then most other bulbs since it's an LED bulb. Price on the lamp was about $35.00 - might be getting a second one for the shop.

sm-greatlight.jpg

Now it's time for a shower to get some of this dust, dirt, and undercoating off me and call it a day . . .

- - - Updated - - -

I've never moved the springs but have read plenty on it "not to hard" but the tubbing is a little involved but nothing to sweat. They sell relocation kits for the springs which are basically a chunk of box tubing cut to be fitted into the rear frame rail. The tubbing I've seen done that I like used the stock parts, you move the tub in against the frame splitting it in half inside of the factory seam then weld a filler in to make up for how much you moved it.http://www.hotrod.com/techarticles/body/hrdp_0903_diy_mini_tubbing_guide/photo_12.html

Thanks 747Mopar - that's the article that I found and I agree, I like how they did it, and that's the way I'm planning on tubing the wheel well . . . it does seem to be doable ! Will be researching more on the spring relocation - still got a couple outstanding questions to figure out before I start.
 
I've never moved the springs but have read plenty on it "not to hard" but the tubbing is a little involved but nothing to sweat. They sell relocation kits for the springs which are basically a chunk of box tubing cut to be fitted into the rear frame rail. The tubbing I've seen done that I like used the stock parts, you move the tub in against the frame splitting it in half inside of the factory seam then weld a filler in to make up for how much you moved it.http://www.hotrod.com/techarticles/body/hrdp_0903_diy_mini_tubbing_guide/photo_12.html

I've been looking for the relocation kits, but I seem to find them only for A-body ( which I found odd ). When I called, they said that the A-body cars were consistent in the frame rails while the B-body cars had a number of different modifications and they didn't want to make, and store, multiple copies of the B-body relocation kits. They suggested that I "fab up" my own . . . which is what I might just have to do. Thanks for the information - I'm going to keep researching this too . . .

One way or another . . . I'm sure I can get this thing done.
 
That hole you found is pretty typical, I had one in the exact spot, I actually noticed mine for the first time when I took the back seat out and I poked the rusty spot and saw the light of day. :facepalm:

I found lots of rust I never found the day I looked over the car. Over the last 2 years I have been surprised about 40 times by spots of rust and spots that you would have figured would be gone but were like new...

Anymore I just run with it. But from what I can tell, I may be officially done with steel repair...wait scratch that, i remembered one more.

Great news Kevin . . . looking forward to seeing your car in paint soon ! I'm still working on my swiss cheese ! ! hah hah

Took a break from undercoating removal tonight ( wasn't hungry - bleach ! ) . . . and did a little welding. Maybe one of these days I'll get the hang of it ! !
 
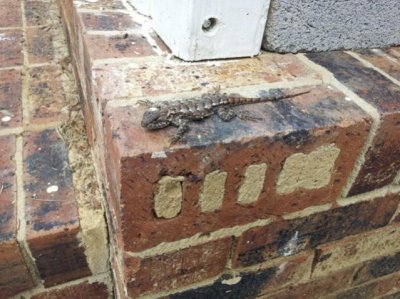
Got a bunch of critters around here . . . some cool, others interesting . . .

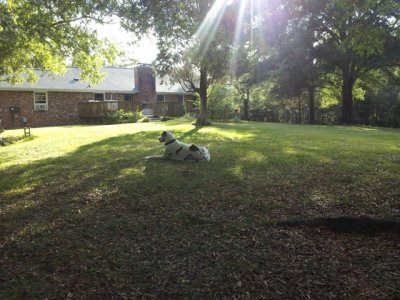
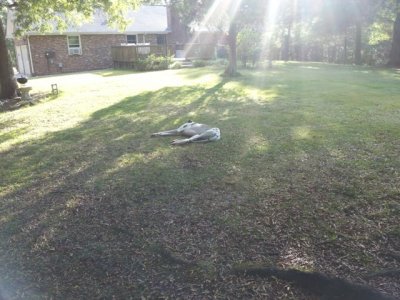
Take a look at the critter I found around the house . .

sm-housefriend.jpg

Pretty cool little guy ! ! !
 
Working on the front clip . . .

Been working on the front clip and engine compartment. Got most of the stuff cleaned up, up front, and I'm trying to get it ready for primer.

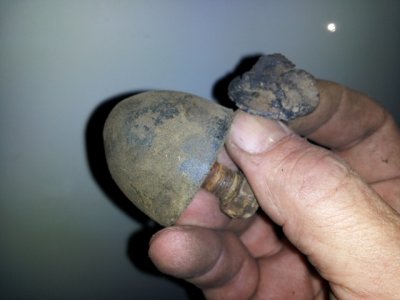
In the process of sanding, I pulled off the upper control arm bumpers . . . well, 1 1/2 of them to be honest . . .
sm-bumpers.jpg

What's left of the passenger side is on top. At least I know what they're suppose to look like with the driver's side.

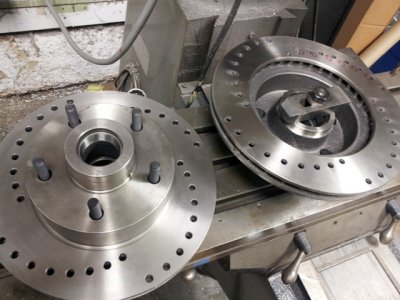
Off to my buddy's shop tomorrow to get my other rotor drilled for my shoebox project - will be glad to have them ready for installation - later.
 
Cross drilled rotors . . . completed

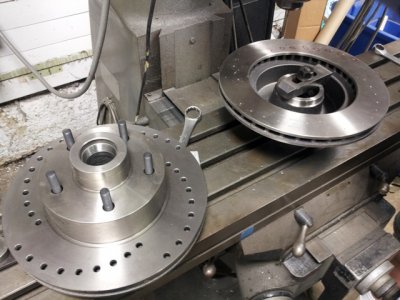
Got to my buddy's shop, and we set up the second rotor to get it cross drilled. Had to make sure that we had the rotors drilled correctly - so that they were mirror images. Sure didn't want to drill them the same way . . . ruh roh . . .

So, here's the rotors as we're preparing to get them drilled:

sm-rotorsstart.jpg

And the completed product - I'm really happy with the way they turned out !
Guess what I'll be doing with the rotors on my Belvedere ? ! ? !

sm-rotorsdone.jpg

Now it's back to work on my Belvedere . . .
 
Core support reinforcement work . . .

Time to get some work done on the Belvedere . . . here's my little helper keeping guard . . .

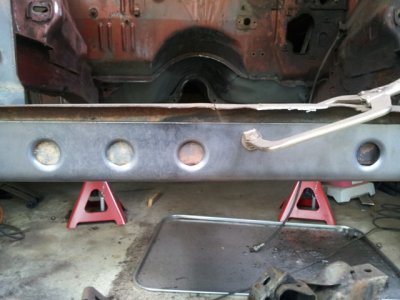
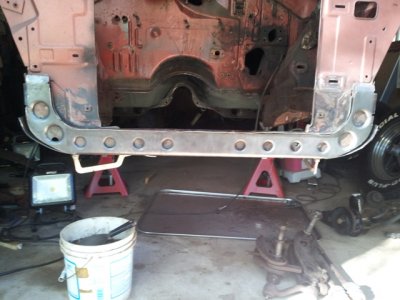
Time to work on my crooked lower core support and see if I can get the reinforcement ready to be installed.

sm-guarddog.jpg

So while the puppy dog is on guard, I'll take a look at the core support . . . it's not tucking up very tight on the original support.

sm-coresupporttoofar.jpg

What's causing it not to tuck up tighter . . . so I look from behind and see that the tack welds that were put in place by US Car Tools are bending a little faster than my lower core support - so the hit the sides. need a little more room to get them to tuck up tighter.

sm-coresupporthits.jpg

So I ground away the tack welds to open up the original shape of the bend to see what happens . . .

sm-coresupportcuttacks.jpg

Had a little fitment issues on the sides where the new support extended over an existing protruding metal web. SO I had to grind a little bit of the new support away and give enough room for the web to be cleared . . . success, both sides needed just a touch removed.

sm-coresupportgrind.jpg

Now with those fitment errors corrected, and about an hour of fiddling with the bent lower support, I got the new support to tuck up nice and tight against the existing support - had some interesting bends and twists in the original support. Bot them mostly cleaned up, but will take advantage of the straightness of the new support to help with aligning both of them together.

sm-coresupportbetter.jpg

Time to check on the guard dog . . . YUP . . . he's watching the backs of his eyelids . . . Good Boy ! ! !

sm-sleepydog.jpg

Got a couple things to figure out and I should be able to get this welded into place shortly.
 
Checking out the new center pickup for my Hemi

Didn't get a chance to get into the shop today, had to do a round-trip visit to Tennessee to meet with the people that my dad worked with on the golf league - An executive meeting - and get some direction on taking my dad and my vision to completion. It's been almost a year since I lost my dad . . . that day is coming up soon.

Tired from the 4+ hour drive out there ( left at 5AM ) and the 4+ hour drive back - plus the passenger bus accident on I-40 that had me stuck in standstill traffic for about 30-40 minutes while 15-20 ambulances passed by to help out - plus helicopters airlifting injured out to hospitals. Emergency vehicles coming from every which direction. It was quite the scene . . . so sorry to say that at this writing, 8 people have lost their lives due to this accident - very sad day.

And the bus was from Statesville NC, which I passed through on both my trip to and from Tennessee.

My thoughts and prayers are with all the families of people that were on that bus, in the SUV, and the tractor trailer involved in the accident.

Sad day for a number of families . . .

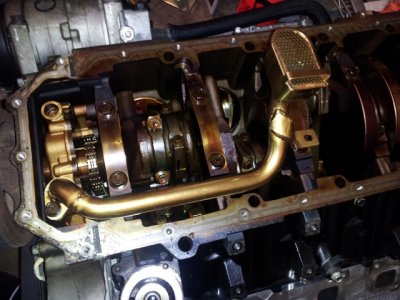
All I could muster up was to do a test fit on the center oil pickup for my Hemi . . . and share a pic . . .

sm-hemicenterpickup.jpg
 
I've got the same pan and pickup tube, they fit great. If you run the stock stiffening bracket on the lower of the engine to bolt to the trans bell housing (may not work with the tremec since it was designed for the NV4500/3500) you will have to clearance the bracket for little lip on the outside of the pan flange.
attachment.jpg
 
Magnum oil pan - slightly different . . .

I've got the same pan and pickup tube, they fit great. If you run the stock stiffening bracket on the lower of the engine to bolt to the trans bell housing (may not work with the tremec since it was designed for the NV4500/3500) you will have to clearance the bracket for little lip on the outside of the pan flange.

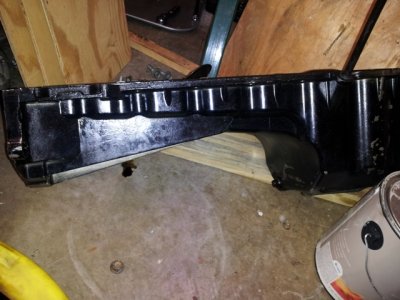
The 5.7 Hemi that I got came out of a Dodge Magnum station wagon - and the stiffening bracket is combined as a single unit into the oil pan . . . don't think I'll be able to use it.

sm-magnumoilpan.jpg

But I sure like the way you were able to re-use it with your oil pan - that looks great !

Another concern - the 2nd bolt on the oil pickup, the one that attaches to the main, has a big gap between the bolt and the bracket - looks like I'll be needing a spacer to make it work ? ? I would have thought that they would make the bracket to fit without a spacer ( oh, and then I"ll need a longer bolt too so that it'll hold the bracket in place as well as hold the main in place ). Might need to get a better picture to show you the details - you can kinda see it on the picture above.
 
Tackled some more undercoating removal . . . passenger side wheel well . . .

Decided to get back at the undercoating removal . . . so that some day I'll be done with that mess !

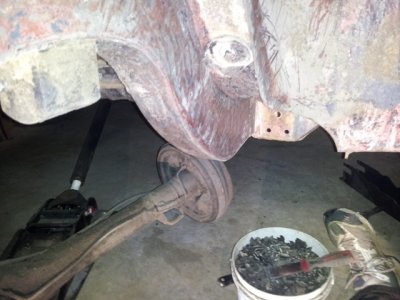
Got the passenger side rear wheel attacked and got over half of it cleaned up.
Here's a shot of the front side, notice bucket number 3 in bottom of the picture, almost ready to empty it and start on bucket number 4 ! !

sm-passwheelwell.jpg

And another shot of the wheel well.

sm-passwellclean.jpg

Getting there . . . hopefully I can be done with undercoating removal SOON ! ! !
 
I believe that there should be a stud under that mount. If I remember right I had a stud there and it used a nut to hold down onto the stud which would have taken up the space since the stud had a hex head there. Also I had to go to the dealer to get that bracket, its only $15 new and is for a 2005 Ram 2500 Hemi with the Manual transmission.

The picture is from the pickup I had modified before I installed my Mildon pan but its the same

attachment.jpg
 
I believe that there should be a stud under that mount. If I remember right I had a stud there and it used a nut to hold down onto the stud which would have taken up the space since the stud had a hex head there. Also I had to go to the dealer to get that bracket, its only $15 new and is for a 2005 Ram 2500 Hemi with the Manual transmission.

The picture is from the pickup I had modified before I installed my Mildon pan but its the same

Argh . . . . go back and look at my picture . . . guess who forgot the windage tray ! ! ! Duh ! ! !

I'll go give it another shot and see how it looks "the right way" . . .
 
It's official . . . bucket #3 is now full . . .

Spent about an hour finishing up removal of the undercoating on the passenger rear wheel well, and it's now complete.

sm-rearpassclean.jpg

And now that I've finished that part of the car, now I've officially filled bucket #3 . . . time to move on to bucket #4 !

sm-bucket3full.jpg

And I'm an hour closer to being done with scraping undercoating ! !
 
I know thats tedious work with getting the undercoating off most of the time but you have come a long way! keep up the great work, its showing!
 
Got to hand it to ya. That is some great determination that you've shown as far as the undercoating. Now that that is over with, I can tell you will put it into the rest of the car.
 
I know thats tedious work with getting the undercoating off most of the time but you have come a long way! keep up the great work, its showing!

Thanks Ron . . . . I think I can . . . I think I can . . . I'm almost there

Got to hand it to ya. That is some great determination that you've shown as far as the undercoating. Now that that is over with, I can tell you will put it into the rest of the car.

Thanks roadrunnerman . . . from the rear axle forward is all done, from the rear axle back is all that is left ( maybe a week or so ? ? ) but I may need to swap things up so I can feel like I'm getting something done. I'm getting close ! ! !
 
Switching it up . . . need a break from undercoat removal . . .

Didn't want to "eat" undercoating today and needed to work on something else . . . so . . . I was trying out a new item that I got from the car show . . .

A pair of 500 pound fender stands . . . they seem to work very well ! ! !
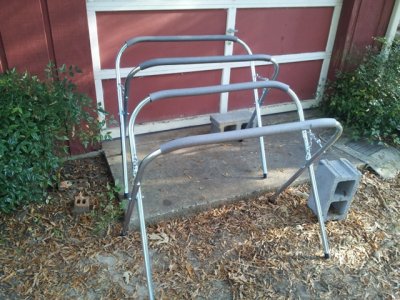
sm-fenderstands.jpg

So I wanted to see what I had on my passenger front fenders . . .
(1) original primer (2) yellow paint (3) copper paint (4) black primer (5) grey primer (6) latest copper paint . . .

Want to get these all media blasted down to the bare metal and get all this paint off them . . . after I weld up all the holes and fix the rot.
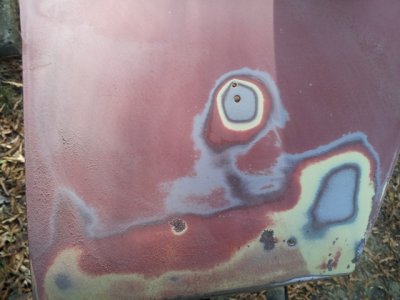
sm-passfendercolors.jpg

since I've removed the rear end from the car, I've got a bunch of parts that need to be cleaned up . . .
and now they're almost ready for etching primer and epoxy primer . . .
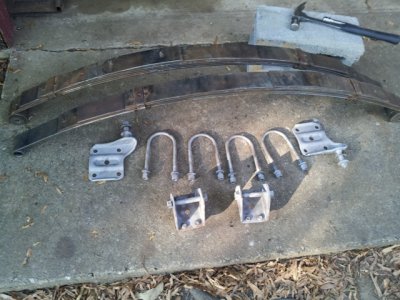
sm-rearsuspcleaned.jpg

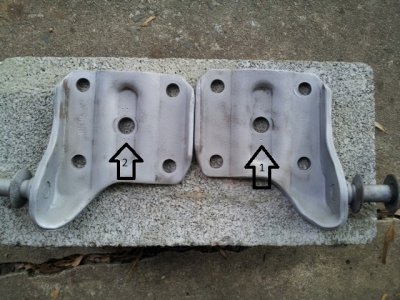
A little trick that I learned for marking part . . . if you want to mark parts and note if they were on the driver side, or passenger side, I've discovered this little trick to mark them easily. First, you can mark them anywhere, but I find an inconspicuous spot, and with a center punch, mark the driver side with a single punch, and the passenger side with 2 punches as seen in the parts below:
sm-markingtrick.jpg

that way they'll always have a mark for where they go on the car - and it's barely visible. It helps me . . .

Tonight or tomorrow I get to figure out what I'm doing with etching primer and epoxy paint . . . but,
this oughta be . . . uh . . . "interesting" ? ? ?
 
Auto Transport Service
Back
Top