• When you click on links to various merchants on this site and make a purchase, this can result in this site earning a commission. Affiliate programs and affiliations include, but are not limited to, the eBay Partner Network.

My 1967 Belvedere Convertible Plans and Restoration (aka - Mad Scientist Build)

Any plans for hopping up the engine or going to keep it bone stock? I will tell you one thing, in stock form on a reasonably narrow tire...smoke is in your future...ask me how I know...:3gears:
 
Any plans for hopping up the engine or going to keep it bone stock? I will tell you one thing, in stock form on a reasonably narrow tire...smoke is in your future...ask me how I know...:3gears:

LMAO . . . I can only guess . . . right now I'm trying to see daylight at the end of the tunnel ( through all that smoke ) . . . My plans are to mini tub it and put a nice wide tire with deep dishes . . . old school . . .

Ok, how do you know ? ? ( grin )
 
Ok, how do you know ? ? ( grin )

Haha, ok story time I guess.

My brother came over and hadn't been in it since I got it running or moving under its own power. Took him down the road gently turned around put it in first took off slowly and then from a roll mashed the pedal....the rest is just blowin smoke.:D
 
Got some more swiss cheese removed . . .

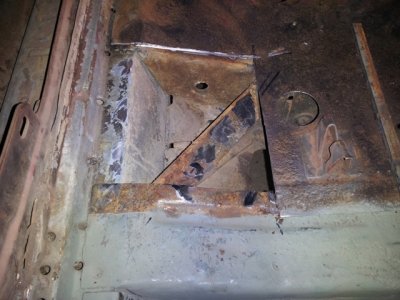
Got a little time in the shop tonight, and removed a small patch of swiss cheese . . . will get the replacement piece to fit into it tomorrow . . .

sm-cancerremoved.jpg

This is under the rear seats, but I got tired of seeing the holes so out it came . . . need to look at the rest of this area and see if there's any more of it that'll need to be removed too . . .
 
Got some stuff done today . . .

well, been working on and off on the Belvedere the last couple days and making a little progress . . .

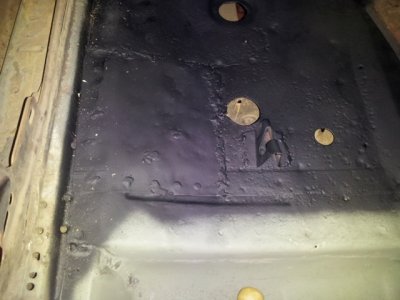
Fixed the hole that was cut out - quick primer - will clean up when I shoot the whole inside of the car . . .

sm-cancerfixed.jpg

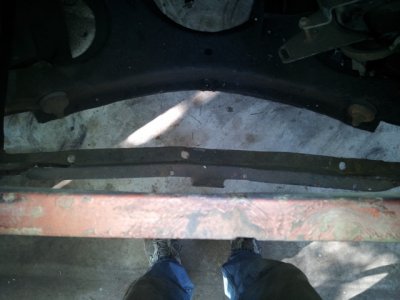
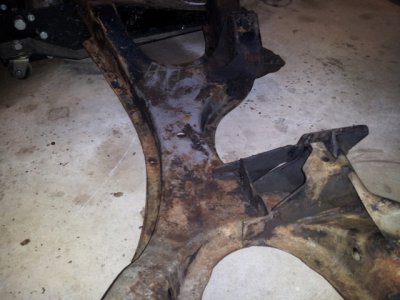
Something looks a little off with that lower core support . . . Hummm . . . is it suppose to look like a boomerang ? ? ?

sm-lowerbent.jpg

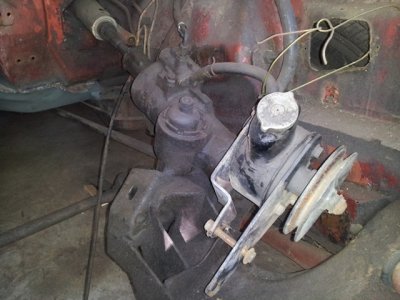
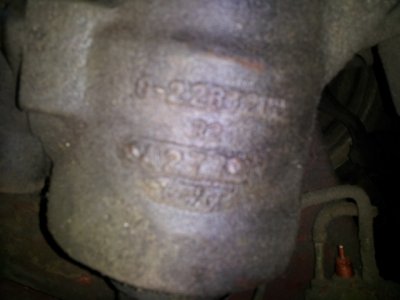
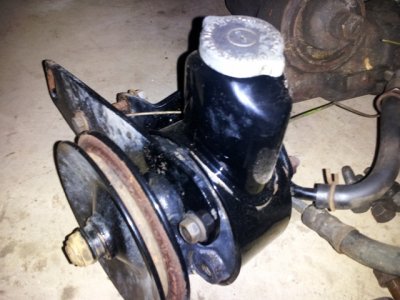
This power steering unit might be available at a later date - trying to decide what I'm going to do on the front clip . . .
The alterkation is sounding very promising . . . still investigating.

I've seen the following front clips:
1- magnum force
2- XV Motorsports
3- mancini racing
4- alterkation
I'm sure there are probably more out there . . .

The numbers on the power steering are a bit blurry, but wanted to throw them out there.

sm-powersteering.jpgsm-psnumbers.jpg

Pulled the hood off the car and set it aside and out of my way, working on getting the engine compartment cleaned and painted.

Working on trying to get the K-member out of the car now . . . working on getting the brake master cylinder removed and the steering column removed from the car.
 
Apart she comes . . . more coming off the car . . .

Got a chance to spend time working on the Belvedere today, and got some stuff accomplished. Got the front tires off, and almost all of the front suspension off - still planning to have the k-member dropped this weekend.

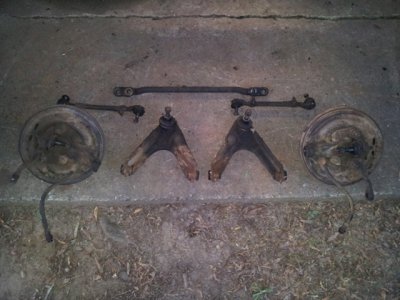
Front end parts all separated - still got to get the torsion bars out and the lower control arms off too.

sm-frantendapart.jpg

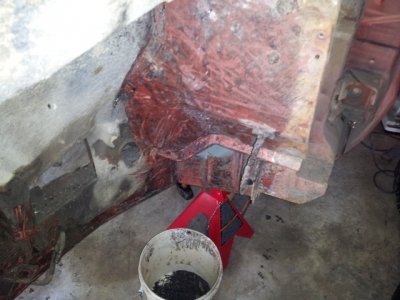
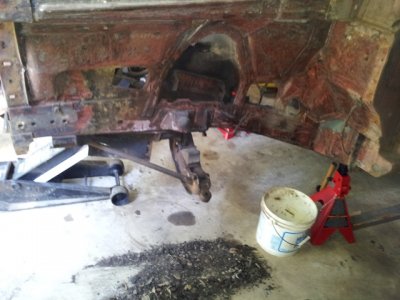
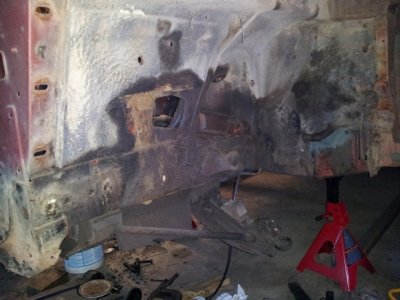
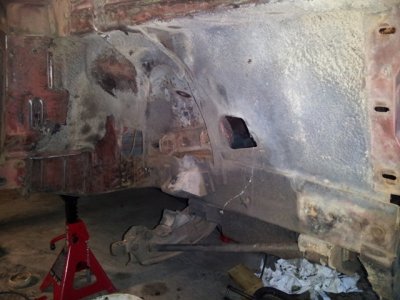
The driver side - looking might empty . . .

sm-emptydriverside.jpg

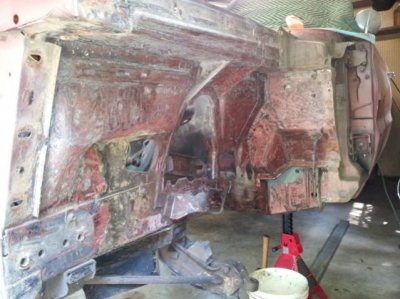
The passenger side - also, looking might empty . . .

sm-emptypassengerside.jpg

Oh, and you know what that means . . . I got a chance to work on scraping off more undercoating. ( oh fun, fun, fun . . . NOT ! ) Well, my bucket Number 2 is now filled up again, so it's time to empty it into another bag and keep my collection of junk coming off the car rolling. Going to weigh them and see how much.

- - - Updated - - -

Boomerang shaped core supports are generally in need of some straightening :D

Good thing you didn't suggest that I cut it out and throw it away . . . it'd come back and hit me in the back of the head ! !
 
Speaking of front clips I just saw an advertisement for a modular front section, sorry can't remember the brand but it looked sweat (it was a known brand like Alterkation or Magnum Force).
 
Speaking of front clips I just saw an advertisement for a modular front section, sorry can't remember the brand but it looked sweat (it was a known brand like Alterkation or Magnum Force).

If you see it again 747mopar, could you post it back here . . . I'm trying to find all of them that I can so I can make an educated decision should I go the full front clip route. I can take all the help I can get tracking down all the options. The number of them seems to be growing - that's good for us here at FBBO !
 
Hear you go, it's from Magnumforce. I like the looks of this one, it looks like it would tie in well and really stiffen it up.modular front end.jpg
 
Collection spots for dirt . . . what got into me ? ! ? ! ?

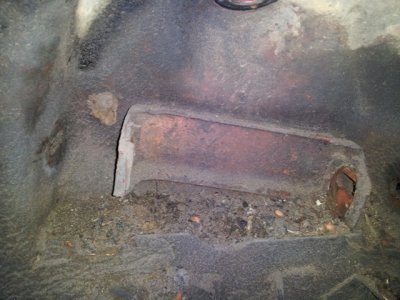
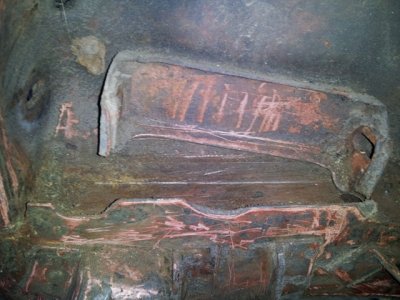
The weatherman said ( we know we can always believe them ) that the humidity today was going to increase - uh, how can it increase when it feels like it's already 100% humidity ? So I got out to the shop early and wanted to take pictures of an interesting thing I noticed on the passenger side, and forgot to take pictures. Places where the dirt can collect.

Both my passenger and driver side looked like this when I started:

sm-collectdirtfull.jpg

The only way to compare it is to see what it "should" look like . . . this is after the cleanup . . .

sm-collectdirtempty.jpg

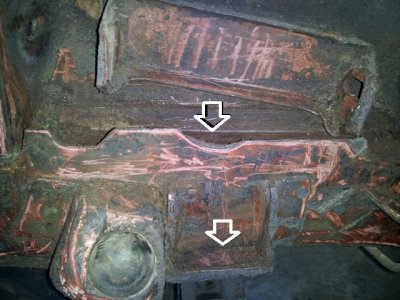
There are (2) spots that i noticed collect dirt - noted by the arrows below . . .

sm-collectdirtspots.jpg

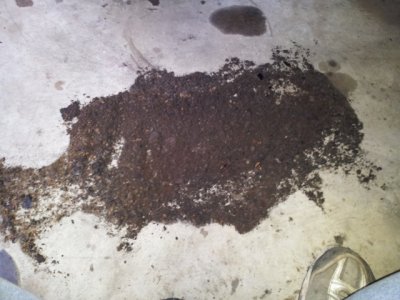
Here's what got cleaned out of those spots . . . and I started to scrape the undercoating too . . .

sm-dirtcollected.jpg

Don't know what got into me . . . got in the zone and started scraping ( had a fan blowing on me to keep me cool, and music blaring in the background . . . ) I didn't think about it . . . just let it happen . . . Next thing I knew, this part was all cleaned up . . . Notice bucket 3 is starting to fill up ! ! !

sm-driversidecleanupstart.jpg

I must have really been in the zone . . . here it is, before lunchtime, and the driver side is all cleaned up ( I know, this is NOT helping you with your plan to get the K-member dropped ) but removing undercoating is so much fun, when the mood strikes, you let it go ! ! !

Notice the collection on the floor . . .

sm-driversidecleanupdone.jpg

Quite a difference from the picture above with all the ugh-dercoating all over the place . . .

sm-driversideclean.jpg

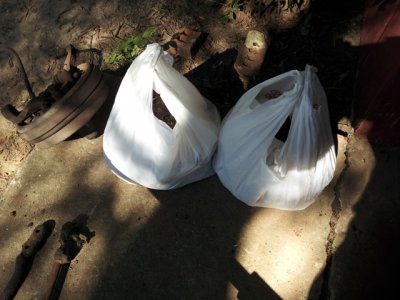
In case you thought I was kidding, here's (2) bags full of (2) buckets full of junk that has been removed form the car . . . at the end, I'm going to weigh them and find out the grand total of junk removed . . . should be interesting.

sm-twobagsfull.jpg

Okay, now if I'm going to get the K-member out, I better get to work on it now ! ! ! Stop scraping ugh-dercoating ! ! !

- - - Updated - - -

Hear you go, it's from Magnumforce. I like the looks of this one, it looks like it would tie in well and really stiffen it up.
Go take a look at the one that is offered by XV Motorsports . . . it's right along the same lines too . . . but, are they only for cars that are meant for the track ? ? ?
 
We have success . . . after 3 hours . . . ugh

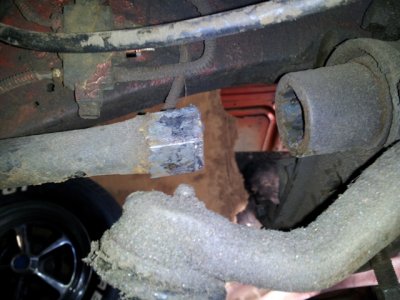
The torsion bars were doing their darnest to revolt against their removal from the Belvedere - but I wasn't going to let that happen. So the bars weren't even remotely interested in moving. But I read a post about using wood blocks . . . a poor mans removal tool . . . so I thought "what the heck, we'll give it a try".

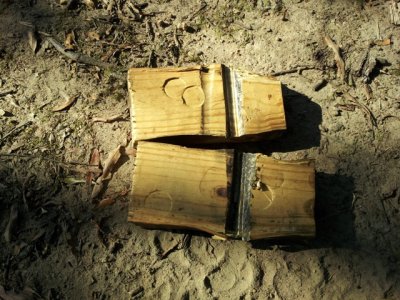
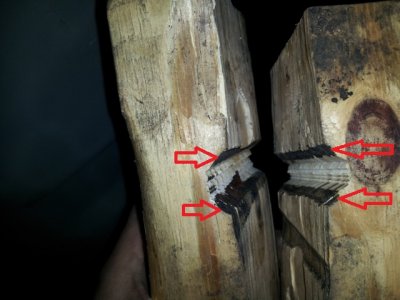
So I cut (2) 2x3 boards and cut a groove in them across the grain - this would provide more strength then with the grain -
as seen in the following photo:

By cutting the octagon shape in the wood it provided for at least 4 points of contact - I hoped the bottoms did too to make it 6 - oh well . . .

sm-blockcuts.jpg

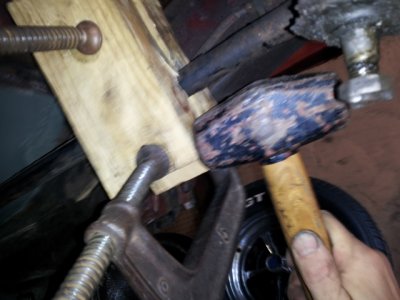
Next I clamped the torsion bar into the groove with (2) large clamps to squeeze the bar - the pressure would ( hopefully) help pull the bar out of the LCA . . .

As indicated in the photo, the torsion bars were not hit, only the wood was hit allowing it to transfer the force ( safely ) to the torsion bars - see pic for location of hammer striking area . . .

sm-poormanremoval.jpg

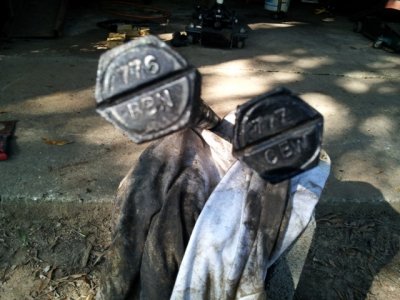
Driver side - about 15 minutes later . . . we have success . . . However, on the passenger side, it took me over 2 hours to get that side out. Talk about being stubborn ! !

sm-torsiontada.jpg

And the end result . . . we have (2) torsion bars fully removed from the car ( note to self the L and R went in first and into the LCA )
Oh, the L and R are on the other side of the torsion bar . . . duh !

sm-removedtorsionbars.jpg

Let's see how the wood blocks faired in the process . . . un, I've seen better looking 2x4s . . . but the torsion bars were not messed up with vise grips, or scored, or damaged in any way.

Result - poor mans removal tool was a pretty good success !

sm-howblocksfaired.jpg

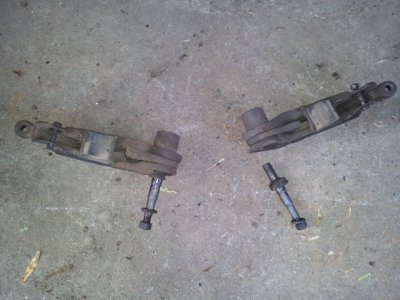
Got the Lower Control Arms removed, but something looks amiss in this photo . . . Hummm . . . .

Passenger side on the left, Driver side on the right, this does not look very good . . .

sm-lowercontrolarms.jpg

No, the K-member is still in the car . . . for another day . . . the weatherman was right, it was hot and humid today ! ! !
 
Last edited:
Met my goal . . . one day late . . . K-member is OUT !

Since I didn't get to it yesterday, I was bound and determined to get the K-member out today.

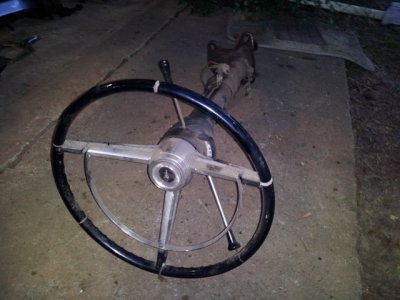
SO, to accomplish that, first the steering wheel had to come out first:

sm-steeringwheel.jpg

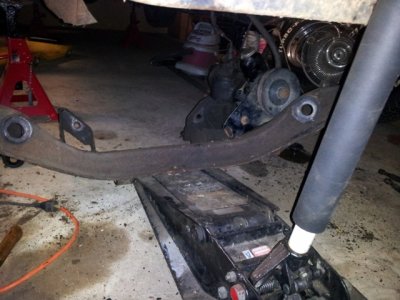
With the steering wheel removed, there was only 4 bolts left to get it out . . . and now it's OUT.

sm-kmemberout.jpg

Ugh, it's miserable and so humid outside, not much going to get done tonight.

Where is "Fall" and cooler weather ? ?
 
Last edited:
Next on the agenda . . . frame connectors

Wanted to add frame connectors to the Belvedere, especially since the car is a convertible.

Got the frame connectors delivered the other day and now I'm trying to fit them so they can be welded.

sm-frameconnectors.jpg

Got some grinding to make them fit better before I can get started on the welding . . .
 
Had to take care of some programming - got some stuff done

As it would have it, had to got some work done on a golf website that I've been building for over 5 years with my dad. Got the end of the year tournaments coming up and had to build some new functions to make them work.

That said, got a chance to try out my "new" pressure washer on some of the parts that I've pulled off the car . . . got the pressure washer with Visa bonus points - ahem - they say for free . . . but I paid it for somehow. If anyone ever tells you that you can wash car parts, with a pressure washer, and stay dry, don't believe them . . . no matter how I tried to figure the right angle to avoid getting splashed, it didn't work. I not only got it with the water, but with the oil and dirt that was caked on the K-member. Oh, I didn't get wet . . . nah . . . I got SOAKED !

But the parts got cleaned ( better than I did )

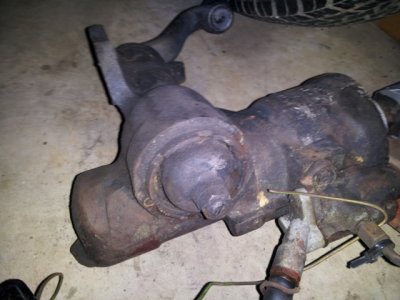
Power steering gearbox cleaned up nicely.

sm-cleansteeringbox.jpg

As did the power steering pump/reservoir . . . the paint on it looks almost new ( I was surprised )

sm-cleanpspump.jpg

And the K-member did have some metal under all the "gunk" that was caked on it . . .

sm-cleankmember.jpg

Still working on fitting the frame connectors under the car, and getting them to fit properly. That's going to take a bit of time . . .

Got another set of stands under the back of the car, so I can drop the rear axle out and be able to get some undercoating cleaning in the back half of the car . . . it's about the last bit of undercoating left. And I'll be happy to to be done with removing it.
 
Lookin good there buddy. Oh and there is no way to stay clean when power washing parts. ( I take that back, pay an unsuspecting kid to do the work hehe)
 
Kevin, that's messed up.....but I like it!
 
Make up for slow weekend . . . in the shop

Well, I feel real bad that I didn't accomplish much this past entire weekend - yeah, got some stuff done around the house, but didn't get nearly anything done on the car. So I got out in the shop tonight and tackled a couple items that needed to get out of my way . . .

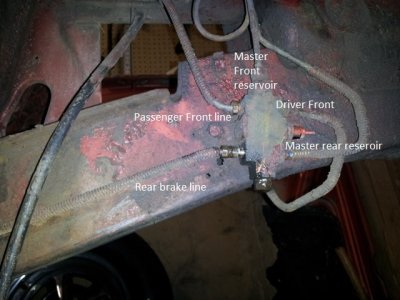
First, to get the engine compartment cleaned up, I need to remove the master cylinder, so out comes the proportioning valve:

sm-proportioningvalve.jpg

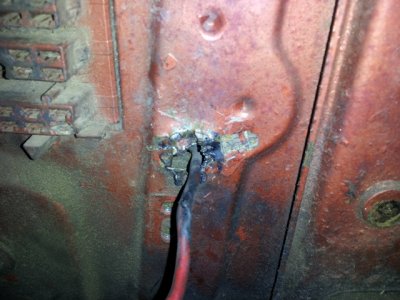
In the process of working on the proportioning valve removal, I found this neat "feature" . . .
a hole punched ( very crudely ) through the fire wall to run a live wire . . . oh boy, electrical modifications by who knows ? ! ?
This ought to be a whole lotta fun later . . .

sm-holetofix.jpg

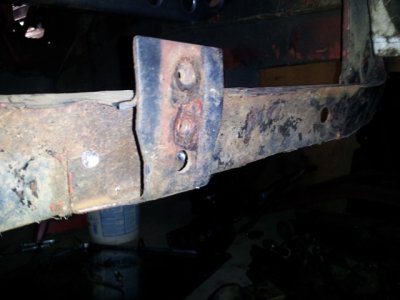
Lower core support has a little bracket that is in the way . . . so out it comes . . .

sm-bracketinway.jpg

Removal is complete !

sm-bracketremoved.jpg

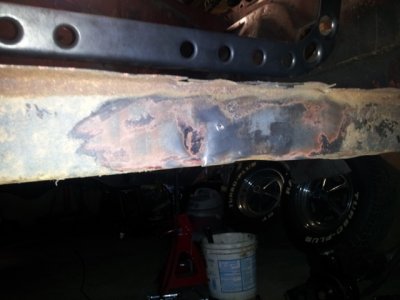
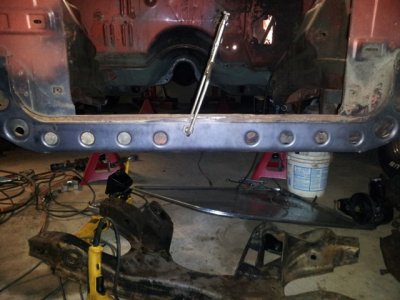
And now . . . I figured out how to fix my boomerang lower support - add a boomerang lower support straightener ! Ta-da ! ! !

sm-fixboomerang.jpg

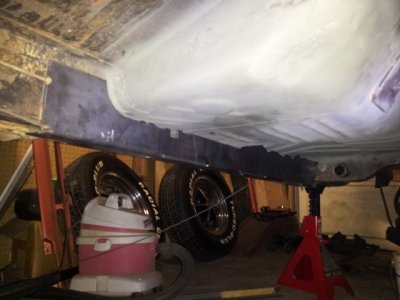
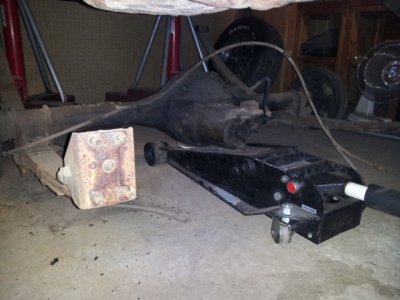
And . . . got the rear end dropped out from the car . . . guess this means I've got room now for undercoating remove ( oh yippieee ! )

sm-reardropped.jpg

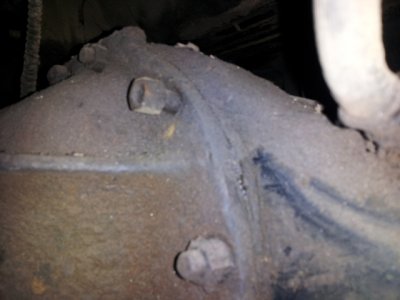
Oh, and to share with you all the "fun" things that I find with the car, I found this on the rear end of the car - Do you think this bolt is holding the assembly in place tight ? ?

lookwhatifound.jpg

Whew . . . got a few thing done that will give me a load of other tings that'll need to get done now . . .

Now if I only I didn't have to fix grapevine trellises, remove brush from the wooded area, mow the lawn, fix the lawnmower to mow said lawn . . . oh, and work . . . they all get in the way of my play time ! ! ! Argh ! ! !
 
Auto Transport Service
Back
Top