• When you click on links to various merchants on this site and make a purchase, this can result in this site earning a commission. Affiliate programs and affiliations include, but are not limited to, the eBay Partner Network.

Front end suspension adjustment

Looks good from what I see. Yeah, book says have a full tank of gas, when adjusting the alignment. Popcorn stuff.

Did you mention, getting to the rear axle, later? If so, there's a chance, once it's up to snuff, it could sit higher in the back.
 
Yes, once this is all done and dusted and as i need to leave home for work for the upcoming weeks i will not do this now but i will change out the complete rear end suspension as well.
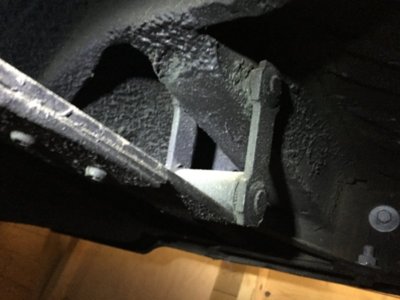
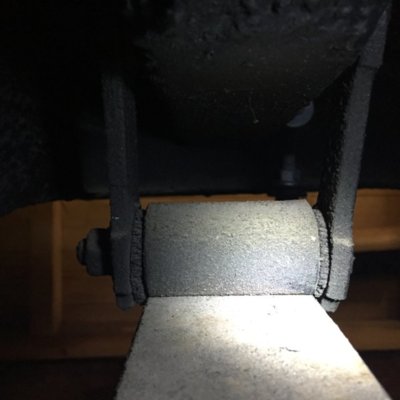
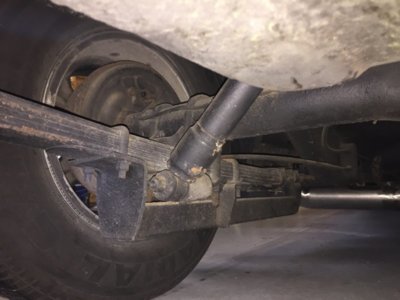
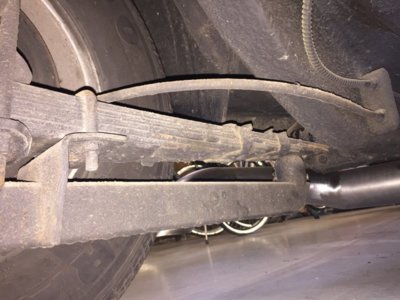
At the moment i have these torsion things on my springs, which are supporting the most likely weak springs so that is the only reason they are still there.
Bushings became something else then rubber so time to go for that crap, and i still need a pinion snubber as a finishing touch.
https://www.moparshop.de/en/Online-Store/Drivetrain/59/Pinion-Snubber-8-3/4
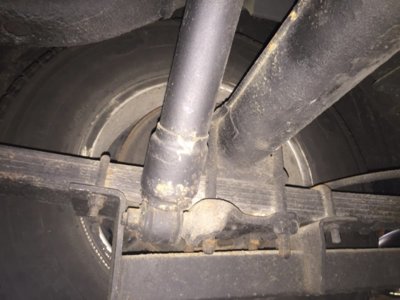
I got new XHD springs, all Poly graphite bushings and new shackles and bolts (PST kit) and a matching set of new shocks to complete.
Springs: https://www.moparshop.de/en/Online-Store/Suspension/22102/Leaf-Spring-B-Body-66-72-XHD-RH?c=580
Definitely the rear will come up after that so then i might have to increase ride height at the front again, once that is completed i will get it to a professional alignment shop to do their magic.

In the meantime i also want to rebuild the rear drum brakes with some new goodies, change wheel bearings and seals and get the rear axle cleaned and painted.

And i really need a new steering box, this one is a goner and spoils the front end pleasure.
Steering box: https://www.moparshop.de/en/Online-...B/E-Body-till-1972-firm-feel-Hi-Quality?c=580

A Firm Feel stage 2 gearbox, i wonder if it is possible to change it out without the need to remove the engine and exhaust (1-7/8 primary header type)

IMG_8939.jpg IMG_8940.jpg IMG_8943.jpg IMG_8946.jpg IMG_8949.jpg
 
If i remove the power steering pump and battery tray, would it be possible to lift the steering box over the K-member and pull it out from there?
Or lower it through the hole in the K-member?
Pulling it towards the rear end looks tight to me.
 
When I removed mine I took it out from below. It is tight but it comes out. I suspect the pitman arm amongst other things would prevent it coming out from the top side.
 
Here's a vid for a Challenger.....should be pretty close to being the same procedure.
 
When I removed mine I took it out from below. It is tight but it comes out. I suspect the pitman arm amongst other things would prevent it coming out from the top side.

The pitman arm can be removed first right?
Did you had to remove the torsion bar etc. as well or did it come out through the hole on the forward side?
There is such lack of space that i cannot even remove the header from the mounting studs as it hits the steering pump.
Tried this a long time ago to change the header gasket as it leaks a bit, so that is one of the other jobs to be done at the same time.
 
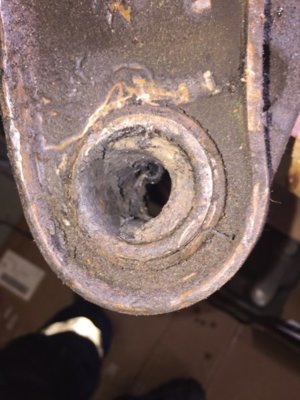
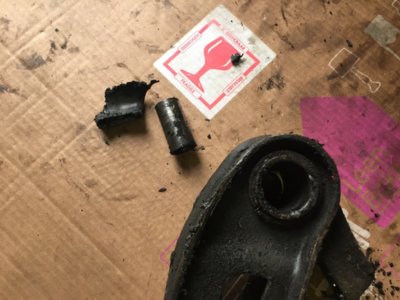
The LCA rubber bushing is new, just the inner steel bushing is not "locked" on the pivot shaft.
There is no clearance, just the bushing and pin do not have an interference fit as the should have.
To me, this only causes the bushing to rotate around the pivot shaft instead of the rubber element taking the torsion. Should be no problem but after summer i will change them anyway.

The washer causes a more "fixed" negative camber angle between the LCA and the knuckle which increases my adjustability towards the negative side, exactly what i need in this case.
All other parts are renewed, Bilstein shocks, LCA bushing, added LCA reinforcement plate, upper and lower ball joint, strut rod bushings, new UCA with new bushings, tie rod assembly's and new wheel bearings.
There is no clearance in any component and is rock solid, just the usual play in the steering box which became the new PITA, but will get a new gearbox from FirmFeel or so to get that sorted...future story to come :)

@miller: I will get a measurement centre to centre of both arms and see what comes up.
These arms will be manufactured in a fixture with all correct dimensions but who knows, maybe someone was not paying attention on a Monday morning. :)

Sorry about my misunderstanding, I remember reading about lower bushings being loose, I took that as meaning the rubber was deteriorated in the shell itself.
Like I believe Miller said measure the center to center of the uca and compare old to new, I wonder if the lengths are off. Thus giving you problems, I take it when you had old uca installed the alignment was good?
Its going to be something super simple.
 
I've measured both UCA and both, old and new one are same...8-1/2" from cambolts center to ball joint center.

Reason being for the past success of the alignments was most likely caused by the condition of the old LCA bushing as they were shot!
This was the root cause for me to pull the stuff as i did notice a big camber difference on the driver side wheel after some cruising.
During driving i noticed it started to "sway" more from time to time and when i came home i notice the wheel was no longer sitting straight.

The spacers allow me to set it properly now, root cause might be a bent frame somehow but i cannot see any evidence of damage and distortion of any parts.
When the time comes to pull the engine and K-member i might find something but for now i guess it is ok to drive it as is.
Another thing i noticed during checking toe settings, using a rope across the car from the rear wheels is that there is a difference of around 2cm between both sides.
So, when a line is pulled "flush" with the rear tire, i measure 2cm more towards the front tire on the driver side wheel.
If like the passenger side wheel has a spacer installed and sits 2cm more outwards.
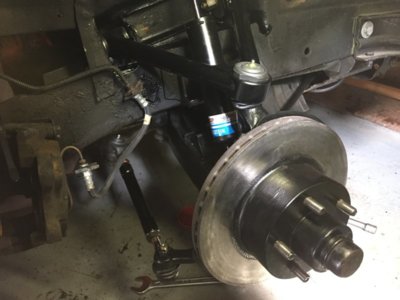
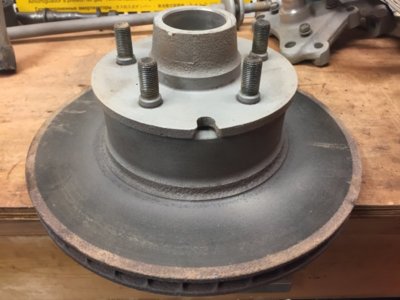
The only difference is the brake rotor, see pictures. The one installed is a single piece, the blasted one on the bench is 2 piece.
Driver side has the OEM 2-piece rotor as per manual, the other is solid and had a spacer ring behind the outer wheel bearing to prevent it going in too deep and most likely the nut will not take any tension as it bottoms out on the thread of the shaft.

IMG_9070.jpg IMG_9320.jpg IMG_9292.jpg IMG_9323.jpg
 
Good deal on the upper arms. Least you know for sure. And...a good deal you got into the front end, before it came apart on you!

You'll find some rotors. Just takes a little looking, the joy of fooling with these old beasts. Try a 64!
 
Hey guys, I’m late to the show here but curious. I’m doing my headers on a 71 charger with a 340 and have to pull my tie rod apart to get the header off. Should I replace the tie rods at this time too? There’s no slop but the end and sleve have quite a bit of surface rust. I’ve also heard I can get bigger tie rods from a later model that bolt in? Just looking for a bit of advice
Thanks guys
 
Depends on their condition, when i pulled mine, and noticed same on the ball joints, that once removed you can feel how loose they are.
If the tapered rod is very easy to move, better replace them.
I went for a set of Pro Forged rods and sleeves, they are good quality and the sleeve is a much better and stiffer option then the OEM one.
Originally they are 9/16", there are 11/16" available but to me no use to go for the bigger one if you are not on the race track or so, the 9/16" are strong enough.
Have a look for Pro Forged or PST, they have complete sets available which are a good replacement over the OEM ones.
 
I had both wheels set at -0.8 Deg, after a short drive they both maintained the same angle.
Later on i went for another drive and "abused" the car a bit more...hard launch :) and went a tad faster over 2 speed bumps to give the suspension some stresses to do it's job.
Coming back...Left front at -1.9 Deg and Right front at -0.2 Deg :mad:
So i gave up for now and parked the car in the garage, 3 weeks to work and i will reconsider my options. :realcrazy:
 
I could not resist, i had to get this alignment sorted before going or i will be heart broken for the next 3 weeks. :wetting:

I have added same spacer washers on the passenger side between spindle and lower ball joint to get more pre-negative camber, reset the ride height and started from scratch again getting camber right.
While working, i also realised i messed up with my new digital spirit level which for whatever reason was not calibrated properly.
I did not get the car on a spot where it was perfectly horizontal, so after redoing the math i included the current angle of the car and checked and set both wheels to -0.7 Deg.
Tightened the living **** out of the UCA cam bolts when completed.
On a side note, what i also did was setting both cams in center and work from there to get the camber set so all works the same way.
Took the car for a hour drive around town (scored many thumbs :thumbsup: from other drivers) and just drive normal, making sure plenty full turns, be a bit rough on the throttle and brakes and not treating it like a baby.
After coming back, got my readings again, making sure i properly included the angle of the car as it was not sitting perfectly horizontal (again) and checked camber again which was still found as i left it.

When driving the steering wheel centers pretty well, only last bit i need to help it but that is probably due to the steering box being sloppy.
It does not pull to either side and can easily let the wheel go during driving 50-60 mph.
When steering it does provide some "more power" to get it from center and after steers well.

I am really hoping it stays the way it is, on my next leave i will see to get the rear end done and bring it to a alignment specialist.
 
Last edited:
Aww...admit it! Bet you were holding yer mouth right! :steering:

As happy as a pig in the ****!! :D


Ok, I've ordered a new pitman arm and idler arm (standard type to prevent header clearance issues) and a stage #2 Firm Feel steering box.
Included some OEM type new fasteners as well for the box to make sure it goes in tight.
Now wondering, how to install the pitman arm and making sure both are in straight position?
As the sector shaft is splined the pitman arm could go on in any direction right?
Or is there a notch, key way or so that I did not notice yet?
 
That makes things easier. :)

Do you happen to know the size of the roll pin as well for the steering coupling?
I was looking if they are sold individually but did not find any offered from the site I ordered my stuff.
 
When I had my manual box rebuilt, the company replaced the main sector with a replacement. The replacement did not have a master spline. No biggie, I put my pitman arm on, and cycled it full lock both ways a couple of times, the found mid point. Once I did this, I pulled out the trusty dremel and carefully cut a master spline. Of course make sure you examine your coupler to only remove the amount of splines needed to slide on.

This is of course if your new box does not have a master spline. Sorry, I can't help you with the roll pin diameter.
 
Me neither, on the roll pin. Got the old one...use it to match up.
 
Auto Transport Service
Back
Top