• When you click on links to various merchants on this site and make a purchase, this can result in this site earning a commission. Affiliate programs and affiliations include, but are not limited to, the eBay Partner Network.

1964 Rusty Bucket transformation

I got to work on the 64 today...yay.

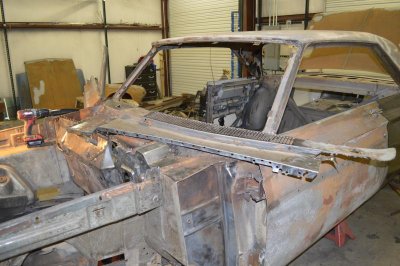
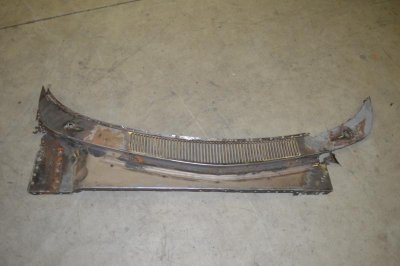
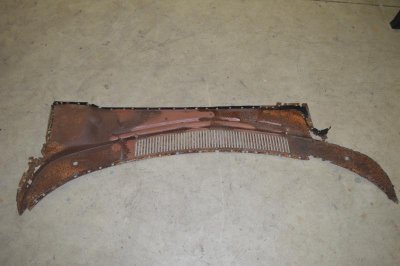
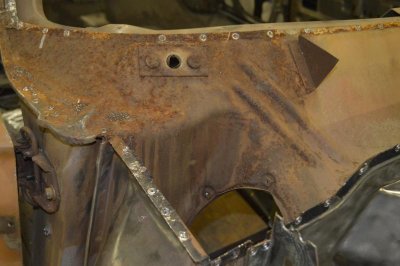
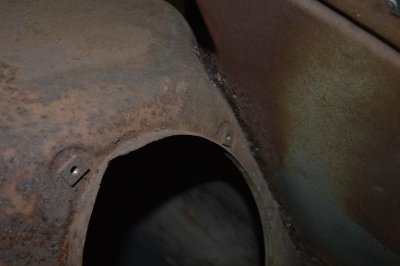
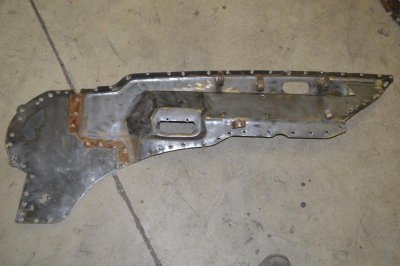
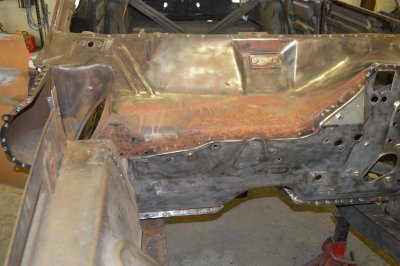
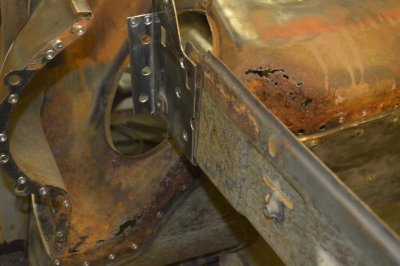
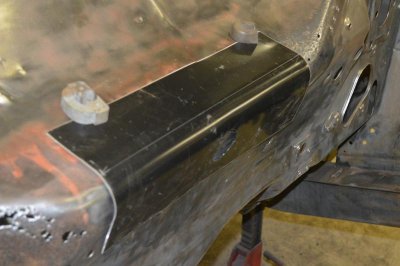
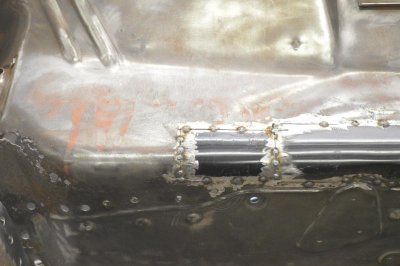
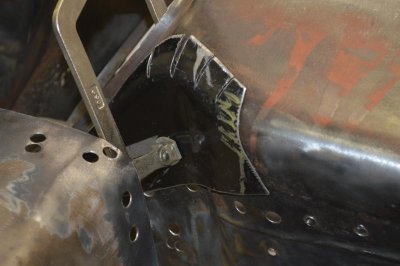
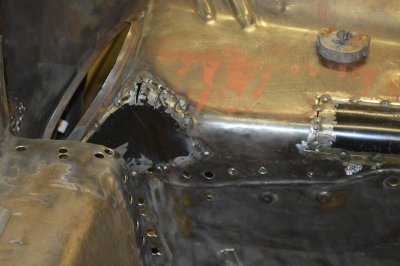
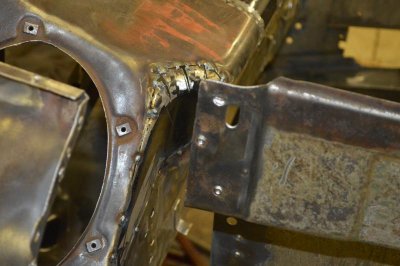
The upper LH and RH horizontal brackets between the cowl and inner fender have been removed. The cowl tacks have been drilled out and the panel removed. See pictures:

DSC_0517.jpgDSC_0518.jpg

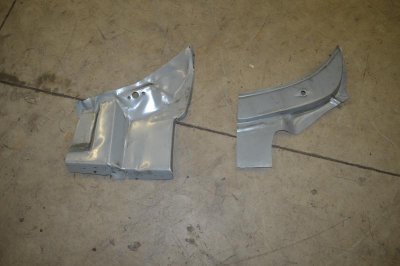
The outer cowl laying on the shop floor.

DSC_0519.jpg

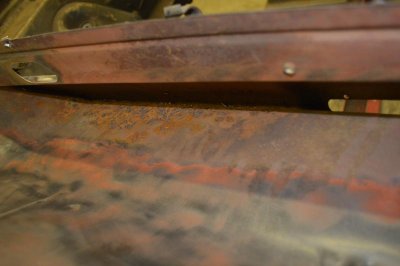
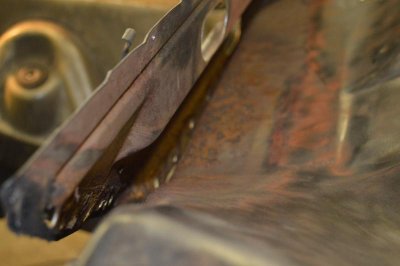
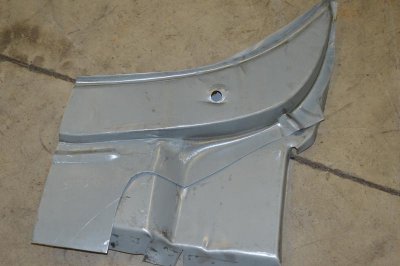
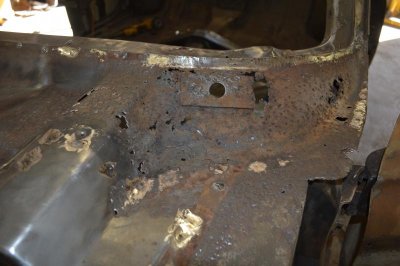
The under side of the upper cowl....look at all that rust. You can tell the factory didn't do much for the raw metal on the inside of a panel.

DSC_0520.jpg

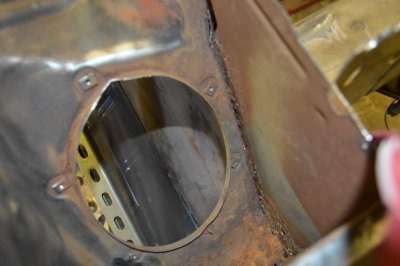
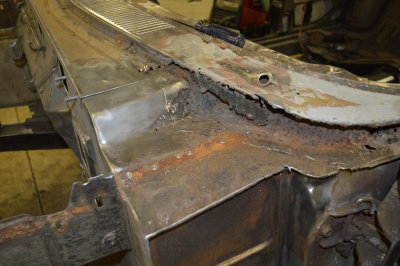
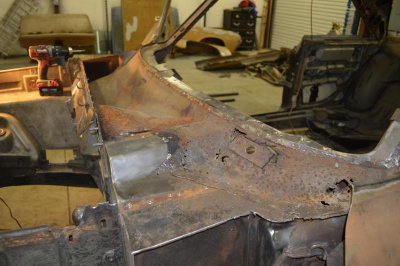
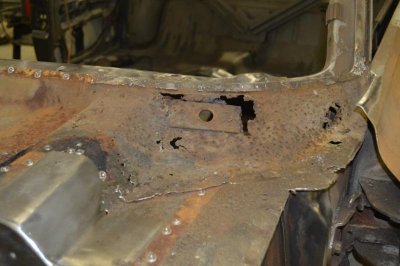
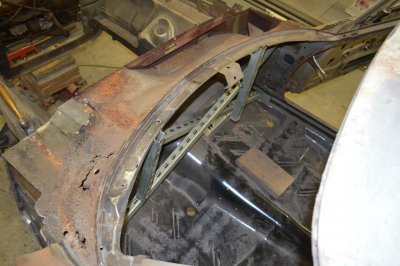
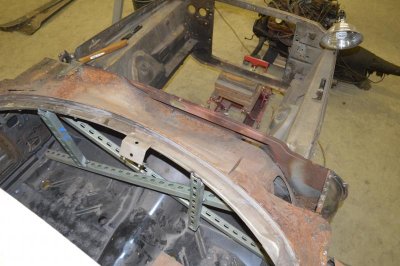
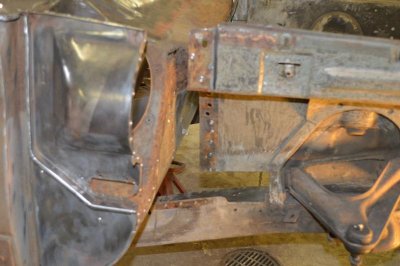
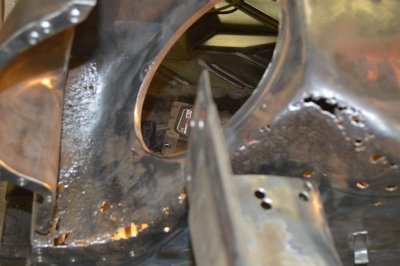
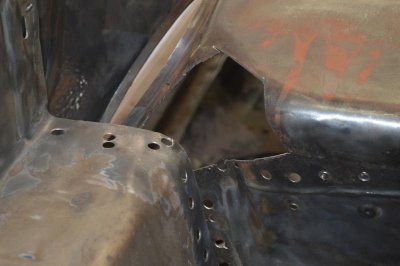
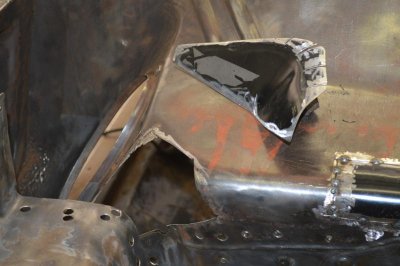
The inner cowl will need attention.

DSC_0521.jpgDSC_0523.jpgDSC_0524.jpgDSC_0526.jpg

Before the upper cowl was removed additional vertical supports where tacked in between the x brace and the dash mount. They can bee seen in the overhead inner cowl pictures.

DSC_0522.jpgDSC_0525.jpg

Some input from you guy's that have been here and done that, would be quite welcome...
 
Hi Crumley.

Sorry for the late reply, I missed your posts. The answer is yes, my left upper cowl piece is the same piece that you would be buying.

Man you went through a lot of work to get that entire cowl off. I admire your drive! Unless you have scored another one from somewhere that one will have to go back on. While it's open you'll want to blast those areas and get all the rust and scale off. You're going have to patch up the decayed and missing metal with new. You still have your wiper pivot mounts so you're not too bad off. Metal, fibreglass, filler will get it all smooth and then the top cowl can go back on. You'll obviously want to epoxy prime or treat it while it's open.

Once your cowl is back in place, then you'll need to replace the metal that's missing on the right side. Cut pieces and rebuild it. When you go to fit that new left top cowl piece you're going to need your fender on, hood hinge on, hood and door on, in order to get a good fit. Those are all important gaps that can bind and are immediately detectable if they're not right. You also need to make the top fender mounting hole on the side of the new piece and with the fender on you can mark where the hole needs to go.
The brow on the top where the wiper shaft comes through is also not the same as the original. At least it wasn't on my piece. Perhaps your old piece with the brow is still good to use for reference or maybe to weld in place. That left piece is lots of work to get it right. When your all done on the outside you'll want to probably do some finishing on the inside so it doesn't look ugly if your under the dash looking up. That is a lot easier to do with the car on a rotisserie. You're already well into it! image.jpgimage.jpg
 
Malex. Thank you very much for the response. Gives me a direction to head. The LH upper and lower replacement panel have been ordered. Hopefully they will be here before next weekend....and they won't require much modifying....lol

I was kinda of hoping there would be some additional input, ie: from the people that frequent this site, that have been there and done that.

Just looking for other ideas/ solutions on the cowl area.

But you know what, it doesn't matter, we will keep, keeping on.

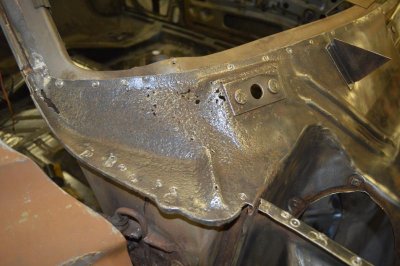
I worked on the 64 today. I began cleaning up all of the rust issues in the lower cowl area...prognosis not good. This area will require additional work. Unfortunately no one makes replacement panels for this area.

If anyone has a short cut, other then fiber glassing, I am all ears. The area could be sand blasted, but, it wouldn't matter what method of rust removal a person used, it will still end up needing replacement metal.

For the picture hounds, here is a look at what I am referring to:

Its total Swiss Cheese. I plan on replacing the metal in sections around the wiper arm. Thus not cutting out a large area at any time. Hopefully minimizing warping...
DSC_0529.jpg

Below, The plan is to remove the panel at the seam (drill out tack welds), rebuild/ repair both the inner and outer panels, along with the fresh fresh air box. replacing the rotten metal on the bench and reinstalling.
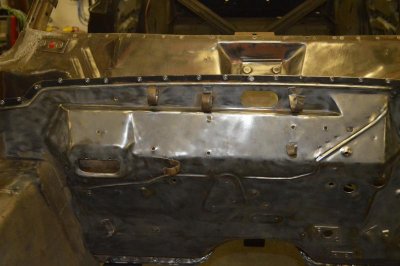
DSC_0533.jpg
DSC_0531.jpgDSC_0532.jpg

Old cars, don't ya just love them? The more you dig in, the deeper you get........it must be a sickness...
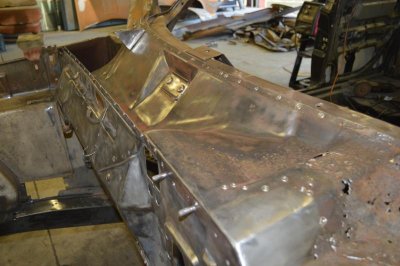
DSC_0527.jpg DSC_0529.jpg DSC_0531.jpg DSC_0532.jpg DSC_0533.jpg
 
Well I couldn't stand it....the outer fire wall and inner fresh air box area, had just a little to much rust for me. So I broke out the old tack weld cutter and drilled out the welds. Now the rust issues between them can be addressed. Pictures:

DSC_0534.jpg

The fire wall laying on the shop floor:

DSC_0535.jpg

The fresh air box will need attention:

DSC_0536.jpg

The sheet metal tying the fire wall to inner fender well is being a bit of a pain to remove...but it will also be removed to gain better access to make the needed repairs on the fresh air box:

DSC_0537.jpg

DSC_0534.jpg DSC_0535.jpg DSC_0536.jpg DSC_0537.jpg
 
Wow crumley nice work ! I'm in the same boat almost the same when I look up under my dash not looking forward thank you for taking the time to post all you have it will help me
 
Last update for the weekend. The metal between the firewall and inner fender has been removed:

View attachment 308864DSC_0538.jpgDSC_0539.jpg

The entire area wire brushed. You never guess what? More Swiss cheese...

DSC_0540.jpg

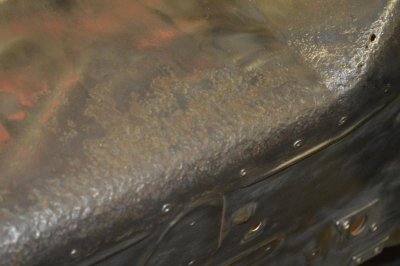
Heavy pitting....

DSC_0541.jpg

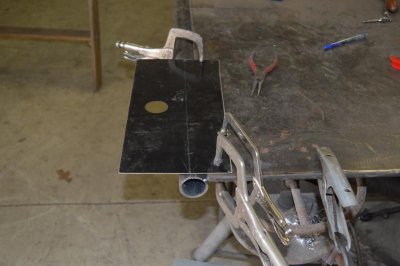
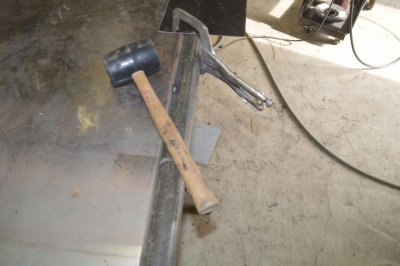
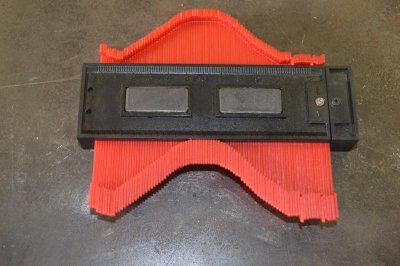
Using some drop pieces of scrap sheet metal, A replacement panel has been strated. I used a contour gauge to get the leading edge angle. A piece of 2" pipe (the radius on the 2" was as close as I could find) was tacked flat on top to the fab table. The sheet metal clamped to the table and a rubber mallet was used to pound the bend into the metal.

DSC_0543.jpgDSC_0542.jpg
DSC_0544.jpg

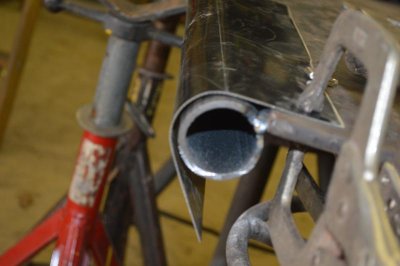
A picture of the metal bent around the 2" pipe. Actually in this picture there is to much bend in the metal.

DSC_0545.jpg

The over bend was taken out by laying the piece on the table and pushing down on the center of the bend.

At this point it is about the 3rd trial fit...it is close but will need additional work.

I will continue the tweaking and trimming until it has a nice tight fit with minimal gaps.

DSC_0546.jpg

Also this weekend I picked up some 15 x 7 American Racing Torque Thrust D wheels for the front.

I guess I had better go spend some time with the wife so I don't get put into the dog house..lol. Wait a minute the shop is my dog house....

DSC_0538.jpg DSC_0539.jpg DSC_0540.jpg DSC_0541.jpg DSC_0543.jpg DSC_0542.jpg DSC_0544.jpg DSC_0545.jpg DSC_0546.jpg
 
this is timely! I have the same repairs in this area on the 64 Polara. What do you use to drill out the spot welds? I just pulled the windshield and am preparing to remove the cowl but I plan to reuse it and I'm not sure what I should use to minimize the material removed at each weld.
 
At this point why not buy a good used cowl and replace what you have? But you're probably like me. So you'll fix it.
Doug
 
Glenwood, See picture:

DSC_0547.jpg

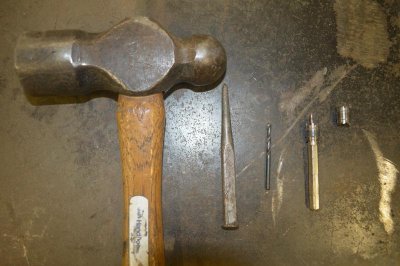
I have become quite proficient at cutting factory tack welds, I use a heavy hammer, center punch, small drill bit and a tack weld cutter (Harbor Freight special).

1. Center punch the approximate center of the factory tack weld.
2. Take a small drill bit and drill the center of the punch indention.
3. Drill it just deep enough to hold the tip of the spot weld cutter.
4. Drill the spot weld, with the spot weld cutter, just deep enough to cut thru the top layer of sheet metal. They actually sell replacement spot weld cutting bits.
Extra hint: A little tension can be added between the layers of sheet metal by taking a putty knife and slightly driving in between the layers of sheet metal. This additional tension will be enough to cause the metal to separate when the tack weld cutter cuts thru the upper layer. You will hear a very distinctive pop sound you cut thru the upper layer.

After cutting the factory tacks, the spot weld cutter will leave a 3/8" hole to fill. Not a big deal if a person is proficient with a welding machine. When replacing the panel make sure the edges of the panel are flat. Weld the old spot weld openings and grind down flush.

dvw, I have looked into buying a complete replacement cowl area from out west. The last one I found on e-bay was quite pricey. It was more then I paid for the entire car with engine, transmission and rear end.

Lol.......I am a tight wad, I will replace the needed panels in sections.....it will give me much needed tin bending experience....

DSC_0547.jpg
 
Last edited:
Thanks for the tips Crumley. I center punched and drilled divots today. I'll have to pick up a cutter and give it a go.

Doug, I wish I could find a clean cowl to replace it with. I think mine is worse than it appears... We'll see after I get it off.
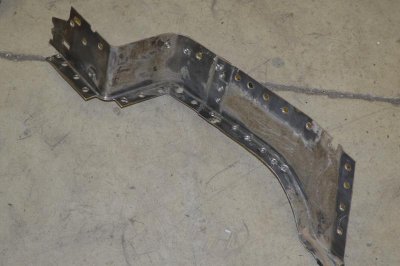
 
Gents,
The LH re-pop cowl pieces have been ordered from Sherman Industries Sheet Metal. The scheduled delivery date is Monday 03-01-16. Hopefully they will be here by then.

I did managed to do a little work on the 64 today.

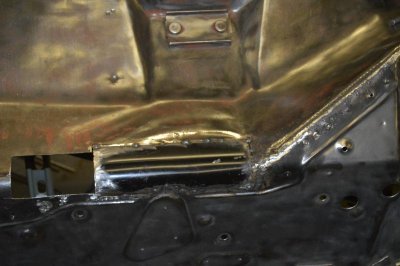
The one section of the pitted area on the firewall has been cut out. A replacement tacked in. The smaller holes where filled using a wire welder.

DSC_0548.jpg

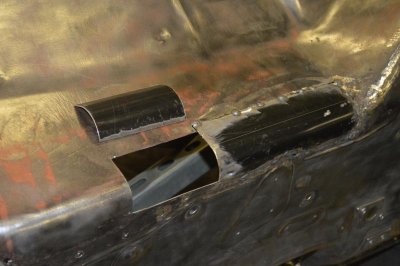
My goal was to make this in one piece, but, due to my lack of experience, the piece didn't line up with the existing triangular section on the lower fire wall......lol. A laugh is needed here to keep me from crying. The hand fabricated piece had to be cut in half to make it work.


DSC_0549.jpg

Due to my mistake, this area will now need to be installed in 2 sections. If I have time tomorrow, the additional piece sitting on the fire wall get tacked in. I will then move on to the other areas of the cowl.
 
Your doing a great job! I'm sure glad my 65 doesn't have any issues like that. Keep up the good work!
 
The effects of 50 years eh Crumley. We can't expect much different though as these cars went through decades of dust, dirt, leaves and everything else packing into these areas.
The same goes for the floorboards. All these cars allowed water to get it and the rug would soak it all up. While the windshield would seal good to the rubber gasket, that wasn't the case between the windshield gasket and the metal lip; especially along the bottom corners. Urethane or a good sealing product on the metal or in the gasket groove when the windshield is going in will help immensely. On my Roadrunner that I did 25 years ago I installed a new gasket and windshield. When I would wash the car the floor would be wet. I had to pull the windshield back out and use urethane on the metal lip, which fixed the problem right up. Lesson learned.
Crumley you're determined to get every ounce of decay out and it looks like you're going to accomplish that! The next 50 years will be much kinder than the first. Keep up the good work!! And if you haven't done so already, make sure to remove that broken bolt that holds your heater duct to the cowl.
 
Gents,

Thank you for the encouragement. I am enjoying, the sheet metal learning curve I am going thru. Malex, will do on the bolt removal, especially while the front of the fresh air box is off.

Well progress is being made on the firewall one small section at a time. For the picture hounds out there:

The other half of my goof up tacked in.

DSC_0550.jpg

A new piece patch made oversize. It is held in place with step over clamps. Scribe lines are made around the replacement piece. The rotten metal removed.

DSC_0551.jpg

DSC_0553.jpg

New replacement piece has been trimmed and filed for installing.

DSC_0556.jpg

After considerable more cutting, grinding and filing the new patch is tacked in place.

DSC_0557.jpgDSC_0558.jpg

This process will be repeated a bunch more times before the fire wall is repaired....lol.

DSC_0550.jpg DSC_0553.jpg DSC_0551.jpg DSC_0556.jpg DSC_0557.jpg DSC_0558.jpg
 
looking at how organized and thorough you are it is hard to believe this is your first time. I recommend the 440, it will probably cost the same and you can achieve twice the power
 
A little update,

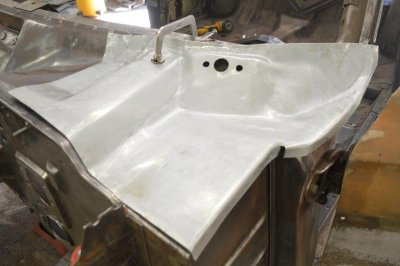
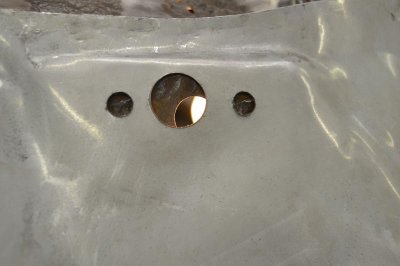
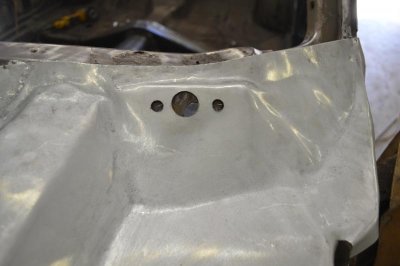
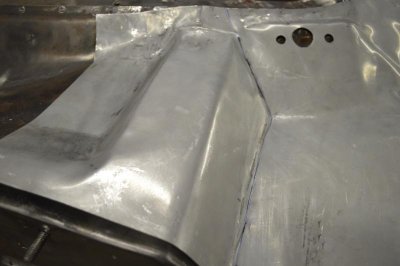
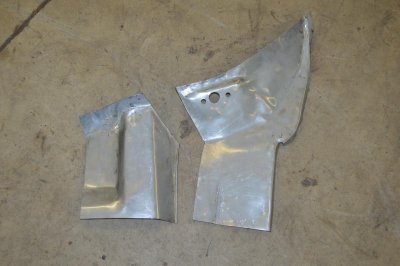
The LH upper and lower cowl pieces came in.......you can say they are sorta close to the factory shape....lol. They will need quite a bit of modifying. Meaning, a lot of cutting, beating, banging and shaping to make them fit. At least the basic shape is there.

DSC_0559.jpgDSC_0560.jpg

I was originally thinking, making a fiberglass shipping tape and transfer tape pattern from the new LH upper cowl panel. Then flipping the tape pattern inside out to use as a pattern on the RH side. But after looking at the fitment of the new LH replacement panel, I think that I will use the old panel as the pattern. At least I know the old panel fits correctly.

DSC_0559.jpg DSC_0560.jpg
 
Last edited:
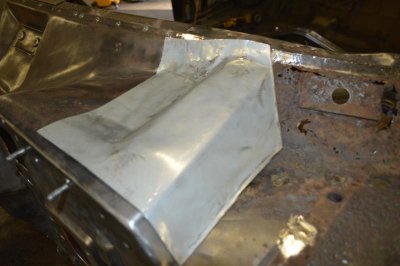
Another update...I couldn't stand it and have begun the instillation of the replacement LH lower cowl panel.

It took a BFH to beat some of the kinks out and flatten the edges. A cut off wheel was used to cut the bent down leading edge to get it to sit on the cowl.

DSC_0561.jpg

A grinder was used to grind down the spot welds and remove any of the upper cowl metal.

DSC_0562.jpg

The windshield wiper mount area was pushed back up to its approximate location. The replacement panel set in place and wouldn't you know it? Nothing lines up especially the windshield wiper hole.

DSC_0564.jpg


DSC_0563.jpg

The fix for this issue....get the cutter out and make things fit. The panel was cut along the line drawn and is now cut into 2 pieces.

DSC_0565.jpgDSC_0566.jpg

The left side cut fits but needs trimming and some additional work to fit correctly.

DSC_0567.jpg

Stay tuned.......it is going to require quite a bit of beating, cutting and trimming be before it is ready for instillation.

DSC_0561.jpg DSC_0562.jpg DSC_0563.jpg DSC_0564.jpg DSC_0565.jpg DSC_0566.jpg DSC_0567.jpg
 
Last edited:
Auto Transport Service
Back
Top