• When you click on links to various merchants on this site and make a purchase, this can result in this site earning a commission. Affiliate programs and affiliations include, but are not limited to, the eBay Partner Network.

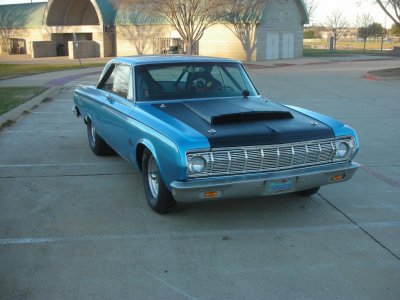
1964 Rusty Bucket transformation

Superfreak and Homstead thank you for the reply's.

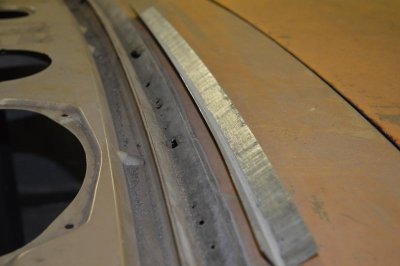
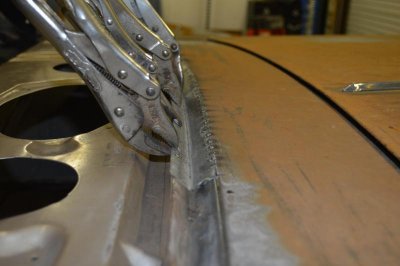
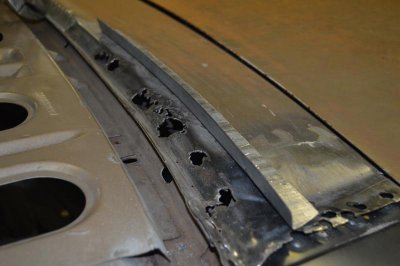
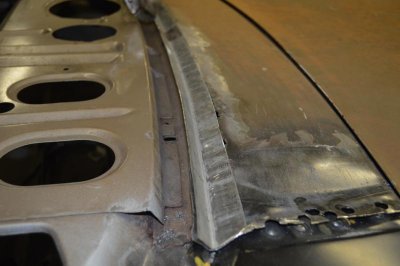
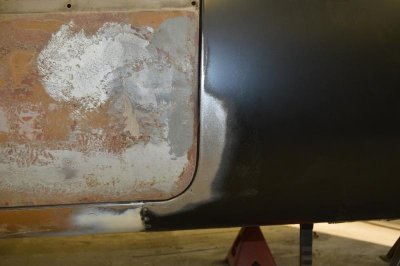
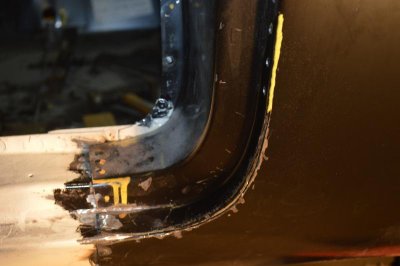
The tight door gap was bugging me. To get the needed door gap, a small cut off wheel was used in rotary end cutter. The 1/4 panel was cut along the curve. The yellow line is where the cut will end.
DSC_0459.jpg

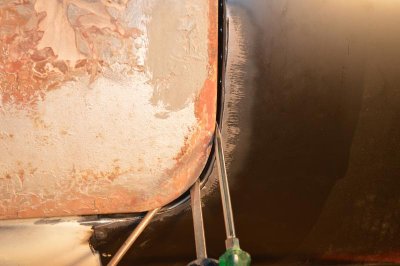
The 1/4 panel curve was pushed back using screw drivers to check the gap.
DSC_0460.jpg

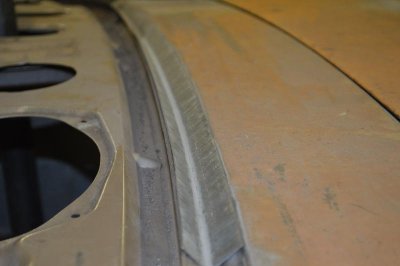
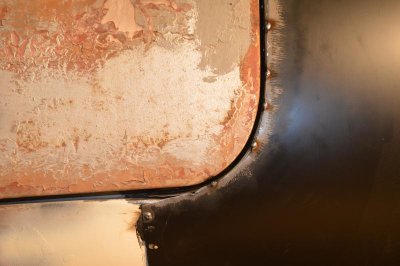
A single cut wasn't deep enough, so the slot was enlarged about the thickness of 2 cut off wheels. The screw drivers re-inserted between the door and 1/4 panel to get the needed gap. The panel is currently just randomly tacked. The enlarged radius will be welded out before the body work is completed.
DSC_0463.jpg

DSC_0459.jpg DSC_0460.jpg DSC_0463.jpg
 
I think your doing a great job on this, These old car's can come back to life and be right, we just need to get it done and i think to many just give up and call it quits when it gets rough, i guess only the strong survive and there sure is a lot of strong ones on this forum man, keep on keepin on buddy!!! :)
 
Nice work. Gonna be a sweet ride. If you haven't made a decision on engines; I would use a 440. The 318 is a great engine, but they are not cheap to build a stroker from. Then there's the question of resale. Most people seem to prefer a big block. JMO.
 
Thank ya'll for the support.

Furyus....a stroked 440 is the way I am leaning due to costs and parts availability. I would really like to put a 426 hemi in it (wouldn't we all....lol) but I am just a poor pipe fitter that needs to try and stay on a budget.

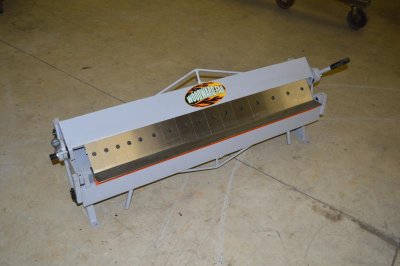
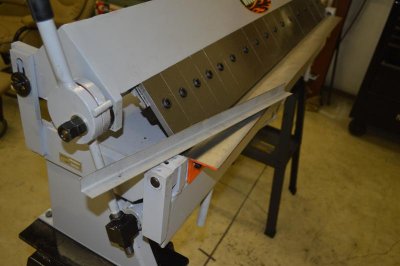
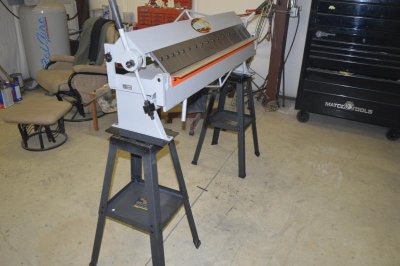
I didn't do much on the 64 this weekend. I did manage to pick up a sheet metal pan and box brake Saturday.

DSC_0464.jpg

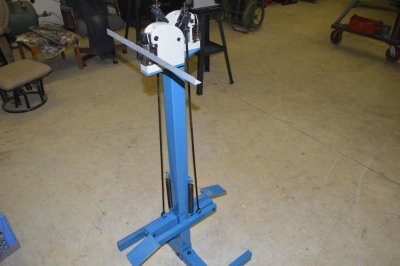
I can "now" really mess up some sheet metal. I also have a shrink-er stretcher ordered, hopefully it will be here in a few day's.

I am still going back and forth on cutting and making the modification to the rear fender well so 315 tires can be installed....don't be surprised if this modification doesn't end up happening.

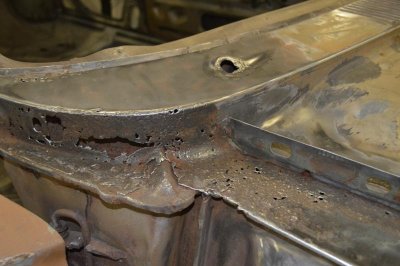
The metal replacement required in the cowl area has me really scratching my head, especially around the wind shield wiper motor mount. I may need to have a few adult beverages and ponder the next move.

DSC_0466.jpgDSC_0467.jpgDSC_0468.jpg

This will be one heck of a sheet metal learning cure....lol. I have been thinking about scribe lines on the firewall and dash mount to locate the center line of the wiper arm both vertical and horizontal? I am also thinking that some type of gauge or bracket will need to be fabricated to locate the wiper mounting plate...I am sure one of ya'll has already been down this road? I am open to suggestions.
 
Update, the LH 1/4 panel is now completely tack welded out.

The new sheet metal brake has been sitting on the floor of the shop.....the getting down on my knees to bend a piece of sheet metal is nuts especially when you are an old fart. I went to harbor freight and picked up a couple of bench grinder stands to make a stand for the brake. Now the brake is much easier to work with. I have been playing with the sheet metal brake and a new shrink-er stretcher and managed to make a replacement piece for the back window. For the picture hounds out there:

DSC_0470.jpgDSC_0471.jpgDSC_0472.jpgDSC_0473.jpgDSC_0476.jpg

DSC_0470.jpg DSC_0471.jpg DSC_0472.jpg DSC_0473.jpg DSC_0476.jpg
 
Here is a base I made for my slip roller so it is nice and easy to roll out of the way.

 
Update on the Belvedere:

Glenwood, thank you for the complement and many an adult beverage has been drank in that comfy chair pondering the next move.

Superfreak the box/pan break may get wheels in the future.....right now I just needed to get it off the floor to save old knees and back.

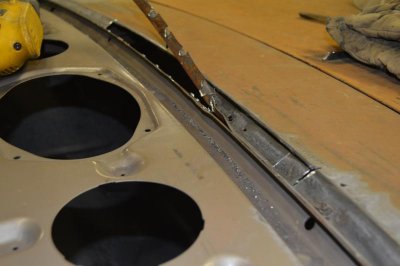
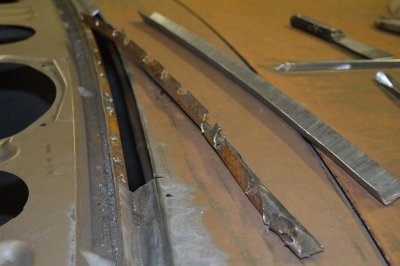
It was a bit of a pain locating the tack welds around the back window. I ended up taking a putty knife and bumping it with a hammer between the lap joints to find the tacks to drill out. Pictures:

DSC_0478.jpgDSC_0479.jpg


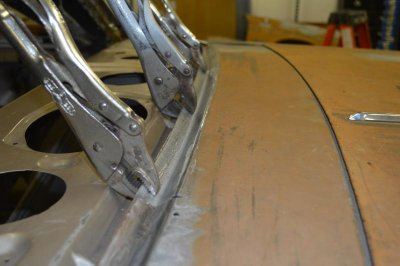
The practice piece made last week in the shrink-er stretcher has been trimmed to fit and is vise griped into place to check fitment.

DSC_0481.jpg

A few tacks and vise grips to hold it,

DSC_0482.jpg

Another piece of metal has been bent and stretched for the next section to be replaced,

DSC_0483.jpg

Trial fit....looking pretty good, hopefully I will get to continue this tomorrow...well see....depends on what the wife wants to do...lol.

DSC_0484.jpg

DSC_0478.jpg DSC_0479.jpg DSC_0481.jpg DSC_0482.jpg DSC_0483.jpg DSC_0484.jpg
 
64 Plymouth 014.jpg


Great Job, your car is looking great. Top notch work, something to be proud of. I put a 440 stroked to a 493 in mine. I think you will have a lot of great memories to be made in your car.

64 Plymouth 014.jpg
 
I have all my machines on wheels. Much easier to move and they are not 200+lb dead elephants in the middle of the floor. You can pull them out to the work area when needed then stash them in a corner or unused area when done.
 
Boy does that rear window repair look familiar. The funny thing is my right 1/4 was tight in the same spot to the door, factory 1/4. It's one of those things that I wish I had fixed. Carry on, great job.
Doug
 
[FONT=&amp]Thank ya'll for the complements.

It has been a lot of fun monkeying around with this old 64 Plymouth.

When I get the time, the brake will get a different stand with wheels.

A little update on the project:

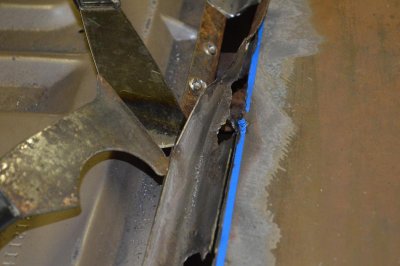
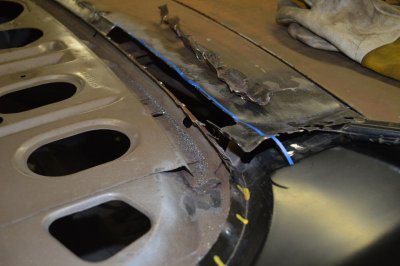
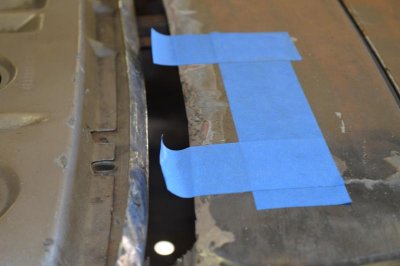
A cut was made along the blue tape line. [/FONT][FONT=&amp][FONT=&amp]The putty knife and hammer routine[/FONT] was used to find the tack welds around the back window.

DSC_0485.jpg

DSC_0486.jpg

[/FONT][FONT=&amp]The rotten metal removed and the new piece is trial fit.

DSC_0487.jpg

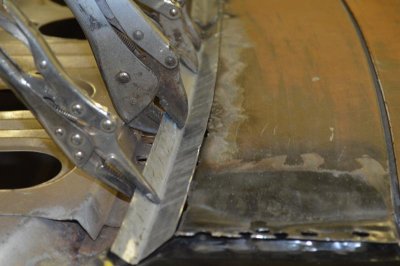
After lots of trimming and fitting the piece is ready to be tacked in.

DSC_0488.jpg

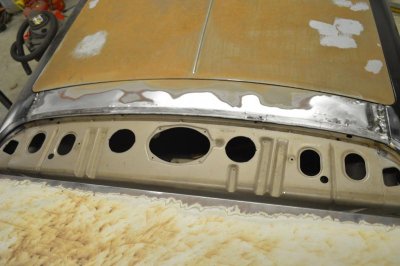
There was a section of metal that was heavily pitted. There wasn't enough metal to tack to without blowing thru. So before instilling the new patch piece, the bad section was taped off and cut out. A new piece of metal will be cut to fit.
DSC_0489.jpg

[/FONT]
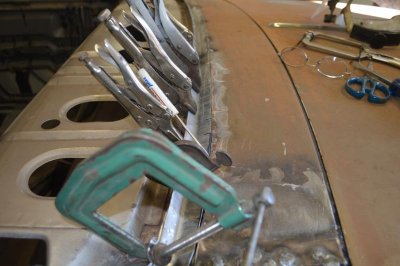
[FONT=&amp][FONT=&amp]Random tacks installed to hold the new piece in place.
[/FONT]

DSC_0491.jpg

DSC_0492.jpg


[/FONT]

DSC_0485.jpg DSC_0487.jpg DSC_0486.jpg DSC_0488.jpg DSC_0491.jpg DSC_0489.jpg DSC_0492.jpg
 
Additional update,

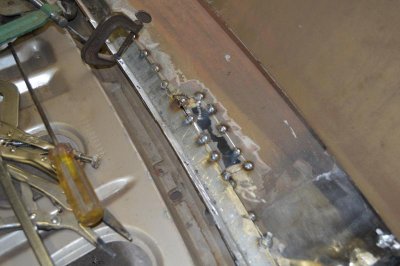
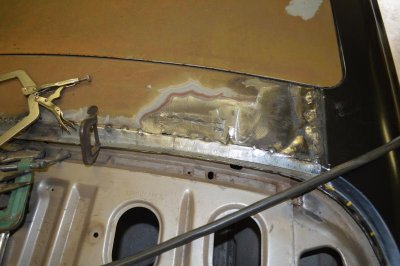
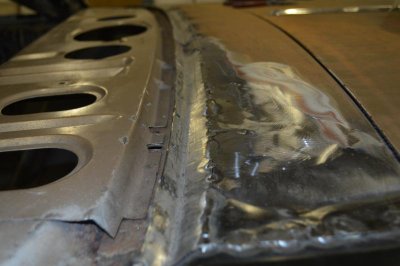
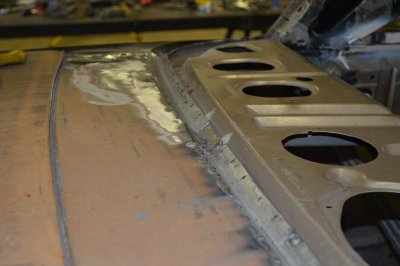
Patch has been made and is welded in. The panel has shrunk between the back window and trunk creating a low spot. I have tried to re stretch this area as best I can with hammer on dolly. It is still a little low so it will require a little filler. The other window surround pieces are still in need of finish welding. See pictures:

DSC_0493.jpgDSC_0495.jpgDSC_0499.jpg

DSC_0493.jpg DSC_0495.jpg DSC_0499.jpg
 
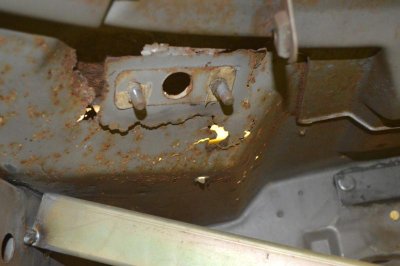
The driver's side wiper area on my car also needed work like yours. Your studs are still in place for reference so you'll be able to fix the area.

When you install the left upper cowl piece you would be wise tach it in place only until you have installed the fender, hood and door to make sure you have the right gaps.

image.jpg
 
The driver's side wiper area on my car also needed work like yours. Your studs are still in place for reference so you'll be able to fix the area.

When you install the left upper cowl piece you would be wise tach it in place only until you have installed the fender, hood and door to make sure you have the right gaps.

View attachment 304945
Boy that repair looks familiar as well.
Doug
 
malex, thank you for the input on the cowl area. Will do on tacking the cowl piece in place. The door, fender and hood will be trial fitted before final welding.
I have a question? Did you make the LH cowl piece on your car or is it from Sherman Industries? Unfortunately the RH cowl piece (upper and lower) on my car will need repaired, this piece isn't made, so I will try and fabricate them myself. Looks like a bead roller is in my future.

A little grinding and 80 grit sanding got done on the 64 today. Pictures:

DSC_0501.jpgDSC_0503.jpg

On the right side of the picture below, where the additional patch was installed. The patched area has shrunk from welding. This has caused it to flatten. I will try and re-stretch this area again. Hopefully without cracking the weld.
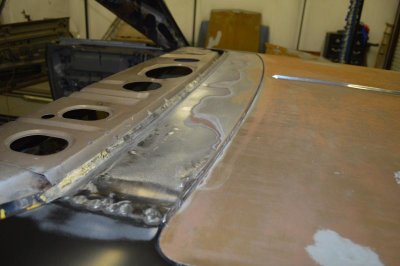
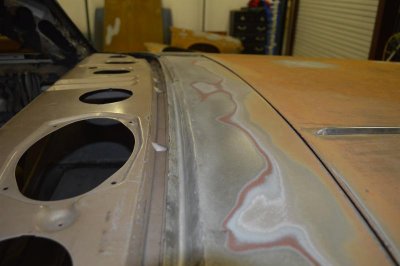
DSC_0504.jpg

Some additional pictures after sanding.
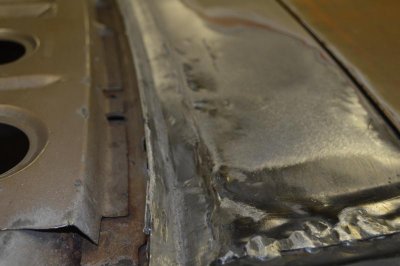
DSC_0505.jpgDSC_0506.jpgDSC_0507.jpg

Furyus and partmopar, I spoke with a Mopar engine builder that was highly recommended by Joe Suchy. After telling him what I planned on doing with the car, mostly street driving and a occasional visit to the drag strip. He suggested going with a stroked LA small block or 440 big block. He stated, as others have said, the issue with the 318 ploy is the cost. The performance parts, along with the head port work can get quite costly. So it is looking like a stock bore 440 or maybe a stroked 440 will be going in between the fenders.

DSC_0501.jpg DSC_0503.jpg DSC_0504.jpg DSC_0505.jpg DSC_0506.jpg DSC_0507.jpg
 
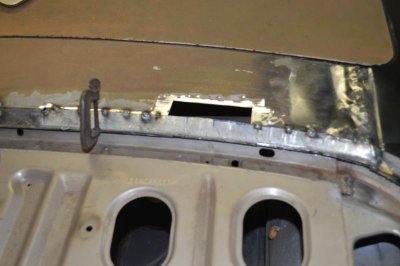
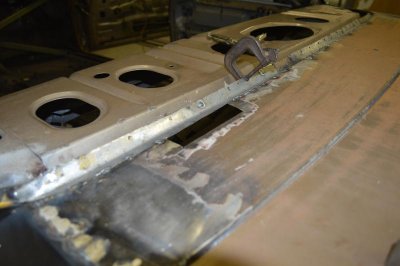
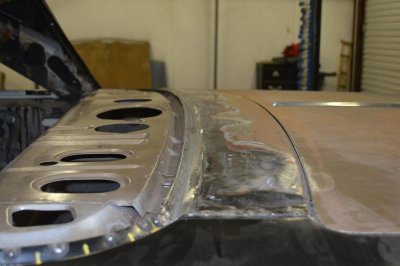
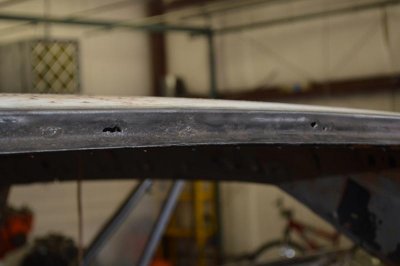
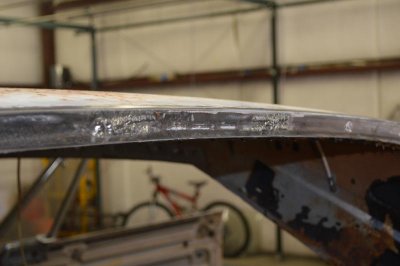
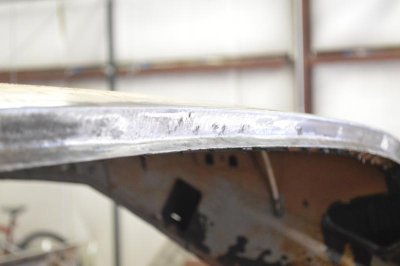
A little update on the build......a couple of rust holes in the upper back window has been repaired.


DSC_0508.jpgDSC_0510.jpgDSC_0512.jpg

The LH lower door curve has been prepped. See pictures:

DSC_0513.jpg

Gents: Is it common to not respond to questions concerning a restoration? Doing the cowl area is going to be one heck of a challenge for me, so some feed back from those that have been there and done that would be appreciated. Replying after the fact is like Tuesday morning quarter backing on Monday nights football game (to little too late). Ok, ok, I am done with my rant.... for those that are interested some more pictures:

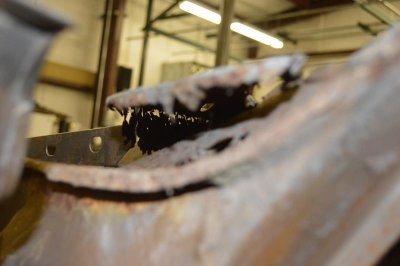
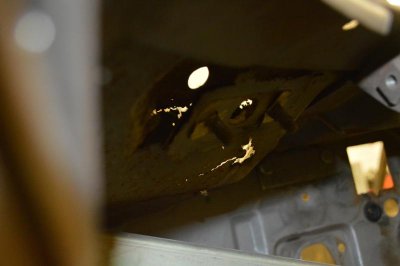
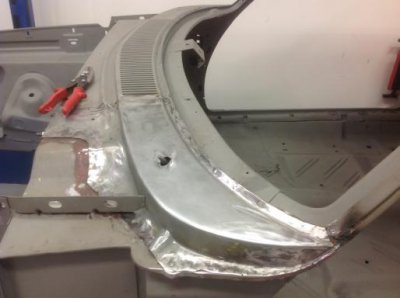
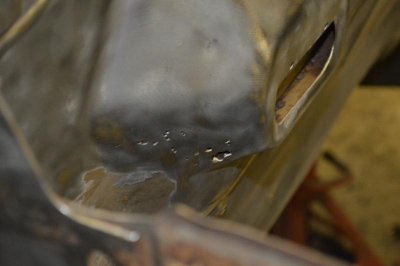
The LH cowl area is in dire need of attention, it is as bad as the RH cowl. See pictures:

DSC_0515.jpgDSC_0516.jpg

Right now I am considering getting the LH upper and lower cowl piece from Sherman Industries, even thought is doesn't fit. Making it fit, then make a temp-let of the upper piece using fiberglass shipping tape, flipping it inside outward to make the RH side.

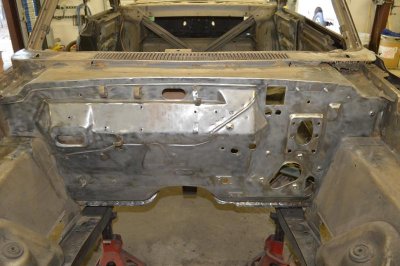
I also stripped off the paint on the firewall.

DSC_0514.jpg

DSC_0508.jpg DSC_0510.jpg DSC_0512.jpg DSC_0513.jpg DSC_0515.jpg DSC_0516.jpg DSC_0514.jpg
 
Last edited:
Auto Transport Service
Back
Top