• When you click on links to various merchants on this site and make a purchase, this can result in this site earning a commission. Affiliate programs and affiliations include, but are not limited to, the eBay Partner Network.

1966 Charger Carolina Car (Pic Heavy)

Stukenbroeker

Active Member
Local time
3:20 PM
Joined
Feb 3, 2014
Messages
43
Reaction score
6
Location
Charleston, SC
Hey guys,
New to the site and wanted to start a build thread here for a father/son project we just picked up.

First, a little backstory:
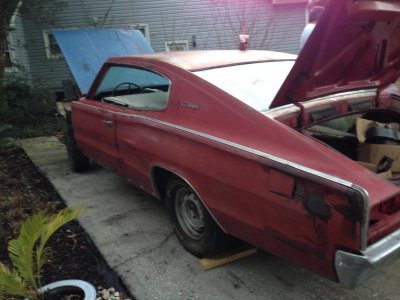
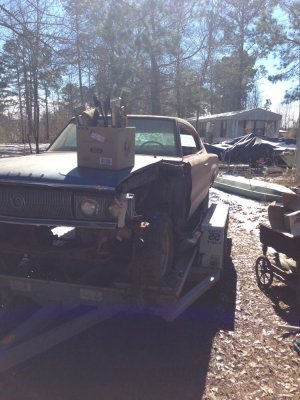
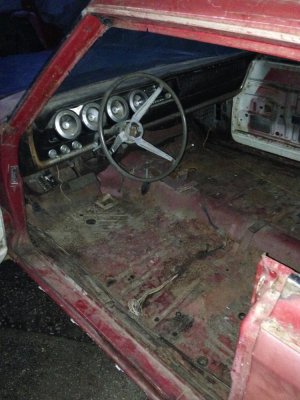
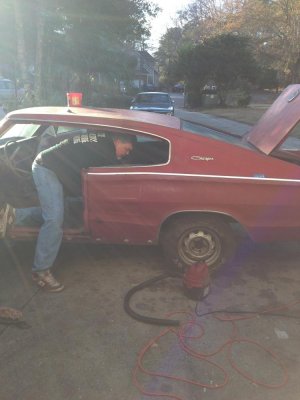
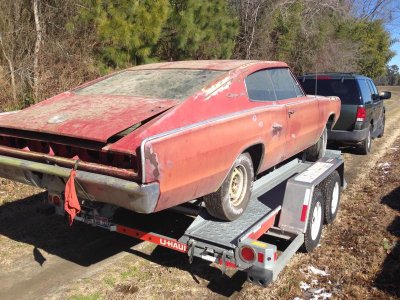
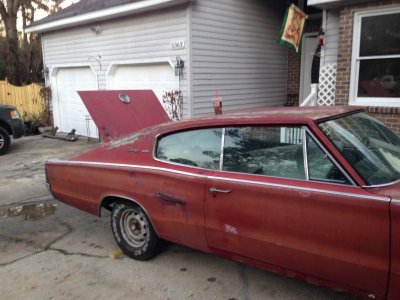
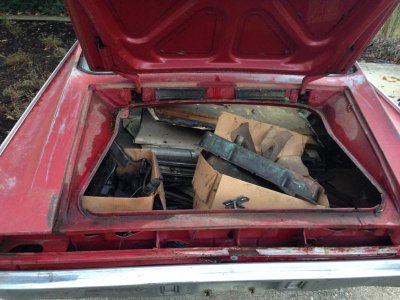
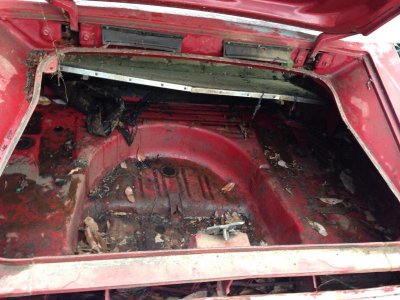
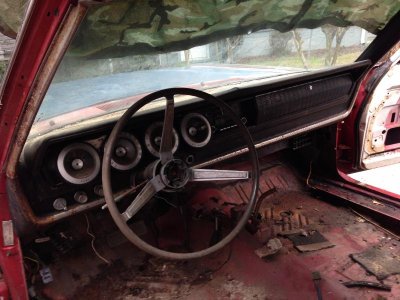
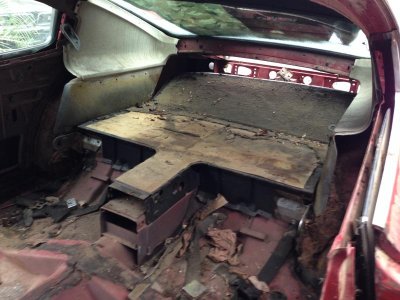
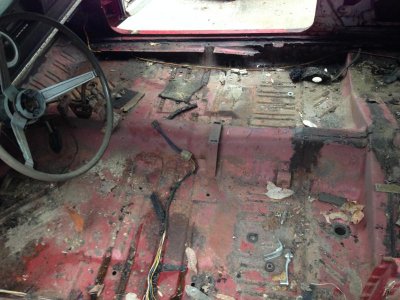
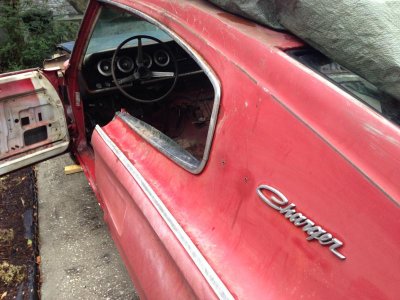
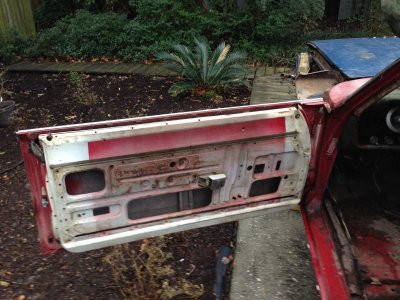
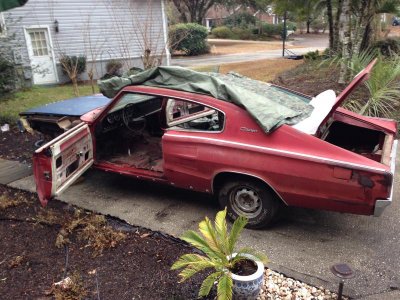
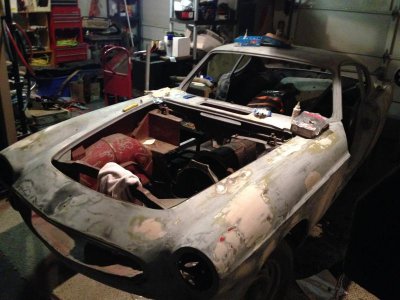
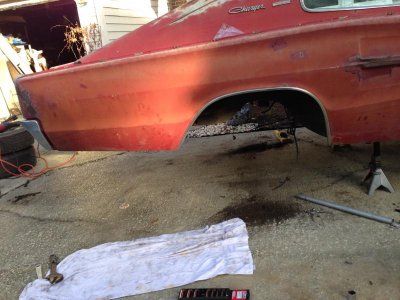
We purchased this car out of Hannah, SC last week. The previous owner had the car for 15 years stored in a warehouse, in the same condition it is in now. He bought the car from an older gentleman who had this 1966 charger, and another 1967 charger. The previous owner was also given his choice of engines when he bought the car, and decided to take the 440 rather than the 383 that was originally in the car.

Along we come.
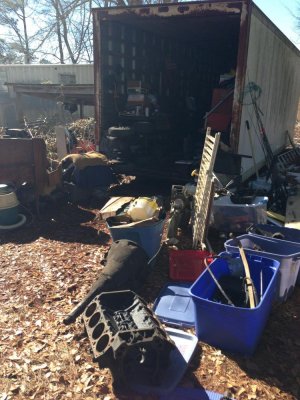
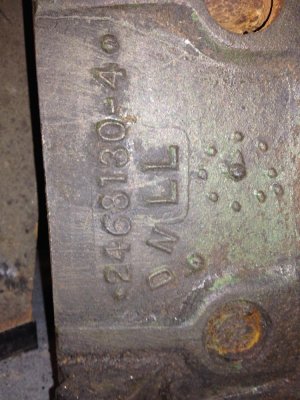
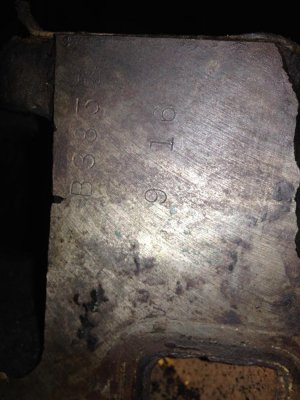
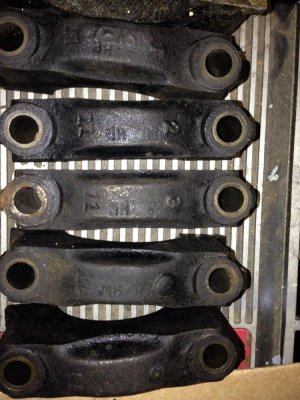
We checked out the car, and it looked solid. He had disassembled the engine and it was all stored in random boxes in a trailer. After running all of the numbers on the block, heads, intake......turns out he actually had the original 383 that came with the car.

We have big plans for this car, and it will end up being my brother's first car. I will try to keep the tread up to date as we make progress on the car. I'm juggling another project at the moment (putting a 302 in a 1967 Volvo P1800), but hopefully the Charger will go smoothly!
 

Attachments

  • photo-17.jpg
    photo-17.jpg
    59.2 KB · Views: 464
  • photo-16.jpg
    photo-16.jpg
    131.4 KB · Views: 426
Welcome to the site!
Good to see more 1st gens getting back on the road. Keep up the pics!
 
So after getting the Charger home, we managed to get everything removed from inside the car. The previous owner gave us an extra hood, extra trunk lid, an extra gas tank, and a whole boatload of trim to sort through. We managed to get most of the trim off the car and assess any major damage before darkness took our workday away. Looks like the major problem areas are going to be the passenger rear floor pan which will need to be replaced, and the lower area on the front driver fender behind the wheel. I'll know more about the condition of the other trim later on today once I can inventory what's in the garage.
 

Attachments

  • photo-30.jpg
    photo-30.jpg
    116.9 KB · Views: 360
  • photo-31.jpg
    photo-31.jpg
    125.6 KB · Views: 383
  • photo-18.jpg
    photo-18.jpg
    106.9 KB · Views: 371
  • photo-25.jpg
    photo-25.jpg
    76.4 KB · Views: 371
  • photo-19.jpg
    photo-19.jpg
    113.1 KB · Views: 398
  • photo-20.jpg
    photo-20.jpg
    64.3 KB · Views: 396
  • photo-21.jpg
    photo-21.jpg
    72.8 KB · Views: 375
  • photo-22.jpg
    photo-22.jpg
    77.3 KB · Views: 388
  • photo-23.jpg
    photo-23.jpg
    71.5 KB · Views: 383
  • photo-24.jpg
    photo-24.jpg
    69.9 KB · Views: 366
  • photo-26.jpg
    photo-26.jpg
    78 KB · Views: 371
  • photo-27.jpg
    photo-27.jpg
    74 KB · Views: 372
  • photo-28.jpg
    photo-28.jpg
    86.4 KB · Views: 378
  • photo-29.jpg
    photo-29.jpg
    83.1 KB · Views: 379
  • photo-32.jpg
    photo-32.jpg
    104.1 KB · Views: 380
  • photo-33.jpg
    photo-33.jpg
    105.8 KB · Views: 382
Welcome. Appears to be a good solid car.
 
Very nice "love the early Chargers".
 
Today we began removing the front k-member. The new bushing kit is coming in tomorrow and I was hoping to have the k-member dropped, blasted, and painted and ready to install the new bushings. Turns out it didn't go as smoothly as I had hoped (when does it?). We managed to get most of the driver side disassembled, but again the dark set in and we couldn't get the passenger side off in time. I then moved into the garage to sort out some of the pile of parts that were in the car. Upon doing so I came to realize that we were given many duplicates, so that leaves us with the task of determining which parts are the correct original parts. Tedious work, but rewarding. After looking at some of the parts and planning out the work, I have ended up with a few questions I was hoping you fine folks might be able to answer.

First, I looked at the main caps from the 383 block, and they all look normal to me except cap #4. The "4" that is cast onto the cap seems to be on a raised circle, whereas the other caps are flush with the contour of the cap. Is this normal? And if so, is there some sort of significance to this?

Second, the floor wiring rail that runs along the edge of the floor pan is nearly rusted off on both sides, as I image most are by now. Does anyone have a creative solution for recreating that cover rail? I've only seen the metal pieces offered on one website, and they seemed to want a pretty penny. Or does this rail serve some significant purpose that I'm not aware of?

I thought I'd throw in a few pics of the block casting numbers and the main caps that I had the question about.

And just for fun I added a pic of my other project. a 1967 Volvo P1800S that is getting a 302.
 

Attachments

  • IMG_1751.jpg
    IMG_1751.jpg
    123.3 KB · Views: 327
  • IMG_1752.jpg
    IMG_1752.jpg
    106 KB · Views: 313
  • IMG_1753.jpg
    IMG_1753.jpg
    131.4 KB · Views: 315
  • IMG_1754.jpg
    IMG_1754.jpg
    66.5 KB · Views: 314
Looks like a great start, that Volvo is going to be cool when you are finished too!
 
So yesterday was the day of rear end removal. The new bushings kit is in and so are the rear air adjustable shocks and brake shoes/hardware for the rear drums. After completely spacing for about 5 minutes, I finally remembered that the left side lug nuts are reverse threaded, and finally managed to get the wheel removed. The brake drums were a different story. I decided to tackle the drivers side first, which proved to be a good move. After going at it for about 15 minutes with a sledge hammer and a puller that barely fit, I decided to try a little trick I had seen where you modify the gear puller and widen it with a 2x4. Success on the drivers side. I then inspected the drum and figured out why it wouldn't come off, despite being loose. The drum had worn about a 1/4 in groove on the inside lip of the drum and the shoes were riding in that lip. So the shoes were trying to come out with the drum. As expected, time for new drums.

Now off to the passenger side.

The passenger side appeared looser to begin with than the drivers side, but proved to be more difficult. I ended up unbolting the wheel cylinder from the backing plate, and prying up on the shoe retaining pins and clipping them off, hoping that it would free them up enough to pry the drum off. After 1 hour, 2 2x4s, and 3 mild breakdowns, I decided to whip out the old reciprocating saw. Taking care not to damage anything I needed to reuse inside the drum, I began cutting the drum in half. 20 minutes later and the drum is off.

I made quick work of the leaf spring bolts and shock mounts, even though the upper shock mount is extremely inconvenient to get a wrench into.

So now comes the question: With the rear end out, should I go ahead and remove the 3rd member and inspect it now, or wait till its back in the car, drive it, and address if there are any issue then?

Also, what's the best way to refinish/repaint the rear? I knocked off most of the light surface rust, and the original black remains on most of the rear.

As always, thanks for your help!
 

Attachments

  • IMG_1779.jpg
    IMG_1779.jpg
    71.3 KB · Views: 275
  • IMG_1778.jpg
    IMG_1778.jpg
    139.6 KB · Views: 266
  • IMG_1780.jpg
    IMG_1780.jpg
    103.1 KB · Views: 256
Cleaned up the rear end and got the old leaf spring bushings out by heating them up with a blowtorch. Sprayed some matte black, put on some air-adjustable shocks and took to putting it back in the car. We managed to get it all back in except the passenger side leaf spring shackle. For some reason it refuses to go in with the new bushings. Gonna have to drop it back out and start again. Also managed to get the rear brakes rebuilt, and new brake drums installed.
 

Attachments

  • IMG_1789.jpg
    IMG_1789.jpg
    160.7 KB · Views: 222
  • IMG_1791.jpg
    IMG_1791.jpg
    130.8 KB · Views: 217
  • IMG_1785.jpg
    IMG_1785.jpg
    120 KB · Views: 223
  • IMG_1790.jpg
    IMG_1790.jpg
    88.2 KB · Views: 224
  • IMG_1787.jpg
    IMG_1787.jpg
    98.6 KB · Views: 225
  • IMG_1786.jpg
    IMG_1786.jpg
    103.7 KB · Views: 230
Looks great what kind of shocks are you going to put in it? I took my rear end out and replacing seals and I need to put in new shocks but I've never bought shocks before.
 
We ended up going with the Monroe Max-Air MA727s on the rear. This is a bit of a budget build, but we wanted the option to adjust the rear as needed, so for $80 for the pair, we figured we'd give them a shot!
 
What kind of pant did you use when painting the rear end? It turned out awesome, good job.
 
Wow, you've got your work cut out for you. Great going so far.
Give a shout when you get to the headlamps and EL dash that won't be working. ;-)
 
I'd leave the center section in the car until you get it running. Not much you can see with it out, other than condition of ring and pinion. If the bearings are junk and it makes noise it isn't a big job to pull it out while the rear is in the car.
Looks good so far, keep up the good work.
 
I know we definitely have our work cut out for us! We had trouble getting one of the leaf spring shackles on properly, so we basically had to drop the rear out again yesterday and persuade it.

We have some extra headlight assemblies, so hopefully if the ones on the car now aren't working, then the others will. But there's no doubt that I'll be here picking y'alls brain :)
 
Auto Transport Service
Back
Top