• When you click on links to various merchants on this site and make a purchase, this can result in this site earning a commission. Affiliate programs and affiliations include, but are not limited to, the eBay Partner Network.

1966 Coronet Post - MAXIMVS III

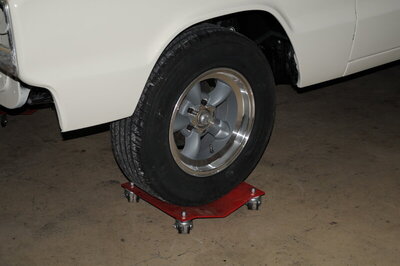
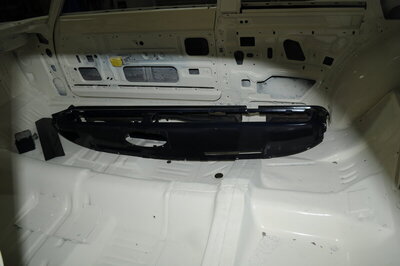
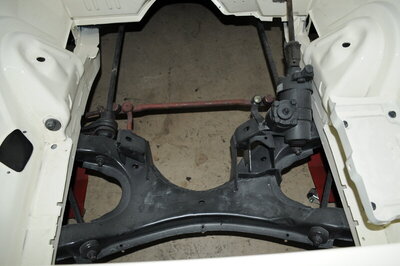
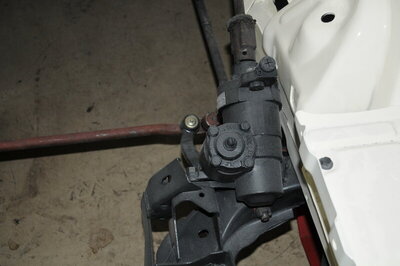
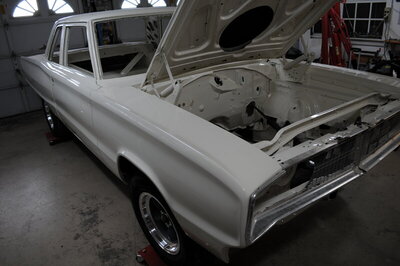
Got the car up on roller skates, dash and trim painted Dark Blue Iridescent (metallic). New aftermarket power steering box fits well with some space to spare from the shock tower. Also the Moroso lug nuts fit well with American Racing Torque Thrust D's - see thread here: https://www.forbbodiesonly.com/moparforum/threads/ttds-with-2-studs-disc-brakes.193208/ . See pics...

snook
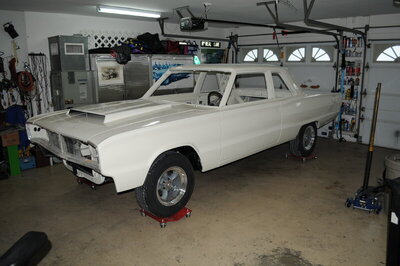
DSC_8344.JPG DSC_8345.JPG DSC_8347.JPG DSC_8348.JPG DSC_8349.JPG DSC_8350.JPG DSC_8352.JPG DSC_8354.JPG
 
Restoration is killing my piggy bank - the front windshield gasket was $229, rear was $165. I need to pick up some part time work at NAPA.

snook
 
I sucked it up and bought all the wiring harnesses for the car (dash, engine (includes the front lighting and modified for Mopar electronic ignition) and the rear lighting harness. With a 30% Year One code (YN7897 for you guys if you need it - just hit yesterday for a flat 30% off) it was $821 (includes shipping). It's like taking a band-aid off; just rip it off and it doesn't hurt so bad (still pinches though!).

snook
 
I deleted the DODGE hood lettering and the fender Coronet emblems. I kept the DODGE lettering on the rear panel though. I also permanently welded up the front fender antenna hole - I won't be needing that.

snook
 
Rear glass is in, thanks to blewbyu2bad for the help in finding a great rear window - he's been a great help as I try to resurrect the beast. Wiper motor restoration is by Concours Creations in Orange City FL. Not cheap but hope it will be worth it - I'll post pics when I get it back. Mine worked great but looked like hell and the wiring was completely shot along with the connector. I just couldn’t bring myself to put it back in after all the work going into the car. Housing is pitted and it was generally a mess. Here some before pics of it.

snook

20200510_124300.jpg 20200510_124308.jpg 20200510_124325.jpg 20200510_124342.jpg
 
Windshield wiper motor resto is in progress. The door, vent and quarter glass is in rough shape - scratches and pitting from sandstorms, the AZ sun was not kind to it. Luckily, no delamination. I sent it out for polishing, the guy says it will look new when he's done - we'll see but he's known for good work around here. I got the windshield wiper linkage apart and I'll be rebuilding that with new bushings and clips with a coat of rustoleum on the linkage arms. As soon as I get the wiper motor back and the linkage installed, I'll be ready to hang the dash and get the front windshield and trim installed. I have new wiring harnesses, so I'll be hanging them at the same time.

snook
 
Got the wiper motor back From Concours Creations (Jerry Scmidt) - it looks fantastic. I'd read some posts here on some bad experiences with them but that's not so in my case. I took it apart to check on the reported problems and they are non-existent in my case, I would happily recommend him in my case. The wiring and connector was replaced, new bearings and brushes were installed along with a new switch plate as my park pin was bent. Freshly regreased as well. Here's some before pics...

snook

20200510_124300.jpg 20200510_124308.jpg 20200510_124325.jpg 20200510_124342.jpg
 
Oh yeah, turnaround time was almost exactly 2 weeks - can't beat that.

snook
 
I see a couple pictures of the plastic white gear with hair line cracks.

Do these gears brake often?:thankyou:
Nope. Have have a couple originals with the same 'old age' looking cracks and mine still worked fine even 20+ years ago.
 
Nope. Have have a couple originals with the same 'old age' looking cracks and mine still worked fine even 20+ years ago.

How does one go about retiming the gears after the gear has been removed once?

also any special gear grease for the lubrication?

I made some scratch marks before I removed the gear.... but it still looks not quit right.

maybe send it out ??

rtrtr.jpg
rtrrttttf.jpg
 
How does one go about retiming the gears after the gear has been removed once?

also any special gear grease for the lubrication?

I made some scratch marks before I removed the gear.... but it still looks not quit right.

maybe send it out ??

View attachment 1026471 View attachment 1026472

I wish I could help you but I haven't a clue. On another note, after a health scare I'm back at it. Finally some progress, I'll get some ppics up soon.

Chuck
 
How does one go about retiming the gears after the gear has been removed once?

also any special gear grease for the lubrication?

I made some scratch marks before I removed the gear.... but it still looks not quit right.

maybe send it out ??

View attachment 1026471 View attachment 1026472
Sorry I didn't see your question until now....and only saw it because of Snooks post. Been so long since messing with mine that I don't remember if it has timing marks but iirc, the shut down contacts can be adjusted. You should be able to run the motor with it out of the hole and note where the arm comes to rest after it reverses. Just make sure you keep your fingers out of the way because that motor has some torque.
 
I wish I could help you but I haven't a clue. On another note, after a health scare I'm back at it. Finally some progress, I'll get some ppics up soon.

Chuck
Haven't made any forward progress on mine but was going to get it up in the air a little bit to make it easier for me to get started on replacing a floor panel but I messed up my back when splitting some fire wood for the smoker on Monday. It's just now feeling better but seems like it doesn't take much to mess it up these days.....
 
I installed a MAXJAX mid-lift and it's been a lifesaver since I don't have the ceiling for a high-lift.

Started on the rear disc brake conversion and promptly pulled the threads out of the drivers side caliper adapter plate when I tried to torque to factory specs; good thing is that Pirate Jacks is sending me a new set of brackets free, so that helps - at least they stand behind their product, should have them this week and I can finish it up.

Spent half the day today trying to sand blast the Edelbrock DP4B intake using the 20# blaster from Harbor Freight ( https://www.harborfreight.com/20-lb-pressurized-abrasive-blaster-68994.html ). I just could not get it sorted out and was ready to take it back when I decided to watch a YouTube review on it. I realized that I had it plumbed wrong (HF instructions sucked in my defense) and once I got it straightened away, worked like a champ using fine coal slag Black Diamond media (red bag, not black) from Tractor Supply - made short work of that metallic bright blue paint.

I still have to install the cam and valvetrain (once I locate some aluminum heads, they are unobtanium right now and the Trick Flows spec a minimum bore of 4.320" and my 0.030" over 383 (432 stroker) is 4.280". I may be forced to run some iron 906's if I can't locate some Edelbrocks or Procomps - any leads?

Anyway, here's some pics of the car and parts ready to go on and in the car:

DSC_8614.jpg DSC_8618.jpg DSC_8619.jpg DSC_8625.jpg DSC_8627.jpg DSC_8628.jpg DSC_8629.jpg DSC_8631.jpg DSC_8632.jpg
 
Like the project. Found out my buddy has a 66 coronet post. Had no idea he had one until he showed me under a barn where it was sitting. Yours is looking good. I like the white. Are you finishing the interior up like factory in it?
 
Like the project. Found out my buddy has a 66 coronet post. Had no idea he had one until he showed me under a barn where it was sitting. Yours is looking good. I like the white. Are you finishing the interior up like factory in it?

Thanks. Pretty much, Legendary didn't have the right bench seat covers for this WE, so I found a local shop (dude is 85+ YO and knows his stuff) to make a set of seat covers. I was lucky and found the front/rear bench seat set for a post car a little north of where I live and they were great cores, even the mounting brackets were in great shape, they just need blasted and painted. The dark blue interior is looking sharp, glad I made that choice. Finished up the front suspension and front/rear disc brake conversion, still have to plumb and install the master cylinder and line-lock. This car was completely stripped and came with no usable parts other than the body - I had to replace the front/rear floors (trunk floor was good- so no work there other than painting), it was a previous race car that was weld sticked all over the floors to the point that they were not recoverable. Too much to list on all that is being replaced. I did decide to go manual steering over power though.

Body parts that were replaced:
  • Front/rear floors
  • Firewall
  • Inner fenders
  • Core support (now a 26")
  • Installed a 67 hemi scoop
  • K-member

Chuck
 
Auto Transport Service
Back
Top