You are using an out of date browser. It may not display this or other websites correctly.
You should upgrade or use an alternative browser.
You should upgrade or use an alternative browser.
1971 Satellite "resto mod" like Pappy Joe wants it.. :)
- Thread starter PappyJoe
- Start date
Propwash
Well-Known Member
- Local time
- 4:56 PM
- Joined
- Oct 29, 2009
- Messages
- 9,695
- Reaction score
- 4,338
- Location
- Island of Misfit Toys
Looking sharp PappyJoe. Cool ride.
PappyJoe
Well-Known Member
Got some more work done finally. Worked on the driver fender and have it about ready. Also worked on the passenger door jamb. On the engine I've been working with the motor mounts to try and get the engine in for a test fit. I don't have the original motor mount bolts so I've had to get some that will work until I can get the correct ones. Now I need to modify the motor mount studs to fit into the adapter plates. Studs are too long and have to be cut down. I'll show some pics when I do it. I've also gotten in the factory manual for the 04 dodge so I can look at the wiring situation. Haven't ordered any new parts for now. I really need to focus on the body work. My goal was to have it painted by the end of summer, around the middle to end of Sept. I'm running out of time so my focus needs to be on getting that done, then look at the rest. "Focus", Such a little word, such an important concept.. For now, here are some before and after pics of the door jamb.


PappyJoe
Well-Known Member
Well, it's been a while. Too long. Didn't get much posted, but I did get some stuff done. The poor car had a lot more rot than I had originally thought, which already was a lot more than I had ever imagined when I bought it. But I guess you just deal with it. So here are some updates on what I've gotten done, some changes in direction, and a whole lot of sanding...
I have to say here that I've looked around at some other awesome projects on here and it's really intimidating to post up my work. There are some extremely talented guys on here that will probably get a chuckle out of what I'm doing but all I can do is the best I can. I'm proud of what I've done so far. In the end that's what it's all about, seeing what has been accomplished, how far it's come, and knowing what it took to get it there.
I've been putting in a lot of hours at work so getting things done have taken a back seat from time to time, but I've worked night..
View attachment 259863
And day..
View attachment 259864
to try and get what I can done when the time is available.
So here we go..
The first change I've made is color. I was originally going with B5 Blue. I even trial painted the inside of a door to see what it would look like. And it was really good.
View attachment 259865
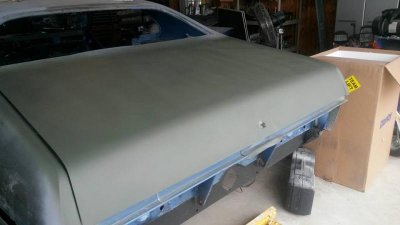
But when I took a few color choices and put them on some metal with black separating them, the car will have black in the hood and on the rear spoiler, etc. I decided to go a different way for color. The one in the center, Snakeskin green, will be the color. Which also means the interior has to change from the current blue to black. This led to some additional changes which I'll show later.
View attachment 259866
But first there were many "surprises" that came up which had to be addressed. A buddy of mine brought over his welder and we did some fabricating. Rust had it's way in some unexpected places that I had not previously found. The scariest was the frame rail on the driver side by the gas tank. While these pics only show the outside, it had to be repaired on the bottom and the back side as well.
View attachment 259872
View attachment 259873
View attachment 259874

And finished with por 15 applied. I also applied bed liner on top of this so it blended in quite nicely.

Next came the body seam on the driver side at the front of the door. It was completely rotted away. This pic is after we've already cut it out.
View attachment 259875
And new metal goes in.
View attachment 259876
And finished product cleaned up with bed liner applied.

I'm also going to a smoother fire wall in this process so the heater core is gone. I'll be using a vintage air system so we covered the holes and smoothed her up some.
View attachment 259877
View attachment 259878
View attachment 259879
I think it came out pretty good so far. Still have the driver side to work on.
View attachment 259880
The passenger fender had a huge dent filled with bondo that had cracked. Decided to put in some new metal here too.
View attachment 259881
View attachment 259882
New metal goes in.
View attachment 259883
And it gets some body work love to smooth her out.
View attachment 259886
The only problem was when it was finished I didn't like the body line right at the end of the fender. it was crooked from the previous repairs. You can see it bowing in slightly right at the end. Decided to go ahead and take care of that while we were there.
View attachment 259887
View attachment 259888
Fabricated a new piece with the mounting nuts for the front header panel. Ended up having to fabricate another piece to go further back where that big gap is, but it all worked out.
View attachment 259889
Next came the passenger door. It was rotted out pretty bad at the bottom and I couldn't find skins for these yet so had to make repairs.

Cut out upper part and made upper template.

Upper and lower templates being installed.
View attachment 259890
View attachment 259891
Think it came out ok.
View attachment 259892
Did some work on the trunk. It had the go wing on it which I'm not going to use so I had some holes to fill.


And after the body work is done, also treated the metal at the bottom (not sure what it's called) that was replaced when the new quarter panels were installed..

Decided to have some easier fun and work on the inside of the trunk a little..
View attachment 259893
Sanded and treated it for rust.
View attachment 259894
Then put some bed liner on it. Later this will be covered with dynamat, then a fabric cover. Planning on doing the same to the interior floor pan.
View attachment 259895
During this time I "spruced" up the garage a bit. Put up some stuff I've picked up along the way at different events. Makes it a little more fun. Man cave.. Not sure what the heck was on that flat screen when this was taken, lol, guessing one of my granddaughters was out there helping me.
View attachment 259896View attachment 259897
Like I said, the change in paint color meant changing from blue to black interior. I decided that I might as well go with some new seats in the process. I'll be putting the stock buckets and rear seats up for sale soon. They are in perfect shape with new covers, light blue.
View attachment 259898View attachment 259899View attachment 259900
Right now I'm trying to figure out wheels and tires next. Want to go ahead and get them here. Trying to knock out the big ticket items. I want to go big and fill out those wheel wells, was thinking 18s front and 19s back but still investigating what will fit. Looking at ordering a Percy's wheelright fitment tool to make sure I get it right.
Sometime during all this we added a new grandson to the family

And I worked on installing a new A320 simulator at our training center, now I'm on the project installing the new 787 sim ready for training mid June.

So I have been busy even though I haven't gotten much of a chance to post in a while. My goal at the moment is to get paint on it by the end of the summer. Have her up and ready by June 2016 for summer nationals in Dequin. Funny, I think that was my goal last year for 2015... Didn't happen.. Oh well..
I have to say here that I've looked around at some other awesome projects on here and it's really intimidating to post up my work. There are some extremely talented guys on here that will probably get a chuckle out of what I'm doing but all I can do is the best I can. I'm proud of what I've done so far. In the end that's what it's all about, seeing what has been accomplished, how far it's come, and knowing what it took to get it there.
I've been putting in a lot of hours at work so getting things done have taken a back seat from time to time, but I've worked night..
View attachment 259863
And day..
View attachment 259864
to try and get what I can done when the time is available.
So here we go..
The first change I've made is color. I was originally going with B5 Blue. I even trial painted the inside of a door to see what it would look like. And it was really good.
View attachment 259865
But when I took a few color choices and put them on some metal with black separating them, the car will have black in the hood and on the rear spoiler, etc. I decided to go a different way for color. The one in the center, Snakeskin green, will be the color. Which also means the interior has to change from the current blue to black. This led to some additional changes which I'll show later.
View attachment 259866
But first there were many "surprises" that came up which had to be addressed. A buddy of mine brought over his welder and we did some fabricating. Rust had it's way in some unexpected places that I had not previously found. The scariest was the frame rail on the driver side by the gas tank. While these pics only show the outside, it had to be repaired on the bottom and the back side as well.
View attachment 259872
View attachment 259873
View attachment 259874
And finished with por 15 applied. I also applied bed liner on top of this so it blended in quite nicely.
Next came the body seam on the driver side at the front of the door. It was completely rotted away. This pic is after we've already cut it out.
View attachment 259875
And new metal goes in.
View attachment 259876
And finished product cleaned up with bed liner applied.
I'm also going to a smoother fire wall in this process so the heater core is gone. I'll be using a vintage air system so we covered the holes and smoothed her up some.
View attachment 259877
View attachment 259878
View attachment 259879
I think it came out pretty good so far. Still have the driver side to work on.
View attachment 259880
The passenger fender had a huge dent filled with bondo that had cracked. Decided to put in some new metal here too.
View attachment 259881
View attachment 259882
New metal goes in.
View attachment 259883
And it gets some body work love to smooth her out.
View attachment 259886
The only problem was when it was finished I didn't like the body line right at the end of the fender. it was crooked from the previous repairs. You can see it bowing in slightly right at the end. Decided to go ahead and take care of that while we were there.
View attachment 259887
View attachment 259888
Fabricated a new piece with the mounting nuts for the front header panel. Ended up having to fabricate another piece to go further back where that big gap is, but it all worked out.
View attachment 259889
Next came the passenger door. It was rotted out pretty bad at the bottom and I couldn't find skins for these yet so had to make repairs.
Cut out upper part and made upper template.
Upper and lower templates being installed.
View attachment 259890
View attachment 259891
Think it came out ok.
View attachment 259892
Did some work on the trunk. It had the go wing on it which I'm not going to use so I had some holes to fill.
And after the body work is done, also treated the metal at the bottom (not sure what it's called) that was replaced when the new quarter panels were installed..
Decided to have some easier fun and work on the inside of the trunk a little..
View attachment 259893
Sanded and treated it for rust.
View attachment 259894
Then put some bed liner on it. Later this will be covered with dynamat, then a fabric cover. Planning on doing the same to the interior floor pan.
View attachment 259895
During this time I "spruced" up the garage a bit. Put up some stuff I've picked up along the way at different events. Makes it a little more fun. Man cave.. Not sure what the heck was on that flat screen when this was taken, lol, guessing one of my granddaughters was out there helping me.
View attachment 259896View attachment 259897
Like I said, the change in paint color meant changing from blue to black interior. I decided that I might as well go with some new seats in the process. I'll be putting the stock buckets and rear seats up for sale soon. They are in perfect shape with new covers, light blue.
View attachment 259898View attachment 259899View attachment 259900
Right now I'm trying to figure out wheels and tires next. Want to go ahead and get them here. Trying to knock out the big ticket items. I want to go big and fill out those wheel wells, was thinking 18s front and 19s back but still investigating what will fit. Looking at ordering a Percy's wheelright fitment tool to make sure I get it right.
Sometime during all this we added a new grandson to the family
And I worked on installing a new A320 simulator at our training center, now I'm on the project installing the new 787 sim ready for training mid June.
So I have been busy even though I haven't gotten much of a chance to post in a while. My goal at the moment is to get paint on it by the end of the summer. Have her up and ready by June 2016 for summer nationals in Dequin. Funny, I think that was my goal last year for 2015... Didn't happen.. Oh well..
Attachments
GTX440
Well-Known Member
Hey Pappy, she's coming along great!
a68postcar
Well-Known Member
I like the car pappy. these cars are my personal favorite.
PappyJoe
Well-Known Member
Hey Pappy, she's coming along great!
Thanks!
- - - Updated - - -
I like the car pappy. these cars are my personal favorite.
Thanks! I liked these all the way back to when I was a teenager and had a friend that had one.
- - - Updated - - -
It's odd, when I look at the post on this computer several of the pics are showing links that I can't go to. But when I edited the post to see if I could fix them, they all showed up just fine in edit mode. Scratching my head.. Hope they are all there for you guys.
PappyJoe
Well-Known Member
I've still been after it. I've gotten the passenger door pretty much ready, modified the bolts on the front and rear bumpers, and got the engine in it for a test fit. Now I'm trying to get the trans under it without to much risk to my life. Had it under there when I realized I hadn't taken out the old trans mount and I also need to get the rear brake wires out of the way. So I have to risk life and limb again. Need to get that done so I can start cutting the trans tunnel and get that part of this sorted out.
I got in the rebuild kit from firm feel to do the front suspension including switching to tubular uppers. And while I was at the Summer Nationals in DuQuion I ordered the torsion bars and shocks from Hotchkis. So I'm making some headway. Slow and steady. I'll update with some pics when I can.
I got in the rebuild kit from firm feel to do the front suspension including switching to tubular uppers. And while I was at the Summer Nationals in DuQuion I ordered the torsion bars and shocks from Hotchkis. So I'm making some headway. Slow and steady. I'll update with some pics when I can.
PappyJoe
Well-Known Member
Wow, didn't realize it had been that long since I updated. A lot has happened in the last couple of years. I've got a lot of pics I need to get posted. Quick update, the suspension is installed (Hotchkiss and Firm Feel), the brakes are installed (drilled slotted discs front and rear), I've ordered the gauges and painted the dash. Today I ordered the cam and associated parts for the engine. The body parts are going in for paint, fenders, front and rear bumpers, front valance are done. The hood, trunk deck, rear valance, front header panel are at the paint shop now. Doors and cab are ready to go. Steering column has been done and ready to go in. Finishing up the brake lines and fuel system.
It's been busy. I wanted to have it running by the end of March but that's not going to happen. I'm setting my sights on the end of the summer and keeping on with progress.
You know the old saying, I either have money, or I have time, very rarely do I have both. I've been working a lot of hours to get the parts which is great, but takes away from time to work on it.
I'll try and get some pics and updates posted up on here.
Joe
PappyJoe
Well-Known Member
Thought I'd update some progress. The body is at the paint shop now, but have some pics of panels that are done. Snake Skin Green Pearl, 2010 Viper color. Still have a lot to do. At this point I can't say "that system is done" on anything. But several are very close. Hope when I get her back the engine will be ready and I can finish off the brakes, suspension, and fuel systems. Then it's on to the wiring before I go inside for the interior. But you can see where I'm going with it. The seats are fit for mounting but still need some tweeks.
Getting the engine ready while the car is out. Cam changed. everything else in the bottom end looks good so not doing any more than cam, lifters, timing chain. Heads have been done. Painting and putting it back together. Ordering the coil packs, injectors, etc.
Had to add this, forgot about the new gauges. Funny thing, on the speedometer I had "Satellite" put on it. When I got them "Satelite" was on there. And I even called and talked to them to make sure they knew the correct spelling. No big problem, they arranged for shipping it back and are correcting it. The needles look pink in the photo, they aren't, they're red. Orange would have been preferred but wasn't an option.
Getting there. Very slowly it seems, but getting there.
![1935487_1205222816172001_6484553631350947144_n[1].jpg](https://www.forbbodiesonly.com/moparforum/data/attachments/350/350769-a83bf6d0bf5261bb120147193c971949.jpg?hash=qDv20L9SYb "1935487_1205222816172001_6484553631350947144_n[1].jpg")
![14045674_1362892690405012_8873873875903523082_n[2].jpg](https://www.forbbodiesonly.com/moparforum/data/attachments/350/350770-045edb0b6cd4d32154618362736c65e0.jpg?hash=BF7bC2zU0y "14045674_1362892690405012_8873873875903523082_n[2].jpg")
![16388358_1542562105771402_1058896686761627336_n[1].jpg](https://www.forbbodiesonly.com/moparforum/data/attachments/350/350771-dd611f1d28b393e121a204028becac37.jpg?hash=3WEfHSizk- "16388358_1542562105771402_1058896686761627336_n[1].jpg")
![16997953_1571095769584702_63164546368663064_n[1].jpg](https://www.forbbodiesonly.com/moparforum/data/attachments/350/350772-bbd459f66766b75195f71aafa9c90b8a.jpg?hash=u9RZ9mdmt1 "16997953_1571095769584702_63164546368663064_n[1].jpg")
![17457763_1600259420001670_7350577017568998412_n[2].jpg](https://www.forbbodiesonly.com/moparforum/data/attachments/350/350773-2811af6eb51a65fb75424971044fca76.jpg?hash=KBGvbrUaZf "17457763_1600259420001670_7350577017568998412_n[2].jpg")
![18010034_1640818352612443_7066400935211448900_n[1].jpg](https://www.forbbodiesonly.com/moparforum/data/attachments/350/350774-5d3494c47dd68bbd45f6d3f0cf1c550d.jpg?hash=XTSUxH3Wi7 "18010034_1640818352612443_7066400935211448900_n[1].jpg")
![18010272_1640818322612446_1495207889275713973_n[1].jpg](https://www.forbbodiesonly.com/moparforum/data/attachments/350/350775-4fa0f66c43a9638969248faf79ceb51f.jpg?hash=T6D2bEOpY4 "18010272_1640818322612446_1495207889275713973_n[1].jpg")
![18118498_1640818445945767_1522825424272361397_n[1].jpg](https://www.forbbodiesonly.com/moparforum/data/attachments/350/350776-7d7d439515741120edd6ee1bcb514d14.jpg?hash=fX1DlRV0ES "18118498_1640818445945767_1522825424272361397_n[1].jpg")
![18422116_1656434341050844_6605968932218917674_o[1].jpg](https://www.forbbodiesonly.com/moparforum/data/attachments/350/350778-6568e3f897979c32b7df8e4e85c781b5.jpg?hash=ZWjj-JeXnD "18422116_1656434341050844_6605968932218917674_o[1].jpg")
![18157719_1645367378824207_43084819760551960_n[2].jpg](https://www.forbbodiesonly.com/moparforum/data/attachments/350/350779-fb720c603674d7658d969ed5eb61da2b.jpg?hash=-3IMYDZ012 "18157719_1645367378824207_43084819760551960_n[2].jpg")
Getting the engine ready while the car is out. Cam changed. everything else in the bottom end looks good so not doing any more than cam, lifters, timing chain. Heads have been done. Painting and putting it back together. Ordering the coil packs, injectors, etc.
Had to add this, forgot about the new gauges. Funny thing, on the speedometer I had "Satellite" put on it. When I got them "Satelite" was on there. And I even called and talked to them to make sure they knew the correct spelling. No big problem, they arranged for shipping it back and are correcting it. The needles look pink in the photo, they aren't, they're red. Orange would have been preferred but wasn't an option.
Getting there. Very slowly it seems, but getting there.
![18194759_1646308088730136_6025170719101844766_n[1].jpg](https://www.forbbodiesonly.com/moparforum/data/attachments/350/350780-749c22193940a4a914e5df68802f9219.jpg?hash=dJwiGTlApK "18194759_1646308088730136_6025170719101844766_n[1].jpg")
![18274853_1646308042063474_2457813331147812744_n[1].jpg](https://www.forbbodiesonly.com/moparforum/data/attachments/350/350781-c7aaa5d66e8bcd75821a0e93174c0ce3.jpg?hash=x6ql1m6LzX "18274853_1646308042063474_2457813331147812744_n[1].jpg")
PappyJoe
Well-Known Member
Time for more update. Body is back from paint. Looking good. I've been spending time on the engine getting it ready. And on the console, ecu, wiring, pretty much all that needs to be done. Have ordered a lot of parts the last few days which should get me closer to finishing up. Here's some pics as of late.


PappyJoe
Well-Known Member
The new wiring harness, which is really nice, unfortunately has a fuse box that could not fit through a hole in the firewall. Only way to get it inside was cut wires so I decided to make an interface panel to reconnect the wires in case I needed to pull them for any reason in the future. Ordered wire label kit and got the all labeled and ready to go. It's installed now but I only have a pic of the building faze.

PappyJoe
Well-Known Member
Also I ran into a bit of a hitch that anyone else building one and planning on using a bellcrank box for throttle position might want to be aware of. New ones are out of stock and on a national back order. One parts guy told me they may stop making them. I managed to find one at a dealership. Had to pay a premium price but I got it. Of course you can still find them in the wrecking yards which is what I'm going to do asap for my 04 Ram in case they do decide to discontinue manufacturing them. But thought it was worth passing along.
Plymouth71
Waterslide Decal Artist
Love the Color. How are things coming along?
PappyJoe
Well-Known Member
Sorry, didn't realize how long it had been since I updated on here. Have made a bit of progress.
![22282007_1813004755393801_2405073265311018022_n[1].jpg](https://www.forbbodiesonly.com/moparforum/attachments/22282007_1813004755393801_2405073265311018022_n-1-jpg.614606/ "22282007_1813004755393801_2405073265311018022_n[1].jpg") We got the engine and trans installed. I wasn't sure how it would work out but I really like the color contrasts.
We got the engine and trans installed. I wasn't sure how it would work out but I really like the color contrasts.
PappyJoe
Well-Known Member
Similar threads
- Replies
- 100
- Views
- 3K
- Replies
- 47
- Views
- 3K
- Replies
- 25
- Views
- 2K
- Replies
- 145
- Views
- 9K


