• When you click on links to various merchants on this site and make a purchase, this can result in this site earning a commission. Affiliate programs and affiliations include, but are not limited to, the eBay Partner Network.

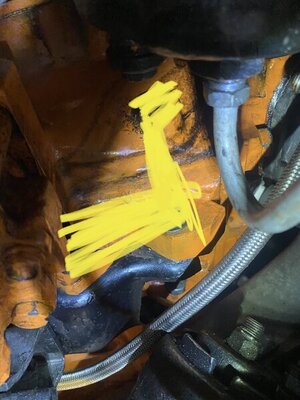
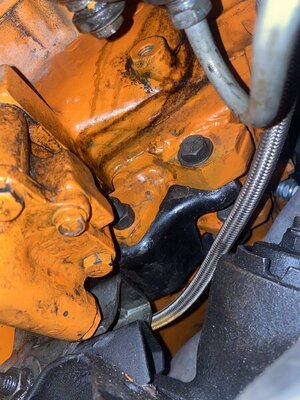
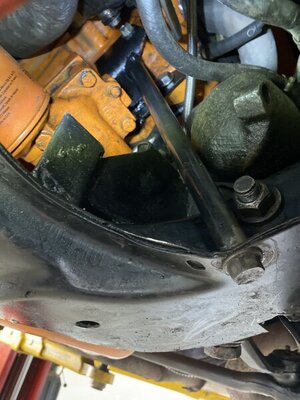
440 dodge broken motor mount ear

According to the Certanium web site, this material, 889SP 1/8" and 516" has been discontinued.....is there an alternate? I was always lead to believe that thick section cast iron should be preheated, maintaining an interpass temperature of 400°F and depending on the depth of the area welded, to post weld heat treatment (normalization) to prevent inter-granular cracking in the heat effected zone. Maybe this occured to the innitial re pair? Welding of cast iron that is under a tension application, is difficult at best.....Just asking....
BOB RENTON

I think you are spot on. Block by rights should have gone in an oven but due to being assembled repair methods far more limited. They used torches to heat before and after best they could but no question it is a compromised area which we all knew going into it. All that being said I intended to support with a torque rod after repair which I never did and on top of that I showed car no mercy and it held up two seasons.
 
According to the Certanium web site, this material, 889SP 1/8" and 516" has been discontinued.....is there an alternate? I was always lead to believe that thick section cast iron should be preheated, maintaining an interpass temperature of 400°F and depending on the depth of the area welded, to post weld heat treatment (normalization) to prevent inter-granular cracking in the heat effected zone. Maybe this occured to the innitial re pair? Welding of cast iron that is under a tension application, is difficult at best.....Just asking....
BOB RENTON
I also picked up a lb. of high % nickel rod from Airweld, but I haven't tried it yet. Pricey at $40 a lb
 
Last edited:
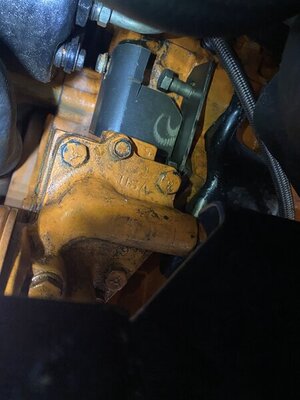
I’ve been brain storming and I think I’ve decided on what I’m going to do and I might get picked on because it is a little bit on the hack side. I want to weld the engine support right to the broken ear. I know welding steel to cast iron isn’t ideal but if I can get a decently strong weld I won’t have to pull motor to repair. I’ve also ordered a universal torque rod to bolt to the engine to add support.

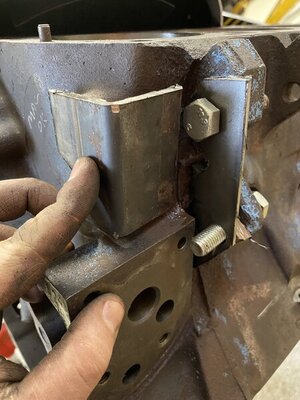
brainstorming a less hack approach fabricate a bracket to pick up empty threaded boss top engine mount ear and tie it into bottom broken ear

4D13A1C0-CCC7-4AAF-BD98-7151DF9FEA92.jpeg F268112C-08F5-4FE6-9D3C-001812E78D20.jpeg
 
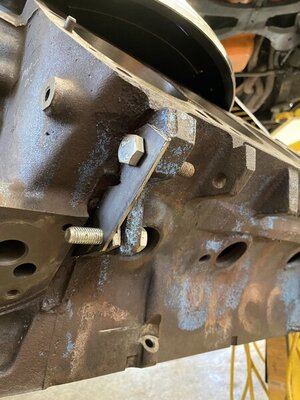
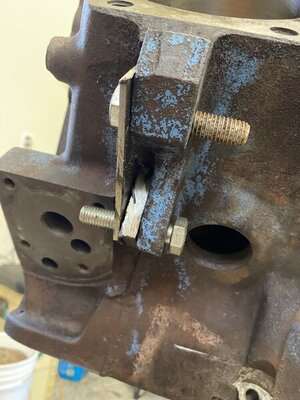
Made a prototype this morning. Thinking this will do the trick and I will weld my torque rod right to the Center of bracket after putting some preload on it. May fab a piece like I mentioned earlier to the bracket into front of block via that empty threaded boss.

C831E00E-5ECD-4436-84F1-75D3F6F9908A.jpeg 82D97FE7-031E-4689-93B0-2ABACFE14C6F.jpeg
 
I've always chained them to the top open hole behind the p/s pump.
It's a fairly uncomplicated issue.
 
Thinking something like that to add some more rigidity.

View attachment 1242757

IMO....it's not so much the shape, but the depth of the section or thickness of the plate that is between the mounting bolt holes. The thicker the section would reduce the bending moment between the bolt centers....just my opinion of course.
BOB RENTON
 
Jmo, but I think the solid motor mount is the cause, or just not helping. I think some cushioning from rubber, or poly would help, plus the fixes that you have planned, plus an engine strap.
 
I've always chained them to the top open hole behind the p/s pump.
It's a fairly uncomplicated issue.

You’re probably not wrong a chain alone would likely be sufficient. But I certainly don’t think reinforcing compromised ears that locate the engine in the engine bay is complicated. But I can tell you from experience if that area explodes again it will get complicated.
 
IMO....it's not so much the shape, but the depth of the section or thickness of the plate that is between the mounting bolt holes. The thicker the section would reduce the bending moment between the bolt centers....just my opinion of course.
BOB RENTON

my thought with that piece is it would help with any twisting motion and distribute across the two mounting points instead of one.
 
Jmo, but I think the solid motor mount is the cause, or just not helping. I think some cushioning from rubber, or poly would help, plus the fixes that you have planned, plus an engine strap.

I agree with you 100% I broke a couple sets of rubber mounts that’s why I went solid but poly may be a good idea I will look into it.
 
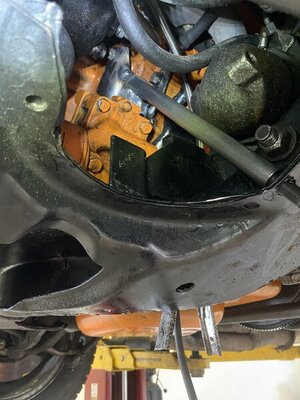
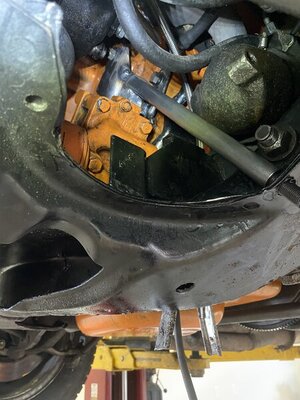
Final mock up. Welder is on a job site so that’s it for now but I’m happy with that will tack it in place, take it off weld it up and hit it with paint. Essentially a bolt on replacement lower ear.
 
Make sure you test fit with oil pump installed
 
Make sure you test fit with oil pump installed

yes good thought as I was going I did hold pieces against engine in car to look for other interference problems such as oil pump. It is going to be a bit of a pig to wiggle in place with the power steering and the lower ear bolt will also be tight for clearance against oil pump but other than that looking good.
 
Auto Transport Service
Back
Top