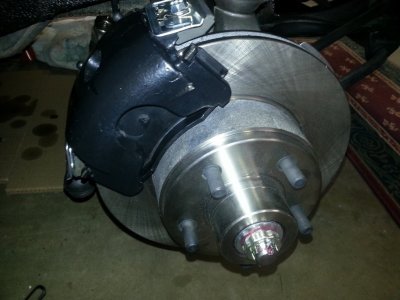
Actually I am lucky that the local O'Rielly has a motorhead that loves his slant 6 Valiant. Dr Diff says correct bearings, so I will proceed.I'd take the rotor to a parts store. Tell them to pull up a rotor bearing for a 73-76 A body, like Duster, Scamp, etc. See if the bearing(s) you need fits. Hopefully, you don't get a punk kid who looks at you like you have a third eye when you say "Plymouth".
You are using an out of date browser. It may not display this or other websites correctly.
You should upgrade or use an alternative browser.
You should upgrade or use an alternative browser.
Dr Diff front disc conversion 68 Road Runner
- Thread starter Billccm
- Start date
That makes sense. In fact, I might have done that with mine but it's been a while. Alzheimers  If you punch the races out, I'd use a brass punch so you don't slip and nick up the inside
 If you punch the races out, I'd use a brass punch so you don't slip and nick up the inside
Still confused.
Do I have to drive the race out to use this bearing?
Follow what Cass says. You should have other races with your kit. You can if you want. Either bearing or race, something will have to be changed
I just got back from my local, friendly brake shop. I have a friend of a friend that works there (Chevy motorhead, but great guy).
He went back and exchanged the races. When I said what do I owe, his reply was "$500, but I will collect next week". I pulled a ten dollar bill out and handed it to him. He seemed happy with that.
Passenger side rotor is on; driver side may wait until I get my brake lines to allow easier access.
Hopefully I'll get the caliper on tomorrow and test fit. So far, life is good.
Is this the correct line for the rear? They mention the TEE as if it's something I need to buy, but I assume it's compatible with the TEE I have now?
http://www.ebay.com/itm/66-69-Mopar...c6e27119d:g:XPkAAOxyOM5Rbcj8&vxp=mtr#shpCntId
http://www.ebay.com/itm/66-69-Mopar...c6e27119d:g:XPkAAOxyOM5Rbcj8&vxp=mtr#shpCntId
Is this the correct line for the rear? They mention the TEE as if it's something I need to buy, but I assume it's compatible with the TEE I have now?
http://www.ebay.com/itm/66-69-Mopar-B-body-Rear-Drum-Brake-Rubber-Flex-Hose-Axle-Line-Tube-Tee-H610-1p-/190826615197?fits=Year:1968|Makelymouth|Model:Roadrunner|Submodel:Base&hash=item2c6e27119d:g:XPkAAOxyOM5Rbcj8&vxp=mtr#shpCntId
When you click on the link, and you start to scroll down, it shows a brass fitting as a "suggestion" to buy as well. That's the "Tee". Yes, it's the same as what's on the rear end housing. Do you need to change it, no. Should you, up to you. Be careful when you take apart the lines from the tee, simply because it is brass. Looking at the tee, you'll see a large "pin". That is simply to hold it into the rear housing and simply pulls right up and out and the "tee" is free. Disconnect the lines first. When you have the "tee" fitting off the rear, inspect it for any kind of damage in the threads. If damaged, replace.
The "pin" that holds the tee onto the rear end is a vent and it's threaded in. You can't pull it off.When you click on the link, and you start to scroll down, it shows a brass fitting as a "suggestion" to buy as well. That's the "Tee". Yes, it's the same as what's on the rear end housing. Do you need to change it, no. Should you, up to you. Be careful when you take apart the lines from the tee, simply because it is brass. Looking at the tee, you'll see a large "pin". That is simply to hold it into the rear housing and simply pulls right up and out and the "tee" is free. Disconnect the lines first. When you have the "tee" fitting off the rear, inspect it for any kind of damage in the threads. If damaged, replace.
The "pin" that holds the tee onto the rear end is a vent and it's threaded in. You can't pull it off.
You are correct, Fran. I had a brain fart
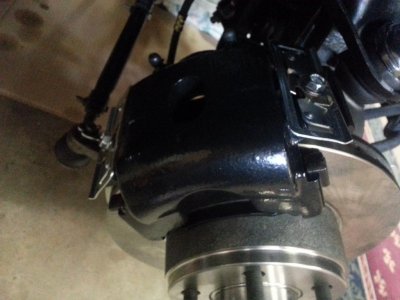
Although I did not plan on wrenching on the Road Runner this weekend, I could not keep away from the car. My In Line Tube order arrived today, and I had to at least try to finish off the passenger side.
Routed and contorted and contorted some more the brake line that runs across the firewall to the passenger caliper. Went easier than I thought (finally something to do on this car that does not take hours and hours).
Ran into a small delay getting the rubber hose to seat into the clip mount at the frame. When I took the drums off, there was no clip on this side for the rubber hose. Didn't give it much thought at the time. Now I know why there was no clip. The mount tab at the frame was slightly bent such that the hose would not seat into the mount. I took a LARGE vise grip and just kept clamping the tab to get it as flat and planar as possible. This worked to an extent as the hose would seat, but a slight wave in the tab made placing the clip on the hose slot impossible. Took a small solder assembly bench vise and clamped/squeezed/pressed some more. Finally got the clip on.
Followed In Line Tubes instructions on seating the line nut to the hose.
The passenger side disc conversion is now complete!
Have other commitments this weekend and my other vehicle needs some maintenance (Grand Marquise), so no more MOPAR wrenching for me until next weekend (unless I find a few minutes here and there to bench bleed the master cylinder).
Wish me luck. Next step is complete the drivers side conversion. Then porpotioning block mounting and master cylinder install. Last step is replace lines to the rear, and install new Raybestos wheel cylinders.
Thanks for listening! Have a great weekend.
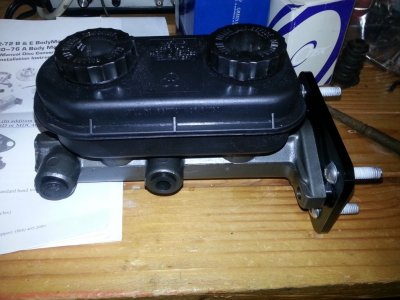
Anyone ever decode, or make notation of the Dr Diff kit? I've collected all of the part numbers from boxes, or the parts themselves (see below). The master cylinder is a mystery; Google, eBay, rockauto, etc no cross reference? Hopefully it will last many years, but down the road what would I ask for in a replacement master cylinder?
Part Name: Brand: Part Number:
Proportioning Block MBM PV6070
Master Cylinder Sanyco 6E23R
Spindles MBM 2627
Rotors Professional SB-7032
PS Caliper MBM 184144S
DS Caliper MBM 184145S
Part Name: Brand: Part Number:
Proportioning Block MBM PV6070
Master Cylinder Sanyco 6E23R
Spindles MBM 2627
Rotors Professional SB-7032
PS Caliper MBM 184144S
DS Caliper MBM 184145S
When it craps out you can pull it apart and measure the bore.
Another option is buy another master from Dr Diff and double bag it with desiccant inside. I can spend your money pretty good.
You could buy another master cylinder from Dr. Diff and double ziplock bag it with desiccant inside. I can spend your money pretty good!
Don't do like I did put a new drum brake master I removed from my Dodge when I changed to disc's. Put it someplace and couldn't find it when the master crapped on my drum brake Plymouth.
Don't do like I did put a new drum brake master I removed from my Dodge when I changed to disc's. Put it someplace and couldn't find it when the master crapped on my drum brake Plymouth.
So I was contemplating a way to reinstall the master cylinder rod boot. I emailed Dr Diff, and he basically said he never uses the dust boot, and I might get a universal one from Mancini Racing if I really desire using a boot.
The original boot looks really nice, but not sure I can use it with the adapter plate for the new master cylinder?
Anyone out there use the boot?
The original boot looks really nice, but not sure I can use it with the adapter plate for the new master cylinder?
Anyone out there use the boot?
Similar threads
- Replies
- 20
- Views
- 2K
- Replies
- 25
- Views
- 964
- Replies
- 15
- Views
- 2K
- Replies
- 11
- Views
- 282
- Replies
- 18
- Views
- 857


