• When you click on links to various merchants on this site and make a purchase, this can result in this site earning a commission. Affiliate programs and affiliations include, but are not limited to, the eBay Partner Network.

Fiberglass goodies

The latches I actually bought have rivets instead of the screws shown.. Just sayin
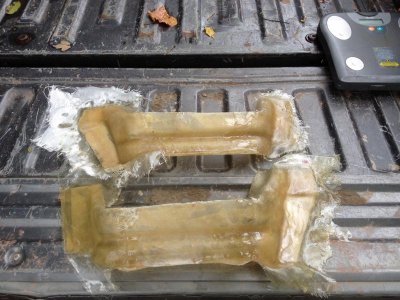
 
Went from 24lb steel bumper and 8lb brackets to 3.5 lb fiberglass (total bumper and brackets). 47 lb steel deck lid to 17 lb. so we're looking at about 60lb savings. Not bad.

Best part of this process is my hinges were not in the stock location plus my steel bumper wasn't even good for a core, so I saved weight and probably about $1000 in chrome bumper and having the hinges relocated.

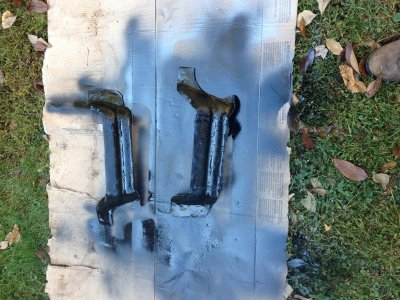
Here's a pic of the hinges. Just reinforced the brackets with 2 more layers of glass and gusseted those small tabs for rigidity. Should be a final trim, prime, paint and mount tomorrow.

You can see I went too heavy on the resin, but pretty pleased considering it's my 2nd time glassing anything. Fun little project.

As ed china would say, a 'Top Tip' is to avoid that cheap glass mat that is not woven. go for the woven matt - heavier and MUCH easier to deal with. Far superior finished product for a knucklehead like myself, far stronger and much faster as it just lays down nice and easy instead of the cottonball crap that keeps sticking to the gloves and pulling up every time you touch it.

image.jpg
 
60 LBS. Huh?
 

Attachments

  • GearsGIF.gif
    GearsGIF.gif
    86.6 KB · Views: 372
60 LBS. Huh?

Yep. I figure I took 60 lb off the rear then this winter I'll relocate the battery, putting most of that right back. You should consider it, heck soon as I sell my steel deck lid this whole job becomes free.

- - - Updated - - -

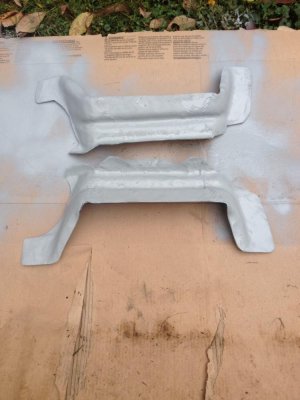
Here's my brackets - ready to install. definitely not going to be confused with professional pieces, but they won't be visible anyway. I have to say I have a lot more confidence now to make some fiberglass kick panels to better incorporate my speakers and I will definitely try my hand at the front bumper brackets.

image.jpg

- - - Updated - - -

Here's a better pic in primer.

image.jpg
 
Went from 24lb steel bumper and 8lb brackets to 3.5 lb fiberglass (total bumper and brackets). 47 lb steel deck lid to 17 lb. so we're looking at about 60lb savings. Not bad.

Best part of this process is my hinges were not in the stock location plus my steel bumper wasn't even good for a core, so I saved weight and probably about $1000 in chrome bumper and having the hinges relocated.

Here's a pic of the hinges. Just reinforced the brackets with 2 more layers of glass and gusseted those small tabs for rigidity. Should be a final trim, prime, paint and mount tomorrow.

You can see I went too heavy on the resin, but pretty pleased considering it's my 2nd time glassing anything. Fun little project.

As ed china would say, a 'Top Tip' is to avoid that cheap glass mat that is not woven. go for the woven matt - heavier and MUCH easier to deal with. Far superior finished product for a knucklehead like myself, far stronger and much faster as it just lays down nice and easy instead of the cottonball crap that keeps sticking to the gloves and pulling up every time you touch it.

View attachment 213820

You're actually better off strength wise if you use both. The woven roving should be sandwiched between layers of matting. You're right, a little heavy on the resin. Resin adds weight, but no strength, so soaking off the extra would help. You can use paper towels to absorb the excess, a fiberglass roller helps with that.

Great job though, I thought of exactly the same thing. With chrome paint, it would look original.

Paper towels. DOH. The whole time I'm trying to squeegee the excess off with my fingers. Never occurred to me to use the quicker picker upper. Thanks for the tip.

Huh, never knew there was such thing as a fiberglass roller...

- - - Updated - - -

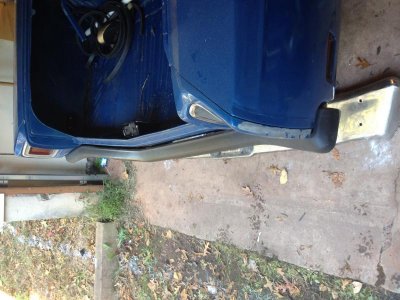
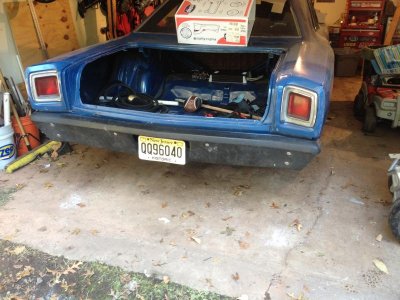
Done. The fit is better than I dared hope. The gap is tighter than my OEM bumper and nice and even. For now I'll just leave the gel coat until the new garage is done and I can find some room to spray it.


image.jpgimage.jpg
 
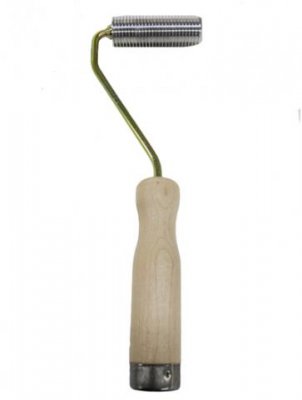
Here's a picture of a fiberglass roller. It's like a paint roller, but instead of a foam or woolen roller, it's aluminum with slots machined in. It's great for both pressing out air bubbles, and ensuring good contact of the matting against the next layer. It's easy to wash off with acetone once you're finished. A quick search on Amazon will get you one.

roller.jpg
 
Here's a picture of a fiberglass roller. It's like a paint roller, but instead of a foam or woolen roller, it's aluminum with slots machined in. It's great for both pressing out air bubbles, and ensuring good contact of the matting against the next layer. It's easy to wash off with acetone once you're finished. A quick search on Amazon will get you one.

View attachment 214056
Lol everything I know about fiberglass work I've leaned from Ed China and some of the other car flipping shows. I've seen them use a roller before but in my idiocy it just looked like a painters roller with Saran Wrap on it. No idea where I go that idea but I tried it and (for me at least) it was a disaster.

I just thought I was terrible at it. Well, I am , but I thought the roller proved I was terrible-er.
 
the dietary "shrinking her *** weight" project looks great so far
keep it up, we're having fun now...LOL
 
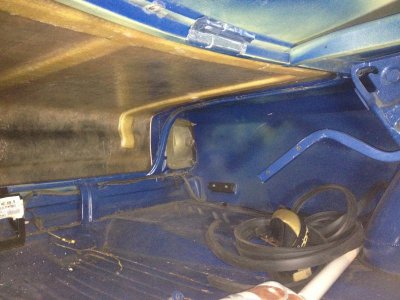
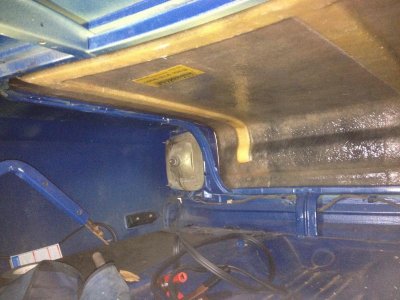
Okey dokey gentlemen. Question for ya's. So I pulled the rear seat back to get a look at what I'm up against. Looks like the weather strip and rain channel run down and away from the deck lid toward the rear of the car. You guys see any way to get the deck lid weather tight?

Looks to me like a weather tight trunk is a thing of the past. Well, since I never installed the weather seal, technically the trunk was never weather proof. But now the hope of a weather tight trunk in the future is a thing of the past.

image.jpgimage.jpg
 
Okey dokey gentlemen. Question for ya's. So I pulled the rear seat back to get a look at what I'm up against. Looks like the weather strip and rain channel run down and away from the deck lid toward the rear of the car. You guys see any way to get the deck lid weather tight?

Looks to me like a weather tight trunk is a thing of the past. Well, since I never installed the weather seal, technically the trunk was never weather proof. But now the hope of a weather tight trunk in the future is a thing of the past.

View attachment 214348View attachment 214349

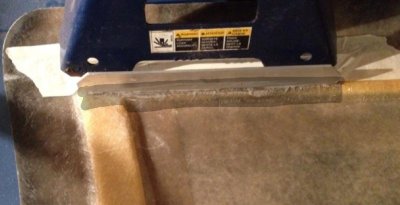
Hard to see in the picture, but how about contouring a piece of closed cell foam to the deck lid to take up the additional space?
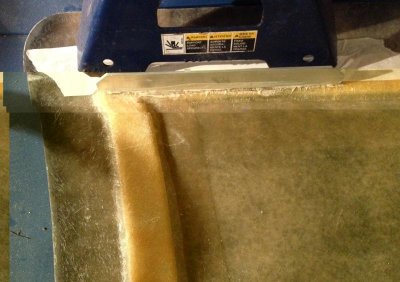
 
Hard to see in the picture, but how about contouring a piece of closed cell foam to the deck lid to take up the additional space?


Hmmmmmm. Then I glass it in place. Good work!
 
Ok, got the hinge brackets set with adhesive. I went with aluminum brackets because the coefficient of thermal expansion of AL is much closer to the fiberglass than steel is, so I figured there would be less chance of issue later on.

I scuffed the contact surface of the fiberglass and brackets and am using jack stands to help set them in place.

Hey, I was thinking of just leaving the brackets as is, and not glassing over them. Good idea?

image.jpg
 
I think if you do glass over them, I'd suggest epoxy resin instead of regular polyurethane resin. It'll stick a lot better to metal, worth the much higher price.
 
I think if you do glass over them, I'd suggest epoxy resin instead of regular polyurethane resin. It'll stick a lot better to metal, worth the much higher price.

Thanks, photon, if I go that way, I'll be sure to use the epoxy. What do you think, should I even bother? that adhesive is pretty strong stuff, I bet it'd delaminate the fiberglass if I tried hard enough to separate them.

I was thinking that if I do it, I'll just lap a small fiberglass strip onto the aluminum angle to help absorbed any pulling on that end like in the picture below. Maybe I'm just creating unnecessary work.

image.jpg

- - - Updated - - -

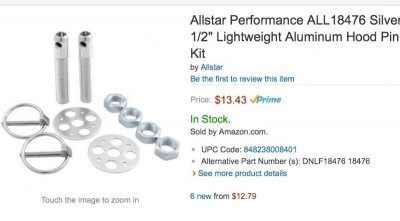
Well, I received the sliding clevis pins and I have to say - I've NEVER bought a cheaper piece of anything in my life. I tried to avoid the cheap stuff too and ended up buying overpriced cheap stuff instead.

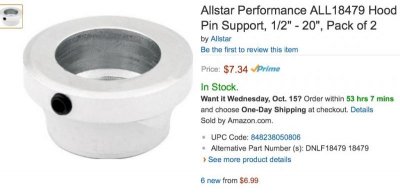
So I decided to go with these pieces from allstar performance instead. Simpler pieces that should be pretty hard to mess up (we'll see!). I'm sick of the traditional hairpin look so this should freshen it up a bit without breaking the bank...

the pins are gun drilled aluminum. For extra lightness lol.

image.jpg


They even sell these cool spacers to replace the heater hose we all use. I sure will miss my 2 year old grabbing the heater hose spacers and chucking them into the woods.

image.jpg
 
Looky looky, she done. Have a little massaging to do but it's bolted on and functional.

image.jpg
image.jpg
 
Last edited:
Auto Transport Service
Back
Top