You are using an out of date browser. It may not display this or other websites correctly.
You should upgrade or use an alternative browser.
You should upgrade or use an alternative browser.
Finally...........
- Thread starter Joe Mopar
- Start date
Joe Mopar
Well-Known Member
Thank You, Thank You, Thank You. Well I can put that question to rest.
toniflexen
Well-Known Member
- Local time
- 11:42 PM
- Joined
- Sep 2, 2008
- Messages
- 230
- Reaction score
- 32
- Location
- Gifhorn / Germany (Schland)
holy ****, it looks amazing! wow!
SUPERSTOCKRACER
Well-Known Member
JOE, heres some inspirational pictures for your interior.It feels so good when you start seeing everything come together.good luck.
Attachments
Joe Mopar
Well-Known Member
Inspiration? Yeah I can use some of that. Your cars looking good. Same seats as what I have and looks to be the same color interior.
I know you have several cars, but which one is this that you're doing the interior in?
I know you have several cars, but which one is this that you're doing the interior in?
Joe Mopar
Well-Known Member
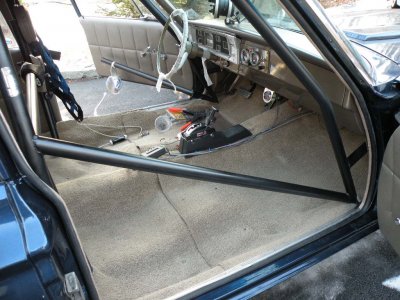
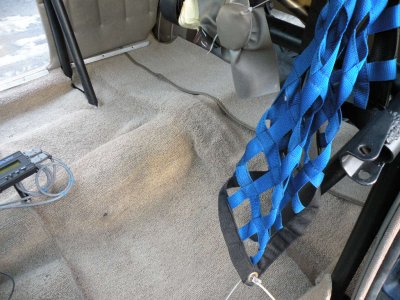
Just thought I'd post a few pictures of the progress.
I put down a couple of coats of bed liner on the floor over the weekend.


Today after work I started to put down the Fatmat.


I put down a couple of coats of bed liner on the floor over the weekend.
Today after work I started to put down the Fatmat.
Joe Mopar
Well-Known Member
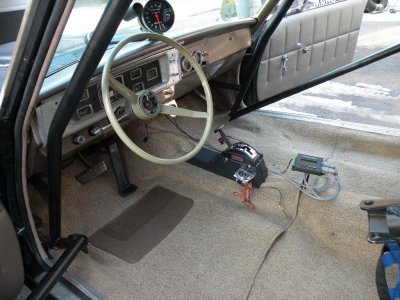
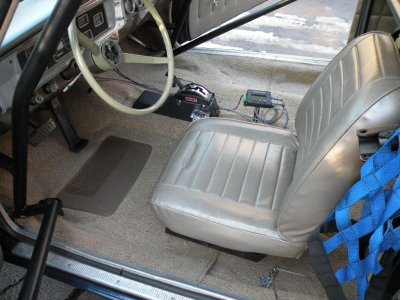
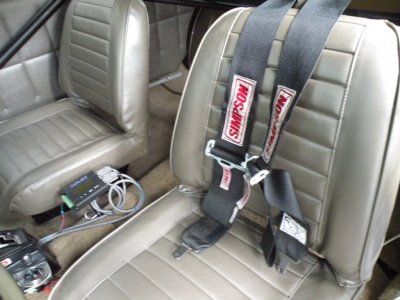
Well today I worked on putting in the carpet and installing the bucket seats back in.


Next on my to do list will be to start putting the dash back together and getting that installed back in. Please pray for me. :icon_axe:
Next on my to do list will be to start putting the dash back together and getting that installed back in. Please pray for me. :icon_axe:
Basoline
Well-Known Member
Looking good! Wouldn't it be easier to install the dash first and then the interior?
Joe Mopar
Well-Known Member
Looking good! Wouldn't it be easier to install the dash first and then the interior?
Hey Basoline not really sure but I guess I'll find out. The reason I did it this way is I just repainted all the dash and interior trim and had all the bezels redone so I didn't want to take a chance of scratching it putting the carpet in after. I'm thinking it shouldn't be to bad this way. I hope!
Joe Mopar
Well-Known Member
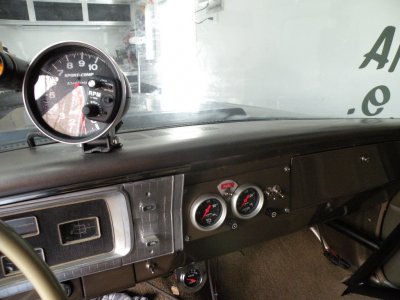
Well today I started cleaning up the under dash wiring harness. Wiped all the wires down with Armor All and cleaned up all the connections.
Then I noticed how tarnished and crud in the fuse box and figured if I didn't do something with it now it would come back to haunt me. I pulled the fuse holders out of the box and cleaned up all the fuse contact points using an emory board and a small round file from a dremel tool. Took a while but it would have taken much longer there were problems after the fact.


After placing the harness into the dash I reconnected the switches, speaker, defroster vents, radio and such.


G-Car sure did a nice job with the bezels and gauges. Tomorrow I'll try to button up the wiring and not sure if I'll place it in the car yet. I'm waiting on a replacement glove box, so I may wait till I have everything mounted.
But there's plenty more to work on. LOL
Then I noticed how tarnished and crud in the fuse box and figured if I didn't do something with it now it would come back to haunt me. I pulled the fuse holders out of the box and cleaned up all the fuse contact points using an emory board and a small round file from a dremel tool. Took a while but it would have taken much longer there were problems after the fact.
After placing the harness into the dash I reconnected the switches, speaker, defroster vents, radio and such.
G-Car sure did a nice job with the bezels and gauges. Tomorrow I'll try to button up the wiring and not sure if I'll place it in the car yet. I'm waiting on a replacement glove box, so I may wait till I have everything mounted.
But there's plenty more to work on. LOL
SUPERSTOCKRACER
Well-Known Member
that looks fantastic Joe. Your doing a great job. Mine is a 65 plymouth Belvedere Super Stocker.
Did you get the dash in yet?
If I'm a betting man, you'll need to remove the seats to get under the dash to install. GREAT JOB .
Did you get the dash in yet?
If I'm a betting man, you'll need to remove the seats to get under the dash to install. GREAT JOB .
Attachments
383man
Well-Known Member
Joe that looks awesome ! You will be so happy as the attention these 62 to 65 Mopars get is unreal and when they look as good as yours it will draw a crowd every time you pull up anywhere. It will pay off in the end as its the greatest feeling driving around in our Mopars and when they look as good as yours its an even better feeling. Ron

Joe Mopar
Well-Known Member
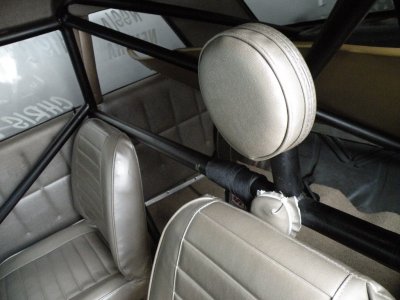
Hey Chris I know you have way more experience than I do with these cars. I thought of the installation of the dash before I put the seats in and it looked to me like it would go in. I hope I was right , but if I have to pull a seat or two to get it in there then so be it. I'll know better the next time. Looks like we have the same seats, I'm jealous though I wish I had the head rest ( without the roll cage ).:icon_axe:
Oh to answer your question I didn't get the dash in yet, waiting on a couple of parts and yesterday I had to put brakes and give a little attention to my truck. Also have a little more work on the wiring, trying to get as much of that straightened out before the dash goes in so I don't have to be a contortionist to get under the dash. :eusa_boohoo:
Thanks Ron for the compliments on the 440. Your car looks awesome as well and I like the red. I'm looking forward to going to a few shows this summer.
SUPERSTOCKRACER
Well-Known Member
Hey Chris I know you have way more experience than I do with these cars. I thought of the installation of the dash before I put the seats in and it looked to me like it would go in. I hope I was right , but if I have to pull a seat or two to get it in there then so be it. I'll know better the next time. Looks like we have the same seats, I'm jealous though I wish I had the head rest ( without the roll cage ).:icon_axe:
Oh to answer your question I didn't get the dash in yet, waiting on a couple of parts and yesterday I had to put brakes and give a little attention to my truck. Also have a little more work on the wiring, trying to get as much of that straightened out before the dash goes in so I don't have to be a contortionist to get under the dash. :eusa_boohoo:
Thanks Ron for the compliments on the 440. Your car looks awesome as well and I like the red. I'm looking forward to going to a few shows this summer.
Joe just saw you are from Danbury. We live very close to each other.
Joe Mopar
Well-Known Member
Joe just saw you are from Danbury. We live very close to each other.
Yes we do.
Joe Mopar
Well-Known Member
If I'm a betting man, you'll need to remove the seats to get under the dash to install. GREAT JOB .
Well Chris I got the dash installed back into the car no problems with the seats in place but having the room to lay down to reach up under there to make connections was another story.
I ended up taking out the drivers seat. :bootyshake:
Joe Mopar
Well-Known Member
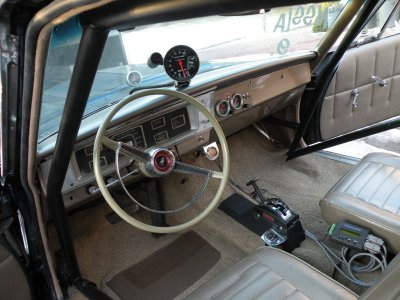
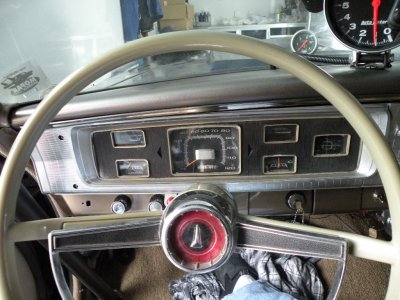
Well I installed the dash back into the car and made all the connections underneath.


The horn ring still needs to be cleaned up from being at the body shop, but I'd like to change it out for a nicer one. So if anyone has one they don't need I'd be interested. Maybe I'll just leave it till next winter and see if I can send it out to someone to be redone.
The horn ring still needs to be cleaned up from being at the body shop, but I'd like to change it out for a nicer one. So if anyone has one they don't need I'd be interested. Maybe I'll just leave it till next winter and see if I can send it out to someone to be redone.
Similar threads
- Replies
- 16
- Views
- 459
- Replies
- 10
- Views
- 1K
- Replies
- 5
- Views
- 959
- Replies
- 29
- Views
- 1K


