• When you click on links to various merchants on this site and make a purchase, this can result in this site earning a commission. Affiliate programs and affiliations include, but are not limited to, the eBay Partner Network.

Hawk-Rod: The Restoration

I'd love to meet you for a beer and check out that car Hawk, I'd bring the wife and kids along to see too. Let me know when the time comes and where ever the journey leads you near here.

The Cards in town 1-9 and 21 - 27 Sep if you stay overnight and want to see a game or whatever.
 
I'd love to meet you for a beer and check out that car Hawk, I'd bring the wife and kids along to see too. Let me know when the time comes and where ever the journey leads you near here.

The Cards in town 1-9 and 21 - 27 Sep if you stay overnight and want to see a game or whatever.

Sounds great. When the time gets closer, I am going to revive my "Hawk's Bucket List Drive" thread and post more details. I am looking forward to trying to meet several FBBO members along the trip!

Hawk
 
Major Milestones Today!

I had some major milestones today. Since I got the wipers in, I was now able to get the dash in. And since the dash was in, I was able to get the K-Member in too! Wow, that's a lot, but it all kind of fell together. There is, of course, LOTS of cleanup and wiring and hose routing, etc., but the engine and dash are off my garage floor and on the car where they belong!!!

Sorry for the picture dump, but here it goes:

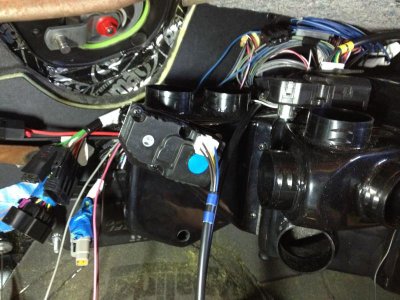
I cleaned up wiring under the dash to prepare for installing the dash.
IMG_3741.jpg

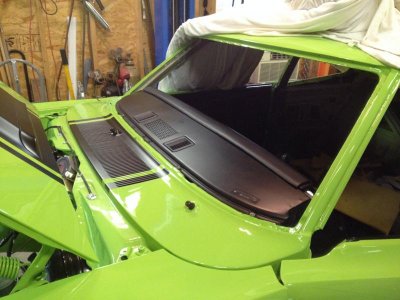
Dash installed in the car! It was actually quite easy, as we just handed it in through the windshield. The only issue with the dash is that my added-on fuse panel had a clearance issue with the heater box. I thought it had enough room but knew it would be close. I will have to improve this, but I'll save that work for another day...
IMG_3775.jpg

Dash from outside the car. Nice with some more black to contrast the green!
IMG_3776.jpg

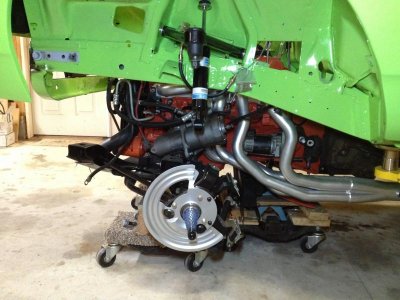
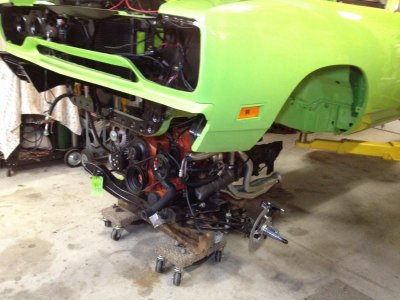
Then I figured I would get to the K-member and install that too. I won't upload TOO many pictures, but here are a few. Installing an engine from the bottom with a lift is the way to go! Very controlled, very easy (I did this part alone), and no risk of a heavy engine swinging around and damaging stuff...
IMG_3793.jpg

IMG_3799.jpg

IMG_3798.jpg

Here is the underside of the car after it was installed. Of course, I had to carefully check to be sure the car was still weighted properly on the lift (it was).
IMG_3817.jpg

Here is a shot under the hood, you can better see now how the A/C will all fit with the heater hoses. A little bit busy, but that's the best I could do here to minimize the A/C footprint. Note that my air grabber vacuum can could no longer sit in its stock location, so I moved it to just above the A/C hoses. This is close to its original position, and maybe it hides the hoses just a bit. Note that the fuel pressure regulator and pressure sensors are hidden by the engine - this is what I wanted to minimize being able to see the fuel injection stuff. I still have a lot of wiring cleanup here. I plan to wire all the new wires together with factory dry electricians tape to make it look as factory as possible. That will have to be for another day...
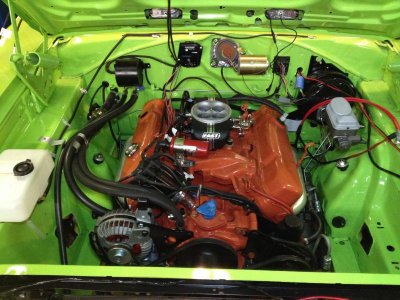
IMG_3820.jpg

OK. Now it is time for bed. It has been a long day but I am excited! Lots got done today!!! :hello2:
 
That's looking great Hawk. The black dash looks awesome against the green just as you said. The pipework under the hood is most impressive, looks very tidy, organised and professional. Well done mate.
 
What an awesome job! I can't believe how much you got accomplished in one day - and with two football games on to boot. Your dash looks great.
 
Great progress Hawk, it's coming together nicely.
 
I have done some work on under hood wiring but still have some more to go - some pictures will come when that is done.

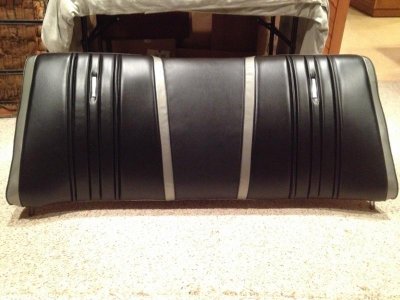
Today I instead started working on recovering the seats. Well, after quite a bit of work and the help of a friend, I (only) got the back seatback done. Let me tell you, I want to give some respect to upholsterers! It was a lot of time consuming work, but I think it turned OK for an inexperienced newbie...

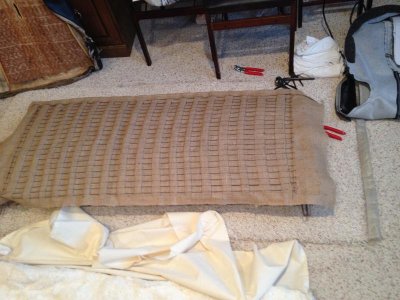
One thing that was a royal PITA was removing and rethreading all the spring steel wire into the burlap. Not hard, but it took a LONG time. Then the burlap has to be folded over and sewn over the first wire. I sewed it by hand, although I'm sure a professional upholsterer would have used an industrial sewing machine.
IMG_3836.jpg

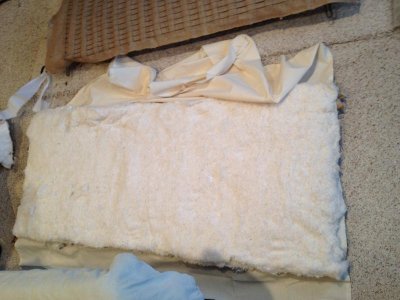
I ended up using three layers of the cotton sandwiched within the muslin to get what I believe is the correct thickness.
IMG_3838.jpg

To attach the cover, I marked the center of the top of the frame and the seat cover. I started there and then hog ringed the cover along the top out to both edges. I then attached the bottom center and worked my way out to each corner. Getting the corner of the cover over the bottom corner was not easy, but it worked fine - you just want to protect the corner of the seat cover from ripping. I finished the seat cover up by attaching the sides. A little heat treatment and I think it will look pretty good!
IMG_3843.jpg
 
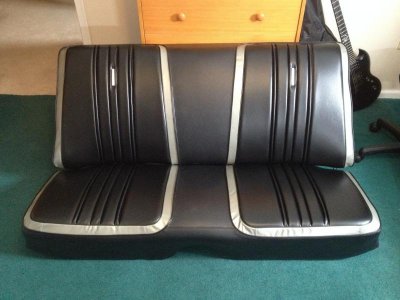
I finished the rear seat bottom. It was pretty much just like the seat back, except it uses high density foam instead of cotton. I then started on the front seat backs, and realized that I got the wrong kit from Legendary so I don't have the high density seat foam (the seat covers are correct and fine). I will have to call them on Monday and see if I can get that straightened out.

Anyway, here is a picture of the completed rear seat. Notice there are some wrinkles in the silver piping, especially on the seat bottom. However, the black vinyl is absolutely perfect, so I don't see any other way besides (carefully) using a heat gun to work some of those out. I think they will work out OK.
IMG_4016.jpg

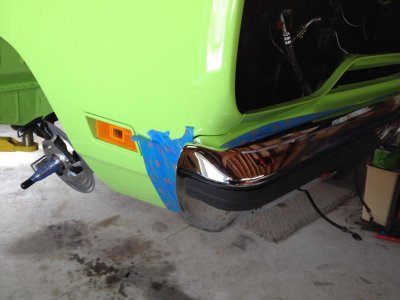
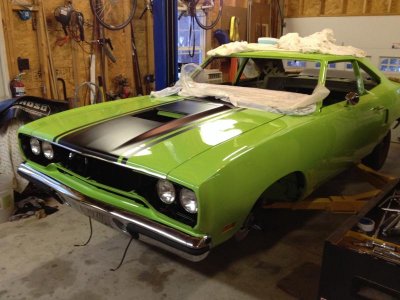
I also got the front bumper installed. This was not merely a bolt in! As you all probably know, there are a lot of things to align when bolting on a front end. When Mark came up and we installed the fenders, we got all the hood and door lines spot on. But there was nothing to guide us for the lower area where the bumper goes. Well, once the bumper got partially installed we discovered that the lower part of the body needed to move towards the passenger side. The upper part, however, needed to stay where it was. The picture below tries to illustrate what we did (this is a picture of the finished bumper). The red arrows might be a bit hard to see, but show where it needed to move:
IMG_4013b.jpg

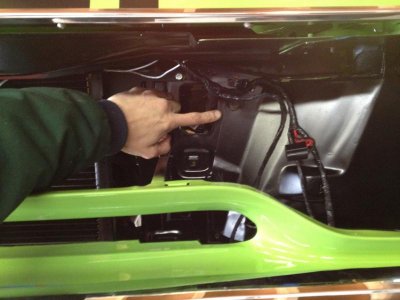
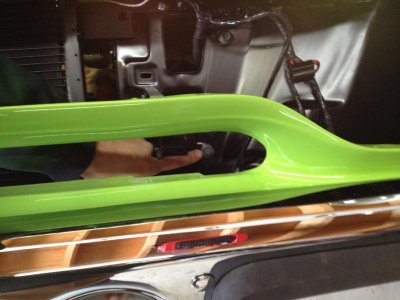
These next two pictures show the bolts that need to be loosened to move the lower part of the body. Of course - both sides need to be loosened to move it over...
IMG_4009.jpg

IMG_4010.jpg

Finally, one important thing when fitting this stuff - I taped off the painted areas with tape - I knew Mark would kill me if I screwed up the paint!!! This costs very little time and just a little bit of tape, but can do a lot to avoid dings in the paint!
IMG_4008.jpg
 
One final update before the Superbowl starts.
First, I always push safety stuff, because things can go wrong in a hurry. Do I listen to myself? NO :iamwithstupid:
I was using steel wool on my headlight bezels when I realized that they were stainless. Why not polish them? Of course, I started without my gloves on and the bezel got caught and whipped around on to my hand. OUCH! Nothing really serious, but it hurts.

Folks, wear your protective gear- it only takes a second to get hurt...
IMG_4022.jpg

OK, here are the results of the bezels - My car now has eyes!
IMG_4027.jpg
 
Last edited:
The better to see you with . . .

Great progress on the car Hawk ! ! !
 
she's coming along quite nicely!!!!


cut the very tip of my index finger off 2 weeks ago with a utility knife........ about 3/16 of an inch thick, was laying on the table like the end of a pepperoni...... ouch
 
cut the very tip of my index finger off 2 weeks ago with a utility knife........ about 3/16 of an inch thick, was laying on the table like the end of a pepperoni...... ouch

No, my injury was an ouch. Yours sounds like major screaming pain... :violent-smiley-101:

Hope all is OK...
 
Coming together real nice now Hawk, and great work on the seat covers. They look very nice.
 
Looking great Hawk, nice work. Wish I had a post lift...sigh.lol.

Thanks for the kind words.

Yes, the lift is fantastic. I got it maybe three years ago and I love it. If you are going to do a lot of work on your cars and can afford the cost and space, it is an absolutely awesome tool to have!

- - - Updated - - -

Coming together real nice now Hawk, and great work on the seat covers. They look very nice.

Thanks. The seat covers are time consuming and a bit of a pain. But once you get over the fear factor they are not too bad...

- - - Updated - - -

WOW that car is looking SO good Hawk, loved ever photo you posted. Great job on the seats, inspiring.

You have a set to work on too! Looking forward to see your progress as well!

Speaking of which, one of the things Tony and I talked about was the "smell test". In some cases, my seat foam was in OK shape. The problem was, it stunk of mice and mold. I didn't want to replace my seat covers and have them look nice but make the interior smell bad, so I replaced the foam too. I guess I could wash the foam, although the cotton padding would be tough...
 
Auto Transport Service
Back
Top