Sorry, I have not posted in a bit, but I have been making slow progress. It has been busy with family having come over, graduations and birthdays. All good stuff, but it takes away from car work.
So I polished and installed the B Pillar stainless. I also polished and installed the driver side and most of the passenger side stainless molding that sits under the drip rail. I went to install the Year One reproduction drip rail molding, and it is NOT RIGHT!!! It is missing the little turned down piece at the back window. I'm disappointed and now need to return that. I also ordered what is hopefully the correct molding.

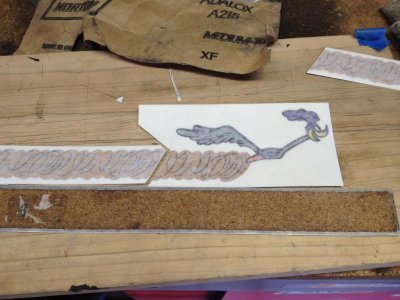
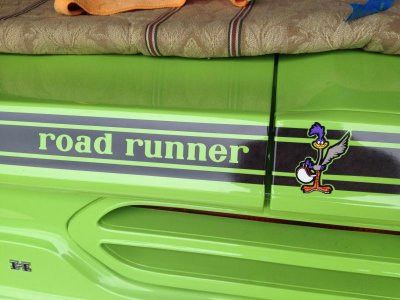
I also installed all the decals on the car except the dust trails. I'll install those this weekend. Here is what I do to install these:
(1) Measure and KNOW where they need to sit before you start ANYTHING.
(2) See step 1.
(3) Then pull off the backing off the decal and lay it upside down on a clean surface. Do not remove the top transfer layer off the decal.
(4) Spray both the sticky glue side of the decal and the body of the car with a bottle of water mix: Mix has a teaspoon full of Dawn or similar dish detergent, and about 2 teaspoons of rubbing alcohol. (If you only have regular alcohol, drink it and find some rubbing alcohol :grin . Avoid bubbles. Keep both car and decal very wet.
(5) Position the decal and slide it around to its proper position. As you get it into position, slowly start to squeegee the water out from under the decal. You have time to work so go slowly. Continue to repeatedly go over the decal and push slightly harder until you have firm pressure and have most of the water out. Also, work from the center out. There really should be no bubbles or water pockets under the decal. If there are, work them out.
(6) Walk away for a 2-3 hours.
(7) SLOWLY peel the backing away at a sharp angle to the decal.
(8) Work out any bubbles, if needed, with a pin. You shouldn't have to do this if you did step 5 well.
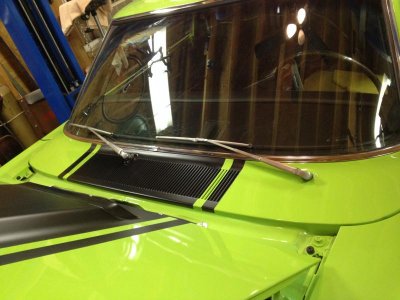
I installed the wipers. FINALLY a job that went as easily as it should have!
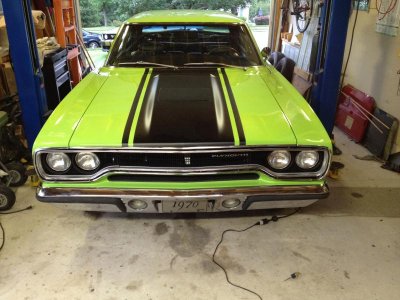
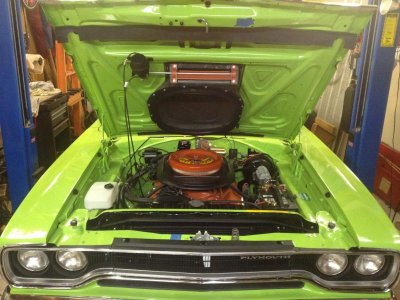
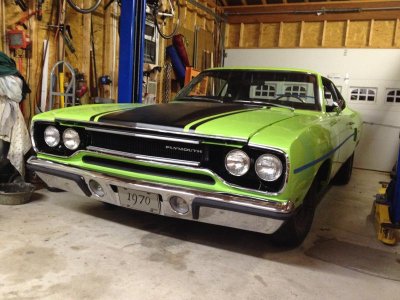
I have been working slowly on the grill, but this job has turned into a nightmare. First, cleaning up and painting the grill has been a chore. A neighbor kid helped me paint them, and he did a nice job, but mending broken parts and polishing the stainless trim has been a pain in the butt. Here is a picture with the center in (sort of) position. I also had to readjust the lower metal grill to make the opening the proper size. Finally, the headlight buckets are not centered properly. All these variables make the grill a royal PITA!!!
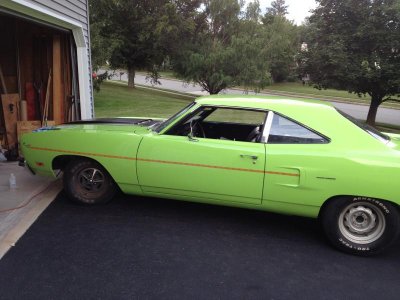
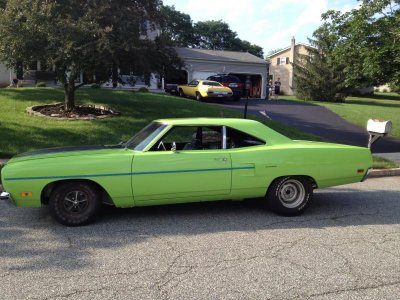
Finally, I also installed the interior kick panels, finished all under dash wiring cleanup and dress up, and installed the front seat. Sorry, no pictures of this - I guess I forgot the camera for this part, but this is pretty boring stuff. I also finally tried driving the car up and down the street slowly, and that went well. I have a video and I guess I will try posting that if you want. It is kind of boring because I took everything very S l o w to make sure there were no issues. Here is a shot of it in the street at least as proof!
So I am getting close, but I only have a couple of weeks until Carlisle. I'd say I have a 1 in 3 chance of making it, but I am sure as heck going to try - I already bought the parking pass. I just need to keep pushing and see if I can make it!
So I polished and installed the B Pillar stainless. I also polished and installed the driver side and most of the passenger side stainless molding that sits under the drip rail. I went to install the Year One reproduction drip rail molding, and it is NOT RIGHT!!! It is missing the little turned down piece at the back window. I'm disappointed and now need to return that. I also ordered what is hopefully the correct molding.

I also installed all the decals on the car except the dust trails. I'll install those this weekend. Here is what I do to install these:
(1) Measure and KNOW where they need to sit before you start ANYTHING.
(2) See step 1.
(3) Then pull off the backing off the decal and lay it upside down on a clean surface. Do not remove the top transfer layer off the decal.
(4) Spray both the sticky glue side of the decal and the body of the car with a bottle of water mix: Mix has a teaspoon full of Dawn or similar dish detergent, and about 2 teaspoons of rubbing alcohol. (If you only have regular alcohol, drink it and find some rubbing alcohol :grin
(5) Position the decal and slide it around to its proper position. As you get it into position, slowly start to squeegee the water out from under the decal. You have time to work so go slowly. Continue to repeatedly go over the decal and push slightly harder until you have firm pressure and have most of the water out. Also, work from the center out. There really should be no bubbles or water pockets under the decal. If there are, work them out.
(6) Walk away for a 2-3 hours.
(7) SLOWLY peel the backing away at a sharp angle to the decal.
(8) Work out any bubbles, if needed, with a pin. You shouldn't have to do this if you did step 5 well.

I installed the wipers. FINALLY a job that went as easily as it should have!

I have been working slowly on the grill, but this job has turned into a nightmare. First, cleaning up and painting the grill has been a chore. A neighbor kid helped me paint them, and he did a nice job, but mending broken parts and polishing the stainless trim has been a pain in the butt. Here is a picture with the center in (sort of) position. I also had to readjust the lower metal grill to make the opening the proper size. Finally, the headlight buckets are not centered properly. All these variables make the grill a royal PITA!!!

Finally, I also installed the interior kick panels, finished all under dash wiring cleanup and dress up, and installed the front seat. Sorry, no pictures of this - I guess I forgot the camera for this part, but this is pretty boring stuff. I also finally tried driving the car up and down the street slowly, and that went well. I have a video and I guess I will try posting that if you want. It is kind of boring because I took everything very S l o w to make sure there were no issues. Here is a shot of it in the street at least as proof!

So I am getting close, but I only have a couple of weeks until Carlisle. I'd say I have a 1 in 3 chance of making it, but I am sure as heck going to try - I already bought the parking pass. I just need to keep pushing and see if I can make it!


