• When you click on links to various merchants on this site and make a purchase, this can result in this site earning a commission. Affiliate programs and affiliations include, but are not limited to, the eBay Partner Network.

Is this right? Removing ball joint.

TT from NH

FBBO Gold Member
FBBO Gold Member
Local time
9:06 PM
Joined
Aug 6, 2021
Messages
177
Reaction score
109
Location
NH
I'm removing the front suspension on my 68 Coronet and have removed most everything but am struggling with removing the ball joints. I am using a heavy hammer and pickle fork to separate the ball joints from the steering knuckle and nothing seems to be moving. What am I missing? I have loosened the top 1-59/64 ball joint nut as much as possible on both sides; now they just turn but don't come out further -- are they supposed to screw off completely? The FSM simply states, "On Coronet models, remove upper ball joint nut and remove stud from steering knuckle using Tool 3954." What is Tool C-3964?

Help!

IMG_4815.jpg


IMG_4818.jpg
 
Screw the ball joint back in so you don’t damage the threads. Take that hammer in the photo and wack the hell out of the area marked with green arrow. It will drop right out
FDFCEB34-5E9E-4243-8C54-610F88C6204B.jpeg
 
A hammer in the wrong place, and heat on the wrong thing have sold lots of car parts...............
 
You started off on the wrong foot. Release the taperd stud, and then unscrew the ball joint. As noted above, the control arm is damaged.
 
Hind site is 20/20, you went about this in the wrong order. Now you're going to be replacing parts you didn't need to.
1. Loosen nut on upper balljoint under upper spindle mount. Take it out about 5 or 6 turns, enough that you can see a 3 or 4 thread gap between nut and spindle
2. Hit spindle with large hammer where it is marked by a green arrow above. The pressure of the torsion bar will separate it easily.
3. Next, repeat with lower ball joint.
It separates easily but you will need to pull down on the spindle or drum assembly to see it is separated because the torsion bar presses down on it.
4. Take the pressure off of the torsion bar by unscrewing the adjusting bolt out until the torsion bar no longer puts force onto it.
5. Remove upper and lower ball joint nuts, tie rod nut and remove the spindle and brake assembly.
6. Unscrew upper ball joint.
Yup.... that's why I've always recommended sourcing the FSM for the inexperienced.
 
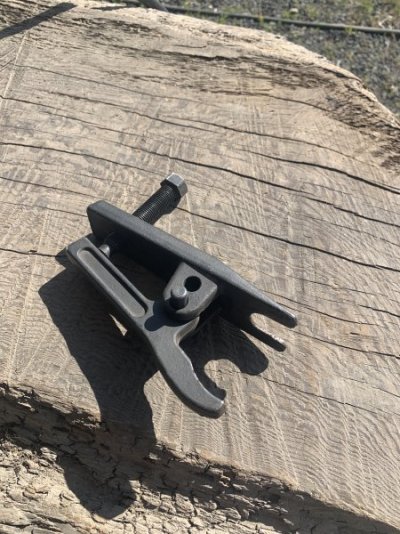
Harbor freight tool I use alot- get the pitman arm puller too.
You can tack weld those ball joints if the threads are bad, I have done it and didnt die.


image.jpg
 
Thanks everyone for your insights. The UCA was already beat up before I started (I haven't touched it except for putting the pickle fork under it and banging on it) so I appreciate knowing it needs to be replaced.
 
Since I need to replace my upper control arms, where would you recommend I shop for them? I'm guessing you all have some thoughts :)
 
Since I need to replace my upper control arms, where would you recommend I shop for them? I'm guessing you all have some thoughts :)
Many options out there both stock repops and high performance tubular adjustables. I went with QA1 tubulars on my bird. The stock design is very solid but most are made out of Chinesium theses days.
It all depends on what your end goal is and what your budget is. Do a little web surfing and you'll see what I mean.

IMG_3729.jpg
 
Okay, I figured that I needed to replace my UCAs since you all agreed that they were beat up (and I couldn't remove the large top nut holding the ball joint anyway). I tried your suggestions to remove the knuckle and spindle and gave up. Since I was replacing the UCA, I figured I'd cut the ball joint (see picture) and simply hammer out the protruding end on my workbench. IT WILL NOT COME OUT and I've hit it as hard as I could. I even drilled out the center thinking it might provide a little more give; no luck. Of course, in the process, I'm guessing that I've damaged the knuckle so now I'm looking at replacing the knuckle/spindle.

So, here I am, back for ideas. Since I'm now replacing my UCAs and knuckles/spindles -- and I'm thinking of going with front disc brakes -- what advice do you have for me? @Runner 68 , I like your look but I'm guessing the cost would essentially double the car's value; still, my birthday's coming up.... I'm looking to build a driver that I can feel safe in.

IMG_4829.jpg
 
Take the spindle off. You have to anyway.

cut the ball joint stud with the mushroomed stud even with the spindle with a sawzall.
Now turn it upside down and support the knuckle. Get some help or a big vice.

If you have a torch heat around the stud left in the tapered hole. Heat the knuckle. NOT THE STUD. Get it as hot as you can. Get the grease and rubber off as much as possible. It will catch fire.

Get a long bolt or punch close to but not as big as the ball joint stud and with a big hammer smack that sucker. Keep the punch or bolt as flat as possible/perpendicular.

You could even try an air hammer if you have the right flat tool to use. Don’t want to spread the stud in the hole like a center punch!

Chrysler and front end shops back in the day resolved the stripped control arm threads by tacking three or four welds on top. From ball joint to control arm. They didn’t lay a bead down!

The load on the front end is on the lower ball joint not the upper ball joint. That’s why the upper joints last longer. No worries about tack welding the ball joint.

But it’s your car and do what is comfortable.

Have fun.


The best way to remove was mentioned above. Loosen the nut and keep torsion bar stressed until you get it separated so it will help you. Then relieve the torsion bar screw to do the bottom joint.
 
Auto Transport Service
Back
Top