• When you click on links to various merchants on this site and make a purchase, this can result in this site earning a commission. Affiliate programs and affiliations include, but are not limited to, the eBay Partner Network.

My 1967 Belvedere Convertible Plans and Restoration (aka - Mad Scientist Build)

What can you do when it is raining . . . but spend time in the shop ! !

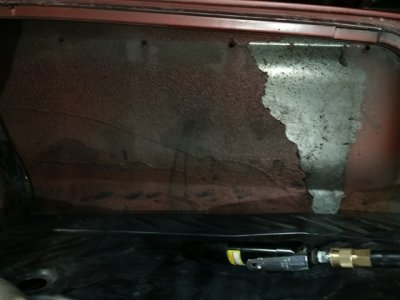
Got out to the shop this morning due to it raining here ( probably all day ) and got the last of the spot welds ground off and the last of the metal removed from the rear of the car and then thought . . . how is this going to look ? ! ? ! ?

So I was off to grab the donor panel and see what it was going to look like . . . I think I'm glad I went this route now ! ! !
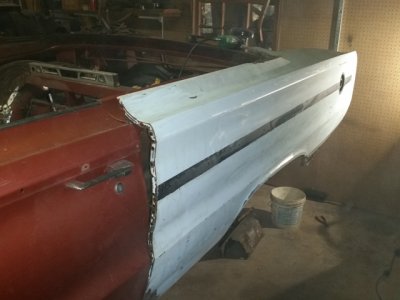
sm_panelback01.jpg

The rear of the car will be welded on the normal weld areas . . .
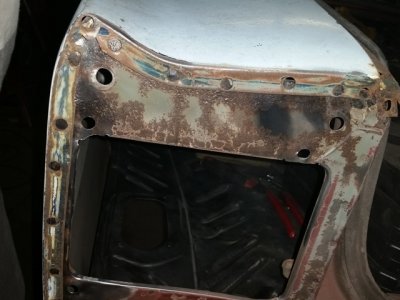
sm_panelback06.jpg

The trunk area of the car will also be able to to be welded in the normal weld areas . . .
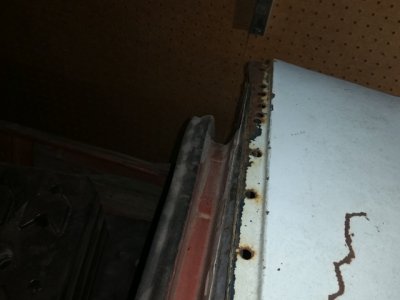
sm_panelback05.jpg

However, the difference in the top portions of the quarter will require some additional thought . . . but I think I have a plan . . .
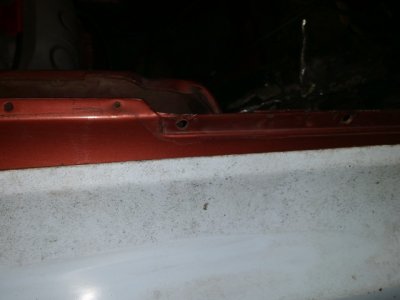
sm_panelback02.jpg

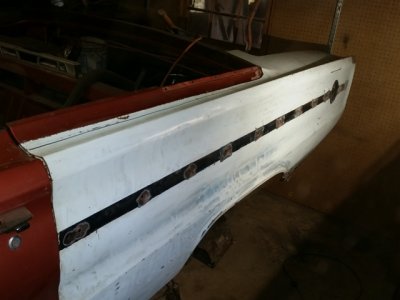
Cut it down the top of the panel on the side to keep my original top section in place . . .
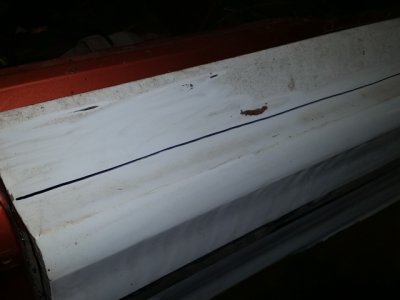
sm_panelback03.jpg

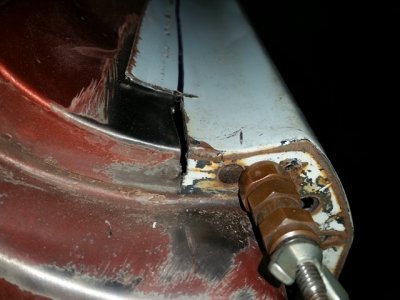
And an angled cut across the back to replace the damaged top area and lean the original top section in place . . .
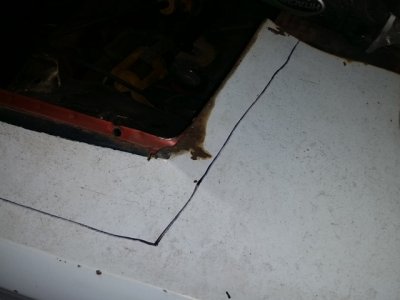
sm_panelback04.jpg

And the end result is that I will have minimal bondo in the car and a much truer, cleaner looking quarter panel as a result ! ! !

Got a lot of work ahead of me this weekend ( no tree work to get in my way ! ) . . .

After I get everything fitted and lined up, I'm going to weld up all the holes, grind them flush, and get all of this in epoxy primer before it gets put back on the car.
 
More panel progress . . .

Got the unwanted edges cut off of the donor panel and got it set in place - looking very good . . .

sm_panelback07.jpg

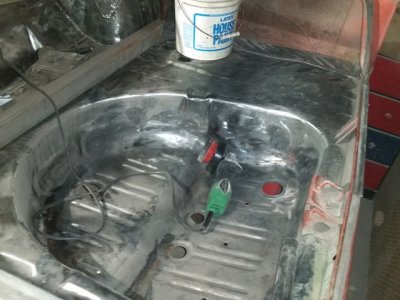
And while I got started on the cleanup of the trunk, I decided it was a good time to finish up the cleanup process . . .

sm_panelback08.jpg

Got more fitment work on the panel . . . and hole welding, and epoxy priming . . .
 
holy smokes khan that looks freaking fantastic. trunk area looks new all cleaned up. i appreciate all the guys that can do all this work, as i am not talented enough and dont have a welder and everything. talk about grabbing this by the horns. cant wait to see it next spring. once again khan-vert NICE JOB!!!!!!
 
More fitments . . .

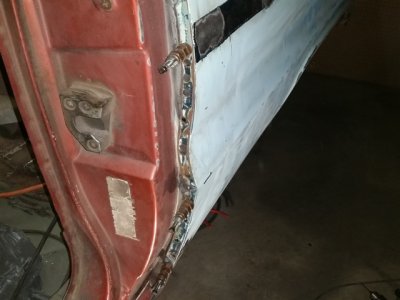
Got the panel fitment going along quite nicely . . . and I like the way it is going . . . the top trimmed and held in place with a cleco . . .

sm_panelback09.jpg

The whole front edge of the panel with clecos holding it in place

sm_panelback10.jpg

So far so good . . .
 
Looks great Kahn! I'm sure it's hard for you to step back and see how far it's come but the consistency and effort are paying off you are moving right along!!
 
Excellent. Hat's off to you pre-'68 guys. Seems just about almost all chunks of metal needing replacement either needs to be hand-fabed or taken from a donor. Lotta work! Keep it up!
 
:notworthy::notworthy::notworthy::notworthy::notworthy::notworthy::notworthy::notworthy::notworthy::notworthy::notworthy:


Excellent. Hat's off to you pre-'68 guys. Seems just about almost all chunks of metal needing replacement either needs to be hand-fabed or taken from a donor. Lotta work! Keep it up!
:iamwithstupid:
 
And now for something a little different . . .

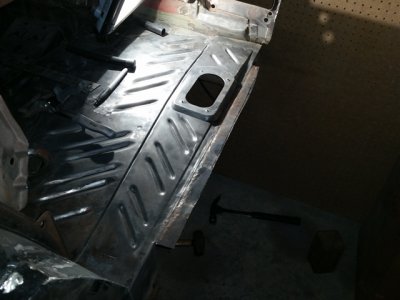
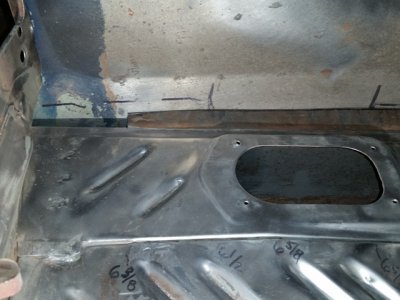
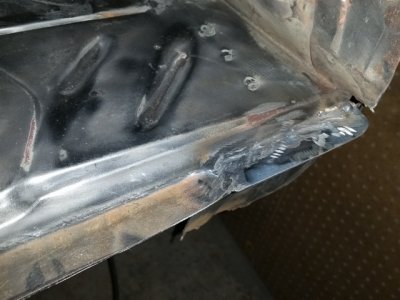
Since the bottoms of my trunk extenders were toast, and I did not like the little "pocket" that gets created when you put then in the original way, I decided it was time to "lose" the pocket and clean up the trunk - this will prevent stuff from collecting in that area, holding water, and rusting the car from the inside out . . .

So I bent the trunk extenders up, hammered them out a bit to straighten them out, marked my measurements on the metal and cut it off . . . to get this . . .

sm_panelback11.jpg

With the panel back in place, the trunk floor will extend to the quarter panel . . . ( got a small hole to fill up front )

sm_panelback12.jpg

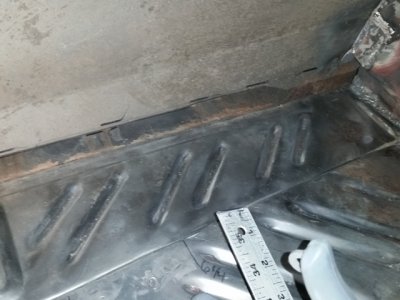
And another small area to fill at the back - this was done to leave my "true" bottom edges at front and back intact so I can match to them with the replacement panel.

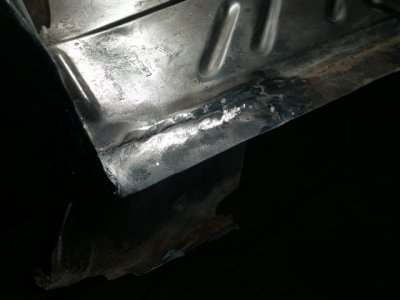
sm_panelback13.jpg

Underneath the flooring, I will put a couple gussets to help support the panels since they will be open on the inside . . .
 
Driver quarter panel work continues . . .

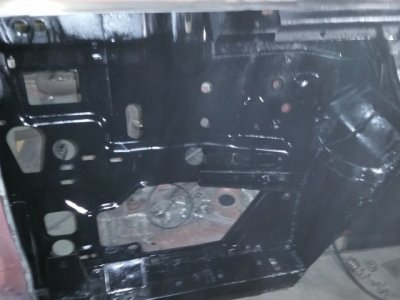
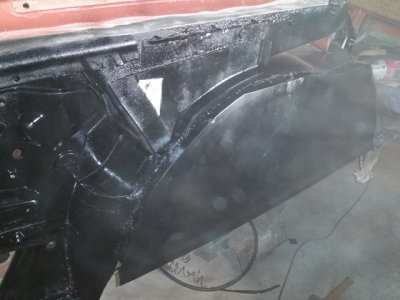
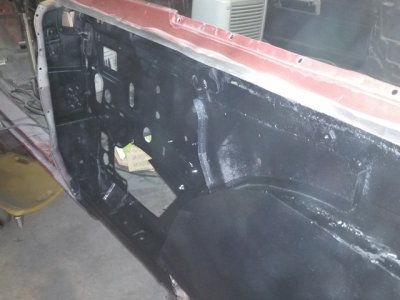
Still got some things that I need to get done to prepare for the reattachment of the quarter panel . . . while I've got the whole side of the car opened up ( and will probably never have this opportunity again ) I took the opportunity yo get some primer in these areas to help protect them from rusting . . . sure can't hurt.

First, I has a couple "open" spots on the filler in my trunk area that needed attention . . . so I patched them . . .

sm_drqtrprepwork01.jpg.sm_drqtrprepwork02.jpg

Then the primer was put into the inside of the quarters . . .

sm_drqtrprepwork03.jpg

Another view

sm_drqtrprepwork04.jpg

and another

sm_drqtrprepwork05.jpg

Want to get the inside of the quarter panel in primer too before it gets reattached . . .
 
I bet that was fun spraying in your tight confines? Looks good
 
Looks like you have a great handle on those quarters you wanna do mine for me? lol Keep up the good work.
 
Went to a local car show today . . .

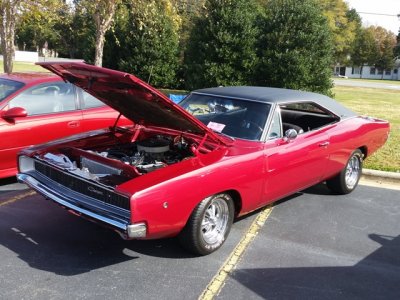
Attended a local car show with the '66 Shoe Box and saw this charger that I wanted to share with the group . . .

sm_rrcarshowcharger.jpg

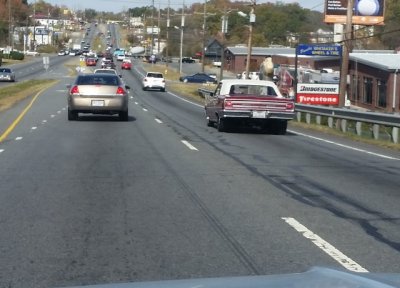
Returning from the car show I saw this car running down the road - the rear tires were HUGE . . . but this picture ( sorry ) does not really show it . . . I likey ! !

sm_rrreturningcar.jpg

- - - Updated - - -

Looks like you have a great handle on those quarters you wanna do mine for me? lol Keep up the good work.

Thanks BigBlock61 . . . you're up in my old stomping grounds . . .

Hee hee . . . I got them all fooled . . . now if I only "knew" what in the World I really was doing ? ! ? ! ? ! ? ! ( sigh )
 
Must be nice to even have a car show to go to haha, Winter is showing it's head up here and people are starting to hibernate already.:angryfire: That is one nice looking Charger though
 
Must be nice to even have a car show to go to haha, Winter is showing it's head up here and people are starting to hibernate already.:angryfire: That is one nice looking Charger though

Hey 747Mopar . . . it's a really really dark orange too . . . just the way you like it ! ! ! LMAO


( Did I mention that it is really, really dark orange ? ? ? )
 
Last edited:
Shop upgrade for lighting . . .

The shop that I have has got (2) 4' T12 Fluorescent fixtures in the ceiling, and they don't provide a whole lot of light.

I found a (4) bulb T8 fixture at one of the local chain stores, and a (4) bulb T5 fixture at the other:

The T5 is HO ( high output ) bulb, uses less electricity, and lights better . . . so the T5 was the choice . . .

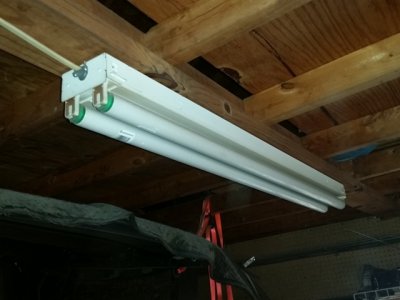
Here is the T12 fixture as it was in the shop . . .

sm_lightbefore.jpg

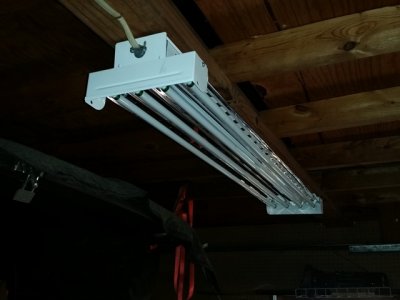
And the T5 fixture that has replace it . . .

sm_lightafter.jpg

The amount of light that is output from the T5 is night and day brighter than the T12 ! !
( night and day - get it ? ? )

Should make for working in the shop a whole lot easier to see . . . Can't wait to give it a try . . .
 
WOW . . . I really like the new shop light . . . I can see now . . .

Got back into the shop again tonight and the new shop light is fantastic ! ! What a difference to be able to see what you're working on . . .

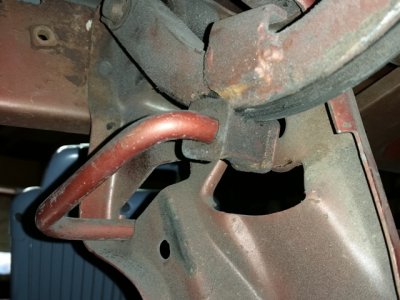
So I got back to work and removed the trunk torsion bars . . . here is a step by step to get this accomplished . . .

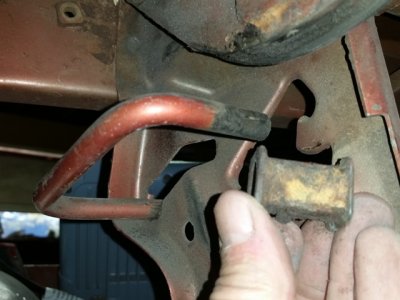
Place a screwdriver under the bar so you can pry it out from the hole using the bracket . . .

sm_trunktorsion01.jpg

The bar will either 1) move to the next hole ( as show below ) or (2) skip all the holes and be loose . . . depends ( I had one of each )

sm_trunktorsion02.jpg

If it does go to the next hole, simple pry it again, and again until it is free . . .

sm_trunktorsion03.jpg

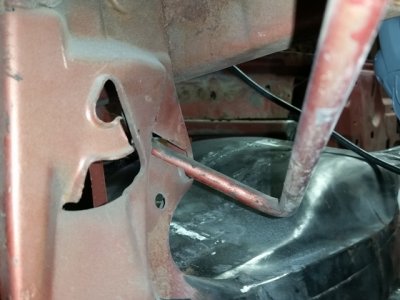
Next we will need to get them removed . . . but first, this is what it looks like on the trunk hinges ( helps when the whole side of your car is removed )

sm_trunktorsion04.jpg

Pull the plastic piece off the end of the torsion bar . . .

sm_trunktorsion05.jpg

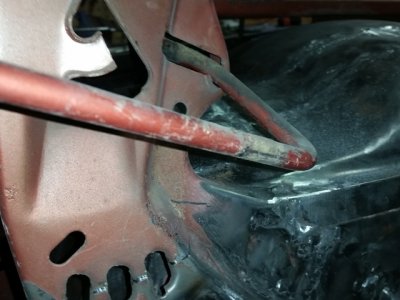
Now you have to move the bar toward the center of the trunk to get it in the proper alignment to remove it . . .

sm_trunktorsion06.jpg

The hole in the bracket is just the right size to pull it through once it gets aligned properly . . .

sm_trunktorsion07.jpg

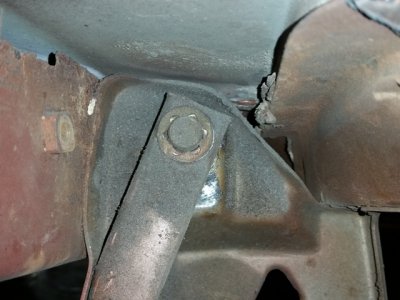
Lastly - to remove the trunk hinges, they are held in place with clips - you'll have to pull them off and then slide the brackets off the post . . .

sm_trunktorsion08.jpg


More trunk work . . .

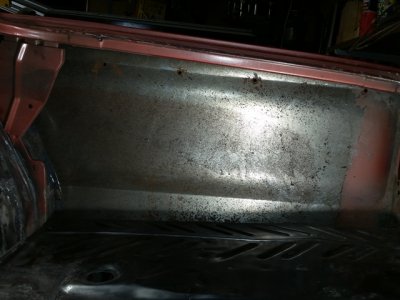
I need to remove the undercoating on the passenger side so I can match the driver side and allow welding to the inside of the panel later . . .

sm_uncoatremove01.jpg

That air-scaler is becoming one of my favorite tools . . . about an hour later and it was cleaned up . . .

sm_uncoatremove02.jpg

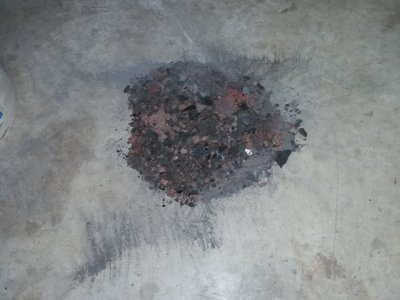
And here I thought I was done with undercoating . . . yet another pile of this stuff for the garbage . . . ARGH ! ! !

sm_uncoatremove03.jpg
 
Larry, I really enjoyed our meeting last Saturday. Looks like you have a pretty good handle on restoring your 67 Belvedere. And are coming along nicely. Thanks again for the parts. I also liked your modification to your shed, great idea. I am going to do that to one side of my barn. I think I'll do it on the side away from the river. Good luck on your project and if I can be of any help feel free give me a holler anytime.

- - - Updated - - -

We had just discussed this Saturday. Glad you looked into it, now I know how to do mine. Guess the uncertainty is worse than doing it. I have a new set of those bumpers too. They are nylon and should never wear out. Again I thank you.
 
Auto Transport Service
Back
Top