• When you click on links to various merchants on this site and make a purchase, this can result in this site earning a commission. Affiliate programs and affiliations include, but are not limited to, the eBay Partner Network.

My 1967 Belvedere Convertible Plans and Restoration (aka - Mad Scientist Build)

Next step . . . add transmission . . .

I had hoped to spend a lot of the day working on the tunnel hump, but spent a good part of the day running around and tracking down a vehicle for my youngest daughter . . . finally got that under control, so I can stop worrying if she was going to be stranded on the side of the road - broken down . . . and the phone call . . . Dad - - - -

Glad to finally have that resolved and behind me . . . so . . . back to the BELVEDERE


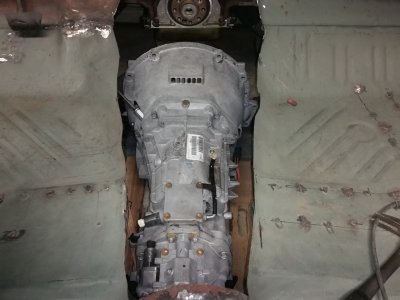
Next . . . just add transmission . . . ( yeah, like that's any easy task ) . . . Cut out the cross member that is in the way . . .
sm_thehemiisin13.jpg

That wasn't so hard . . . got it cut out . . . but now to get the transmission UP in place . . .
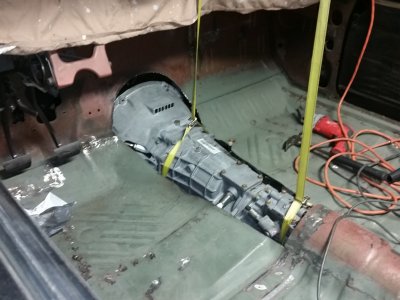
So . . . how about some ratchet straps . . . ? ? ?
sm_thehemiisin14.jpg

Now, before you say "that's not fair, you have a convertible . . . the straps are run through the windshield opening . . . ( smile ) . . .
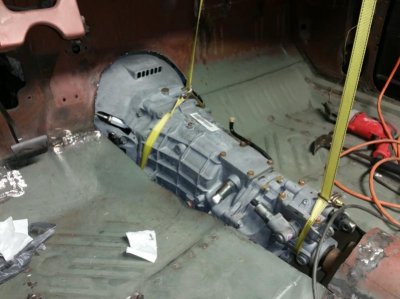
Now . . . I've got the transmission bolted to the engine . . . so it's almost sitting where it needs to go . . . YAY . . .
sm_thehemiisin15.jpg

It's tight around the firewall . . . and I'll have to get some more trimmed out of the way to be able to raise the tail of the transmission . . .
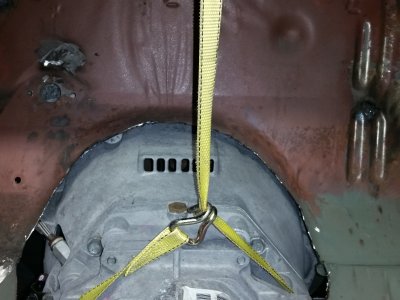
sm_thehemiisin16.jpg

Now to get the 2013 Challenger tunnel hump in place and see how it all lines up . . .

- - - Updated - - -

WOW! Just caught up on your thread. You are doing some really good stuff dude.. You remind me of me with some of your tricks,, cherry picker in the back of the truck,,lol.. You gonna have a sweet ride!

Thanks Daytona Kid . . . what can I say, we all learn how to use the tools we have to get the job done ! ! !

That's not a cherry picker in the back of a truck . . . that's my "tow truck" . . . LMAO

- - - Updated - - -

Sometimes you just have to improvise haha! I think the most impressive part of the build is what Kahn actually has to work with and how he just makes it work. Next summer I have to make the drive down to visit for a weekend, Good Guys show???

Thanks 747 ! ! ! Well . . . how else am I gonna get it done ! ! !

You know you're always welcome ( we can go look at that 64 Dodge Van that's down here in Concord when you visit too ! ! ! )

- - - Updated - - -

Kahn ... you have an engine in your car !!!!

WOOOOOOOOOOOOOOOOOOOOOOOo

Also that idea on the cherry picker in the back of your truck was Sooooper

wile-e-coyte.png

Thanks Tallhair . . . LMAO . . . I'm on a mission ! ! ! ! ( smile ) And I'm having FUN ! ! !
( I don't know about that Genius Part . . .
 
Hey Larry,

It's been quite a while; hope all is well.

The Belve sure is coming together, and after all those headahes it's wonderful to see the engine in place. Taking the floor and tunnel from the donor should make your next stage go pretty smoothly (hope I didn't just jinx ya!); can't wait to see the progress.
Take care.
 
Now things are going to get interesting . . . how to cut it right and not too much ?

Got the tunnel cleaned up a bit, there was a bunch of extra metal on the hump that I had to separate at the spot welds, and get it ready for my car . . . that being done I set the hump in the car to see what I've got to work with.

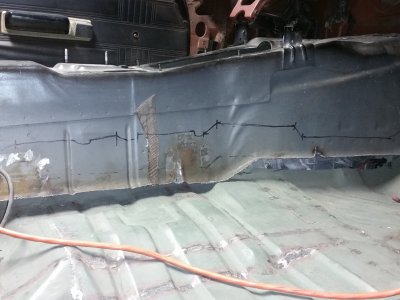
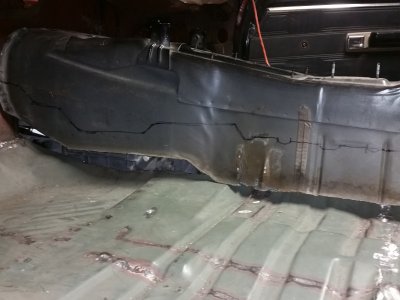
Then I took a sharpie - yeah - it's doodle time ! ! ! And tried to mark the approximate shape of the bottom contour on the tunnel hump . . .

The passenger side . . .

sm_thehemiisin17.jpg

The driver side . . .

sm_thehemiisin18.jpg

The idea is going to be to cut it well short of those lines, and slowly work my way toward the lines until i get the look ( and fit ) that I need . . . then the tacking will start . . .

Hope this works out as planned . . .

Really enjoying seeing the engine and transmission in the car . . . and soon I'll be pulling it all back out to get the tunnel hump welded into place . . . SHEESH ! ! !
 
Looking good Kahn! Having that tunnel sure simplifies things doesn't it?
 
Holy HEMI kahn-vertiable man. You get that tunnel hump in there that should look badass. I'm still totally impressed all the work you put into this car. It will be so gratifying to say I built that car from the ground up. EVERYTHING!!! Keep up the great work kahn. Finally had some time to catch up on your th read. Take care. Counting the days down to nationala 2016. I already have that weekend off. Bah ha ha
 
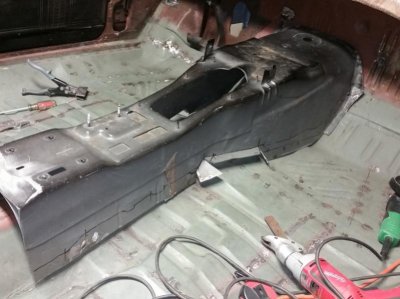
Sneaking up the fitment . . . trying to not mess up the only tunnel hump that I have

The idea and concept of making the 2013 Challenger tunnel hump fit into the 1967 Belvedere was an interesting thought . . . but the fitment . . . is a whole other matter . . .

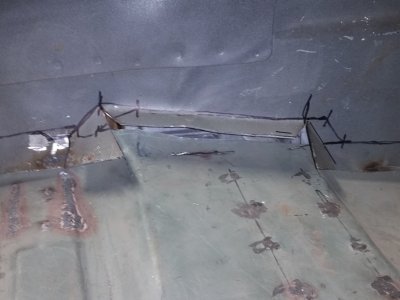
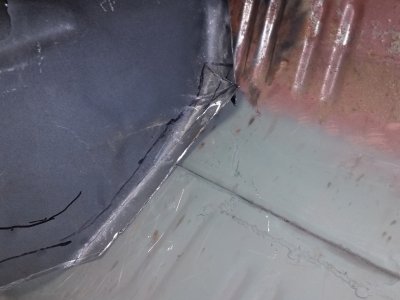
So after a lot of thinking, and doodling, and measuring, and re-measuring, and re-measuring ( measure many times, cut once ) . . . I came up with a plan . . . try and cut the hump to fit the contour of the floor, and move the metal to match the floor contour . . .

sm_thehemiisin21.jpg

Hammer, and bend the metal to make it better fit the existing flooring . . . seems to be working out fairly well . . .

sm_thehemiisin22.jpg

And after about 2 hours of wrestling with the tunnel hump, the metal, cutting, grinding . . . I'm slowly sneaking up on the fitment ( uh, I think ? ? ? )

sm_thehemiisin23.jpg

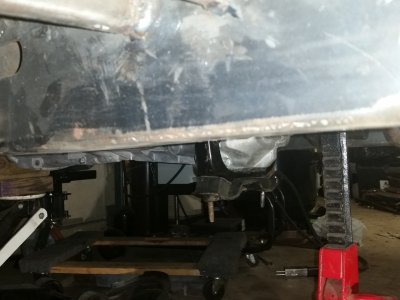
Also, after crawling around under the car last night, I've got a little ( ok, big ) concern about how low the transmission isloator hangs below the car . . . this pic is to try and show how low it is with the frame rails . . .

sm_thehemiisin19.jpg

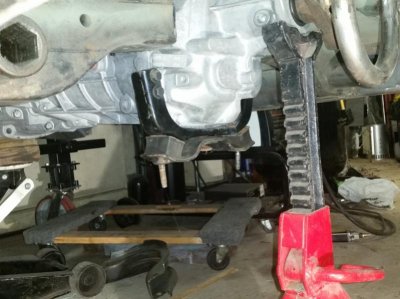
And another to get a better view of how the isolators attach to the lowest part of the transmission ( will probably make some new isolators for this application ) . . .

sm_thehemiisin20.jpg

But it seems to be coming along . . . slowly but surely ! ! !
 
No way around it kahn. The Trans hangs low I think if I remember right I got 4 1/4 inches of clearance. It's low baby. As goon would say IT'S FER RACIN. high speed runs let the wind blow thru your hair. OOPS sorry...you know what I mean.
 
Hey Larry,

IMHO the tranny is too low; one speed bump and that bad boys sump could be history. That being said, moving the trans up for clearance would necessitate moving/modifying your engine mounts too so I'm not seeing that as an option.

I'm not sure if you've set your ride height yet but you could consider raising it an inch or so and/or fabricate a heavy gauge, high grade steel skiid plate that bolts on to the frame rails. No, not pretty but it could save you from ripping out the sump.

Again, just MHO.
 
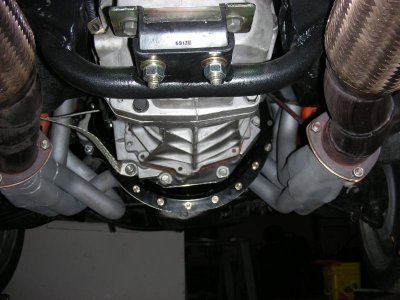
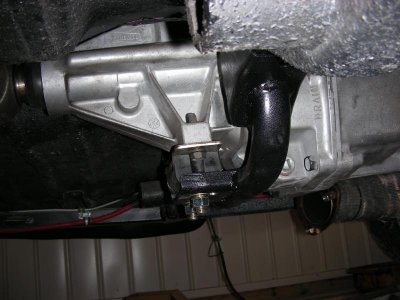
Wow, that's a crazy mount!!!!! I figured it would be like mine with the mount tucked in tight? What's your tranny angle compared to the car, is your motor mounted lower than the factory motor was? Here's a few pics of mine, totally different mount.

DSCN9704.jpg

My suggestion would be to build your mount like this hugging the bottom making more clearance, then build the attaching points off of it incorporating some poly mounts?

DSCN9628.jpg

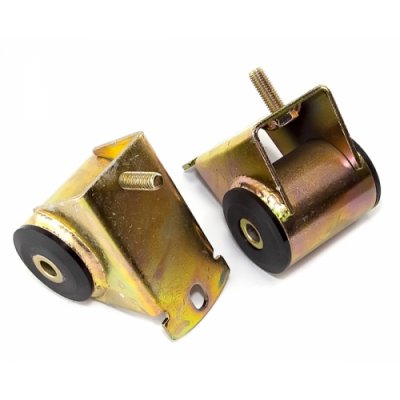
Maybe something like this made to bolt to the side of the tranny for insulators???

17473.15-500x500.jpg
 
Getting ready for the cross member re-build . . .

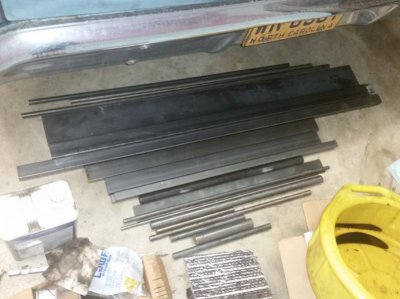
trying to get a feel for how to make the replacement cross member . . . so first, a trip to the steel supply to pick up some drops . . .

Got variety . . . and think I've got plenty to make it work . . .

sm_thehemiisin24.jpg

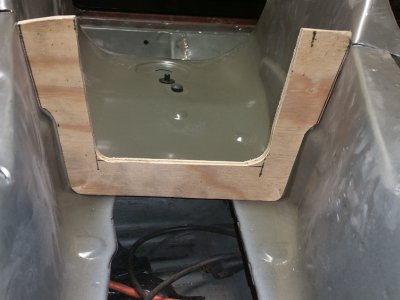
Then I need a "form" to match the inside of the tunnel hump that will cover it . . .

sm_thehemiisin25.jpg

And make sure that it'll fit inside when the trans and tunnel hump are in place . . .

sm_thehemiisin26.jpg

So far - so good . . . Hoping to get it designed and fabricated this weekend . . . hopefully, tunnel hump welding started, and try to finish up the sheet metal work . . . OH, and that means I'll have to pull the engine out of the car again, and I was so liking the look of the car with an engine in it ! ! !

TRANSMISSION UPDATE

Spent some time this past weekend, raising the front of the car to get the rockers level, and then adjusting the transmission to get the "desired" 3 degree tail down setup . . . ( well, my past pics, I did my "math" wrong and I was way too far tail low . . . UGH ! ). Now the bottom of the transmission is about level with the frame rails - that make me feel much better ! !

- - - Updated - - -

That looks kinda low.....

Yup . . . messed up something on my calculations . . . it's sitting much higher now and that makes me feel much better too ! Thanks Cranky !

- - - Updated - - -

No way around it kahn. The Trans hangs low I think if I remember right I got 4 1/4 inches of clearance. It's low baby. As goon would say IT'S FER RACIN. high speed runs let the wind blow thru your hair. OOPS sorry...you know what I mean.

LMAO . . . Yeah, I know what you mean . . . think I got it tucked up in there nicely now that my "math" is correct ! !

- - - Updated - - -

Stay away from the A&W with the speed bumps!!! I have the same issue with the fender well headers I'm prototyping.

Gary

Roger that Gary . . . I'll keep that in mind ! ! ! LMAO

- - - Updated - - -

Hey Larry,

IMHO the tranny is too low; one speed bump and that bad boys sump could be history. That being said, moving the trans up for clearance would necessitate moving/modifying your engine mounts too so I'm not seeing that as an option.

I'm not sure if you've set your ride height yet but you could consider raising it an inch or so and/or fabricate a heavy gauge, high grade steel skiid plate that bolts on to the frame rails. No, not pretty but it could save you from ripping out the sump.

Again, just MHO.

Thanks CarnalSupply . . . Think I've got the error of my ways figured out . . . onward ! ! !

- - - Updated - - -

That low tranny scares me. I'd be back to the welder and moving the engine mounts up a little.

Thanks SNKBIT . . . I was worried too . . . which is the reason that I want and re-checked everything . . . YUP, I did something "dumb" . . . but it's corrected now ! ! !

Wow, that's a crazy mount!!!!! I figured it would be like mine with the mount tucked in tight? What's your tranny angle compared to the car, is your motor mounted lower than the factory motor was? Here's a few pics of mine, totally different mount.

View attachment 291635

My suggestion would be to build your mount like this hugging the bottom making more clearance, then build the attaching points off of it incorporating some poly mounts?

View attachment 291636

Maybe something like this made to bolt to the side of the tranny for insulators???

View attachment 291640

Yeah 747Mopar . . . I agree with you, and my plan is to move the current isolators rearward and put them in the same location as your car - sure with I had the nice mounting holes that you've got on your trans to make it happen . . . but I don't . . . so I'll make plan "B" and get it done the way it "needs" to be done, and make it work in my car.

Just got to tackle the challenges that are thrown at me one day at a time . . . then move on to the next one ! ! !
 
I was so baffled by the weird mount setup on your tranny that I failed to comment on the rest..... Looks great Kahn, I think what you've got going on for beefing your cross member back up is more than enough especially since your not even running torsion bars plus the fit looks perfect. I also like the fact that your folding the edges of the hump instead of butt welding it, I'm sure either would be fine but I think your approach will be less likely to crack down the road.

Stinks that your tranny doesn't have the simple setup for mounting but nothing goes easy for you haha, you'll get it.
 
Auto Transport Service
Back
Top