• When you click on links to various merchants on this site and make a purchase, this can result in this site earning a commission. Affiliate programs and affiliations include, but are not limited to, the eBay Partner Network.

My 73 Roadrunner Project

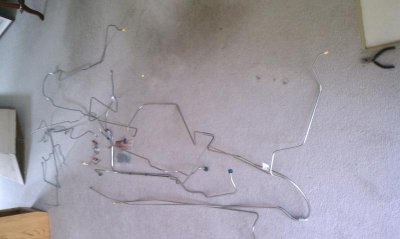
Hi Pat, I got lucky and found a set of NOS sway bar plates from Chets(he does stuff on ebay, but you can call direct), my originals were cracked. Best bet would be to hit up Moparmark here on the form, also desert valley auto parts in phoenix, although sometimes they are slow to respond, I have had good luck getting some parts, especially if you ask to talk with their manager. Otherwise NOS stuff is rare to find, but you might check with Collectors Auto Supply, they sell stuff on consignment and it can be way over priced.
 
Put the rear bumper mounts on today, just have the reinforcement piece on temporarily so i could get it lined up. Hopefully will be doing the body plugs and the headlight mounts next, then on to the wiring once the dash gets back from paint.
 

Attachments

  • IMAG0996small.jpg
    IMAG0996small.jpg
    49 KB · Views: 1,433
idrivemopars, That ole bird looking really good, I to love the color and it is going to look sweet when together! Good luck putting it all back together, hardest part i think there is when wanting it done to drive it and see how it looks completed.. Well worth the wait though.
 
Just a tip... find yourself some rubber grommets or make a couple out of electrical tape and put them in the holes in the bumper mounts that the wiring for the tail lights goes through before you put the bumper on. There's a chafing issue back there and it's easier to fix with the bumper off. :)
 
Just a tip... find yourself some rubber grommets or make a couple out of electrical tape and put them in the holes in the bumper mounts that the wiring for the tail lights goes through before you put the bumper on. There's a chafing issue back there and it's easier to fix with the bumper off. :)

I have a new tail light harness being made right now, and if it turns out good, i will share the builder information so those of you that have crappy tail light sockets and wiring can get new ones. Not sure when it will be out of development but hopefully in the next month or so.

- - - Updated - - -

Just thought i would share a before and after of the engine bay.

- - - Updated - - -

firewall before and after, getting ready to put the insulation and shoddy pad back in.
 

Attachments

  • Before and after engine bay small.jpg
    Before and after engine bay small.jpg
    45.3 KB · Views: 651
  • firewall before and after small.jpg
    firewall before and after small.jpg
    40.3 KB · Views: 632
I have a new tail light harness being made right now, and if it turns out good, i will share the builder information so those of you that have crappy tail light sockets and wiring can get new ones. Not sure when it will be out of development but hopefully in the next month or so.

- - - Updated - - -

Just thought i would share a before and after of the engine bay.

- - - Updated - - -

firewall before and after, getting ready to put the insulation and shoddy pad back in.

Looks really good I really love your car and the work you're doing it. You are one of the few taking a 73 to the night degree of a restoration and man I hope you drive the wheels off of it when done.

If you get time I got a pic thread going for 73-74 Plymouth B body cars would love to see your car in the thread and a little bit about it. Before and after pics would be great.
 
Got the firewall insulation and shoddy pad on today!!!! The one thing that was interesting about the car was how the drivers side shoddy pad was applied, and should go under the bar, but the factory one was installed just as the new one, just one of those little quirks about my car i guess, so i did it the same way!!!
 

Attachments

  • DSC04588small.jpg
    DSC04588small.jpg
    46.2 KB · Views: 615
It's looking great and yes, let us know when you get the wiring harness back, how it turned out and who did it.
 
got done restoring the brake pedal assembly, she is ready to go back in!!!
 

Attachments

  • IMAG1049small.jpg
    IMAG1049small.jpg
    50.3 KB · Views: 582
Great work! How do you keep all of your parts organized?
Everything that i took off the car was either boxed and tagged, or bagged and tagged, plus i took a lot of pictures before removing stuff. I had to buy three new shelves for my basement to store everything on in an orderly fashion!!!
 
At least I was able to get something done today with all the crapola going on with my body shop.
 

Attachments

  • IMAG1057-1.jpg
    IMAG1057-1.jpg
    67 KB · Views: 547
:icon_thumleft:looking pretty good so far :headbang:
 
beautiful! my first mopar was a '73 runner 340 4 speed.
 
I have a 73 440-6pk clone car hunter green, used to be hemi orange. Selling it now no time and not good to let them sit around.
 
Just an update for folks that were following my build and may wonder why no recent updates and whats happening with the car. Also for those that say the car looked good in the previous pictures i posted, well, it looked good from a far, but was far from good.

Baiscally the guy that did the paint screwed me over, was supposed to be multi-layer job, but in reality it was only two coats of color and no clear. This is why the color looked odd, and changed in different light, because of the transparent nature of red, the primer was showing though making it look funny and my brain was saying its red, but my eyes said something is not right.

So, its been at another body shop getting a total respray, this time with 5 coats color and 3 coats clear!!!! It should be back home next week, and while it was out i have been working on other things getting ready to bolt back on. Hopefully i will have some respectable pictures of her soon!!!
 
Whilst waiting for the car to come home, here are some updates. Got new inLine Tube Brake, fuel, and trans cooler sets today, pictures below. Here is my heater box I got it done recently and its ready to be installed, and a compare of my old brake booster to what it looks like now after the Ramman rebuilt and replated it.

Enjoy, hope to have actual install pictures starting in a week or so of things going back on the car!!!
 

Attachments

  • IMAG1315small.jpg
    IMAG1315small.jpg
    43.7 KB · Views: 504
  • IMAG1316small.jpg
    IMAG1316small.jpg
    56.7 KB · Views: 502
  • IMAG1325small.jpg
    IMAG1325small.jpg
    175.4 KB · Views: 507
  • IMAG1326small.jpg
    IMAG1326small.jpg
    39.5 KB · Views: 510
Auto Transport Service
Back
Top